|
PREVIOUS MISSION THIEF
2X NEXT MISSION Mission 7: Down Among
Dead Men [This report has been updated for TFix/NewDark 1.27. Situations
affected by these patches and differences between them and OldDark have been inserted in green. All screenshots have
been updated, and new ones have been added.] This is a great mission, and in my opinion the best
so far in the campaign. Story wise, it naturally follows the events in the hammerite seminary. In terms of gameplay, it hits home on
every level. It strikes a nice balance between triggering the nostalgic
feeling of Down In the Bonehoard and Return to the
Cathedral, while also managing to stay fresh and innovative, yet without
overdoing it. The sense of dread and isolation is captured near perfectly in
one of T2X’s standout missions. Top notch! Mainly, I had to break into the mausoleum and find
the Orb of St. Basmus. I also had to locate another
elemental crystal, presumed to be stored down there. 900 worth of valuables
were also required, plus procuring some useful information from the Onam
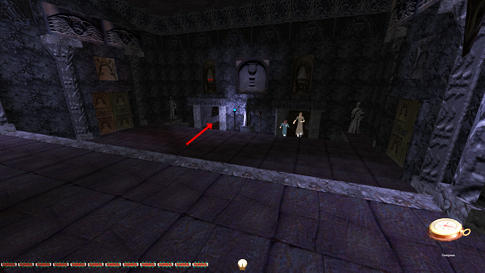
expedition. Finally, I was to return to the starting caves. Planning Nothing to report until I got to the church. The double doors were pickable,
but in NewDark you can avoid them by mantling the
gravestone in the northeast (left image below). From there I could cross the
roof and enter the building via a broken window, or drop to ground level and
approach the graveyard to the west. From the church courtyard I could
instead head east to find the mausoleum façade. Although some of the
mausoleum windows were broken, only one on the top story could be entered,
though it required some stackables. I’d keep that
in mind for later.
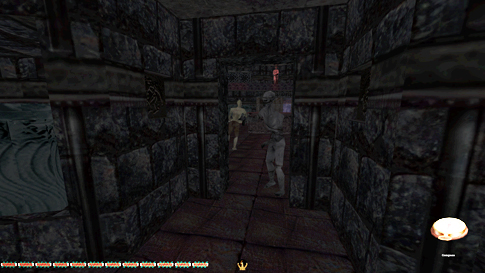
The mausoleum courtyard also had a path down to the
underground tombs, which posed the first main problem. Upon arriving in what
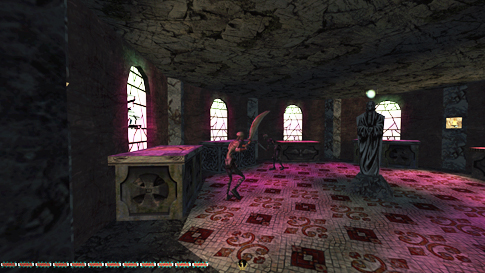
I call the foyer, a scripted event occurred where you witness a gruesome
double murder (right image above). It culminated in a cave-in as a result of
an explosion, caused by Mausoleus himself. Problem
was, the sounds from the explosion alerted two zombies that had this room as
part of their patrol route. Luckily, both of them left the foyer for most of
their route, and if I waited until they were gone before triggering the
explosion, they remained unalerted. I ran to check
after the script had finished and they were then patrolling like normal. The
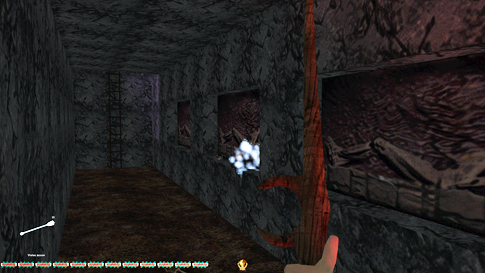
bigger issue however were the zombies in the tombs to the southwest. There
was no door separating them from the sounds of the explosion, and every time
I checked, they were alerted to hunt mode (left image below). Scripted events
like these are normally excused for all ghost modes, since they are
deliberate gameplay elements implemented by the mission author and ordinarily
unavoidable. But following the new Supreme rule #15, if there are ways to
avoid such scripts, especially if they inescapably lead to what would otherwise
be Ghost busts, one should. The foyer was divided into two plateaus. Entering
the upper plateau to the east triggered the script, but not the lower one.
Fortunately, both the torture chamber to the north and the tombs to the
southwest could be entered from the church and the cemetery, respectively.
This meant that if I planned my route carefully, there would never be a need
to enter the upper part of the foyer, thus avoiding the scripted explosion
entirely.
Tombs My first stop was thus the graveyard. It had a few
patrolling zombies, but nothing that couldn’t be snuck by with ease. The
northwest tomb held my first objective, the elemental crystal. It counted as
a light source, but due to recent clarification of Supreme rule #14, this is
an unavoidable consequence of completing a mandatory objective, and thus no
longer considered a bust. From the southwestern tomb I could make my way
underground, but this required picking open the door. Instead I decided to
return later, if I couldn’t find another way past the aforementioned script
explosion. I backtracked a bit and cleaned out the church.
Nothing to report there. Headed underground to the area surrounding the
torture chamber. There was a readable in a hidden library study that
triggered a new, optional objective to destroy Mausoleus’
remains. I skipped the entire readable for all modes. I knew it was impossible
to complete without alerting the two fire elementals in the lava cave.
Although that is a direct consequence of completing an objective, since it
was avoidable (and optional for regular Ghost), it was in my best interest to
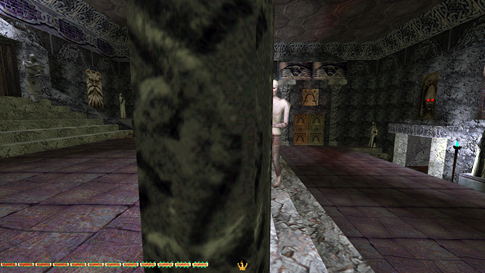
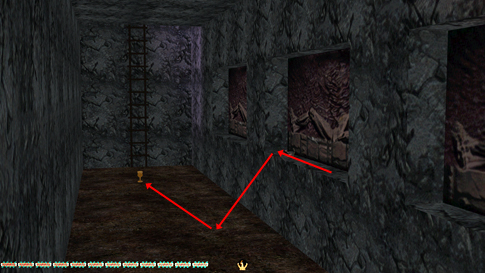
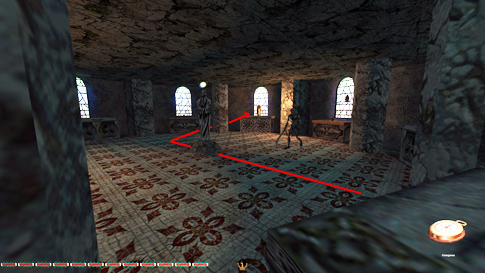
skip it. When following the patrolling zombie out of the torture chamber’s
double door, I realized I could sneak right without triggering the explosive
script. As long as I stayed between the wall and the pillar, I was good, plus
it kept me hidden from both zombies (right image above)
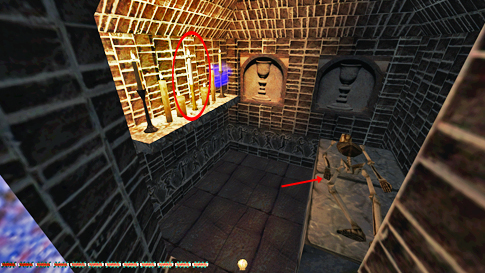
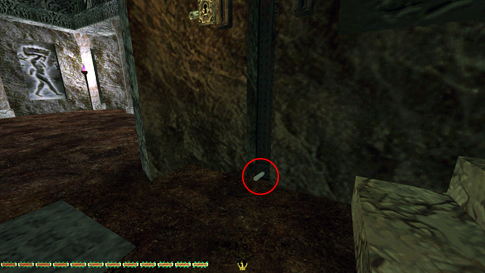
The royal grave chamber had the first loot skip for
Supreme. Seven lit candles were on a shelf in a hidden tomb (left image
above). The middle candlestick was loot, but also a light source. I tested it
by dousing all the other candles, and then watched my light gem as I took the
middle one. Those must be skipped following rule 6a. Only objectives are excused,
and this piece wasn’t. It was only valued at 25, but it meant Perfect Supreme
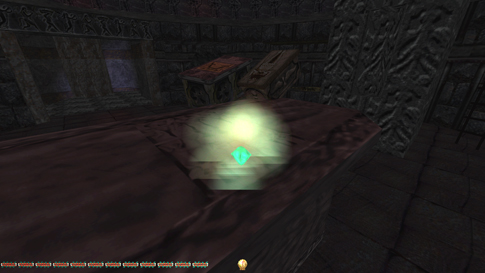
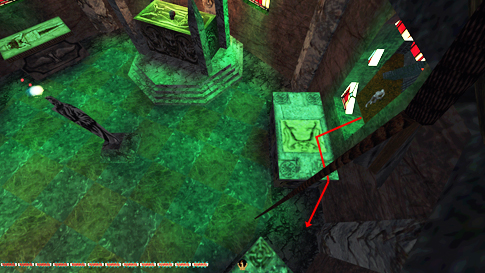
went bye-bye. Just southwest of this chamber I found a green, teleporting
diamond (right image above). It also emitted light, and since it wasn’t an
objective, I skipped it too for Supreme. It also spawned three falling skulls
when taken, potentially alerting nearby enemies. I would probably count this
as a noise trap, further complicating things for Supreme. Easy skip this. Descended to the lower halls via a chute in one of
the grave chambers. Had to leave a rope arrow behind, but I’d pick it up on
the way back. The entire lower level was unproblematic. Just dodging
patrolling zombies really. I needed the mausoleum key in order to proceed,
and luckily the glowing skull didn’t illuminate. If so, that would’ve been a
Supreme bust. At the eastern end of this level I came upon another issue
however. A long, straight hallway concealed a sliding wall trap. It was
proximity bound and completely impossible to avoid if wanting to pass. I
could get to the other side by a different route, but I wanted a gold goblet
on a ledge by one of the murals. It was too far away from either end to
obtain by leaning, so I’d have to think of something else. It was just as a
fluke I decided to shoot it with an arrow (left image below), discovering
that it could be moved! After much experimentation I found a method to
successfully push it to the other end of the tunnel using 3 water arrows. At
first I thought shooting the initial arrow in behind the goblet would push it
out from the wall, but that wasn’t the case. It always ended up in the
opposite corner and never budged after that. Instead I had to shoot the
goblet into the wall so it bounced out again. It wouldn’t fall to the ground
this way, but at least it was much closer to the edge. The second arrow could
now be shot behind it and push it fully off the edge. The third was just a
straight shot to the end, pretty close to the ladder in the distance (right
image below). It would now be easy to take from the other side later. I know
spending 3 water crystals to obtain a goblet worth 25 doesn’t really make
sense, but it was fun figuring out how to do this.
I now had to backpedal and use a crawlspace in one
of the circular vaults. It emerged in the far south, close to the Crypt of
the Forgotten King. There were no enemies here, so nothing much to report. I
opted out of taking both the crystal scepter and the heart ward. The scepter
was only used to open the casket with the ward, and it disappeared upon use.
I also knew the Orb of St. Basmus probably could be
taken without the ward. If not, I could always return to retrieve it later.
Getting the scepter required using a moss arrow, which, although not a bust
to Supreme if used to solve a puzzle, still left patches of moss behind and
didn’t feel very Supreme-like. Furthermore, using the scepter to open the
casket sounded like breaking glass. I assume the scepter just functions like
a key, because the casket could be opened and closed at will afterwards, but
that audio cue just didn’t sound right. I probably wouldn’t have deemed it a
bust if I ended up having to take the ward, but I happily skipped it for now. Snuck through the lava cave by the fire elementals
without problems. Descended the ladder here and finally took the goblet from
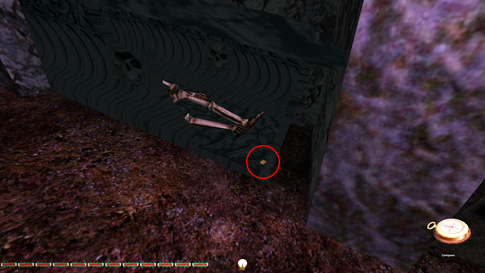
earlier. Climbed back up and entered the mausoleum without issues. The Mausoleum The initial halls and the spider cave had nothing
worth reporting. A well-hidden pair of coins lay in the corner of a broken
casket (left image below). Once I entered the upper levels however, things
got real interesting. First, the intended way to escape the tower was by way
of a broken window on the top floor. Thus, the authors put in a mechanism
where the entry gate both closed and relocked automatically. That coupled
with the fact that the mausoleum key disappeared when used meant there was no
way to leave once inside. I solved that by dropping my healing oil flask at
the base of one of the doors as it was about to shut (right image below).
Funny how such a little thing can block the largest door known to man.
The tower itself had four
floors. Each floor consisted of a circular room with caskets along the edges.
In the middle of each floor was a statue. Since I didn’t have the king’s
ward, each statue had a misty halo above its head. Once taking the ward, all
the halos disappeared. After some experimentation, I realized the halos
functioned like cameras. It was tough to tell, but I think they scanned the
room 360 degrees. It was near impossible to know exactly what direction each
was looking at any given point in time. If I got caught, I just reloaded and
waited a few seconds before going. I don’t think they had first alerts, but
they did make turret-like sounds if second alerting, then started shooting
fire balls on a third alert. Generally, they seemed a lot less jumpy than
normal cameras, and for that I was happy. Each room also had windows, but
they usually only lit up the nearest casket. Worse still were the wall
candles, which light penetrated a farther distance into the room. The first floor was easy.
I just circled the room left and grabbed the one piece of loot from the
shade. Two skeleton guardians patrolled between the first two floors. One of
them stopped at each end of its route, while the other one just turned around
and headed back. The second floor was worse, but still not that bad. If I
went slow, I could cross straight through the middle of the room from east to
west (left image below). Then I could sneak in behind the pillar in the
northwest corner to get the difficult artifact statue in there. Snuck out the
same way.
The third floor was the
worst, mostly due to the stationary skeleton. Two pieces of loot were
situated along the western wall, where it was stationed, plus you also had
two wall candles on this side. There was another skeleton in here too, but it
patrolled between this level and the top floor. Although the shadow patterns
on the floor didn’t reveal it, I could actually sneak straight over from the
eastern corner with a completely black light gem (right image above). I tried
climbing the caskets along the east wall first, but once I got close to the
northern candle, I wasn’t able to progress. Getting into the middle of the
room made it a walk in the park. I still had to time the pivoting skeleton,
but I could grab both vases from close to the center statue. No noises from
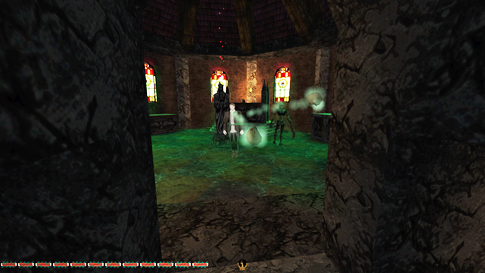
the mist halo either. Nice! The top floor had a big
problem. Crossing the doorway boundary triggered Mausoleus’
ghost flinging three skulls at me (left image below). Although it was easy to
dodge his shots, their impact made an awful lot of noise. I’m not sure if the
event counts as a trap or not. It seemed more like a scripted animation to
me. There was no pressure plate or detection that triggered the shots. There
was a mist halo on this floor too, but it didn’t see me enter the room, at
least I didn’t hear the turret noise. There was no way to avoid this event at
all, it seemed. I went back and picked up the ward too just to see, but it
didn’t change matters. Next I waited for the skeleton to head downstairs to
see if they alerted to the shots. When I headed back down, they were both in
hunt mode (right image below). Replaying the scenario a few times always
yielded the same results. There was nothing to do but descend and find a
different way in.
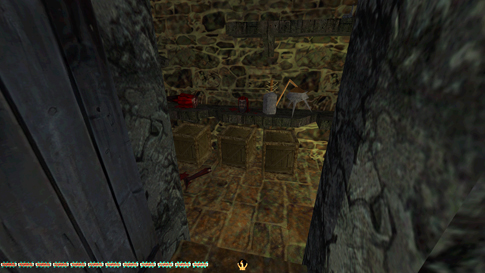
I headed all the way back
and started looking for stackables. I found three convenient
crates in a storeroom close to the torture chamber beneath the church (left
image below). There was another crate in the torture chamber itself, but the
zombie from before patrolled through this room. I brought the crates along
and headed up to the mausoleum façade. An open window was on the top level,
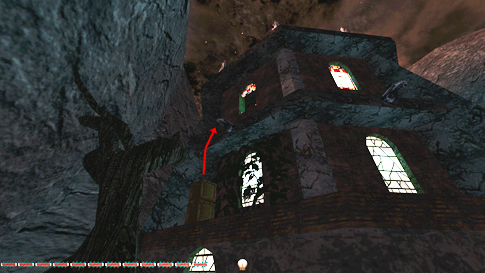
southeast corner. I could mantle up the first ledge, but needed all three
crates to reach the top. In NewDark, newmantle reduces
the required amount to two crates and a healing oil (right image below).
The biggest problem now
was getting through the window. The mist camera was still active and the window
opening was super bright. I really just had to rush in and hope for the best.
I dropped to the floor to the left; that was the spot farthest away from
either of the lit candles. From here, the rest was very straight forward. I
could climb a rope straight up to the ceiling rafters with the light gem
totally black (image below). I retrieved my rope and shot another one closer
to the center by the floating Orb. When taking it, I realized it too emits
light, just like the elemental crystal from earlier. Like with the crystal
though, the new rules allow such objectives to be taken. I dropped onto the large
casket from the upper rafters. With a bit of luck, the camera wouldn’t see me
and I could hide behind it. From here it was just another swift move out of the
window. Again, it was hit or miss. The last piece of loot was in Deadman’s
Gully. No issues there. Returned the crates afterwards and ended the mission
in the starting cave. What a fantastic ride this was!
STATISTICS: Time: 1:16:14 Loot: 1835 out of 1835 (Supreme: 1710) Pickpockets: None Secrets Found: 4 out of 4 Locks Picked: 5 Damage Dealt: 0
Damage Taken: 0 Consumables: 4 Water Arrows (3 to move a goblet in the
lower halls, and 1 to open the casket in Crypt of the Forgotten King) Ghost: Success! Perfect Thief: Success! Supreme Thief: Success! Perfect Supreme Thief: Failed! Norwegian Thief: Failed! Notes: -
Skipped a gold candlestick worth
25 in the royal grave chamber for Supreme. It was a light source, and
removing those is not allowed for that mode. -
Skipped a teleporting green
diamond worth 100 in the upper tombs for Supreme; it was also a light source. -
Could not retrieve
the fire arrows from the lava pit without alerting the elementals. -
The crates used for
ascending the Mausoleum contain three moss arrows. Breaking them busts Ghost. |