|
PREVIOUS MISSION THIEF
2X NEXT MISSION Mission 6: A Question
of Knowledge [This report has been updated for
TFix/NewDark 1.27. Situations affected by these patches and differences
between them and OldDark have been inserted in green. All screenshots have
been updated, and new ones have been added.] This is probably my least favorite mission so far
in the campaign. A hammerite compound has been done many times before, so
this needed to be something special if it was to impress. Unfortunately, it
doesn’t. It is very easy, no hidden loot, no secrets, and several virtually
empty outdoor areas. And how can this otherwise rule-driven faction ignore a
gaping hole in the roof? The conversations and readables do a fair bit to
redeem its replay value, but it’s not enough to save a mission that could’ve
been so much more. I was following the lead I got at the smugglers and
breaking into Sunnyport’s hammerite temple. I had to identify and locate the
high priest, as well as find out whether they were able to aid me in getting rid
of my enemies. I was also to snag 1,300 loot along the way and make it back
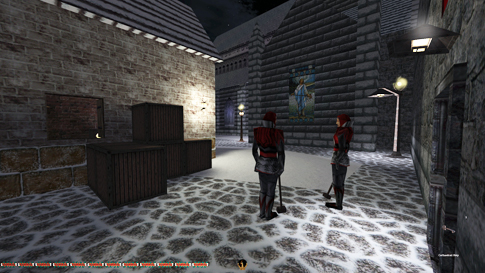
to the streets. First I pilfered
the two hammer guards outside the eastern side entrance. I snuck up on them
from the window of the small shed nearby (left image below). Also grabbed the
key from inside the temple window this way. Brought along the rope arrow from
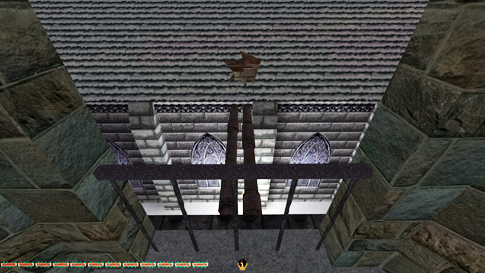
the shed and headed back to the temple main entrance. Had to enter through the
small apartment in the west. Using the doors requires unnecessary key
pickups. Lurked myself through the side window, looted the place, and crossed
the metal pipes to the damaged sanctuary roof (right image below). The hole
took me to the second floor. A couple of loot items here were easy to obtain,
two plates and a statue to be exact. Dodging the archer on the walkway wasn’t
a problem at all. To reach the golden hammer near the bell tower, I needed
the inner chapel key, either from the mentioned archer or the patrolling
hammer downstairs. I headed down the stairs on the west side and waited by
the door. Soon the guard strolled close enough for me to pick his pocket. I
fetched the bell tower loot, relocked the door and went downstairs again. The
urn from the altar in the room just north was one out of two pieces of loot
in the sanctuary itself. From this room I went back south and crossed the
chapel hall behind both guards’ backs. The locked door in the room with the
artifact statue took me to the inner chapel area. The inner chapel key stuck
to my inventory and couldn’t be dropped back. Not sure what I feel about that
really. It feels more in the spirit of Supreme to return it.
I slipped west and grabbed the urn from the office,
then followed the patrolling hammer east, past the side entrance, to the
kitchen. I hid in the doorway, observing the various patrol patterns. After
finishing his convo, the chef walks back and forth between the kitchen and
the pantry, halting at regular intervals. Once he entered the pantry, I
slipped out the northeast doorway. Managed to
pick up the food and the arrow from the fireplace on my way through. Listening
for the chef making comments, I cleaned the mess hall empty. Headed out east
and picked the lock to the chef’s bedroom door. Grabbed the loot and went
back to the mess hall. Took the remaining food
from the pantry through the kitchen side door. Left the mess hall via
the north door. Robbed the small library just north, and snatched the two
artifacts from the atrium. Two guards had a triggered convo in the foyer; I
made sure not to trigger this until absolutely necessary, to avoid more
patrolling people. Cleaned the barracks next. No fuzz. Then picked the last
piece of loot from the small library northeast of the foyer, after the
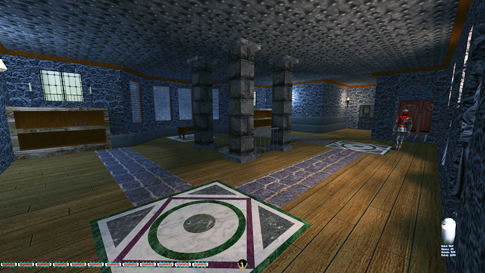
chatters had left. Used the foyer elevator to ascend to the second floor. I remained dark on the elevator going upstairs. The
stationary archer here couldn’t see me on the south side. I leaned over and
grabbed the urn and both goblets from the shelves. Then snuck over to the
door in the northeast when the guard wasn’t looking (left image below).
Looted this room also and walked around the entire complex to appear on the archer’s
west side. From here I could pick the high priest’s chamber door. I made sure
to read the plaque outside the door to check off the objective. Grabbed the
loot, the key and read the book to get new objectives. Looted my way back
through the museum and the cozy living room, to appear in the noisy/carpeted
hallways further east. Ran through the greenhouse and plundered the sitting
room just south. Left through the other door leading to the hallways again.
Looted the observatory accessible from this hallway. Next up was Onam’s
office. From here I could reach the stone halls to the east and loot all the
connected rooms; remembered the vase on the hallway table also. Only one
archer patrolled in this area, he was no hassle. One of the smaller studies
had a valuable ring, while the last pieces of loot were in the larger room at
the end of the western hall. I left through the southern window here,
sneaking along the noisy roof. Crossed the courtyard, entered the double
doors and continued through the hallways west, only to appear with clear
sight of the library door. Crawling across the snowfield, I was able to enter
without detection.
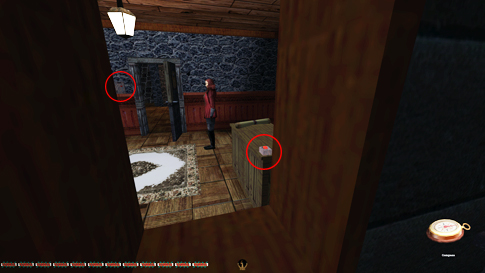
The library depended on the hammer’s patrol route
and fast movement. Three pieces of loot were spread around. No big deal in
here, but success took time mostly. Had to frob the button on the desk
through the office window to open the door (right image above). I tried to
enter via the closest door without setting off Araphax, but it wasn’t to be.
He started a muttering monologue when entering the room, and I could trigger
it without getting a first alert, but there was no way to get over to the
desk without him starting to attack. Enemies don’t give first alerts during a
conversation, and this counted as such, but the room was too bright to avoid
the bust. The door on the other side had a convenient light switch by the
door, though it is a Supreme bust to remove light sources. Alas, I had to use
it. When his monologue finished, occasionally he did a small pivot, similar
to one of the hammerite guards in the Cragscleft mission. This could perhaps
be used to get in behind him unseen, but there would be no way to get back
out regardless. I also realized that when closing the western door, he gives
a first alert. I never noticed this the first time I played the mission,
because he was still talking to himself as I left. This time I listened at
the door for a few minutes and sure enough he gave a settling remark not much
later. Two Supreme busts then. The library key also stuck to my inventory, so I
just used the other exit from the library and emerged by the chapel pulpit.
From here I headed upstairs and left through the hole in the roof. Done deal! STATISTICS: Time: 1:12:16 Loot: 1986 out of 1986 Pickpockets: 4 out of 4 Secrets Found: None Locks Picked: 11 Damage Dealt: 0
Damage Taken: 0 Consumables: None Ghost: Success! Perfect Thief: Success! Supreme Thief: Failed! Perfect Supreme Thief: Failed! Norwegian Thief: Failed! Notes: -
Had to turn off the lights in the
library office to obtain the Mausoleum Map. Busted Supreme Ghost. -
Araphax gave a first alert when closing
the door to the library office after getting the map. Another Supreme bust. |