|
VENOMOUS AMBITION So
glad I finally checked out one of RippedPhreak’s
missions. I have a feeling it won’t be long until I try his other creations.
A massive city mission, dripping with atmosphere and tense ambience.
Interesting characters make for a great story driven mission. And despite
being Perfect Supreme ghostable, this is one of the
toughest missions I have played. Do not miss this! I
had quite a few tasks. My main job was to remove the poisoned bottles of wine
from Theobald’s manor. Next, Yilgun had to be
brought to one of the hammerite prison cells. This
implied knocking him out and carrying him there, and excused that rule
violation. Furthermore, I needed to leave a threatening note on the bed of
the local apothecary, in order for him to leave town. Finally, I had to
obtain the intruder painting from Garva’s
warehouse, in addition to stealing 4,500 loot on the night. That was enough
trouble. Time to begin. South Thrax The
first tough test came in Garva’s house. Both the
sir and a female bodyguard patrolled the premises. I entered through the
bathroom entrance from the south. The woman made predictable, clockwise
loops. Garva’s route went between the reading nook
and the north balcony. I had to follow the woman outside and then into the
bedroom area. However, she heard the doors easily, so I kept at a sufficient
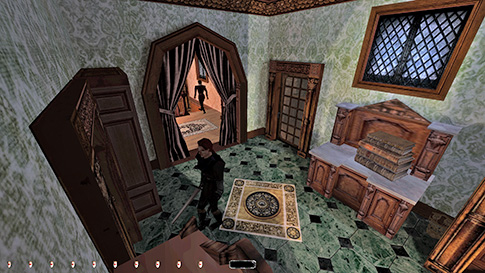
distance. If Garva headed towards the balcony, I
could enter, grab the glasses in the reading nook and the statue on top of
the bookcase, then mantle on top of the other wardrobe and be safe (left
image below). This was a great spot to wait for further moves. At the next
opportunity, I grabbed the loot in the bedroom. Then after that, I left via
the north door, towards the warehouse.
Climbed
the chain and got the loot in the guard station, then returned and entered
the warehouse on the roof. It was the only way in from this direction. Garva’s office was very dangerous (right image above). Garva himself could see me through the window unless I
crouched and stayed away from the center of the room. Then there was a
patrolling guard outside that could see me through the door; he was almost
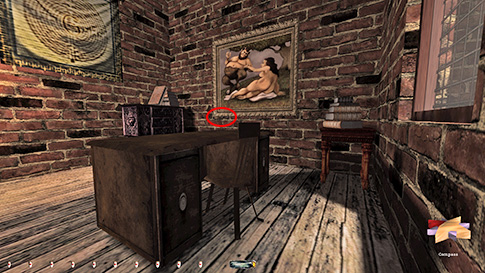
trickier, as I had to time him when leaving too. There was a well hidden
secret in the office too; a button underneath the picture that revealed loot.
I could close it using a second button too, which was a nice touch. The
rest of the warehouse was tense, but not too difficult. The upper floor with
two patrollers was definitely the hardest. I considered returning Garva’s key immediately for Supreme, but decided against
it. I would end the mission close to the south entrance anyway and could drop
it back then. I
left via the northwest office window and entered the apothecary’s via a
window to the west (left image below). This took me into the dining room
where multiple guards could see me from outside. I waited for the patroller
to walk away, grabbed the loot and hid at the bottom of the stairs. I could
wait here and not get caught when the patroller came back. Caradoc (the apothecary) and another guard roamed around
upstairs, but they didn’t react to me being here either. Upstairs was very
tight, but both the bedroom and the sitting room had a small portion of shade
where I was safe. Dropped the threatening note on Caradoc’s
bed and stole his key. I needed this key because I didn’t want to pick the
lock on the upper door to the shop. The key unlocked the lower entrance and
could be relocked. I’d have to return the key to his patrol route later, but
I see that as less of a violation of the Supreme spirit than leaving a door
unlocked needlessly.
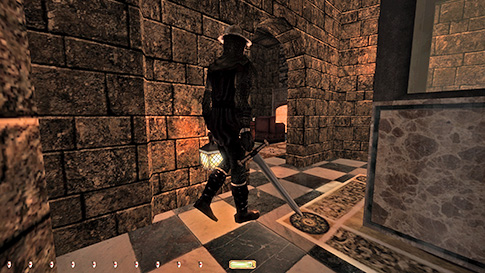
However,
I hit a snag getting to the streets from the courtyard. A guard that is
supposed to patrol had gotten stuck at the northern end, staring my way
(right image above). This guard I have seen stuck in that same position on
several occasions. I found a way, however, to drop from the upper walkway and
not get spotted, given that I landed behind one of the posts for hardcover.
If this guard hadn’t been stuck, I could’ve just used the courtyard door on
the ground floor of the residence. Went
through Lady Fenring’s house to get to the north.
Had to be very careful emerging on the wooden roof, as several guards could
spot me. Jumped over to the building with two wooden balconies, before
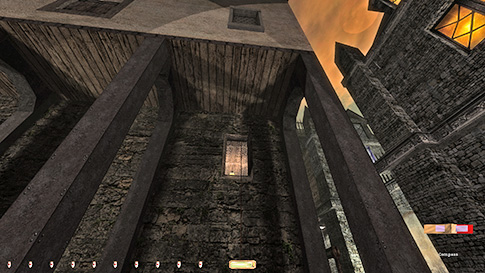
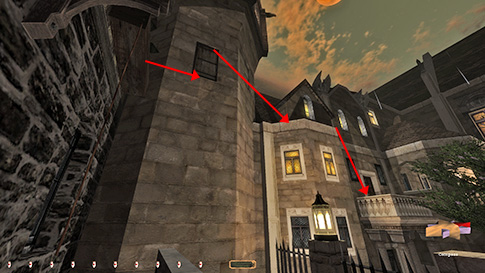
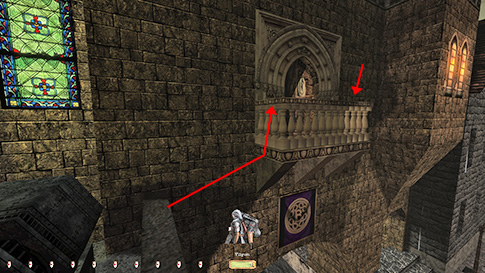
descending to the streets. Theobald’s In
order to enter Theobald’s without picking any doors, I had to first enter via
the southwest tower window (left image below). I could use a rope to climb a
nearby planter box, then mantle in from there. I could also loot Theobald’s
office like this. However, the exit door from his office was also pickable, so I backtracked to the aforementioned window.
With the window open, I could mantle on top of it unseen. From here, I could
jump north to the plateau west of the courtyard, even closing the shutters in
the process. The stationary guard in the courtyard didn’t alert to this. It
was above his vision cone. I could furthermore drop onto the next balcony.
This sometimes gave a first alert, but not always. This door was unlocked and
took me directly to the other side of the locked door to the office.
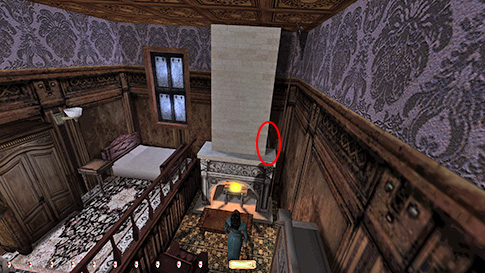
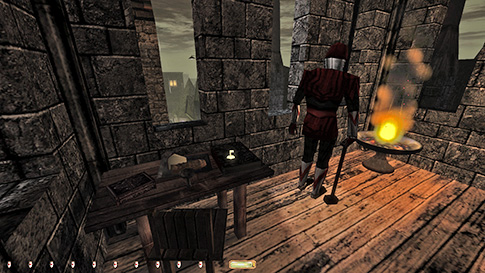
The
manor moreover was tough to sneak through, with lots of patrollers, but few
really troublesome spots. A fire poker in the Lady’s room had to be taken
with a rope arrow in the ceiling (right image above). It had to be placed
rather precisely, so that I could lower myself and not have to jump off to
grab it, but still able to swing around and jump back without getting seen. I
didn’t need the mansion key from the top floor bedroom. Instead, I left via
the door to the courtyard balcony. Not the one I had entered via, but the
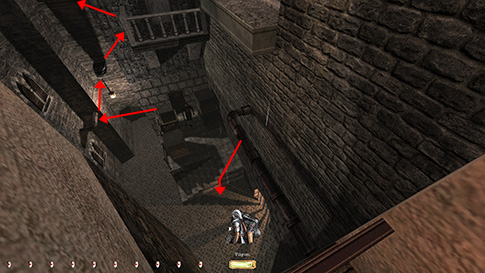
next one over. The courtyard had one patrolling guard, and a stationary one
in a shed. The problem was there were hardly any shadows to hide in. I waited
for the patroller to leave the front porch, then I dropped down behind him
(left image below). This I could do without taking damage and gave me maximum
amount of time before he returned. I followed him over towards the shed, then
grabbed the nugget from the barrel and leaned around the corner to get the
purse from the other guard. Then I went back to a small spot with semi-shade
in front of the generator. This was a good enough spot not to get seen by the
patroller when he went back to the front door. As he did, I slid next to the
generator and mantled up the small power device behind it, then furthermore
onto the fence (right image below). I could easily get a first alert from the
shed guard here, or from two different patrollers in the street. When
mantling the fence, I had to do so at an angle, so that I got fully onto it
and didn’t have to adjust afterwards. If I did, I made a clang and got
caught. I could drop from the southern end of this fence section into the
streets without taking damage. Nice!
North Thrax The
street area north of the opera house wasn’t difficult. The patrollers were so
far away that I could just go slow. Ascended to a wooden ledge to the east of
the opera house, then jumped across to the northeast corner to get inside.
One of the patrollers had gotten stuck at the far west end of the hallway, so
that made it easier to get the loot in here. Jumped back across the alley
afterwards and made my way inside Velmire Keep. Decided
to use a gas arrow to knock out Yilgun, though a
gas mine would also have worked. I felt that was better than using my
blackjack, as it avoided the 1 damage dealt and the knockout count in the
stats. It felt cleaner anyway, but it wouldn’t have been a bust either way.
To get the loot in the big lounge downstairs I found it best to come from the
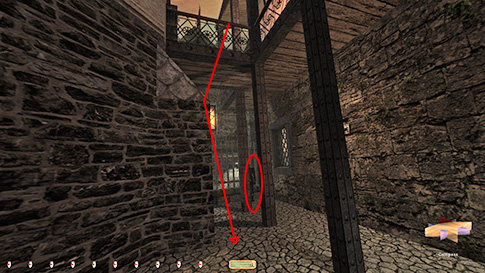
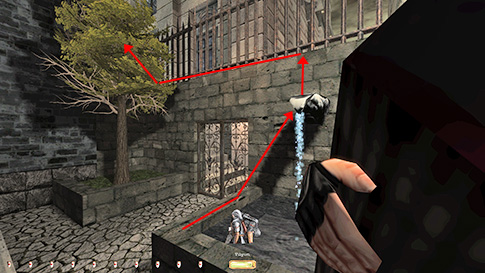
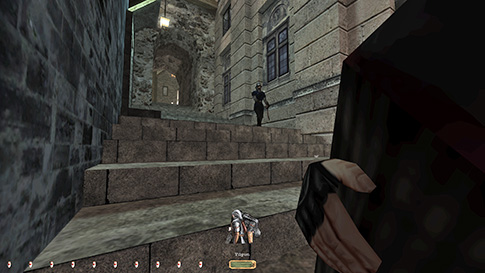
outside, timing the patrolling thief there. To get Yilgun
out to the streets without picking the lock on the front gate, I climbed the
water spout and the fence wall (left image below). I had to time both the
street patroller and the aforementioned thief to avoid any alerts. There was
a tiny shadow in the corner of the stairs where I was safe from the archer
(right image below).
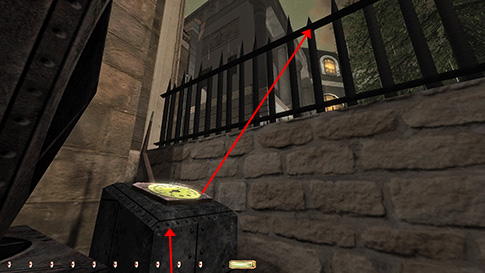
Cleaned
the streets on the south side of the opera house without much trouble.
Climbed the ledges carrying Yilgun and approached Bafford’s towards the south. I could make the leap to the
balcony from the plateau with the generator (left image below), but there
wasn’t much in it. I could hide on the west side of the railing without
getting caught. There was a patroller who occasionally came to the balcony
opening, and he would catch me if I was anywhere else. Bafford’s
was a very tough place to sneak through, and even more difficult when
carrying a body, so I brought Yilgun to the window
on the south side immediately, then went back and ghosted the place. There
were only a couple of safe locations I could hide from the patrolling lanternguard. One was in the scepter room just south of
the balcony door (right image below), the other was on top of Bafford’s desk in the office. Circling the premises
counterclockwise following said lanternguard was
best, but the sitting room and foyer on the north side were tough areas, as
there were basically no corners to hide in. I made sure to reset the code
puzzle to close the display case after getting the scepter.
Yilgun City
Watch posed no issues. I decided to bring Yilgun
back through the apothecary afterwards. This way I could return Caradoc’s key, and I could also approach the church from
the basement door in the back alley (left image below). If timing the archer
and the hammerite patrolling said alley, I could
drop onto the edge of the staircase silently and without taking damage, while
carrying his body. I could hide between the crates and time the guard so I
could pick the lock on the door. At least one door had to be picked to enter
the church, and this one led me straight to the prison cells. Locked up the
cell and returned the cells key afterwards. The
rest of the church wasn’t that difficult. I picked up the display case key
from the southwest tower. I could return it, but had to put it on the book in
order not to get detected (right image below). This is acceptable for
Supreme. If an item is taken from a table, you can return it anywhere on the
same table.
To
leave, I mantled the pipes and balconies back in the alley. This way I could
reach the plateau with the generator to the southeast. The last two pieces of
loot were here. I dropped back Garva’s key to his
home before ending the mission. What a blast this was! Statistics: Time: 2:38:51 Loot: 9091 out of 9091 Pickpockets: 15 out of 15 Secrets: None Locks Picked: 12 Damage Dealt: 0 Damage Taken: 0 Consumables: 1 Gas Arrow Ghost: Success! Perfect Thief: Success! Supreme Thief: Success! Perfect Supreme Thief: Success! |
|
|