|
The Black Parade - Mission 8: Jaws of Darkness Jaws
of Darkness is an excellent, yet very different mission from the rest of the
campaign. It’s a highly needed changeup from the more traditional levels so
far. Delve into the underground crypts below Haghill Forest and uncover the
secrets of archmage Teidir’s tomb. Clever puzzles and sinister enemy
encounters will impress you in this brilliant creation by Feuillade
Industries. I
was tasked with restringing the amethyst harp with silk, plus obtaining Teidir’s
signet ring and Abubtiyar’s tablets. Furthermore, I had to find 1,500 worth
of valuables and return to my campsite in Haghill Forest. It was time to get
going. Pillars of Silence In
the Pillars of Silence I was met with several “shadow thieves”. They didn’t
have voice lines, but otherwise reacted like normal enemies, albeit at an
incredible speed. Their drawback was they didn’t react if I could see them.
Thus, if spotted, I could just back up to a dark spot and wait there until
turning around no longer triggered them. This was a legal move since they
never indicated they were alerted. As it turned out, none of them needed to
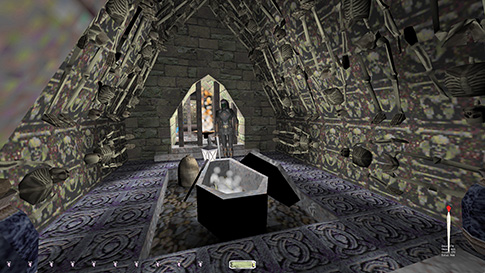
see me. The one in Tsathoggoth's crypt was the most difficult (left image
below). I snuck along the left wall as slowly as possible, then backed up
with the same speed. When leaving, he didn’t follow, so I figured I was good.
What was strange was when I first arrived at the tombs and could see this
crypt from the east, I clearly made out two thieves, yet when I arrived from
the front, only one was there…
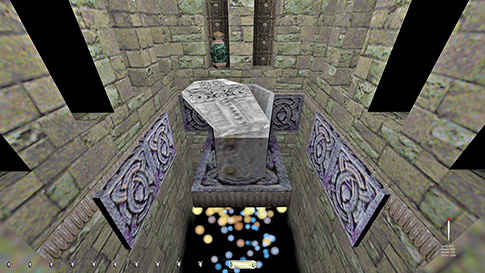
Had
to skip the scepter in Madnazar’s tomb for Supreme (right image above). A
floor trap sprung when I opened the casket, which isn’t allowed for that
mode. Nothing shot out or dealt damage, but it was triggered from my actions
and irreversible at that. The
key in the ancient library wasn’t necessary, so I skipped it. I didn’t treat
the blue water bugs as enemies. They got stuck half the time anyway and never
seemed to react to my presence. They made some noises occasionally, but those
seemed more like the ones rats would make. I could avoid touching any of the
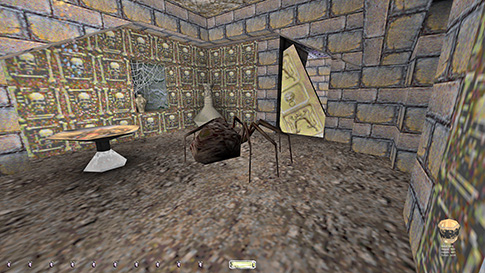
webs that lowered the brown spiders, so there was only the huge one at the
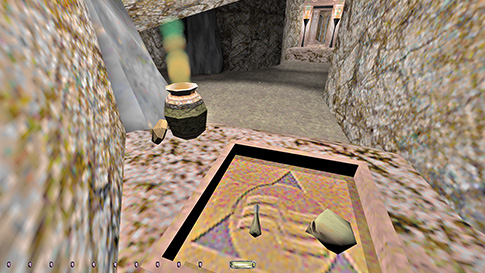
end and she was easy to dodge. In the crypts below the silk, one room had a
stationary spider with some loot (left image below). Although it seemed like
it was facing north, it was in fact looking south; all stationary spiders are
like this.
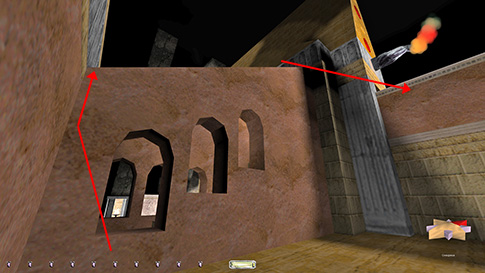
Elemental Towers In
the fire tower, I could skip taking the searing key. The door couldn’t be
closed up either, so this was highly desirable for Supreme. To circumvent it,
I mantled up the roof of the balcony, and then leapt across to the bridge by
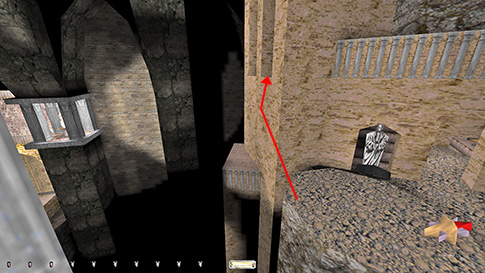
the coal tower (right image above). In
the earth tower I could also skip the dirt-encrusted key, but this was a bit
more complicated. Taking the key triggered a falling boulder trap, which
busted Supreme and was thus out of the question. One of these boulders were
meant to be put on a pressure plate in the flooded cave to open a gate that
lead to the end of this section. To avoid needing this boulder, I
experimented with other items. I found I needed two potions to open the gate.
Since I only had one healing potion in my starting inventory, I used one of
the skulls from the dirt-encrusted key room instead of a second potion (left
image below). Luckily, the patrolling crayman didn’t hear it drop on the
stone. In the next room I could open the double doors that revealed the exit
and then go back around to pick up the items and return the skull. These
doors weren’t closable, as they were operated by those infernal pull chains.
There was also an additional such chain behind a secret panel that accessed a
hidden chamber with loot in a small tower. To avoid leaving this door open, I
found I could reach this tower with an angled running jump from the plateaus
close to the fire tower (right image below), thus skipping the pull chain
altogether. It took a few tries to get it right, but it was definitely a
repeatable maneuver.
Before
the entrance to the water tower, I had to skip two red gems behind a gate
(left image below). They triggered fireball traps when taken, which was
against Supreme. In the water tower, I couldn’t circumvent taking the wet
key. I didn’t find a way to climb up the tall cave with the dripping water.
There might be a way to get there from the air tower, but I’ll leave that for
someone else to experiment with. I did, however, manage to avoid leaving the
door open when returning from the nymph cave. With my entrusted healing
potion, I could mantle back up above the bubbling spring in the sloped rock
(right image below). This was a tough jump, because I had to get enough
elevation to reach the ledge, while also grabbing my potion in the process.
Plus, since the surface was sloped, the potion slid a bit when I hopped onto
it. I was very happy to successfully complete this move, as it also meant the
two extra water nymphs never spawned. The
air tower posed no further issues. I was again forced to take the elemental
key. There was only one enemy, and air mage, and he was no problem avoiding.
I flipped the lever and closed the grate behind me on my way back to Teidir’s
tomb.
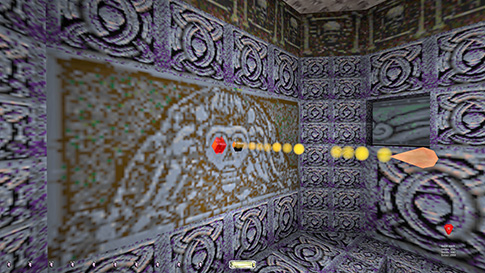
Teidir’s Not
much to report from the last building. Getting the tablets was the biggest
problem. Difficult to detect first alerts from the new monsters. None of them
had decipherable voice lines, just muttering really. Mostly, there was an
elevated pitch or volume when an alert happened, even grunt-like utterings.
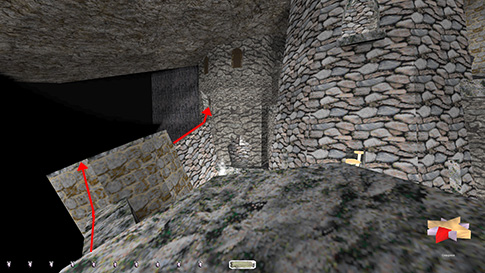
If in doubt, I reloaded. Found the easiest way to traverse and travel along
the sloped wall (left image below). A few bonfires lit me up, but it was dim
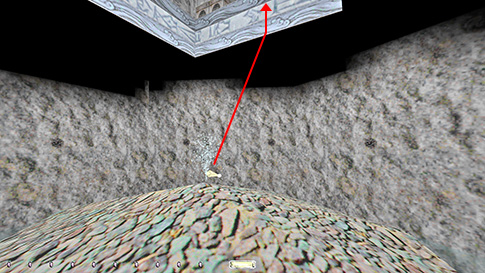
enough to stay concealed if moving slowly. The bonehead on the top level had
a predictable route. After getting the tablets, I could drop down to the
entrance level from the ledge without taking damage (right image below). The
gravel usually made a sound when landing on it, so I had to listen carefully
for alerts. The
caves had changed when going back up, so I actually arrived close to the top
level. I was forced to pull another chain and open two gates simultaneously
that couldn’t be lowered. Argh! The spider statue wasn’t difficult to dodge.
Could avoid all traps by hopping across; most of the time the spider didn’t
hear me. Likewise with the floor panels, I could jump across without
triggering it and with no alerts if it was at a distant part of its route.
Back
at the top, I had to open yet another permanent door to reenter the Pillars
of Silence. I lost count how many that was in total. A new shadow monster had
spawned in the halls. It wasn’t difficult to dodge, just scared the living
daylights out of me as I wasn’t expecting it. Good job, Feuillade Industries! Statistics: Time:
1:35:23 Loot:
3259 out of 3259 (Supreme: 2909) Pickpockets:
N/A Locks
Picked: 0 Damage
Dealt: 0 Damage Taken: 0 Consumables:
None Ghost:
Success! Perfect
Thief: Success! Supreme
Thief: Success! Perfect
Supreme Thief: Failed! Notes: -
Skipped a
scepter worth 150 in Madnazar’s tomb for Supreme. Triggering the floor trap
isn’t allowed. -
Skipped two red
gems worth 100 each outside the entrance to the water tower for Supreme.
Taking them triggered fireball traps. |
|
|