|
INTO THE ODD - [Thief 2: The Metal Age 20th Anniversary Contest] VIDEO REPORT (Narrated Run) VIDEO REPORT (Segmented Run) Like
many other members of the forum, this mission started out being a mixed bag for
me. It ended up, however, as one of the most mesmerizing experiences of my
Thief career. I firmly have this in my top 10 missions of all-time, possibly
even top 5. It is certainly not because of traditional Thief gameplay, but
instead groundbreaking due to exactly that. The sanctuary I put as one of the
most astonishing locations ever made in a fan mission. How can a map have
such a place, and then pleasant, day-time streets going for it at the same
time? Puzzling. But then again, I was going: into the odd. Storywise,
there wasn’t much to go on at start. I was being chased by Bloody Polly’s
henchmen, for reasons unknown. Basically, I was to escape their hunt, find a
blackjack and lockpicks, and then locate a hideout
in Millhold. I knew from the info file there would
be other objectives at some point. No purchase screen of any kind either. Not
that it was admissible for Supreme. Escape The
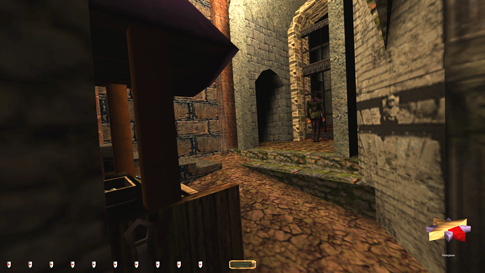
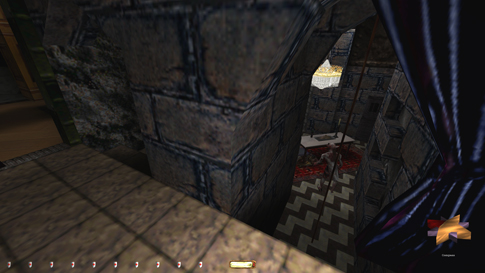
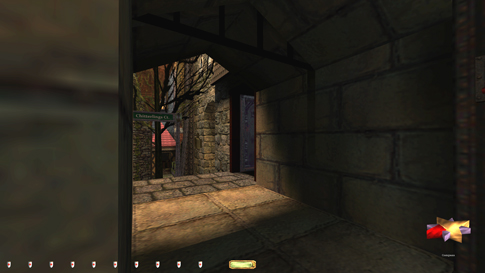
opening streets were fairly limited in scope. A closed gate and a pivoting
stationary watchman covered the entrance to Yeoman’s Market (left image
below). The streets moreover had three patrollers. A woman covered a stretch
from Drowner’s Dock up to the underpass just south
of the pub. Then there was a swordsman with an eye-patch who walked from the
treatment plant gate down to the alley south of the factory. They both
stopped at predictable points, yet could head either way again afterwards.
Highly unpredictable. The third enemy travelled all the way from the starting
latrine, and in a straight shot south to the fishmonger stand. He was the
least of my worries. After learning all the patrols, I found a few convenient
dark spots and planned my route.
The
factory was my initial target, as I needed the replacement gear to get to the
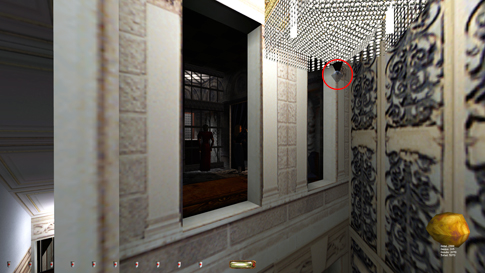
sewers. After taking the coins at the market, I leaped to the metal railing
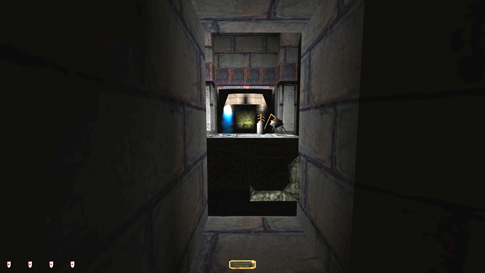
and entered the factory on the top floor. Another patrolling guard, an
archer, covered this level and the outside alley. Luckily, I found a dark
spot on a pipe before he appeared (right image above). I discovered he could
even see me through the door window. Found two pieces of loot behind a brick
above the desk here. I couldn’t replace the brick, so I put it on the desk as
close to the hole as possible (left image below). Putting it flat made more
noise and alerted the outside archer, so I put it vertically instead. Exited
via the bottom floor door, after getting what I needed. I never touched the
gate. From
here, I basically had to get to the junction station without getting spotted,
picking up a few pieces of loot along the way. I waited underneath the shade
cover just north of the factory, timing the two patrollers here (right image
below). Since their routes were somewhat random, an opening emerged soon
enough. Only the swordsman ventured in the direction of the treatment plant,
so that area was a lot easier. I decided to close the treatment plant gate
behind me. That was required for Supreme, and I knew more enemies would spawn
later. I just figured it was better to do it now. I required flipping the lever
in the junction station, close the entrance door, and rush through the gate
before it closed. Tough, but well doable.
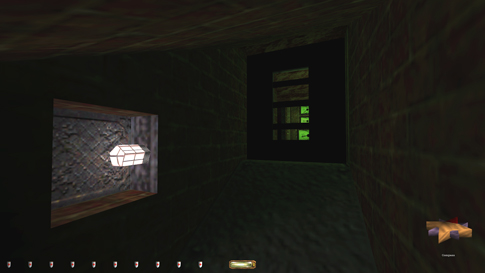
Sewers The
sewers had no enemies to bust from, but there were a few gates and hatches
that had to be closed up due to Supreme rule #7. The easiest ones to forget
were the gates by the cannibals. They were both operated by a lever on the inside
of the lowest gate. I could flip the lever and rush out before that gate
closed, but then the other gate was closed and I couldn’t proceed (left image
below). Instead I had to wait until after I got the mangled key. There was
another gate there that only had a button to open it, but couldn’t be
reclosed (right image below). Then the Supreme rules allow leaving it open.
If I had been able to mantle back up to the vent shaft above, then I wouldn’t
have had to open this gate at all, but it was too high up. There was nothing
to stack to get elevated either. At least I avoided the bust by managing to
close the two previous ones. From here on it was linear gameplay until the
sanctuary.
The
only thing I needed to pick up here at this time was the old-looking key. The
mission could be broken quite substantially by mantling up to the balcony in
the southwest from the staircase statue (left image below). This way I could
get most of the loot around the compound without having to deal with the
patrollers that would spawn later on. However, I opted out of this skip,
being pretty confident those loot items would still be accessible when I
returned. It would pose an extra challenge, the way the mission was intended. I
arrived at the top floor of Balnebrich’s. There was
another “hidden” door that I had to close behind me, without the possibility
of returning (right image below). I had a bad feeling that it was a poor
choice, but I didn’t see any reason I would need to return the opposite
direction later. Hopefully that bullet wouldn’t come back to bite me.
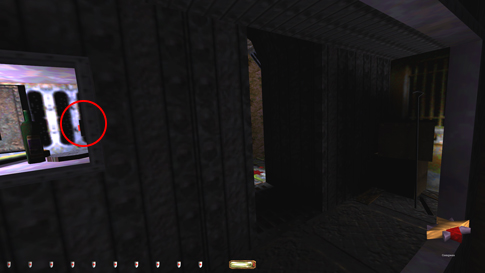
Master Balnebrich Balnebrich’s mansion actually wasn’t that difficult. There were no stationary
guards, only 3 patrollers and a sleeping guard downstairs. When that is the case,
it’s normally just a matter of waiting out the patrols until they’re timed
right. A few hallways were very lit, but plenty of pillars served well as
hardcover. Little to no tile around also made things easier. The pool room
was my favorite, by far. Some hidden loot on a ledge above the canopy (left
image below). Also found a caged crayman down below
(right image below). There should’ve been a hidden objective to free him.
That would’ve made my day.
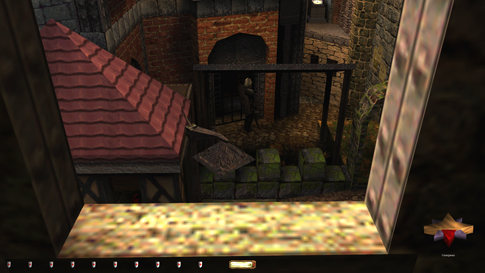
To the Aqueducts Received
my updated objectives after overhearing the Marketmaster’s
conversation. My primary goal now, however, was getting Hoel’s
lockpicks. I needed to reach the aqueducts in the
northeast, and that meant crossing through the eastern streets once more.
They had changed since last time, and would change again after returning from
Hoel’s. I didn’t think the Marketmaster’s
district would change at all, so I could safely return here later. My first
task was thus to open the gate at Yeoman’s Market. Luckily, this gate
couldn’t be reclosed. The lever stopped being frobbable,
which means it is no bust to Supreme to leave it open. A very frequently pivoting archer stood his ground behind the
fishmonger’s stand on that side (left image below). Two other patrolling
guards also ventured over here. They had the same, predictable route, and
they were fortunately walking only a few feet apart. It would’ve been a lot
worse with those two spread apart. The
only new building I could visit in this district (or so I thought) was the
junction chief’s apartment. Since I now had rope arrows, I could reach it
through an open window above the pub. There was another stationary guard
outside the factory gate. He had three facing angles; north, west and
southwest. He didn’t seem as alert as the other enemies in this district
though. Several times where I thought he would comment, he remained silent.
Only if I got close did he seem to alert normally. Perhaps his vision
distance had been reduced, or something to that nature. Anyways, when he
faced southwest, I could climb my rope to the apartment (right image below).
From
here to the aqueducts was easy. I managed to close the access hatch as I
dropped onto the ladder. I seemed to remember the hatch would close by itself
later, but I mostly wanted to see if it could be done. Well, it could. The
aqueducts themselves were non-problematic. Also closed Hoel’s
door on my way out. There was no need to return here later. I now had the
chance to reset the hatch operated by the mangled key, as well as return the
key to the gear pit. This was possible because I now had the lockpicks that enabled me to open another gate to the
boiler room. This gate couldn’t be reclosed and therefore didn’t bust
Supreme. It seems a bit silly to reclose a hatch only to open another one,
but hey. Candlehats Another
pickable door took me to the toughest place in the
mission so far; the sewer maintenance section. Two floors of metal walkways,
two stationary guards, and two patrolling workers with candlehats.
Yes, that’s right. They were wearing hard hats with candles on them.
Practical I guess, if you need both hands available. Anyways, they were by
far the toughest to dodge. The whole area wasn’t big, but they could see me
from either floor, and they were vigilant. I think they had a similar patrol
route, but were on opposite schedules. First, I rounded the corner north and
aimed for the stationary thief’s purse. He faced north, east, and south. Only
the former position was beneficial. After grabbing it, I quickly dropped to
the level below (left image below). Next,
there were two pickable storage rooms at the
western end of this floor. Only one of them was interesting and had loot. The
area outside the door was well lit, and both patrollers could see me from up
above. The central office was the most difficult place to reach. Dodging the
troops, I leapt from the broken ladder to the south, climbed up, and hopped
furthermore onto a small ledge outside the office window (right image below).
The thief from before was within view for part of this trip, but a large
pillar helped me out some. I mantled inside and sought shelter in the back of
the room.
A
stationary guard covered the only door to this room. He never made any first
alerts, as far as I could tell. Not even from the door opening two feet away.
However, there wasn’t enough room to leave without nudging him, and that is
not allowed for Supreme. The window it was then. I decided to take the
eastern one to get out. The thief again had to be turned north for this move
to work. It was hard, as I was bright and in view of both candlehatters.
Timing their routes, I jumped onto the staircase to the east (left image
below). Most of the time I landed in a soft, cushioned crouch, without really
trying to. The distance was just so I ended up on the stairs’ silent edge. I
got the purse from one of the patrollers from underneath the stairs here. Snuck
southeast and found another pickable door further
south. This entire room was pitch black, but with two pieces of loot. That
was it, so I continued west for the exit. The non-verbal stationary guard
mentioned before had to be facing north for me to pass the hallway
successfully (right image below). He also faced west and south.
Sanctuary (What a Place This Is!) Although
this place was highly intimidating due to color scheme and atmosphere, there
were only 3 enemies to worry about. The apparition with glowy
eyes (the owner?) kept a fast pace between the central tower and the
staircase in the east. He only stayed on the uppermost level. Then of course
you had the eyeball beast roaming down below. It was even faster than the
apparition, and had a randomized patrol route, but there were plenty of shade
around to dodge him. Lastly, a masked, cleaver-carrying she-beast patrolled a
two-floored building in the southwest. There was also a mummy tucked away
close to the exit in the east, but it wasn’t necessary to ever get in contact
with. To reach that exit, I needed the sanctuary key from the top floor of
the she-beast building, so I headed there first. A hellishly difficult
metallic walkway took me there. I couldn’t get a feel for its clipping
border. Several times I got stuck along the rim, only to either fall to
oblivion or hop onto it with a clang. The she-beast’s patrol was predictable
and simple. A few traps to worry about upstairs, but nothing too fancy. The
bottom floor was tiled, but there was a convenient wooden beam by which a
rope arrow enabled me to circumvent the stairs (left image below). A plate on
the table down here was all of interest, but there were no shadows at all to
speak of. The exit door was pickable, but couldn’t
be relocked, so I wanted to avoid it. I took the metal walkway back instead.
Had to return here to return the key later on too. Went
back the way I came and lock-blocked the exit gate with the sanctuary key. A
nice trick when you need to both lock the door and return the key. Some people
ridicule that method, but I’ve never had an issue with it. It’s no engine
exploit in my book. On my way back I leapt from the open window across the
garden below, mantling up a ledge with a sleeping corpse (literally, laying
on a couch) (right image below).
The
eastern temple had our first real ghosting issue. A lab of some sort had a
lever panel in the ceiling. Flipping it revealed a massive face-statue behind
a bookshelf. Two pieces of loot was located in its forehead; a ring worth 100
and a blue gem worth 15. Once both of them were taken, the statue face
disappeared and respawned alive and vigilant in the opening of the exit
doorway (left image below). There seemed no way to get past it without
getting spotted. For regular ghost, I downed an invisibility potion and tried
squeezing by. It spawned slightly to the left of the middle, so the right was
the best side to go for. I got partly through, but died as I fell beyond on
its backside. It dealt instant damage by touch, so I didn’t have more than a
few seconds to work with. I even tried drinking healing potions and eating
healing fruits during the process, to buy myself more time, but to no avail.
It almost seemed like it had a lethal spot where I died instantaneously. I
also tried experimenting with putting certain items in the spot where it
spawned, thinking that this might push it further left, or something like
that. Again, no Bueno. I remembered that trick working with a rubble piece on
Markham’s ghost in Precious Cargo. Then I thought perhaps a speed potion
would help. After all, it seemed damage was dealt per second of me touching
the statue. I bound speed potion to ‘s’ and tried again. After only a few
attempts, voila!! I got through! The first time I lost 8 health points. The
next time I did it, I lost 6 (right image below). That was the best I could
do. I don’t see any way of getting through without taking damage, and
drinking the two potions is an absolute must. For Ghost that meant Perfect
Thief was still possible, albeit a chemical success. My priority is usually
Supreme, where the use of potions aren’t allowed. For that mode I skipped the
gem worth 15 and left. Remembered to close the bookshelf panel on my way out.
Next
I raided the shrine behind a pickable, slanted door
further west. The eyeball beast had the outside room as part of its route,
but it was dark enough to stay unnoticed. Lots of loot in there. Now I could
finally return the old-looking key from my first visit here. I had to time
the she-beast’s patrol route upstairs. The pickable
door to that area had an open window in it, so sound traveled much better
through it. She had to be on the top floor not to hear it. Dropping metal on
metal will be Garrett’s downfall one of these days. Had to pick one of the
five pickable locks upstairs in order to get a
goblet, but I could leave the other four locked. Like I said before, I do my
utmost to leave pickable doors untouched. In
order to avoid picking more locks, I mantled up from the statue to the pool
balcony in the southwest. This was the route explained during my first visit
to the sanctuary. From here I could easily access the two levels of the
central tower. The lower floor lab was my favorite place in the entire
compound (see image). So much
detail and mystery packed into a small space. Love it. Dodging the striding
specter, I returned the sanctuary key to the bedroom. Since I had
lock-blocked the gate to the west, I could close it behind me and leave
Supreme clean. Balnebrich Revisited I
now arrived in Balnebrich’s basement. This was a
wonderful way of looping back to the city, and now of course I had my lockpicks. This floor only had a spider bot and a watcher
to worry about. The spider followed a golden child, but it was completely
deaf. It only alerted to visual cues, but then went straight to attack mode.
The watcher naturally was also deaf, so there was no need to worry about
making noise down here at all. First, however, I went up the stairs and
visited the pickable bedroom in the northeast. It
had one piece of loot I wanted. There was now a guard in the small hallway
outside the bedroom door, but he luckily didn’t alert to the lockpicks. This floor moreover also had an extra maid in
the dining area and a new smoking guard by the main (but unfrobbable)
entrance in the south (left image below). Passing this area from any other
direction than the basement was difficult, so I found this to be the best way
to reach the bedroom safely. I could have also reached the now accessible
servants’ quarters, but that required picking a locked gate, and there was a
way to avoid that. So I returned to the basement for now, closing the secret
entrance behind me.
The
toughest spot was the tiled hallway just outside the pool room (right image
above). I could approach it from either direction, but it involved timing the
watcher quite well both ways. In the end I found the sweet spot and managed
to rush in behind the middle pillar to the southwest. There was only a tiny
spot where I was dark enough not to get seen by the passing spider bot, but
also gave me hardcover for the panning camera. The candlestick in the pool
was reachable while keeping the pillar between me and the watcher. Then I
rushed further southeast to clean the rest of this floor. I
ascended by way of the rotunda next to the lab. A rope provided access to
either of the upper floors (left image below). I went all the way to the top
and looted another pickable bedroom there. From
there I looted the pickable treasury in the
northern hallway. Brilliant maneuver to tease the player in the open like
this, knowing the lockpicks isn’t available yet.
Well, they were now. I could wait in the shadows to the east for patrollers
to clear out (right image below). One guard and a guy with a strange, red hat
came up the stairs further east of here. The only one that stayed was an
archer alternating between the top of the stairs and the balcony above the
garden to the northwest. He sometimes stayed at the end of the patrol, and
sometimes he just turned around and headed back. When stationed on the
balcony, I could pick the lock freely. I needed two full patrol cycles to get
the lock open and retrieve the loot.
I
now took the backway into the middle floor servants’ quarters. The gate to
the pool control room was actually frobbable from
the pool side (left image below). There was no need to lean through the gate even, you could reach
it from the right end of the gate, just when the lever was slightly out of
view. You could only reach it when you were in between crouching and
standing, it seemed, so there wasn’t much in it. Anyway, it circumvented
having to pick the main entrance door. The
servant quarters itself was devoid of people. The guard and the servant that
had previously blocked the entrance were now gone. The private court to the
east was also quite easy. There was no loot at the astrologer’s, so I could
skip that place entirely. When opening the gate to Chitterling Court,
however, the door to the torturers’ basement that I thought was supposed to
be open, was not. The purse down there was thus not available at this time.
After inquiring about this issue on the forums, I was told to my amazement
that the control box operated by the mangled key in the sewers also controls
this door! That meant the last time I passed this area, the door had been
open, I just failed to realize it. Now, because I had locked up that hatch
and even returned the key, this door had closed up again. I therefore had to
reload to before closing up the sanctuary door, go back through the sewers to
reopen the mangled key hatch, redo Balnebrich’s and
the Private Court, before finally getting the purse in the basement (right
image below). Of course, this meant I had to return yet again to the sewers in order to close up the door + hatch and
return the mangled key for the last time. Supreme Ghost can at times be
extremely frustrating.
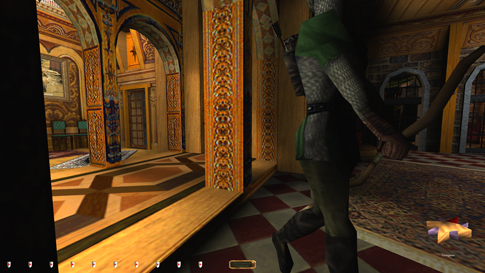
The Marketmaster I
went back through Balnebrich’s and tackled the
streets to the west. Cleaned the smokehouse and the bastion easily enough.
Although there were quite a few people at the market, I was able to open the
entrance to the tomb without anyone seeing or hearing me. I thought the jump
to get to the lever would be too noisy, but nobody said anything. I bounced
across from the lookout tower to the nearest open window to the Marketmaster’s (left image below). From the other window,
I could also mantle up the ledge further west and get the single coin up
there. The
only issue in this building was the top floor, but it was an utter nightmare.
To begin with, I did manage to avoid picking the lock on the gate leading to
the staircase. I could mantle up the painting (!) in the northwest corner of
the hallway, then furthermore up the window frame on the northern wall (right
image below). I needed to time the patrolling archer, but more importantly,
the masked lady in red on the top floor. She had a short patrol in a room to
the southeast of the window I mantled into. She stopped at either end of her
patrol and waited for a while. She never said anything when stationary, no
alerts, no idle chatter, nothing; just straight to attack mode. She did,
however, alert as normal when walking between the end points of her small
route. During her stops, she did make a scripted search maneuver a couple of
times, but that wasn’t due to seeing me. The western stopping point sometimes
pushed her onto the table by her window. The first time I thought she was
stuck, but she always continued her patrol afterwards. I simply had to be lucky
with the mantle and hope she wasn’t there at the window. The other end of her
path was by the golden egg cage, staring straight at it.
There
was another girl on the top floor as well; a maid of some sort. She was
carrying a candle, doing continual counter-clockwise rounds encircling the
loot cage. A third female, a guard, was stationed behind a curtain in the
southwest, a bit further away from the cage. She couldn’t see anything, but
the entire floor was tiled, and she could definitely hear me. There were a
few rugs on the west side of the cage, but they weren’t of much help. The two
moving women were the issue, combined with the noisy floor and the servant’s
candle. I soon got a good feel for how big the radius was on her light
source. I gave it a good bit of distance and then could move in closer behind
her. I basically had to follow her
around the premise, staying at her back as much as possible. I couldn’t move
as fast as her on the tile, so I had to wait in a few spots before she
returned on her next cycle. I also had to be very wary of the madam to the
northwest. Remember, she didn’t first alert when stationed, only when moving,
but she could still give settling remarks upon resuming her patrol, which
naturally was a bust all the same. Doing frequent hard saves up here was a
smart idea. The
first spot I waited in was around the corner after heading down the hall on
the cage’s south side. This was where I could enter the closed-off section
with the third female guard. Right outside her tent was a patch of shade that
kept me concealed as the maid passed (red arrow in left image below). Next, I
mantled the dining room table to the east and crawled over to the northeast
corner. There was a penetrable curtain here, hiding a tiara on a statue. This
was the last piece of loot I found when I played the mission the first time.
Getting there involved close monitoring of the lady in red, as she could see
me through the cage barriers. On the maid’s next round, I snuck out and
crawled through the next permeable drapes to the north. These concealed the
control box for the magical seal protecting the egg. I picked the lock to
turn off the device and hid in the northwest corner of this area. From here,
I could lean through the curtain and monitor both women, without getting
caught by the candle lady (left image below). Once I found this spot, things
went a little bit smoother.
My
next task was to pick the lock on the cage door itself. The lady in red had
to be fully stationed at her northeastern spot in order not to hear it. The
patrolling maid had to leave the room and enter the hallway to the south.
There was just enough time to get the door open and return to my hiding spot
before she emerged around the corner again. It took a while before their
routes lined up so that this was possible. I think I waited 4-5 loops before
the chips stacked correctly. If I picked the lock when the other woman was
stationed by the cage, she didn’t give a first alert, but gave a settling
remark a few minutes later. The first time around I was on my way back
downstairs when she did this, and I didn’t understand until later that she
had actually heard the lockpicks. My
final job was then to grab the egg itself. I wanted to do this and follow the
servant back towards the staircase in one fell swoop. Again this required the
other lady to be over by the window for the duration of the process, which
took a few more patrol sequences. It worked after not too long. But then came
the big blow. Both women alerted to the golden egg missing from the cage!
These remarks are different from normal first alerts, and there are no
settling remarks to follow. I do consider these as weaker busts to the
Supreme mode than regular comments, mostly because they are not due to
getting seen or heard. They can be compared to alerts given to spotting an
open door, a hanging rope, or things of that nature. I even think this was
more excusable, as it was a direct consequence of taking an objective. Most
loot items will eventually be detected as missing anyway, it’s just that
Garrett isn’t around to hear the reactions. But they were busts nonetheless.
I was still happy to be able to loot the entire floor free of any
“traditional” alerts. On
the way back down, I dropped from the window I had mantled up earlier. This
time, the woman had to be stationed over by the (now empty) egg cage (right
image above). I grabbed the cleverly placed diamond from the chandelier now
as well. There was another one in the room further southwest too. Timing the
archer below, I landed softly on the end table. The rest of the building was
no chore. I exited via the bathroom drain pipe. The Market All
that was remaining was loot, and all the rest was in or near the market. I
got the coins from the arrowsmith’s and the vase
from the apartment just southeast of here easy enough. Two city watch guards
patrolled here, an archer and a swordswoman, but there was a patch of shade
at the south end of the underpass where I was safe (left image below). I
tried approaching the main market from here, but it was just too busy. Plus,
this was against the circular patrol path of the aforementioned archer, so I
was bound to run into him sooner from this direction. The western end was
quieter, but there wasn’t a single patch of shade anywhere. The best way I
found was to observe matters from the bastion above (right image below). I
could lean around the corner from darkness and study all the patrols
carefully. One of them was the marketmaster himself
checking in on two salespersons at either end of the market. They luckily
faced away most of the time, but the sir could easily spot me. The eastern
end of the market was lower in topography, plus there was a semi wall on the
east side of the bastion lookout that partly blocked his view. The other
issue was a swordsman outside the mansion’s main entrance. He walked
east-west patrols, with a brief stop at the east end. Luckily, there were
archway pillars along the border of the building that provided hardcover.
When the coast was clear, I dropped left and entered the open tomb entrance.
The doorway here was also dark.
The
tomb itself was free of enemies, so nothing to report there. Coming back up,
I went for the most difficult piece of loot: a gold goblet in a windowsill in
the mansion’s front patio (left image below). I had to time the guard so that
he was heading east, just passing the goblet when I entered. The archer
patrolling the streets had to be gone, and the marketmaster
had to be by the lady at the eastern end during this play. I leapt from the
wall to the right of the lookout tower over to the archway outside the
goblet. With a bit of luck I would land on the edge, without making noise. I
then had to sneak over, get the loot, and sneak back out the archway. During
the last stretch the guard had stopped and was facing north, so
creep-crouching was needed to avoid the first alert. Once I got to street
level, the arches blocked his view, so I could actually run west back to the
underpass outside the arrowsmith’s. The female
guard patrolling here was fortunately nowhere to be seen.
I
made my way back around to the bastion and closed the tomb entrance. I
monitored the patrollers like before, and dropped heading east this time,
grabbing the two remaining pieces of loot along the way. The lady by the
stand here never first alerted to me, which made things easier. The
only thing left was getting to Millhold. One new
guard had spawned in the control station in Yeoman’s Market, although he
wasn’t the problem. Remember the swiftly
pivoting archer east of the gate? Well, he was still there. Timing his
rotation, I ran up to his right as he faced east. I then started
creep-crouching towards the ledge (right image above). He also faced
northwest and southwest. In the latter position, he caught me right away. He
needed to face northwest or east until I got to the ledge. After that, he
caught me if facing east only. On the plateau below, he could also catch me
facing east just before I dropped. Beyond that, I was safe to leave and end
the mission. What an incredible ride this was!! Statistics: Time: 2:54:04 Loot: 6593 out of 6593 (Supreme: 6578) Pickpockets: 4 out of 10 Secrets: None Locks Picked: 15 Damage Dealt: 0 Damage Taken: 6 (Perfect Thief
only) Consumables: 1 Invisibility Potion & 1 Speed
Potion (Perfect Thief only) Ghost: Success! Perfect Thief: Chemical Success! Supreme Thief: Failed! Perfect Supreme Thief: Failed! Notes: -
Skipped a blue gem worth 15 in the east temple at the
sanctuary for Supreme. The spawned statue blocked my exit path, and the only
way to get past it was by using an invisibility potion and a speed potion,
and taking at least 6 points of damage. -
Took two first alerts from the women on the top floor
of the Marketmaster’s after having taken the golden
egg. They alerted to the item missing from the cage. Supreme busts, albeit
very small ones. |
|
|


