|
THE BUILDER’S PARADISE - [Thief 2: The Metal Age 20th Anniversary Contest] I
have very mixed feelings about this mission. My first playthrough
reached severe frustration levels, while the ghost run was surprisingly fun.
Although it’s difficult, with some clever tweaking, it can actually be
Perfect Supreme Ghosted. Heavily inspired by Sabotage at Soulforge,
many players have called this the ending Thief 2 should’ve had. I’m not sure
I agree with that statement. I
had to make my way to Karras’ utopia, The Builder’s
Paradise, in order to stop his evil plans. This involved using his security
machines in some way. I also had to shut down the production assembly in his
factory. Furthermore, I need to find and steal the artifact that controlled
his robotic children, before finally exiting the compound. The good thing was
that fewer enemies were roaming about until I chose to start messing with Karras’ plans. This meant I could choose a route that
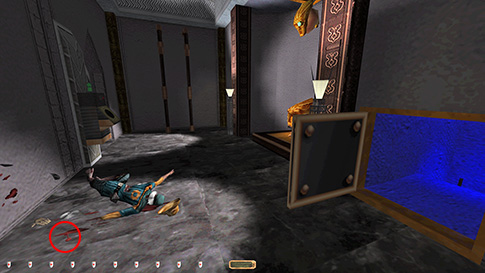
prevented unnecessary robots from spawning early. Basement The
control panel for the air shaft door couldn’t be operated once I was on the
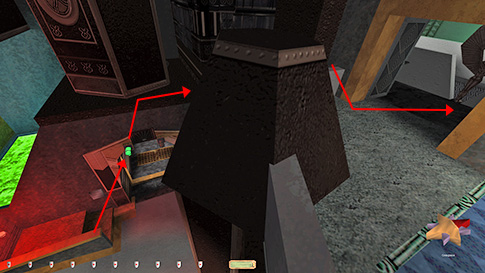
other side, so I had to leave it open. There was a hidden duct to the top
floor which made me able to get the armory key early (left image below). I
thought I would be able to find a way to lower the crane or raise the floor
and thus close the air shaft coming from above, but none of those seemed to
be operational. I also tried to mantle up to the top floor from below, but I
couldn’t find a way to do it. Only later would I realize that you can return
to the starting location to end the mission, not just by using the nave’s
main entrance. That fixed the whole issue, as I could just close the air
shaft then. Problem solved.
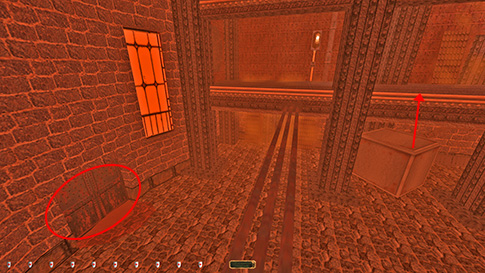
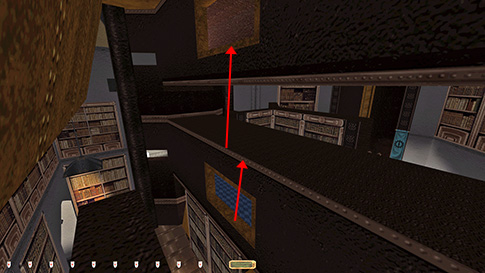
Once
aboveground, there was another set of doors that couldn’t be reclosed. Those
were sliding doors, so I guess I could’ve blocked them with something, but I
found it easier to mantle up from one of the big crates in this area (right
image above). It was a tight mantle, but repeatable. Using items to block
doors requires returning them for Supreme anyway, so this method was
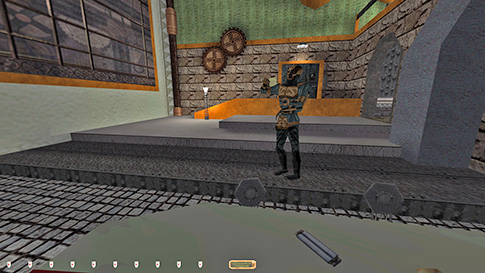
definitely cleaner. West Wing The
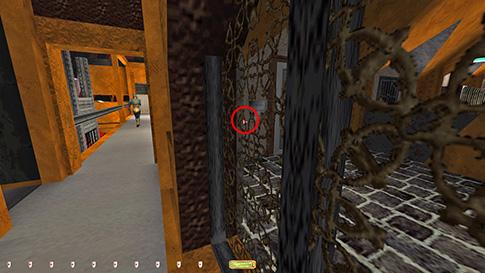
biggest problem in the museum area was Kernel. He was a zombified
robot that would spawn when crossing specific borders. He would always walk
straight towards where I was, whether he had detected me or not. Then he
would just stop and stare a few feet away (left image below). As far as I
know, only the secret gear arrows from the aboveground ruins can kill him. A
few times he would just disappear, but that was always after being fully
alerted. Once I realized what triggered his appearance, he got easier to deal
with, but in general he was a huge pain in the arse.
First, he would trigger when I entered the eastern storage room, so I skipped
that at first. Next, he would trigger once you got close to the lab with the
heads in the sink. Luckily, he appeared way back in the museum, so it would
take a while for him to get to me. I had time to get the eye from the
communications room in the meantime, then rush to the western storage room.
Kernel appeared before not too long, but then I could just use the pipes to
skip over to the east side and he would have to take the long trek around to
reach me. Keep in mind that during all this time he never spotted me, it was
just scripted for him to always know where I was and go straight there. Now I
could easily head down to the engineer’s quarter, where Kernel couldn’t get
to. Nothing to report from this section.
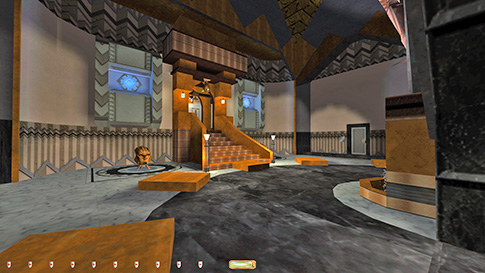
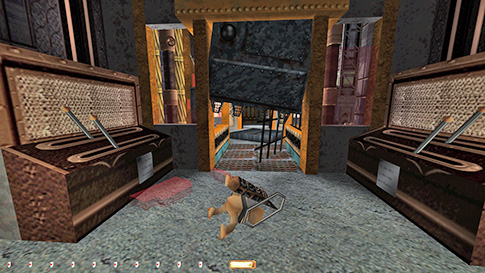
The
nave was easier than I thought. Mainly because the top of the stairs was too
far away for the watcher to notice (right image above). The robot’s patrol
route was also long enough to easily dodge. Used the vent to reach the
barracks and cleaned this area easily. East Wing The
biggest discovery in ghosting this mission came upon entering the assembling
section. On my first playthrough, Karras gave his first monologue when crossing the doorway
threshold. This time, he didn’t. Additionally, several of the upstairs doors
that were locked last time were now wide open. The instant I got caught by an
enemy or a camera however, all these doors locked up and Karras
started talking. If I didn’t get caught, the doors would still lock up after
a certain amount a time, about 1-2 minutes, but this was enough for me to
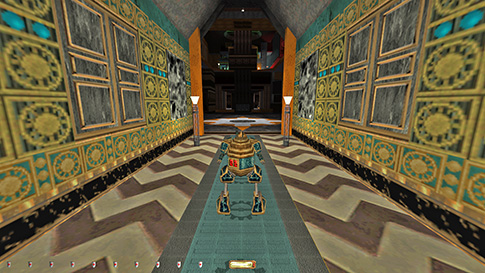
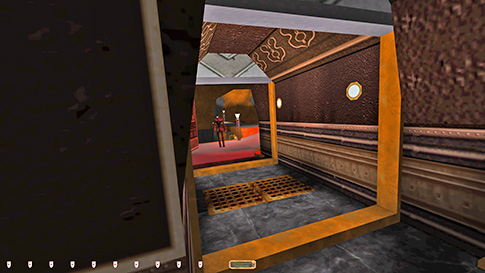
exploit this gap in security. Most importantly was the double doors on the
walkway just above the factory entrance (left image below). They yielded
access to a whole section vital to my progress, not to mention the control
room for Karras’ emergency doors (right image
below). This was huge! Although the lever for the bay door in here was
broken, I could open both doors on the south side. This meant I didn’t have
to use the large elevator down the ramp to the east.
I
could now get to the break room and library area without having to go through
Karras’ floor. This was hugely beneficial, as I
could get the factory key, the museum key and the cold room key without
triggering extra enemies. None of these areas were difficult. There was only
one patrolling enemy, a robot in the council room area. I couldn’t leave via
the council room’s main entrance, as the outside watcher hardly even pivoted.
I could turn off any of the watchers in the security room, but that isn’t
allowed for Supreme. Kernel would spawn again once I read Irina’s journal, so
I skipped that part for now. It wasn’t necessary to progress, and I’d have to
come back to return the factory key later anyway. I
double-checked that I could now enter Karras’
quarters and top floor without having to use the throne room elevator. That
worked fine, so I started to plan proceedings. I knew I needed to close the
emergency exit doors fully, and the only way to do that and still leave was
to descend by way of the aforementioned elevator. However, at the end of the
stairs was a worker bot (left image below). Normally, these robots can be
snuck past as their periscope isn’t operational until alerted, but this one
was different. It was already active and could both see and hear. I was a bit
puzzled, as one time I had seen it in the same location facing south. I
reloaded and did some experimenting, only to come to a startling discovery.
Once Karras finished his first monologue, this
robot is supposed to walk out of the big sliding doors with Karras’ face on it that opens up. It is supposed to stop
in the middle of the large foyer. However, if you aren’t looking at this part
of the factory just then, it instead remains stationary. It’s like an
animation that only plays out if visible on screen. Furthermore, the robot’s
end-of-animation direction was determined by where Garrett was relative to
the robot. Thus, I could manipulate its facing angle by being in a certain
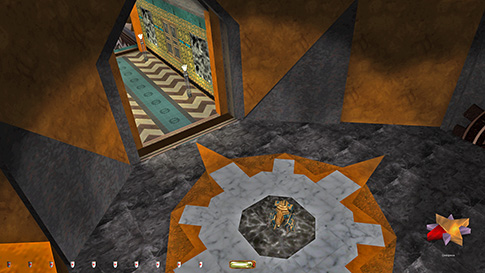
location when it stopped its patrol. This was excellent news! I went back to
a previous save and replayed my entrance to the factory. After opening the
south emergency exit doors, I ran up to get the factory key. This forced Karras’ monologue to begin. Next, I headed down to the
assembly area and watched the robot come out from the top walkway. I made
sure to be towards its northwest, which is the direction it ended up facing
(right image below). Excellent! The stage was now set to mess up Karras’ plans.
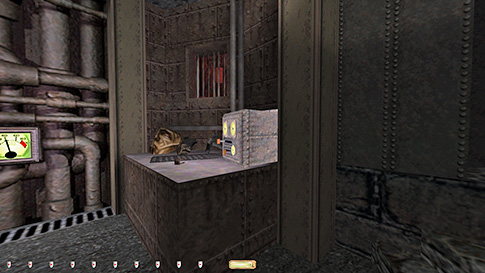
Extraction Section This
part of the factory was mostly about listening for alerts. Everything was
metal, plus the machines muffled the sound of potential alerts. Two mechanist
guards and one of the cyborgs roamed here, but they weren’t tough to dodge. I
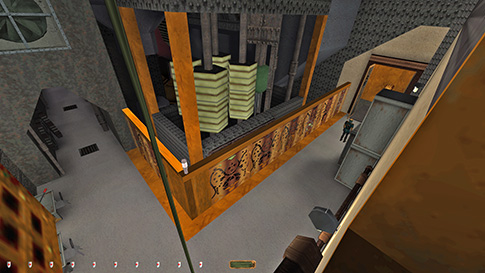
found a predictable way to get down from the manager’s office to the bottom
floor by jumping from the roof (left image below). Mantling up the control
panel next to the melting pot was the best method. Once I got the memory
crystal, two angels were let loose. One in the factory and one in the
staircases above. Atop each staircase was a small patch of shade perfect for
hiding. I’m not sure if it was intended, but I could open the sliding gate
from the inside, as the lever was easily reachable (right image below).
Definitely not an exploit. Flipped Karras’ valve
and switched out the crystals. All the angels would die from this, but that
was an automatic consequence of completing the objective, so no bust. Returned
both the manager’s key and the rare ores key next. Got the vibrating dust by
dropping the boulder into the grinding machine. I used the explosive charge
from the armory to stop Karras’ production. You can
use mines also, but they get armed and can blow up later if anyone walks too
close.
Exited
through a vent in the extraction section’s northwest corner on the upper
level. This took me to a ledge above the nave and furthermore to a back
entrance to the engineer’s quarters. This required the factory key, which I
had. I could now return the control room key and also get the special mask
from the museum with the key from the break room. Next I cleaned the workers
quarters, which was no issue. I could get the chaos egg from the cold room
now, which is why I had waited to go here. When
returning to the factory, a cyborg had spawned just inside the entrance (left
image below). It pivoted, but there was no way to get through the hallway
quickly enough. I was thus forced to go back and head through the vent system
from the engineer’s quarters again (right image below). It was a bit tricky
getting down unscathed and retrieve the arrow. I ended up hopping onto the
nearest light fixture, then furthermore onto the wall pipe below.
Endgame I
headed up to see Karras’ death, in order to check
off that objective. The remaining pieces of loot was on this floor also. I
could now close all the emergency doors from up here and take the big
elevator down. All the angels had fallen, so I was safe to leave. The outside
robot was still facing northwest, so I snuck out on its left side. Headed
all the way up to the break room in order to return the museum key and the
cold room key. I spent a long time figuring out how to reset the elevator to
the middle level. I couldn’t leave via the hallway, as the council room
watcher covered that area. The elevator buttons did not respond to any arrows
or items thrown at it. I also couldn’t click the button and rush out before
the gate slid shut. It seemed to seal off the doorway the instant the closing
animation started, unlike regular sliding doors. I honestly thought I would
be stuck and forced to bust this late in the mission, until I realized I
could mantle out the small window in the hallway. If getting onto the sill
fully, I could lean out the window and look up. Jumping would now enable me
to mantle up to the level between the two floors (left image below). The same
method once again took me into the top floor window. Voila!
Lastly
I returned the factory key. Irina’s ledger was not even necessary to take if
done in this order. All it did was spawn Kernel, which I happily skipped. I
had previously lock-blocked the doors to the generator floor, so I headed
down there next. Got the last two elemental powers in this area. Had to use a
water arrow on the weird spider bot in the fixing room to get the nymph seed.
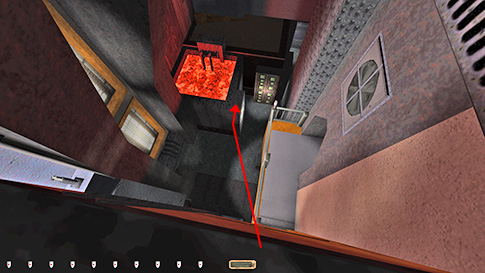
Left via the warehouse and could now finally close the air shaft from the
start of the mission (right image above). Awesome! Statistics: Time: 2:11:53 Loot: 4771 out of 4771 Pickpockets: None Secrets: 9 out of 9 Locks Picked: 8 Damage Dealt: 0 Damage Taken: 0 Consumables: 1 Water Arrow Bodies discovered by enemies: 2 Ghost: Success! Perfect Thief: Success! Supreme Thief: Success! Perfect Supreme Thief: Success! Notes: -
The bodies discovered is as a result of the angels
dying. It follows naturally from the main objective, so no bust. Nobody saw
me in the process. |
|
|