|
The Whistling of the Gears [Thief: The
Dark Project 20th Anniversary Contest] Although I had played The Chalice of Souls before,
which Firemage co-authored, this was my first time playing any of his solo
creations. To be honest, it started out a bit tedious, but has grown into one
of my favorite missions, mostly due to how fun this mission is to ghost. It
definitely could have benefited from a few more weeks of testing, as some of
the objective choices in my opinion hamper the gameplay. It has tons of
Easter eggs and hidden stuff, rewarding thorough completionists like myself.
Along the lines of Into the Odd, the reviews for this did split the community
some, though I’m definitely in the camp of two thumbs up. I
was tasked by Lord Morel to sabotage Lord Tudor’s entry into some inventor’s
contest, in addition to stealing one of his blueprints. Furthermore, I needed
to obtain some incriminating information about Tudor, as well as 1,750 in
loot. A different, yet intriguing backstory to a mission, which is always
welcome. The Church I
knew damaging Tudor’s core would send me across town retrieving the shards
later, so I wanted to head straight for his factory, in order to avoid
lengthy backtracking. However, I also knew I needed a holy item in order to
damage it. There was a hammer in Tudor’s armory that would do the trick, but
that required an unnecessary lockpick on the armory gate. The only other viable
option was using a holy water vial. Only two were available in the mission
that I knew of, the closest of which was in the hammerite church. That was
thus my initial target. The
archer right above the starting area had a purse, and although I managed to
take it without alerts, I couldn’t quite figure out his alerts. Sometimes he
saw me when I was in the streets below, but then wouldn’t even flinch if I
was on the pipe directly outside his window. Oh well, he never uttered a
word, so I was good. I climbed the roofs by the abandoned factory and made my
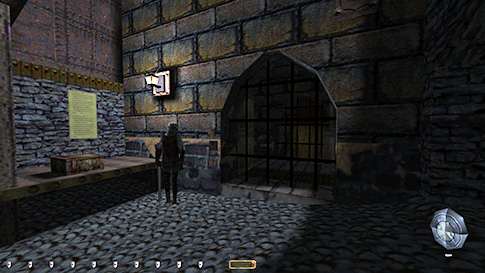
way east. Dodging a patrolling archer, I planned my church entry. I actually
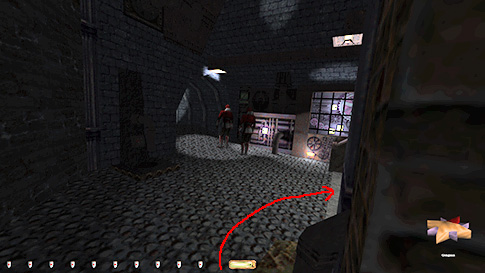
found entering via the ground floor double doors to be the easiest. The
outside stationary guard and the patroller that went in and out often ended
up both facing west, which is when I made my entry (left image below). Guards
rarely alert to doors opening in Thief 1, so this was a fairly safe method.
Since
there was no reason to return to the church later, I cleaned the whole
compound at this time. The building wasn’t that big and there was only one
patroller, a hammerite priest wandering between the floors. I brought along
the holy water vial from the bedroom attic and left via the upstairs balcony. I
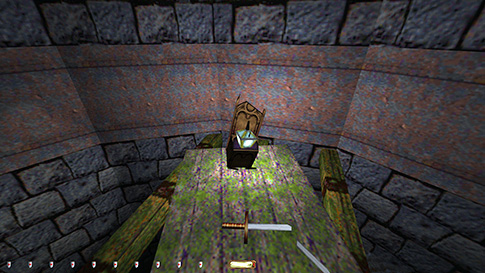
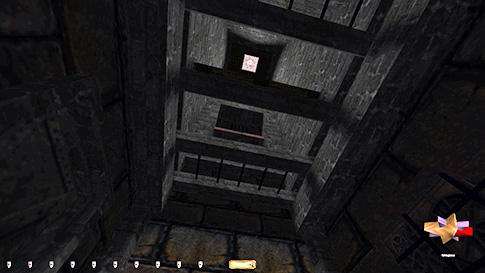
next leapt across north and approached the water tower. There was a hidden
coin stack in the corner below, plus a piece of loot in the tower itself.
Unfortunately, that item had to be skipped for Supreme. It was a valuable
lantern that counted as a light source, which goes against the Supreme rules
to remove (right image above). The Perfect status busted early for that mode. Tudor’s Factory My
initial plan was to enter Tudor’s via the balcony just northwest of the water
tower, but that got cut short by a stationary archer inside who heard the
sliding door. He was stationed in a reception booth just inside the entry. So
I scratched that idea and instead entered by way of a window further north,
just above the factory delivery entrance. From here, my first goal was to
reach the basement factory. I needed a copy of the security key in order to
safely reach Tudor’s top floor chambers. I could pick the lock on his
entrance door, but that necessitated the Tudor’s Quarters Key in order to
relock. Said key was only found in one location, namely directly behind the
aforementioned reception booth archer. Even if I would have been able to
retrieve that key, there was no chance of returning it to its original
location without alerts. The security key, however, would gain access to the
security office, which contained a secret passage to Tudor’s top floor. There
were a total of eight (!) copies of this key, though six of them were on the
wall behind the same archer as before. The seventh was found in a room with a
sleeping archer in the barracks, and returning that copy would wake him up.
The last copy was on another archer patrolling in the basement factory, thus
the reason for my getting there first.
However,
the same archer as before again
spoiled the party. There was a small flight of stairs down towards basement
where he caught me. I honestly thought I would be able to get low enough and
have the top of the stairs block his view, but that was not the case. I think
I got fooled by his awkward posture. He didn’t stand per se, but leaned nonchalantly against a table, which made it
seem like his head was lower than it actually was. His cone of vision was
still that of a normal, standing archer. Try as I might, I was not able to
sneak or rush down the stairs without at least a first alert (left image
above). This was a huge blow, as I honestly thought this was the only way
down to the factory. In desperation, my thoughts next went to the delivery
entrance gate. There was another stationary archer there, but he acted very
differently. He never alerted like a normal enemy, not even if I was brightly
lit directly in front of him. Instead, he gave scripted comments as I approached
the gate itself. The first time, he gave a comment and a frustration shrug.
The second time, he got angry and did a hunt maneuver posture in place. The
final reaction was full alarm with attack. I’m not sure if any of these
situations definitely would count as busts, but I suspect they do. Supreme
rule #4 says: “All AI and devices must
remain in their normal state and not react to anything you do or initiate in
the game.” Although this was a scripted maneuver, it was directly caused
by my presence. Luckily though, he pivoted north, northeast, and east. This
was my saving grace. It meant I could drop onto the wooden plateau as he
faced north and pick the lock on the gate without triggering a reaction
(right image above). He neither alerted to the lockpicks, nor the gate
opening. As long as he stayed either north or northeast, I could also leave
this plateau and reach street level safely. From here, I snuck over to the
gate’s north side and waited for him to face east. The screen capture below
to the left shows the closest I could go without triggering his first
scripted response. What I could do though, was rush through the gate and into
the first room without said response. It seemed not only was the script
proximity dependent, but also time dependent. Unless you spent more than a
second directly in front of or underneath the gate, the archer remained
silent. Perfect!!
The
next gate could also be picked open, but there was another guard beyond it
that could alert to the lockpicks, so I waited for him to leave. Both these
gates could be relocked with the security key or manually closed with levers
later. The only thing worth noting in the factory was a crate that fell off
the top shelf once I passed a certain line. It acted like a trap, so I
avoided it. Fortunately, there was a different gate into the work station
that took me to the other side of that gate, so I could get all the loot in
here for Supreme. Picked up the security key and the lost key also; I would
return both of them later. When leaving, I could again rush out and avoid any
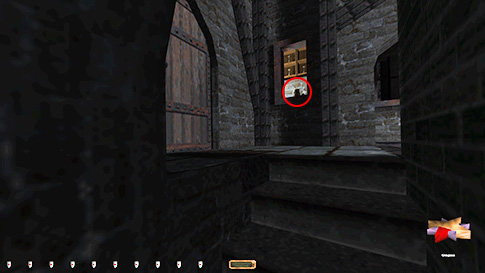
remarks from the guard. I
reentered Tudor’s via the window I talked about earlier. Since I would return
here to replace the core later, I headed straight for the security office.
The hidden passage took me to Tudor’s bedroom (right image above). The only
thing worth mentioning on this floor was getting the diamond by the plant
camera on the floor below. I had to take that coming from above, as it was on
the inside of the pickable door that responded to the quarter’s key. I simply
used one of the pillars in the staircase to get hardcover from the camera. No
big deal. Instead
of shooting a holy water arrow at the portal to destroy the core, I manually
dropped the vial into it. This was a bit tricky to do without taking damage,
but it reduced the use of consumables by one, which is something. Got
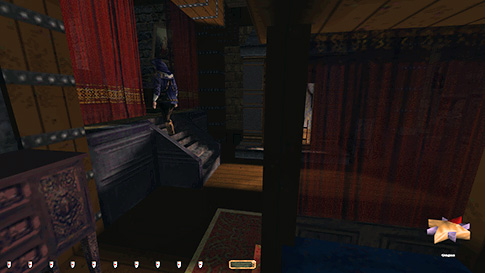
teleported to the abandoned factory next. The Shards Moved
east from this location, through the old mansion with the arguing couple. It
was very difficult to properly detect alerts with them. Usually they only
gave settling remarks, but they were definitely hostile. I moved in a
clockwise fashion around the room, crossing the fireplace towards the desk,
then onto the bed. I sought hardcover from the fireplace behind the bed
posts. From here I had to wait for both of them to head up the stairs in
order to pick the chest without comments (left image below). They moved
around a lot, so it didn’t take too long. Took a similar route out of the
room. If they saw me, a guard spawned in the adjacent hallway, but he never
showed up when ghosting.
Moved
through the museum to the easternmost street. Found the first core shard in
an apartment here. I had to cool it off with a water arrow in order to pick
it up. I could do it without putting out the fireplace, which would’ve been a
Supreme bust. Cleaned the alchemist’s next without issues. His patrol was
somewhat random, but nothing too difficult. Left via the vent shaft in the
lab. It was difficult to close the vent behind me when emerging in the
rooftop storage room, but I got it in the end. Moved
my way through town heading west. No issues to report. Took the air shard
close to the starting point. Picked up the maintenance key before hitting the
shops. It was needed to reach the pottery store, which had tons of loot. None
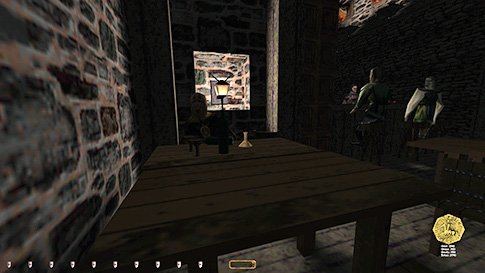
of the other establishments had anything to report besides the pub. I was
seen coming through the window, so I had to come through the vent shaft. From
the shadows of the tunnel I could reach over and grab the coins on the table
without alerts (right image above). If I moved into the light, the bartender
commented. I could move over towards the bar counter, but couldn’t pass it
without a Supreme bust. There was another panel that connected to an adjacent
room, but they also alerted to this panel opening. I eventually found a
method of getting upstairs by use of 2 rope arrows, but one can easily leave
and approach the scrappers from above as well. The scrappers’ floors were not
difficult. I used the ventilation system to get to the top floor, where I
found more loot and the earth shard. The metal around the iron vats was loud,
but each side had storage rooms where I could hide. Had to grab the nugget
from one of the vats from the rope as I ascended to the exit vent. Back
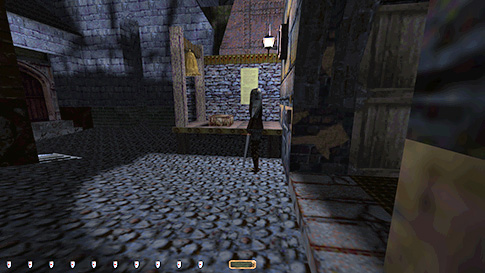
to Tudor’s Looting
the rest of Tudor’s facility wasn’t too difficult. The only piece of loot
that was outright tough was the ring on the shelf beside the key rack archer.
I had to lean around the corner from the bottom of the stairs (left image
below). I managed to get it without dousing the torch though, which I’m happy
about. The armory had no loot, so I left it be. Used the security passage to
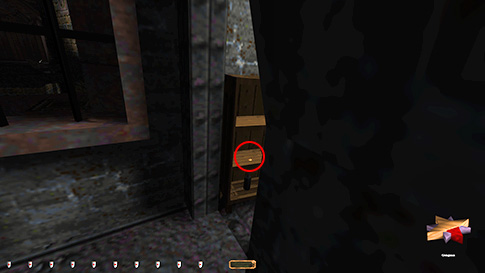
get to the top floor machine room to pick up the final shard. Then headed
down to the factory by way of the delivery entrance and fixed it in the
machine there. Returned the lost key also before leaving. I had to close both
gates by using the levers, then rush out as they shut behind me (right image
below).
From here, I yet again returned to Tudor’s machine
room to replace the core. I had previously grabbed a second copy of security
key from the control room, so I returned that before leaving Tudor’s for the
last time. Took the streets west and returned the maintenance key, before
ending the mission in the south. Supreme success! Statistics: Time: 2:09:21 Loot: 3181 out of 3181 (Supreme: 2956 out of 3056) Pickpockets: 4 out of 4 Locks Picked: 9 Damage Dealt: 0 Damage Taken: 0 Consumables: 1 Holy Water Vial & 1 Water Arrow Ghost: Success! Perfect Thief: Success! Supreme Ghost: Success! Perfect Supreme Ghost: Failed! |
|
Notes: -
Had to skip a valuable lantern worth 100 in the water
tower for Supreme. It emitted light and thus not allowed to remove for that
mode. |