|
ROSE GARDEN - [Thief: The Dark Project 20th Anniversary Contest] When
the random number generator showed ‘15’ and that meant Melan’s entry was the next
contest mission on the list, I smiled and my heart literally jumped with joy.
Ever since ‘Bad Debts’, I knew the talent of this author as something very
special. I just couldn’t wait to sink my teeth into this one. -
Aaaahhhh! The
starting street simply oozes of verticality. It can’t get any better than
this. -
One tip seems to talk about an optional objective of
breaking some guy out of prison. I guess it will trigger once finished, since
true optional objectives aren’t possible in Thief 1 -
The other tip just talks about alternate routes
using chutes and ventilation shafts. I have a feeling this mission requires a
lot of nifty street maneuvering. I’m all for that! -
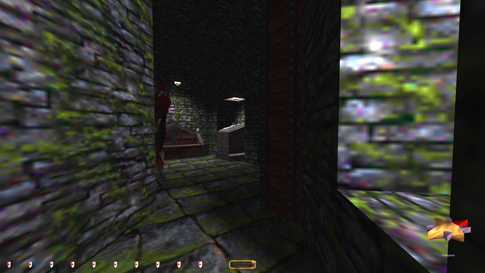
Forced into the wineseller’s
if not wanting to push for the thieves’ highway. Quickly found a hidden
passage to a machine room up above though. I imagine the ways to go open up a
bit soon. -
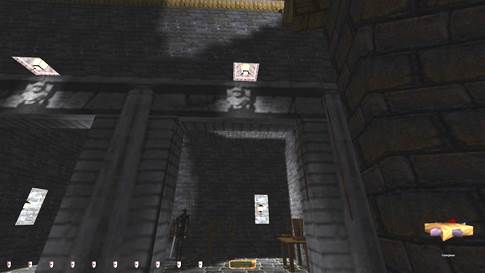
Played a few hours now, and I’m realizing getting to
the rooftops is more difficult than first anticipated. The mission seems very
well tested in order to keep you on the streets for as long as possible. -
This mission is now opening up and is truly awesome.
There is so much detail in the way buildings are connected. I just visited a
sewer section below the alehouse in the north. Through there I accessed a
generator room that finally got me up a chute to the roof. I’ll try to
explore the entire street level first however, then explore vertically later. -
I found a seemingly intended way to ascend now. A
wooden bridge above the barber shop on Gurnald’s
street. I’m like a kid in a candy shop here, that’s how good this is. -
Covered Humprey, Haskell, Brascombe and Weir’s now, although I couldn’t get into
the latter. What I really like about this mission so far is that each
location is worthwhile getting to, but no one place gives you a whole lot of
loot. I don’t even have 1,000 yet, and I feel like I’ve explored for a long
time. Yet looking at the map, there are tons of places I have still to visit.
J -
Just found two ghosts in the alleys south of the
bazaar area. I must admit this kind of broke immersion for me. It just seemed
too random to fit any plot device. Did I trigger them when I took the cursed
gemstone perhaps? That is the only thing that would make sense to me, and
would be cool in a way. -
I know I just made this point, but this mission is
massive beyond belief! -
Just found a big hedge maze in the northwest. I
thought this was Halfsequin Court, but it seems
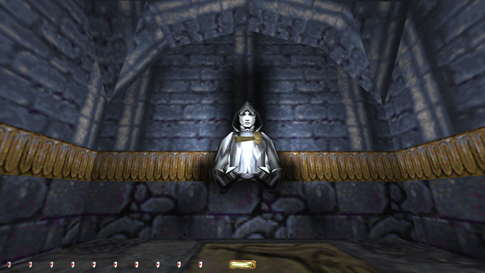
more logical for this to be the very Rose Garden I’m supposed to find. -
The manor by the garden seems very difficult to
ghost. I’m blackjacking everything I can see to get a feel for the place, but
this one could be tricky, especially for Supreme. -
Wow! I just got massively updated objectives at the
top floor. I assume with this city access key I’ll be able to get to various
parts of the city that wasn’t accessible before. -
I’m supposed to ring the bell in the firewatch station, but I’m gonna
hold off on that for now. I’d like to loot the rest of the map before this
“event” takes place. -
Just found a skull key I got on Morwyn
street unlocked a strange door close to the starting plaza. It accessed the
courts east of there that I hadn’t gotten to yet. This mission is something
else, all right. I love it! Finally reached the loot goal also. -
Realized I could frob all
the X marks around the map and prevent thieves from spawning when releasing Bernalt. The first time I went ahead of him and knocked
out/gassed all the enemies. I wonder if you can manipulate his route too, as
some of the arrows are covered by Xs. -
Found my way to Grandmauden
now. Have a few places that are unfinished in the city, but I’ll get there
later. There is a door on a small balcony close to Cistern Court I couldn’t
open, plus the jail key on the hammer priest by the Master Forger doesn’t
have a use. I thought those two might be connected somehow. The readable at
the beginning also talked about breaking someone out of prison. I’ll return
for that later. -
Finished at Grandmauden’s,
but the ending left more to be desired. The only drawback in an otherwise
mesmerizing city mission. -
Figured out how to release Pud
from jail, but could not make sense of his tip. Had to look up a few hints
and in the end almost an outright spoiler on where this key was found. It
unlocked the aforementioned door by Cistern Ct. -
Only 275 loot short. Gonna
hit the streets again to look for missing stuff. Don’t want to succumb to any
more hints yet. -
Found all the remaining loot!! Missed some in the
Rose Garden manor, plus a goblet at Mortesaigues.
The last ones I got was two gold plates at the nobleman couple’s place above
Cistern Court. I remember thinking it was weird there was nothing at all to
pick up there. -
This was top notch stuff, I gotta
say. A few negatives on the difficult gameplay, though that is more of a
challenge and even a plus for me. All the weird symbols around town that
didn’t mean anything was a bit disappointing. Bernalt’s
death seemed a bit rushed, but I’m only nitpicking. -
Score: 28/30. Truly
a mesmerizing mission! Although it’s only my second Melan adventure, I
already consider this author as one of the greats. A word of caution though:
this mission is very difficult. Even my regular blackjack
run was highly challenging, and the subsequent loot hunt even worse. However,
on the third playthrough, I was still finding stuff
I didn’t notice before. The replayability in this
one is staggering. If this ever gets a sequel, I will drop everything on hand
instantly. My
main goal was to meet a certain client at Rose Garden, in order to obtain
information on some Golden Books. Furthermore, I needed to grab a cursed
gemstone at the Haskell’s, rub the plate at the Master Forger’s for good
luck, and pick up 2,400 in loot along the way. I started with enough rope
arrows to go around, and a fairly detailed map to boot. Humphrey & Haskell’s Planning
my route correctly was a big deal. The mandatory lever at Firewatch
meant all the major gates around the city would be open. The only way to flip
it was by getting the city access key from Rose Garden. It made sense to
prioritize heading there first. I needed to make sure I closed up all
possible gates and such by the end of the mission for Supreme, so I made a
thorough list ahead of time. I knew that mode was in for a challenge, but you
never know. Also, some pickable locks could be
avoided, which makes sense for Supreme as you leave them unlocked
unnecessarily. It’s not against the rules, but in my opinion goes against
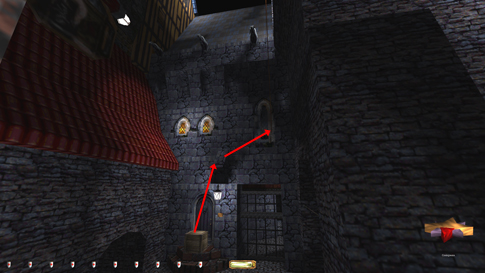
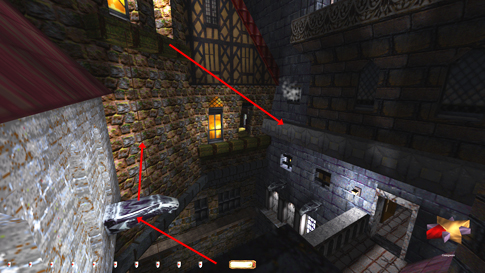
that mode’s spirit. The door to the wineseller’s
basement was a good example. It could be accessed from above later, so I
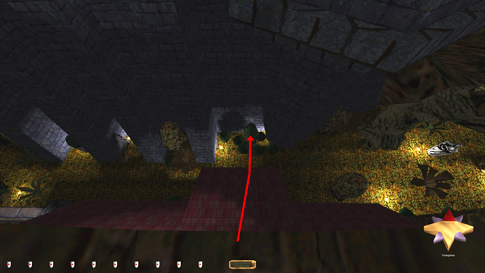
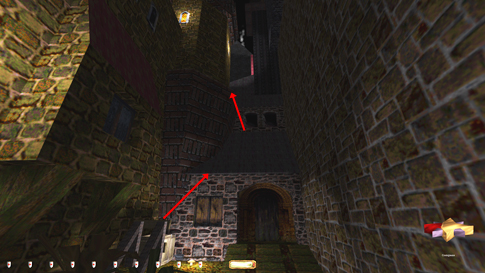
skipped that intended entry and instead looked to the thieves’ highway. The
wooden beam above the gate to the southeast provided a nice opportunity. It
was too high to reach from below, but with one of the crates by the stairs I
could mantle the lamp overhang, and furthermore leap for the rope (left image
below).
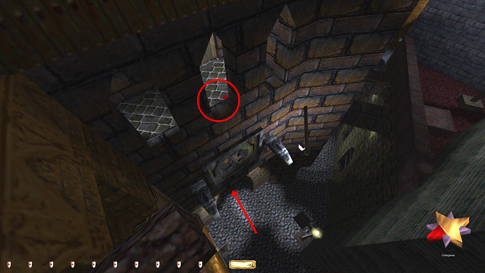
The
only conceivable way from here was crossing to the north. There was a wary
patroller in one of the buildings below, so I treaded across the roof tiles
carefully. Northwest forced me down to ground level again, at the western end
of Burnett Street. I instead leapt from one of the power boxes to Humphrey’s
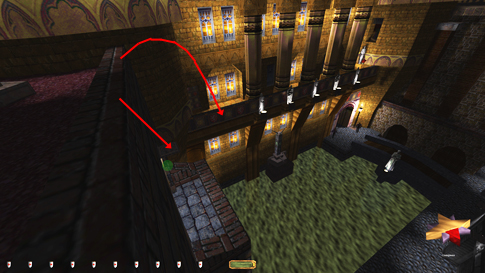
balcony to the east. My biggest problem yet came when crossing the bridge
from Humphrey’s to Haskell’s, a required location due to the aforementioned
gemstone. There was an archer patrolling the bridge, with a small route that
took him just inside Humphrey’s hallway to the west. On the bridge itself he
stopped for a moment facing south going east, then facing north heading the
opposite direction. I realized he didn’t give first alerts when stopped, only
when patrolling. He did however alert like normal, he just didn’t say
anything until suddenly giving the settling remark when starting to patrol
again. It is very easy to quicksave thinking you
are safe, then only to discover you were caught all along. I managed to sneak
halfway across the bridge unseen when he faced north, then the rest of the
way as he did his little loop going west. I also had to time the patrollers
inside the gate at Haskell’s, as well as the lone swordsman occasionally
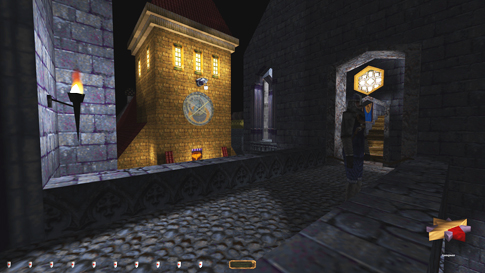
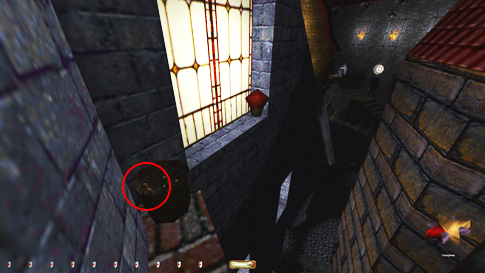
venturing down the bridge coming from Humphrey’s. I found a very convenient
dark spot on the outer part of the bridge’s ledge, just next to the gate’s
locking mechanism (right image above). From
here I needed to pick the lock in order to proceed east. However, that was
easier said than done. The archer heard the lockpicks
at all times, except for a few seconds when he was patrolling at the
westernmost part of his route. Again, he wouldn’t give a first alert when
stationary, but as mentioned, he does
alert and would settle with a comment after a few minutes. For some reason,
guards don’t give the settling remark from alerting to doors, lockpicks or the likes, until much later. Very tricky for
Supreme. It’s always better to be safe than sorry. The guards inside
Haskell’s could also hear the lockpicks, so I had
to pick for but a few seconds at a time. I think I used 3-4 rounds of the
archer’s route in order to get it open. Tedious, but worth it. I thought
Haskell’s itself would be more difficult, but there were enough scattered
patches of shade in important areas. I grabbed the Sir’s vault key, but
didn’t steal the gemstone yet. It would release several haunts stationed
around the city, highly inconvenient this early. I needed the key in order to
leave through the side door and continue east. It could easily be returned
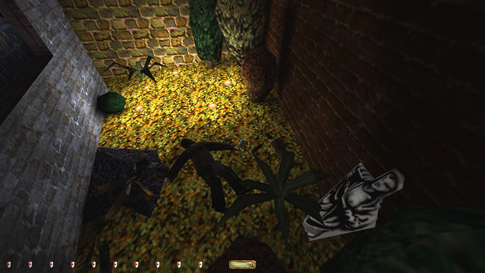
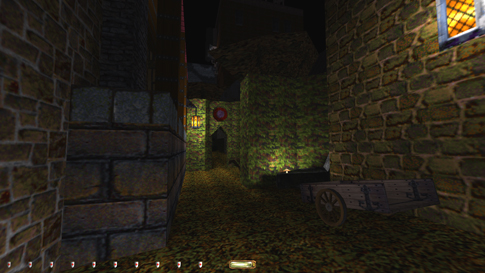
later. Bazaar! Nothing
much to report from Brascombe and Weir. I found
what I believe to be the latter dead in a small pit west of his mansion (left
image below). He must have fallen and not been able to call for help. The
note by his back door made it seem like he had been missing for a while.
Passed through the Hopfrog Public House toward the Morwyn Street plaza. A thief protected the main office
(right image below), but his patrol made me able to pick the lock on the
door. It was a tough lock, but a patch of shade right outside the door kept
me safe.
The
streets in this area were tough. The engraved skull key was my first issue.
It was located in a garden patch on a plateau far northeast on Morwyn Street. Four guards had the potential of spotting
me. Two of them covered the street entrance to Mortasaigues.
One was stationary and got blocked by one of the large pillars if I moved
somewhat north of the little fountain. The other one patrolled back and forth
between the pillars and the windows, coming to a halt at either end. When he
stopped at the northern end, if I snuck forward, his view of me got blocked
by the corner of the building straight to the north. I could then sprint
east, past a lamppost, and hide underneath a wooden walkway (left image
below). The two other guards were located at this end of the plaza. The
jumpiest was an archer at the far east. He moved completely out of view
around the north corner from time to time, so he was easy to avoid. The other
one was a swordsman who came down towards the middle plaza, and then walked
all the way back to said walkway. When I made my sprint explained earlier, it
had to be following this guard, plus when the aforesaid archer was out of
sight. Next
I had to time the guards and make a run for a rope attached to one of the
wooden blocks below the garden. The top was very bright, so it had to be done quickly. Getting back down was
easier, as I could drop safely in the northeastern corner, and sneak over to
a dark patch further south. I then had to time another sprint back underneath
the walkway, and then finally back to the open plaza further west. It was
mostly waiting for the patrols to be synchronized.
I
also robbed the armory southeast of this plaza with no trouble. Some
well-hidden nuggets on top of a bookshelf in here (right image above). The
door couldn’t be relocked, and it couldn’t even be closed. I hate such
situations, as it’s clear evidence someone has been there. But it doesn’t
bust any Supreme rules, so I guess I was good. Next
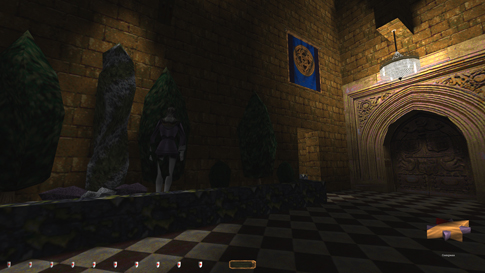
I had to ascend to Mortesaigues’ balcony. Again I
used the closest pillar as hardcover for the stationary guard. Once he came
into view on the other side, I had to creep-crouch over to the northern side
of the second pillar. The green areas in the capture below were safe spots.
There was one patroller on the balcony itself, but he wasn’t much of an issue.
Inside, the biggest problem came downstairs. A swordsman covered the main
staircase and came to a halt in the archway leading to a great ballroom of
sorts. I could sneak in behind and hide in a dark corner to the immediate
left. However, there was another dangerous guard, an archer, making
counterclockwise loops around the ballroom’s perimeter. He stopped for a bit
in the northeast corner and also in the tower to the southwest. Two pieces of
loot in here: a necklace on a table to the northwest, and a diamond in a box
on the rafters. The diamond was by far the trickiest. I could climb a small
balcony on the southern wall with a rope arrow. Up there, I was hidden from
all patrollers if I stayed crouched. Next, another rope took me to the
rafters and the loot. The issue, however, was getting back down without
taking damage or leaving the rope. Easier said than done. I realized the only
way was to fall into a direct mantle on the balcony’s north side (right image
below). The drop had to be perfect both in angle and velocity. A tad too
fast, and I would bounce off the ledge into the middle of the ballroom. This
usually didn’t kill me, but it hurt. Too slow and I wouldn’t reach the ledge
and die on the tiles below. I also had to wait for the swordsman to be out of
the room and the archer to be on his way into the southwest tower with his
back turned. I managed to do it twice, so it is repeatable, and I think it’s
the only way to keep Supreme intact.
Dropping
from the balcony to the tiles was possible without taking damage, but very
difficult to do without making noise. I had to inch over the edge on the east
side from a crouched position, and immediately press crouch again when
landing. I would either make no noise or make a very quiet tap, soft enough
to avoid an alert from the archer. Again I hid in the dark corner just
southwest of the archway here. The
necklace was quite straightforward. As the archer headed north, I followed
into the shadows in the middle of the ballroom. The torches on the northern
wall didn’t illuminate this far. Then, as he patrolled past the necklace
heading south, I snuck forward and leaned in for the steal. I had to return
before he turned around in the southwest. Once the archer left, I followed
the path of shade into the tower. More loot here and my escape route through
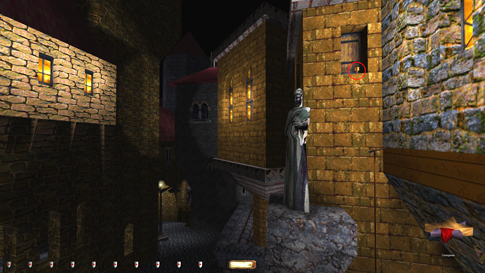
a window. To the Garden Continuing
west I came to a fork. I could either drop onto a balcony and head north
towards the rooftops of Cistern Court. My other option was to jump a gap to a
reddish tower and cross a bridge towards Lord Ameer Al-Asri’s.
I chose the former, as the bridge to Al-Asri was
very exposed, and I did know of another way in. I didn’t go down to street
level at Cistern Court yet. For now, my priority was getting to Rose Garden.
But I wanted to get the few pieces of loot up here since I was passing
through. There was a guard station on the south side, with a lone guard
covering the east window. The two rooms with loot lay to the east, and I
couldn’t go by way of the intended wall statues, as that took me directly in
front of said window. Instead I had to use the sole statue on the opposite
(northern) wall. I could reach it from atop the chimney in the northwest.
Climbing up the roof tiles to reach it was loud, and I could get spotted by a
nobleman through an open window to the southeast. An archer did patrol the
walkway up here also, but he had a rather long route overall. The screen
capture below shows how I could reach the northeastern ledge by way of a rope
arrow. This took me outside the view of the guard behind the window. I could
also leap from this ledge over to the metal shaft to the south. That made
entry to the noble couple’s residence possible. Their window had a dark spot
where I could take a breather. The woman in there patrolled back and forth a
bit, while the man stood by the fireplace, somewhat pivoting. Not too much of
an issue getting the two gold plates though. Back outside I could traverse
the aforementioned metal vent shaft back to the southwest corner where I was
completely safe. Instead
of heading to ground level then, I crossed the roof to the west. I passed
through an abandoned building with a patrolling spider and could now access
Al-Asri’s from the north. The archer in there was
much easier to dodge than first anticipated. There was a big patch of shade
outside the vault gates where I could wait him out. I went back through the
spider building and safely dropped to the empty hedge maze to the east (right
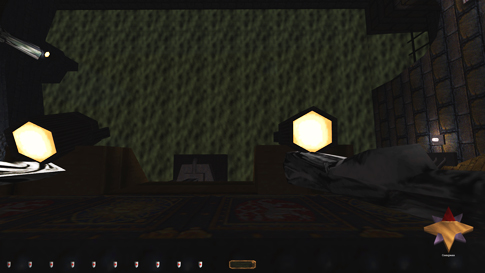
image below). Rose Garden!
The
entire outsides were devoid of enemies, bar a few mines on the hedge tops.
The inside was anything but. At least four patrollers, one swordsman and
three thieves, roamed the bottom two floors, plus a female bartender and a
kitchen maid. A few of the thieves were extremely
jumpy, commenting on the slightest movement seen or step heard. Hard
cover was my safest option. After getting down the first flight of stairs, a
patch of shade to the right of the first pillar was a good spot for
reconnaissance. Luckily, all patrollers left the main restaurant area or the
view of it, for at least part of their route. That meant it was just a matter
of waiting for the right moment to move. I eventually sprinted east to just
outside the closest booth, another safe spot. Next I headed through the
wooden door to the east. This basement-like area was much easier to move
around in. I could grab the coins on the bar counter coming through a vent
shaft to the bartender’s right (left image below). I could even grab the loot
from the top of the cabinet, making for a quick escape afterwards. The
goblets in the kitchen were a bit more tedious, but creep-crouch-strafing got
me there without any alerts from the servant. To
get upstairs I headed back to the wooden door and flung a rope into the
walkway fence above (right image below). This was quick and easy to ascend
when nobody was looking. The remaining upper floor, including the bedrooms in
the southwest were fairly easy to ghost. Three patrollers made their way
upstairs, each with their own routes, but they were all predictable. The
tiled halls were more challenging, but sporadic shadows made it perfectly
possible. One thief headed all the way to the bedroom with the upstairs key.
I had to time his route a bit more precisely. There was a perfume bottle in
this bedroom that didn’t look like loot, but counted as such. I remember
having a hard time finding that piece the first time through this mission.
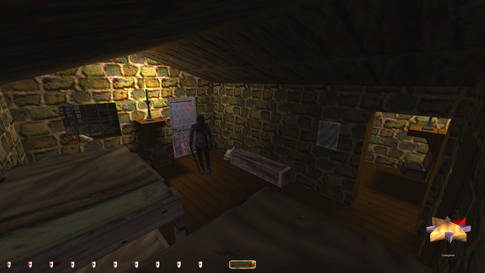
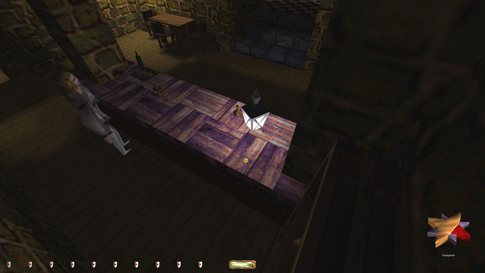
The
floors above the locked storage room door were something else. It is
astounding to see how authors come up with new ways of creating scary, tense
environments. This reminded me a bit of the black frog world in the campaign
with the same name. This too effectively portrayed that intense feeling of
dread and desolation. Each room contained something new and worthwhile. I
especially appreciated the bedroom on the first level. Details like the
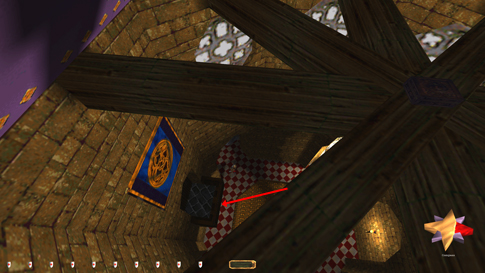
mummified corpse in the ceiling, and the eerie sounds by the door in attic,
to name a few. There was a piece of loot in the water by two frogs in an
adjacent rom. Initially I thought this might be the first skipped piece,
until I realized you could get it without ever entering the water. Sliding
down to the outer edge made it possible to grab before fully dropping in
(left image below). The
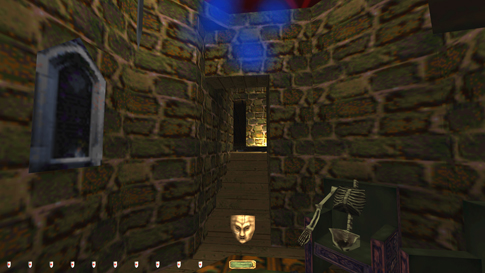
subsequent problem came on the next floor, in a sunken down tower. A golden
skull was protected by a spitfire trap, shot from the mouth of a floating
mask. I could avoid the trap by jumping into the room from the middle of the
stairs. There seemed to be a proximity trigger, but only from ground level.
Alas, I could not avoid it springing heading out. However, I could grab the
mask as another junk item, then drop it on the floor and leave safely. The
mask gave a verbal cue when highlighted, but this was a scripted event and
not an alert. Should taking the mask and therefore disabling the trap be
counted as a bust? It’s not an unnecessary pickup, and I left the mask in the
nearest logical place. The only rule I could see broken here is #8: “No turning off of security systems”,
but even that is a big stretch. I counted it as ok and moved on.
The
top floor had a very clever “trap” of sorts. A sleeping zombie in an adjacent
room alerted and woke up if walking too close to the right side of the
hallway. Remember, sleeping zombies are triggered by proximity at ground
level, and I guess that means through walls as well. I simply stuck to the
opposite side of the hall instead. The patrolling specter was slow and didn’t
give first alerts, so no issues there. Got my new objectives along with the
vital city access key at the end of the top floor. Of course, this meant I’d
have to return that key at the end of the night, ugh. The papyrus got stuck
to my inventory though. To
get back out without taking damage, I dropped from the first window on the
north wall. If landing at the sloping roof, I could mantle the bush on the
ground and avoid any loss of life (left image below). Neat! I wish I could’ve
taken the same trip back up... X No Longer Marks the Spot Although
it broke immersion some, I brought along the mysterious key from the garden
as I left. I know I technically didn’t know about it yet, but it would be an
awful lot of backtracking to come back for it later, and then return a third
time to replace it again. I never Supreme missions without knowing the map in
detail first anyway. It was what it was. I
immediately headed for Firewatch to flip the city
gate switch. It made traveling around the city just so much easier. I also
kept detailed track of which gates to close up before ending the mission. The
city gate switch couldn’t be flipped back, but at least two of the gates it
opened could be manually reclosed: the one in the northeast corner of Burnett
Street to the bazaar, as well as the gate from Swordsman Place leading to the
Master Forger. Everything that can
be reclosed must be reclosed for
Supreme, a rule that directly follows the true spirit of that mode. What also
happened now was the opportunity to influence the spawning of thieves around
the city once I rang the bell for Bernalt. 8 spots
around the map had Xs chalked into pillars and
walls of alleyways. Those were now frobbable and
this prevented enemies from spawning at those locations. It was my personal
challenge to scratch them all out before ringing the bell.
A
new gate could now be opened to Al-Asri’s back
yard. I took this route back to Cistern Court and descended to the street
plaza. I wasn’t planning on heading back up this way, so no rope left behind.
The sloping roofs and ledges made this quite easy (right image above). I
could also steal the loot from the inaccessible keeper compound to the north.
A keeper was stationed there for a while, but he always wandered off as I got
close. Sneaky. I also got the loot from the mysterious apartment. Leaving
for Burnett Street I made sure to close the gate behind me. I wiped all four
x-spots on this street, from east to west. At the western end I grabbed a
goblet from a windowsill above the north tunnel. I could leap from the foot
of the nearest statue and mantle up the street sign below the window (left
image below). A lean and a jump, and the loot was mine. I then ascended the
wooden bridge south of Al-Asri with a rope. With
the city access key, the generator room below Humphrey’s was now accessible,
and I cleaned out the wineseller’s with ease. This
circumvented picking either of the other two doors accessing this location. To
me, avoiding the picking of locks that can’t be relocked is as important as
relocking those that can.
I
continued northwest through what I believe to be de Cotentin’s house. The
skull from Morwyn Street opened both doors to his
“garden”. Found another tough-to-reach piece of loot in a bucket further
south (right image above). Entered the physician’s house by picking the back
door. I could have taken the inside guard’s key through one of the windows by
the front entrance, but there was another copy of the same key in the
doctor’s office upstairs. I would much rather avoid removing a key from
someone’s belt, since you can only return it somewhere along his path.
Besides, I wasn’t leaving any door unlocked. It’s not the lockpick
count in the stats that bother me, it’s the amount of unlocked doors left
behind that do. So in conclusion I had to 1) pick the lock on the back door,
2) get the doctor’s key from his office, 3) relock the back door, 4) unlock and
lock-block the downstairs main entrance, 5) return the doc’s key to the
upstairs office, and 6) close the front door and let it lock shut behind me. Cleaned
the rest of Dead Cat Street with ease. I unfortunately had to skip my first
piece of loot for Supreme in the Footman’s Grave. The hammer on the casket
counted as a light source (left image below) and Supreme disallows removing
them, even if it’s loot. Fudge, but oh well. There was another goblet on a
windowsill above the canal also. With a well-placed rope, I could grab it
from atop the line (right image below). Had to use a crate to get into the
barricaded apartment with the purring cat sounding fellow further south. Not
sure if there’s a way to break through the boards in that place. At least I wasn’t
able to. I took the loot and left.
Skipped
breaking Pud out of jail for Supreme. It was
possible, but very difficult to obtain his tip without taking a first alert
from one or more of the other inmates. Also, dropping the tip after reading
it always made too much noise to stay undetected. Then you also had to deal
with the priest patrolling through on a regular basis. It was just too big of
a hassle to bother with. I instead headed down the underground alley and
rubbed out the last X across from the cucumber store. Lastly,
I headed up Forger’s Walk and accessed the top floor study from the south.
The outside statues made rubbing the golden plate much easier than
anticipated. I could have approached it from the north also, but there was a
stationary hammerite guarding an unfrobbable entrance on that side, plus the study was to
the south. Bernalt and
Returns At
this point I realized I had left a rope arrow behind somewhere. I started the
mission with 4, but had only 3. I found it all the way back on Morwyn Street, so I spent some time retrieving it before
getting ready to release Bernalt. Once I rang the
bell, many of the street guards disappeared, and since I had removed all the Xs I could find, there were hardly any thieves around
either. The first thief I found had spawned was in the starting plaza, in a
small alley just across from the wineseller’s
basement. I reloaded and went back to see if I could find an X, but to no
avail. I guess he triggers regardless. It didn’t matter, as Bernalt didn’t pass through that area anyway. Once he
reached Grandmauden, I got a verbal cue, indicating
the balcony window was accessible. At this time, I didn’t enter. I had a few more things to take care of in town,
and since my exit route was down Hesprin’s Gap, the
adjacent alley to Grandmauden, I felt it more
logical to tackle that mansion last. Instead, I returned the way I came and
traveled back towards Halfsequin Court via Dead Cat
Street, closing a few gates along the way. Now, several things had changed in
town. Plenty of civilians had spawned, some patrolling, others not. Most of
them were neutral and indifferent to me, but a few were hostile; especially
one guy that caught me by surprise several times, traveling through the
Master Forger plaza and across most of Dead Cat Street. The original guards
were back, but in different locations and states. For example, the swordsman
from the guard station below Al-Asri was now drunk,
and stationed in the alley outside. Another thief had spawned in Thin Alley,
across from the physician’s. Strangely, he commented with first alerts to the
swordsman patrolling here. I had to be careful heading up the slope above the
canal, but I got through unseen.
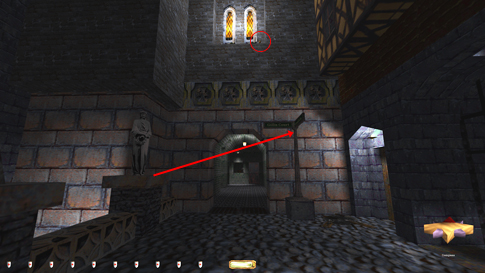
I
locked up all the gates responding to the city access key, including the one
from the half-blocked alley south in Halfsequin Ct.
leading to the garden. You can’t lock-block gates, so I’d have to find
another way out once having the returned the key. In total, three keys were
replaced, the mysterious key, the upstairs key, and the city access key. No
issues, just same procedure as last time, except the ghost burrick was nowhere to be seen. I then climbed the roofs
and ledges in the southeast to get back to Al-Asri’s
yard (left image above). To lock up the final gate, I crossed the ledges east
to above Mortesaigues. The gate between Burnett
Street and the Bazaar was operated by a big switch in an adjacent control
room (right image above). Although the lever at the Firewatch
had opened this gate, Supreme still required me to close it. I then went back
to the red tower east of Al-Asri and dropped to the
street level by the alehouse. Grabbed
the alehouse key from the inside patroller through the porch window. There
was no other feasible way in for Supreme, besides picking the lock. Used the
flooded cave system below the basement and emerged in an old, abandoned coal
mine. Some ventilation shafts took me further, to some sort of hammerite alchemy lab. A lone sentry guarded the switch
for the exit to the alley, but I wasn’t interested in that. I couldn’t leave
that way and shut the door behind me. Instead I took the other exit up to a
nearby generator room. I got caught a few times sneaking past the stationary hammerite, until I realized I needed to hug the eastern
side of the hallway (left image below). That way, I left the view of the lamp
before entering his field of vision. I
left the generator room through a hatch just northwest of Haskell’s. Crossing
the street east was tricky, due to the multiple patrollers around, but I
eventually reached the southern door leading to Haskell’s vault. I could now
steal his gemstone, but not without first removing the force field with a
holy water arrow. I guess the argument can be made for this to be the removal
of a security system, and like before, be in violation of Supreme rule #8. I
more see it as a magical seal that needs to be broken in order to acquire the
object. It is comparable to reading the Prayer of the Wallbuilder
before taking the Talisman of Air in ‘Undercover’. The rule specifically
mentions watchers, and security systems are listed to include similar alarm
springing devices. I have ruled this as being ok for Supreme, but it’s
definitely worthy of a discussion. On my way out of the vault, four heads spawned
on each of the corner pedestals. This made a loud clunk, but didn’t alert
anybody topside. I imagine it signified the four haunts that now had spawned
around town. Used a rope arrow to climb the fence in the staircase and return
the vault key. I had to return it to Haskell’s southeast location while he
was stationed by the testament. Otherwise, he heard it.
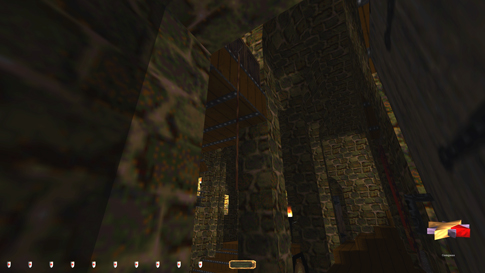
Grandmauden On
my way back to the alehouse, I could hear fights in the streets below. The
haunt in the underpass west of Burnett Street must have spotted some
patrollers and started whacking. I went down to check after things settled
down and counted four bodies. I couldn’t care less, and instead headed all
the way back down Dead Cat Street, arriving yet again at Grandmauden. The
open window talked about in the instructions was located directly above the
main gates, at the western end of a long balcony overlooking the canal.
However, the only way to access that balcony was from the east. I had to
ascend by way of rope arrow to a board above the entrance to an underpass. A
thief had spawned in an outdoor dining area nearby, close enough to see me
climb the rope. So I had to attach a second rope in the inner corner, out of
view of the thief (left image below). I couldn’t mantle from this rope, but I
could leap to the first one when above the door frame, then grab both ropes
as I pulled myself up. The wary archer on the south balcony would spot me
here if he was stationed at the eastern end. I timed his route so I reached
the shaded part of the little garden up here without any comments. A tree
took me further up to a gray ledge. An angled jump got me even higher, to an
upper plateau with some large generators. Now I was directly above a smaller
balcony, leading to a guard station with some loot. Another archer protected
it, with regular waits on said balcony. I could drop onto the lamp below,
while staying dark (right image below). Then when the archer headed inside, I
dropped further and hurried into the shadowed tunnel. The loot was easy to
get from there. Back outside I found a very convenient dark spot in the
southeastern corner of the balcony fence (green area in the right image
below). Here I could wait out both archers without getting caught. I tried
making a running jump from this fence over to Grandmauden’s
main balcony, but I couldn’t do it without first alerts from both guards by
the main entrance. I tried every which speed and angle, but to no avail. I
knew you could get to this balcony via rooftops from Weir’s back yard, but I
didn’t want to succumb to that solution just yet. With a good leap, I could
mantle back up the lamp and furthermore up to the top plateau again. To my
astonishment, I found it possible to reach Grandmauden’s
balcony without alerts from way up here. As seen in the screen capture below,
I had to start far south on the upper ledge, jump very close to the yellow
wall with the windows southeast of me, and land in a mantle as far east as
possible. If doing this leap as the archer patrolled west, I could also make
it to the first patch of shade before he started heading back. Awesome!
The
insides weren’t really that tough, despite all the tiled floor. The nobleman
upstairs didn’t alert, probably our contact that opened the window. I was
planning on descending to the room with the large tree downstairs, but the
woman who was supposed to be patrolling there had gotten stuck in one of the
bushes in the foyer (left image below). She caught me without fail coming
through the doorway to the northeast. This forced me to go back up and
instead drop onto one of the floodlights beside the metal walkway. It did
mean one less patroller to worry about though, so the loot in the foyer was
easy. After
finding Bernalt in the library, another problem
arose in the room with all the statues. The nobleman mentioned earlier and
that werewolf looking dude in red carrying a sword had gotten stuck in the
small flight of stairs leading to the room filled with statues. They weren’t
physically stuck, but there simply wasn’t enough room for them to fit, and
neither wanted to budge. After a few reloads they finally figured it out and
freed up, but that was after I already had made the long trip back downstairs
and around. The final hurdle was getting back to the streets safely and
undetected. I found a nice, dark spot to drop into the canal just west of the
easternmost pillar on the main balcony (right image below). I had to drop
directly between the statue and the electrical relay device in the water,
while landing as close to the building as possible. If I bounced too far out,
both archers at the main entrance commented. With a bit of luck, I could also
drop onto the foot of the statue, and then break the fall to make the final
plunge easier. Once I got it, the ladder in the far northwest got me back to
the street and I could sneak around the corner and exit down Hesprin’s Gap.
Statistics: Time: 4:11:32 Loot: 4319 out of 4319 (Supreme: 4244) Pickpockets: 2 out of 8 Locks Picked: 12 Damage Dealt: 0 Damage Taken: 0 Bodies Discovered by Enemies: 1 Consumables: 1 Holy Water Vial, 1 Water Arrow Ghost: Success! Perfect Thief: Success! Supreme Thief: Success! Perfect Supreme Thief: Failed! Notes: -
Skipped a hammer worth 75 in the Footman’s Grave on
Dead Cat Street for Supreme. It illuminated and therefore counted as a light
source. -
Had to use a holy water arrow in order to break the
magical seal around The Knight’s Soul gemstone at Haskell’s. Is this in violation
of Supreme rule #8, forbidding the turning off of security systems? I vote
no, due to my interpretation of the rule referring to electrical alarm
systems similar to watchers or laser beams. It is also highly comparable to
taking the Talisman of Air in ‘Undercover’, which has previously been deemed
allowable for Supreme. -
Did use a spoiler from the forums to find the
mysterious key. I was in the right part of the garden, but needed someone to
tell me it was underneath a statue in order to find it. The Ghost rules
forbid the use of “loot cheats or walkthroughs”, which I didn’t use, so I
hope I’m ok there. In my defense, it is a very
difficult puzzle to solve. |
|
|