|
THE DARK MOD - Thief’s Den 3: The Heart of Lone Salvation The
best Dark Mod mission I have played so far, by a long shot. It still doesn’t
reach the heights of some of the absolute best Thief missions, but I’ll be
fair and say it comes close. The story, difficulty and non-linearity are its
strong points. It lacks a bit in mansion layout, especially on the ground
floor, but that isn’t enough to take away from a crowning achievement
courtesy Fidcal & Co. It’s possible to Supreme
ghost, but not without some hefty challenges. I
was tasked to steal the gemstone called The Heart of Lone Salvation along
with some information about it from Eldridge Hall. I also needed to obtain
Lord Eldridge’s Book of Rogues, in addition to 6,000 worth of valuables. Two
optional ghostlike objectives were also present: 1) Not to start a major
alert, and 2) not to let anyone know I was there, which I assume would be
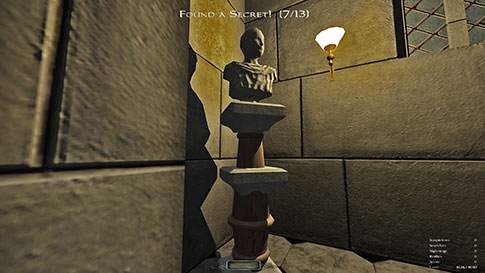
considered a ‘minor’ alert. Another optional objective was to find 8 out of
13 secrets. Of course, all optional objectives are required following the
Supreme Ghost rules. Ground Floor, West I
entered the compound by way of the well, arriving in the basement. I could’ve
gotten over the parapet without alerts, but it was more time consuming and a
lot riskier. I would have to return to loot the courtyard later anyway. In
planning a specific route for this mission, I was limited by a few factors.
1) This mission had a lot of keys,
most of which weren’t necessary to pick up for two reasons. One, there were
easy ways to circumvent the doors they opened. Two, there were other keys
that replaced their use. For example, both Hink’s
footlocker key in the front gate control room, as well as a key stuck in a
footlocker in the southeast barracks on the ground floor, operated trunks
that could be unlocked by the ‘master footlocker key’. Similarly, there was a
‘master bedroom key’ that worked on multiple chambers on the upper floor,
removing the need to obtain other keys for these rooms. 2) Quite a few doors
were pickable, but didn’t have any key assigned. It isn’t against the Supreme rules
to leave these unlocked, but for obvious reasons, I wanted to minimize
picking those types of doors. If the Supreme rules require you to relock
doors that are relockable, then it seems in the
spirit of that mode to also avoid picking doors unnecessarily.
With
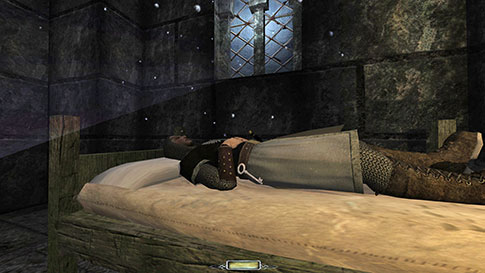
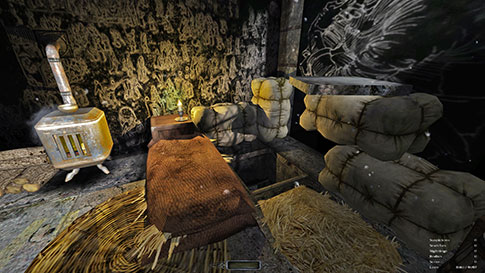
those boundaries in mind, I started cleaning the southern part of the ground
floor. Found the first master footlocker key on a sleeping guard in the
barracks (left image above). This was a crucial early pickpocket, as it
opened every footlocker in the staff rooms. Moved my way west and rounded the
corner north without issues, picking up loot along the way. A
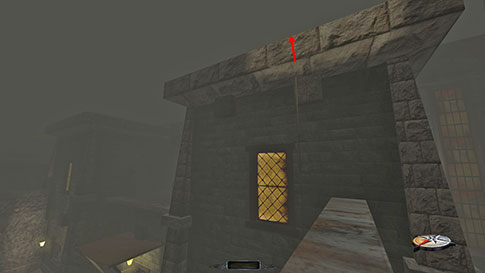
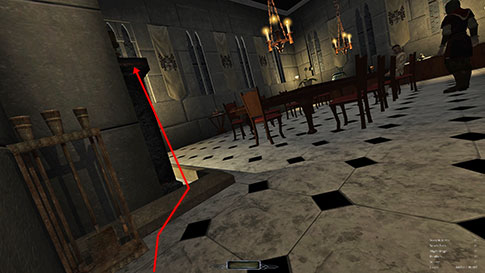
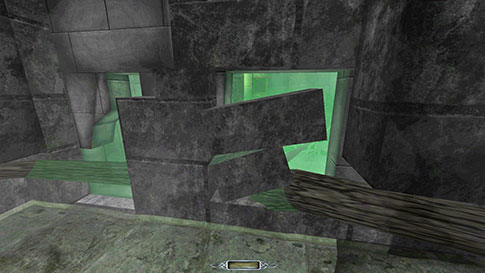
weird situation occurred outside the interrogation room. I didn’t have the
key for this gate yet, but a corpse in a cage in there was rattling around.
This made so much noise that any enemy patrolling near here would alert and
start searching (right image above). It didn’t count towards the stealth
score and didn’t bust any ghost mode, but it was impossible to sneak by this
area once it happened, plus the alerted guards would be patrolling around
with their weapons raised and be highly sensitive for the rest of the
mission. The only way to avoid it was to wait in the far southwest corner of
the floor for all patrollers to pass by. The engine seemed to shut off this
animation if far enough away. I was hoping this wouldn’t lead to other
problems later on. Strange that this issue hadn’t been
picked up during beta testing. My
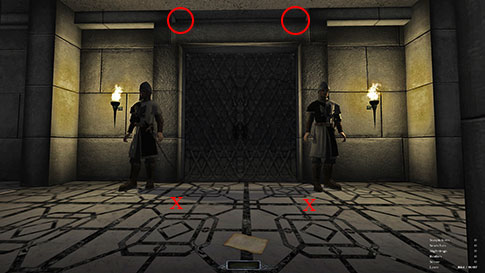
first real ghosting challenge came in the front entrance hall to the north.
Two guards were stationed by the front door for some time, before patrolling
the side hallways, east then west. Four other enemies also patrolled through
this area from time to time, but they had longer and less worrisome routes.
Two lion statues worth 175 each were placed on top of the front door frame.
The only way to get them was by jumping, but that always alerted the guards,
even if they were at the far end of their patrols. A useful trick I recently
discovered is to use a droppable readable to cushion a jump on noisy
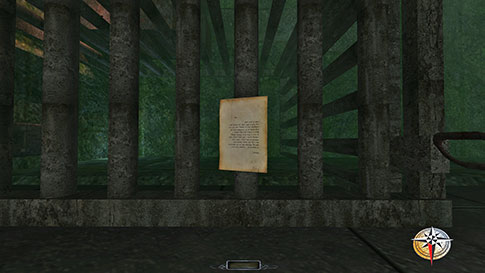
surfaces, sort of like a makeshift removable moss arrow. The only readable in
my possession was Sam’s message, but that fit the bill perfectly; small, flat
and silent. I waited just south of the door until both guards walked away
(left image below). If their routes were mistimed, luckily one of the guards
patrolled faster than the other, so sooner or later they would always
synchronize. Creeping out from the shadows, I walked over to about one tile’s
length away from the loot, then stood up, looked straight down and dropped
the note. Then I could lean and jump to grab the statue. I had to wait for the
next loop to get the second one, but it worked like a charm just the same as
the first.
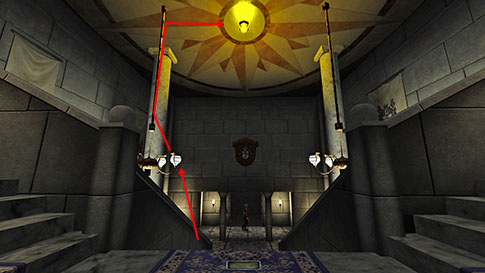
The
ceiling light fixture in the front hall also had loot; four gemstones to be
exact. They were easy to get once I knew how. I didn’t realize until very
late that I could climb the chandelier chains. Again waiting for the guards
to leave, I mantled up the chandelier, climbed the chain and leaned in to
grab the loot (right image below). Yes that’s right, you can lean while
climbing in The Dark Mod. Perfect! Upper Floor Grabbed the old key from Lord Edridge’s
bedroom first. I needed it to
proceed with the main objectives. I’d have to return here later to relock the
door with the master bedroom key. Skipped Lady Helena’s bedroom, but instead
picked the lock on her personal suite. There were at least two other ways
into this area of the mansion, but both required picking up unnecessary keys,
so this was my chosen route in order to stick to the Supreme rules as closely
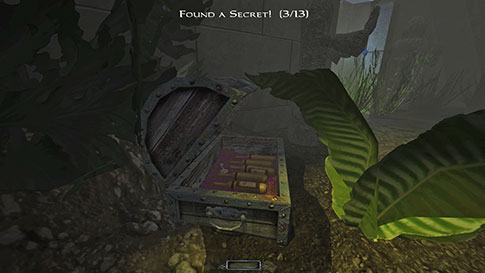
as possible. Exited out her window to get the secret loot
from the garden (left image below). This skipped any need for either
of the garden keys. The spiders could easily be dodged. In
Helena’s suite I did come across something strange. A lit candlestick
couldn’t be operated in normal fashion. Usually, you can move the candle
piece off the base and then take the valuable part without problems. Here, the
light extinguished whenever the loot was taken, no matter what. If I moved
the wax part to the opposite end of the room, then went back to take the
gold, it still extinguished. I could light it back up with my match just
fine, but this didn’t seem good enough for Supreme. Rule 6a says “no removal of light sources”.
Even stranger was if I put out the light before
taking the base, the candle turned back on again! This told me there was a
script to alter the light property of the wax part when frobbing
the loot item. This seemed like an author oversight, so I decided to put out
the light and immediately frob
the candlestick part in order to get the loot and leave the candle lit.
Although the light was only off for a mere fraction of a second, this was
technically a Supreme bust, so I skipped the loot for that mode. Got
the chapel key from the chambermaid’s quarters and looted the office further
south next. I discovered that pickable doors used
by patrolling enemies get relocked the next time they use it. This is great
for Supreme, as doors that would normally remain unlocked due to my action
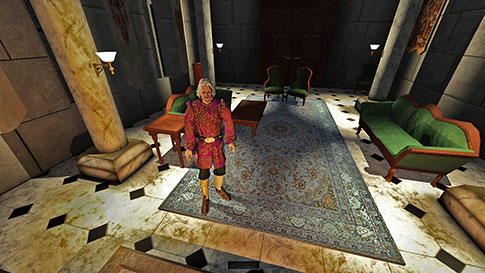
now won’t. Finally I headed up to deal with Martha.
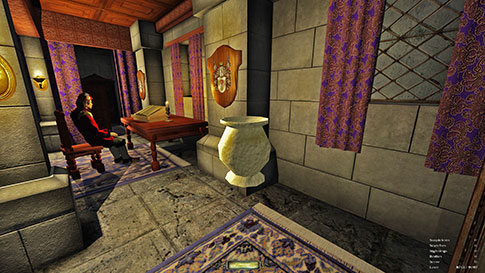
Martha
alerted like a hostile civilian. She would even fail the optional objectives
if seeing me. Luckily, part of her route included the treasure cache room to
the north. While she was in her bedroom area, I could grab the painting and
the gemstone. Then when she headed over to the treasures, I took her bracelet
and exposed the floor hatch. I had to move things out of the way silently,
but also so that she didn’t bump into things during her normal route (right
image above). The western wall was for the most part dark. I’d have to come
up to reset her “furniture” later, but then again I had to bring the holy
healing potion regardless. The
library posed no issues. Found two more candlesticks with the weird light
extinguishing script here. I grabbed them using the same method as in
Helena’s suite for Ghost, but skipped them for Supreme. Had to take either
the spare library key or the disused room key to proceed; I chose the former,
as it somewhat reduced backtracking. Courtyard Left the rear hall via the window. I didn’t want to pick the lock to the guest bedroom
hallway, and I also wanted to avoid taking the balcony key, so the window was
the only other option. I used a couple of rope arrows to climb the balcony
roof and furthermore get onto the roof of the tower west of the parapet (left
image below). There was loot up here that was tough to reach from below with
the lantern guard present. I then dropped onto a preplaced rope from the east
tower. Used Sam’s message like before in order to retrieve the arrow
undetected.
Used the master footlocker key to get the loot from
the east tower. This skipped the
need to get Hink’s key from
downstairs. Had to use Sam’s note yet again in order to
descend to ground level. Dropped it from the canopy
onto the barrel on the west side (right image above). I could have
used the west parapet door, but this was very
difficult dodging both patrollers plus the lantern guard. A
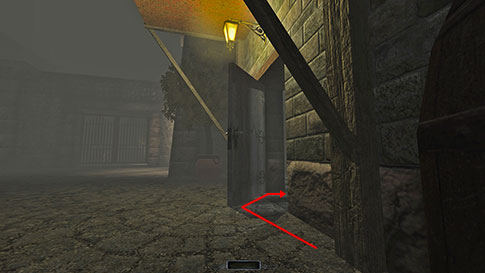
better method once on ground level was to head back in through the door. The
Dark Mod rules do allow for the use of doors to block light sources, and that
was the method applied here. If opening the door about halfway, it would cast
a shadow along the foot of the door, enough not to get spotted by the bald
guard across the yard (left image below). After taking the loot inside, I
used a similar method heading back out. Sneaking across the courtyard due
northeast, I mantled through a window, emerging in the ground floor’s
southeast section.
Ground Floor, East The
dining hall was a tough place. A lone guest sat with his back towards the
double doors on the north wall. Another door was in the eastern corner next
to the fireplace. There was a lamp right by this door, which made it
problematic to enter this way. However, if using the leaning technique
described in previous reports, I could approach the fireplace unseen. All I
had to do was lean right and creep-crouch along the perimeter of the
fireplace (right image above). You can walk or run while leaning in TDM. If
holding lean while reloading, you will even spawn in a leaning position. With
a standing hop, I could furthermore climb the mantelpiece. Here were two
candlesticks. The ring on the bust in the southeast corner I wasn’t able to
reach for Supreme. I could drop to the ground on the south side of the
fireplace if placing a paper on the ground first. I managed to land a few
times without getting comments from the guest, but I could never get the
loot, let alone climb back up the fireplace without severe busts. I tried
using rope arrows in the ceiling also, but I was even brighter doing this.
The rest of the room wasn’t difficult to loot, but I had to douse the fireplace
in order to reach the ring for regular Ghost (left image below). The
living quarters with Lord Edridge
wasn’t hard. I could move around the room counterclockwise coming from
the west. I could even mantle the fireplace and move right in front of his
face (right image below). Got all the loot and the Book of
Rogues this way.
Only
needed the master bedroom key and the pump room key from the housekeeper’s,
plus the loot of course. Then circled around to the western
hallway again. The Heart Accessed the maintenance room behind the crates in
the pump room. Replaced the floor tile and the crates hiding the key also.
In the boarded up display room was a spider that could hear me in the nearby
flooded section. Had to use Sam’s note again to drop from
the pipe into the water. Carefully removed the bricks and entered. The
room was dark, so as long as I crept slowly, I was fine. To open the cage, I
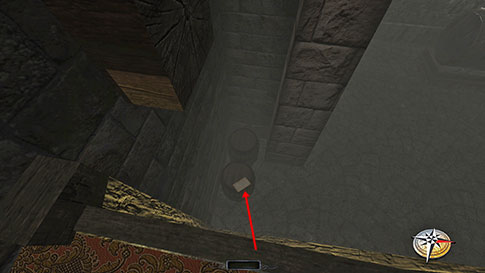
had to flip a switch in the ceiling. Used the note again in
order to reach it by jumping (left image below). That trick quickly
became my new saving grace in this mission. Used it again
when dropping to the ground. Lowered the pedestal and opened it by
lighting the top brazier with one of my matches. It is not against the
Supreme rules to create light sources, however, you
are supposed to reset everything to its original configuration, so I had to
use a water arrow to put out the light afterwards. That is ok, as long as the
light source wasn’t there to begin with. The spider didn’t hear this at all. Needed the note yet again to get back to ground level.
Although I couldn’t close up the gate or lift back up the pedestal, I reset both
switched just for good measure. Couldn’t replace the bricks perfectly when returning
to the flooded section. I did
the best I could and that’s all the Supreme rules require (right image
below).
Went to the interrogation room next. I bumped the loud corpse out of the cage, in order
to avoid alerting the outside guards. I figured that was ok for Supreme. When
I played the mission the first time, the corpse had found its way out of the
cage on its own, so it’s not like this result was inconceivable. After
finding Sam, I had to drag him through the tunnels to the storage room. This
was a bit tedious, as the hallway patrollers above could hear his bones
rattling. I had to pay very close attention to the stealth stats, since I
couldn’t really hear the guards’ mutterings if alerted. It was easier once I
could pick him up instead of dragging him. Left him on the
floor in the chapel. There was another candlestick I had to skip for
Supreme in here. Upper Floor Again I
could now revisit the upper floor, by way of the front entrance hall. Relocked
Lord Edridge’s bedroom door and looted the guest
rooms to the east. No issues here really. Eleanor’s chest key was the only
one in the mission that could be replaced, but when I did, I couldn’t
manipulate it at all. It just stuck in place wherever I put it, even in
mid-air. I managed to put it an inch or so above her neck, but couldn’t get
it closer than that (left image below). Yet another candlestick with the
light bug had to be skipped in here for Supreme.
Andrew’s
room seemed difficult at first, but didn’t prove to be. He sat on a chair
with his back against the entry door. He was turned slightly to the left, but
there was a pillar and some drapes in that end of the room that actually
blocked his line of sight. It’s not like in Thief where enemies can see
through anything made of fabric. The toughest loot item to get was a goblet
inside a pot from the armoire in the northwest corner. I had to inch out from
behind the nearest pillar and silently maneuver the pot out of the shelf
(right image above). Since enemies randomly pivot their heads, I got caught a
few times before being able to replace it. Object manipulation practice is
never a bad thing. Conrad’s
room was devoid of enemies, but had the final lit candlestick that needed to
be skipped for Supreme. That made six in total. Cleaned Lady Helena’s
chambers also on my way back through the front entrance hall. Finally I
returned to Martha’s cell and rearranged her furniture back to how it was
before, which the Supreme mode required. No issues there. Also
left the holy healing potion to check off the optional objective. From
there I left via the underground water supply, destroying the Heart of Lone
Salvation on my way. Returned to the start by way of the streets and finished
the mission Supreme clean. What a ride this was! Statistics: Ghost
– Success! Perfect
Thief – Success! Supreme
Ghost – Success! Perfect
Supreme – Failed! Time
– 3:00:19 Times
saved – 345 Damage
Dealt – 7 Damage Received – 0 Health
Restored – 0 Pockets
Picked – 5 Loot
Acquired – 9097 out of 9097 (Supreme: 8797) Killed
by the Player – 0 KOed by
the Player – 0 Bodies
found by AI – 0 Alerts
– 0 Suspicious, 0 Searches, 0 Sightings Stealth
Score – 0 Consumables
– 2 water arrow (Supreme: 1 water arrow) Notes: -
Skipped a total
of six gold candlesticks worth 40 each for Supreme; in Lady Helena’s personal
suite, the library, Lord Edridge’s hidden library
chamber, the chapel, Eleanor’s bedroom, and Conrad’s bedroom. The flame went
out once taking the loot, and although they could quickly be relit, Supreme
doesn’t allow any removal of light sources. -
Skipped
a ring worth 60 in the ground floor dining hall for Supreme. The sitting guest saw me approach the bust unless I
first doused the fireplace. -
I have no idea
where the damage dealt comes from. Could it be from destroying the Heart? If
so, that is excused per the objective. |
|
|