|
THE DARK MOD - Iris This
is hands down the best mission I have played for this mod so far, and I
cannot recommend it enough. With a massively built city mission and a rich,
melancholy story, WellingtonCrab has set the
standards very high with his first ever creation. The amount of detail will
leave you mesmerized for hours on end. This is one that has to be played to
be believed. I
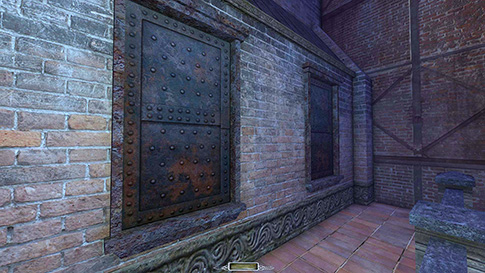
had to make my way from Red Rook, past the plague wall, and into the disease
stricken Hollowbrook. I was tasked to pick up a
memento from a forgotten house in this part of the city, then make my way
back home. That was it for now, but plenty of new objectives could be spawned
later. Red Rook, Safe Zone Once
I found the skeleton key late in my first playthrough,
my whole approach to this ghost run changed. No door in the mission any
longer had to be picked open, which meant I didn’t have to worry about
finding the lockpicks early. Nor did I need any
other key bar the safehaven key. It was required to
get into the sanctuary where the peculiar glasses were located, which in turn
was needed to obtain the skeleton key. Thus my first goal was to get to the
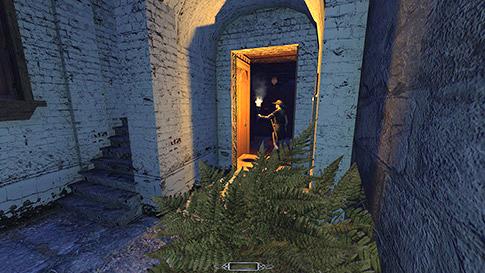
Thieves Highway’s End to get the safehaven key. I
had to climb some balconies and beams to the east in Southbridge to reach
this location (left image below). None of the street guards were hostile in
this part of town, which made most of my movements uneventful from a ghosting
standpoint. There was an archer in the burgage
house that occasionally came out on the balcony. He was fully hostile and
would attack even if I was on street level. Inside the residential areas, the
civilians most often only alerted to seeing me, not if I made noise. Sleeping
tenants seemed to be in comas, as they never woke up.
After
getting the skeleton key I started looting. The loot in the pub could be
taken safely as long as I took it from the shade. If anyone saw me steal it,
I got caught, but they didn’t react to it missing later. The Blackhander’s Lair was tougher. I found it best to
approach from the cookhouse, emerging from the west. I could sneak from the
railing over to the chest by the fireplace and get the contents unseen (right
image above). The two enemies here sometimes alerted and sometimes didn’t,
but most of the time they were hostile. I used the balcony to approach the
fireplace again from the south, so that I could take the loot behind the
painting. The painting disappeared when taken, which was strange. I
managed to get into the back of the weapon shop with no triggers from the
camera. Turning it off was possible from the sewers, but that was a Supreme
bust. I could not, however, enter the front of the shop without the owner
acknowledging my presence. That wasn’t a bust in itself, but it meant that
all the items in the store had to be purchased and couldn’t be stolen. That
included the gilded dagger worth 75. It cost 150 to buy, which seemed utterly
pointless. However, the dagger didn’t count as a loot item until you bought
it or blackjacked the owner, so it technically didn’t count as a skipped loot
item either. The maximum loot count got adjusted once you obtained it. I
thought the back of Percy’s Potables would be harder, but I could quite
easily reach the coins from his left. I thought the outside guard would
dislike me entering, but he stayed put. The woman in the Blackbriar
boarding house was very alert, triggering to sounds I made in the streets
even, but she was the only one there and slept as part of her “route”. The
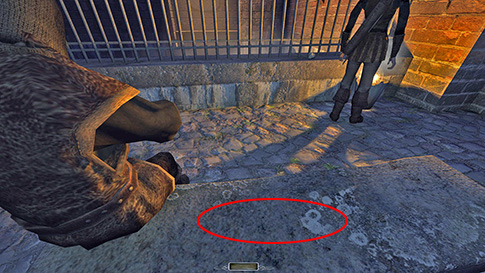
guards by the Ramsey Monument were tougher still. The flickering light from
the burning barrel was a problem. There was a box with loot under the bench
on the north side, where the guy sat reading a book. I had to come from
behind him and grab the loot through the bench from above (left image below).
This put me farthest away from the light source, plus I was out of his direct
view. It was a bit luck-based whether I frobbed the
items or not, but I got them in the end. The coins on the ledge closer to the
barrel I had to take from the northern side of the fence (right image below).
The slanting roof brought me low enough not to get hit by the barrel’s light
source.
The
courtyard residences was the final area in the safe zone I visited. Without
the skeleton key I don’t think it would’ve been possible, at it would’ve
required the master key. I could perhaps have rang the captain’s service bell
to lure up the receptionist, but that seemed a bit against the spirit of
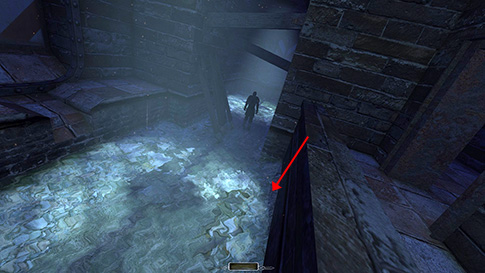
Supreme. Nonetheless, the skeleton key opened everything. I emerged on Rookbridge ready to tackle the precinct. I
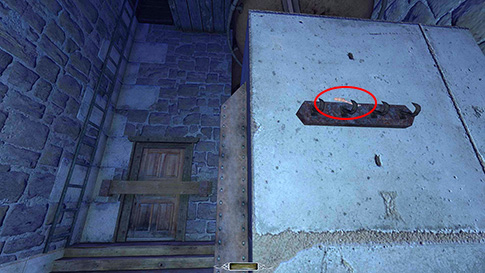
had to skip two weird pieces of loot in this area. They were two rubies inside two homeless people, only
visible with the glasses (left image below). One was in a sewage wash below Bridgebottom, while the other was in a rooftop shack
above Rookbridge. When taking the rubies, both of
them fell over dead. This didn’t count as damage or kills in the stats, but
it was a clear bust. Rule #2 says: “No
combat damage may be dealt or taken and no knockouts or kills of any kind are
allowed, whether or not they show up in the final stats.”
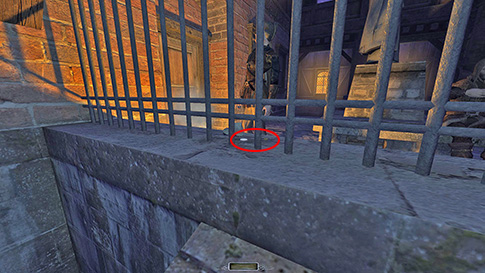
Red Rook, Hostile Zone The
precinct had two guards on the ground floor. One was looking at some papers
in the lobby, consequently guarding two coins on the same desk (right image
above). I couldn’t find a way to get them without turning off the lamp. I
could use the guard’s shadow to hide from the light source, but I had to lean
around on his right in order to reach the coins, and then I was too bright
and entered his field of vision. The lamp had a greater frobbing
distance, so I could reach it from farther back. He did turn it back on, but
not until after 5 seconds or so. This was enough time to get the coins and
hide again. I thus skipped the coins for Supreme. The rest of the precinct
was easy. Had
to approach Marksman’s Loft from below. I tried from the precinct window
first, but it was too loud dropping onto the pipe. I guess if I had a soft
readable to muffle the noise it could’ve been done. I also couldn’t come via
the east window, as the two guards by Ramsey’s monument then alerted. I guess
this was considered breaking and entering to them. In
Brewbower, although the streets were hostile,
nobody still reacted to sounds. This made it a lot easier than anticipated.
The exception was the apartment above Red Lady Taps. The guy there heard me
tapping my shoes on the outside balcony even. Imagine if the whole mission
was like that! I couldn’t drop from his windowsill to the inner hallway
without a level 1 alert. This meant I had to go get a soft readable after
all. I actually headed all the way back to Southbridge and brought Renwick’s
note. Whatever I obtained, I’d have to return it later anyway, and since I
might be needing something similar in Hollowbrook,
I wanted to bring something from close to home. Dropping it back in the
apartment perfectly cushioned my drop with no alerts (left image below).
The
rest of Red Rook was easy. Nothing to report. Managed to close the pump house
shutters on my way out, and even locked the control box (right image above).
The trick was to use the key on the box first while standing in the
windowsill, then flip the lever as the box closed and then hop out. It had to
be done while the patrollers on the Hollowbrook
side was farther away, otherwise they gave alerts. Hollowbrook Things
were much more difficult when having to worry about keeping quiet. I really
wish the whole mission had been like this, especially inside buildings. It would’ve
made ghosting a lot more tense. Jumped into the brewery window from the water
wheel via the balcony. When jumping, landing in a mantle is silent, an
especially useful technique since crouching while dropping doesn’t eliminate
any noise in this mod. In order to complete the hidden brewery objective, I
had to take the brewery key. I thus also had to return it as close to the
rack as possible, while also replacing the board (left image below). I
had to drop into the water in the west in order to avoid alerts. I’m not sure
what determines it, but occasionally I wouldn’t make any splashing noise and
this avoided alerts. I couldn’t find a stealthy way to move east in North Sloughgate, so I headed southwest through the Ivy Bound
Tomb instead. The fireplace lit up after taking a memento in here, so I put
it out with a water arrow. In order to get back down from the sealed off
balcony in the northwest, I had to use Renwick’s note again to cushion the
drop (right image above). I’m happy I had brought it along.
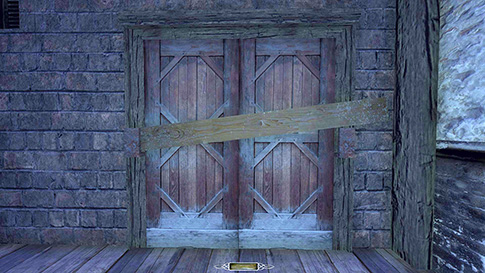
I
could now reach the corpse grinder’s lair via the double doors from the pantechnicon. They were barred from the inside and could
only be opened from the south. The only place I found to drop into the water
in order to get Roderick’s safe combo was a small patch of sand in the
farthest section (left image below). All other areas Roderick gave a level 1
alert. I know you can just read the note and reload once you know the code,
but it seemed more immersive to only open the safe after having read it. Once
back above ground, multiple guards were on high alert, probably from finding
the double doors left open. I had to replay this section and closing them
fixed it. I couldn’t replace the board properly the way I could in the
brewery, but it sealed the door shut (right image below). I figured as long
as it couldn’t be opened from the opposite side, I was good.
I
have never seen enemies stuck in The Dark Mod as much as in this mission.
Four guards in total were just walking into walls. Luckily, it didn’t lead to
any problems while ghosting, but it would have been extremely annoying having
to bust this late in such a massive map. Restarting at this point just didn’t
seem like an option. One stuck guard was carrying a lantern just north of Grimkirk. He was close to the staircase next to the
Monument Hall entrance. Unfortunately, after opening the door using the code
from the statues, he noticed it being open and came to investigate. It didn’t
add to the stealth score and he didn’t see me or hear the code panel break,
but he did trigger to the door. So did the other female patroller in this
area. They both made clear alerts like “This is supposed to be shut!” These
alerts are allowed for regular Ghost, but not for Supreme, so all 885 loot in
there had to be skipped for that mode. A big hit to the loot total that.
The
toughest move in the mission for Supreme came in a lab called the Seventh Junction.
A memento called the cerebral tether worth 200 was inside a neural chamber
with the only access point being a ceiling hatch. The problem was dropping
down was too high to avoid damage. Losing health, although frowned upon, is
allowed for regular Ghost, but not for Supreme. I reloaded a save from my
blackjack run and tried cushioning the drop with smaller items I had brought
along just to see if it was possible. However, those items didn’t decrease
the drop more than a few inches. I needed something more substantial. I found
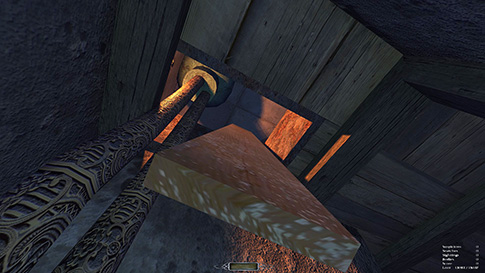
a wooden board blocking the main entrance to this lab at the base of the
closest staircase. I spent the next 10 minutes finding a way to get that to
the top of the test chamber. I first had to maneuver it up a chute while climbing
some wires (right image above). This was object manipulation at the most
hardcore level. Not only did I have to climb up without dropping the board or
falling off the wires, but I couldn’t bump it against any of the sides as
this alerted multiple patrollers in the area. Our household owns multiple
versions of the board game Operation, and this obstacle course was strikingly
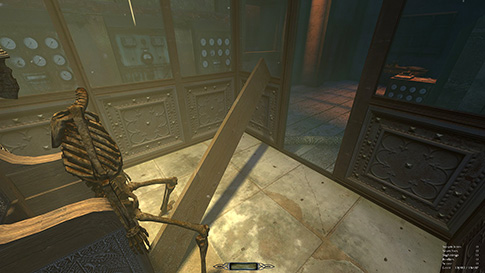
similar. Once
above the access hatch, the next problem was dropping the board without
alerting the whole neighborhood. I tried and failed a lot before I found a semi-predictable method. Getting the board
to bump against the foot of the chair with the skeleton sometimes did not
generate any sound. Next, I had to make it get wedged between the chair and
the glass on the door side. If it landed on the floor, not only was this
loud, but this wouldn’t break my fall at all, which was the main purpose of
doing it in the first place. After quite a few tries, it finally slid firmly
into place where I wanted it (left image below). The board didn’t even budge
when I landed on it, and this drop was harmless and silent. Now I had to
straighten it back up and set it in one of the corners in order to get the
door open. The last part was bringing it back downstairs and place it up
against the door. Just like the previous board by the double doors, this one
could also not be slotted back into the metal grooves. I did get it to block
the door from opening though, which I called close enough for Supreme.
Awesome!!
The
rest of the mission was easy. I ended up having to use 5 more water arrows to
douse torches in the tomb underneath Basilica Gate. They all lit up when I
entered, so I felt putting them out was the most Supreme like, though I’m not
sure whether it is required. There were 4 water crystals in the baptismal
fount and 1 more in the sewers. After
finishing the reported Ghost run above, I received an updated beta version of
this mission from WellingtonCrab. This version
included updated scripts that turned all enemies inside private buildings
fully hostile. This meant they would now trigger to sounds just like normal
enemies. The following is a list of changes to my Ghost run in the new
version: -
I could no
longer enter the upstairs window to Cloak & Dagger without a level 1
alert from the sleeping guard. I used Renwick’s note to muffle the drop,
although such level 1 alerts are technically not Supreme busts. -
Also had to use
the note to soften the drop to get into the back of the weapon store. This
was more difficult because I couldn’t drop it from the sill as the camera
would see me then. I had to lean in from the ledge by the small garden and
blindly drop it behind the sill, then hope I would land on it when climbing
up. It didn’t take me many tries to get it right. -
In order to get
to the secret of the void outside Blackhander’s
Lair, I had to use the note again in order to jump onto the wooden ledge from
the wire. Two more such readables had been added
elsewhere in the mission, including 20 more loot, but they were not
problematic to obtain. -
Monument Hall
can now be looted for Supreme! The patrollers no longer alert to it being
open, nor do they close it, which had caused some players to get permanently
locked in there. The author never wanted the patrollers to interact with the
door, so now they have been fixed to patrol inside just to investigate the
rooms, but without alerting or closing the door. Statistics: Ghost
– Success! Perfect
Thief – Failed! Supreme
Ghost – Success! Perfect
Supreme – Failed! Time
– 4:47:45 Times
saved – 375 Damage
Dealt – 1 Damage Received – 0 Health
Restored – 0 Pockets
Picked – 12 Loot
Acquired – 14612 out of 15057 (Supreme: 14605) Killed
by the Player – 0 KOed by
the Player – 0 Bodies
found by AI – 0 Alerts
– 0 Suspicious, 0 Searches, 0 Sightings Stealth
Score – 0 Consumables
– 6 Water Arrow Notes: -
The dagger in
the weapon shop didn’t count as loot until I blackjacked the owner. It was worth
75, but cost 150 to buy, so it was completely pointless for any Ghost mode. -
Skipped two
rubies for a total of 400 inside two homeless people in the Bridgebottom area for all Ghost modes. They died as a
result of taking them; obvious busts. -
Skipped two
coins worth 7 on the ground floor of the precinct for Supreme. I didn’t find
a way to obtain them without turning off the desk lamp. -
Three items
worth 45 gold I couldn’t find during my first playthrough,
so I used the loot cheat to locate them. These items were skipped during the
Ghost run and thus deducted from the stat total. -
My Supreme playthrough registered 1 damage dealt, though I have no
idea why. I only used weapons to douse the 6 fires that triggered as I
progressed through the mission. |
|
|