|
THE SCARLET CASCABEL Mission 2 - The Scarlet Cascabel This stellar campaign
finishes at our final destination, Blackwell Hotel. Discover the dark secrets
surrounding the hotel’s former inhabitants, and the curse of the Scarlet Cascabel. The hotel can get a bit repetitive at times,
but the tension never fades, and ghosting this mission is an absolute blast.
I am sorry I put this off for so long, but now that it’s done, it was well
worth the wait. My main objective was to
find and obtain the Scarlet Cascabel. I also had to
find out some information about it from the hotel proprietor. Then there was
a Mr. Nightingale who possessed a stone tablet I needed to find, in addition
to discovering its purpose. No loot requirement for this one. Ground Floor I avoided picking the lock
on the basement door and instead entered by one of the gallery windows. It
seemed the most stealthy. Couldn’t move far without triggering the lobby
conversation. I tried to use the hatch and go through the basement, but all
the doors were locked there too, so I couldn’t proceed. Said hatch annoyingly
disappeared on me also, which made it very tough to get back up to the salon.
Once I got the can of grease and entered the hallway, things opened up. All enemies could see me
through the windows, which was to be expected. However, they could also see
me through all the double-wide pocket doors, which I don’t think was
intended. This made things a lot more challenging, as roles weren’t reversed;
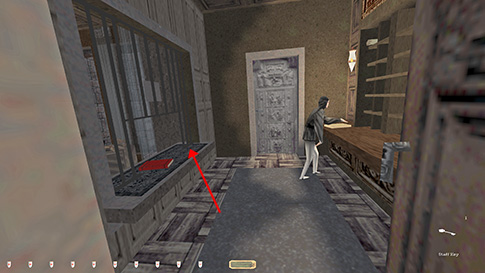
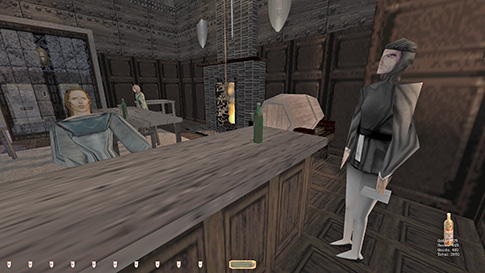
I couldn’t see them. My first task was getting the staff key; the hotel was
just impossible to properly navigate without it. The easiest copy (or should
I say ‘least tough’) to get was in the lobby office. The clerk in there
patrolled around a bit, but stopped in two spots. I made sure to use the
doors when he was on the move, to check for real alerts, since patrolling
enemies never give first alert comments when stationary. Once in there, on
top of the service counter was the only safe spot (left image below). I
double checked that the key could be returned safely also. Although I
couldn’t put it on the desk itself, on top of the book worked, and that is
allowed for Supreme.
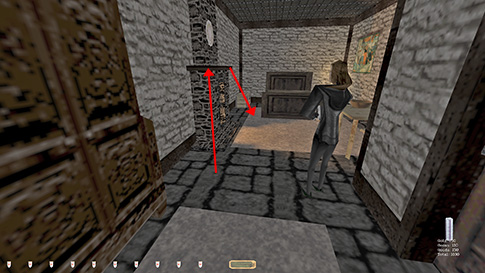
Basement This was the toughest
floor in the hotel. All the servants made almost every room tough to sneak
through. The head of housekeeping was stationed just inside the door, yet she
didn’t alert to the lockpicks. In order to get the
coins in this room I had to climb over the mantelpiece (right image above).
Going back I had to jump to the rug by the door. The kitchen was the most
difficult place down here. Three servants patrolled two rooms, and due to the
windows they could all see into both room. The western wall was dark, so I
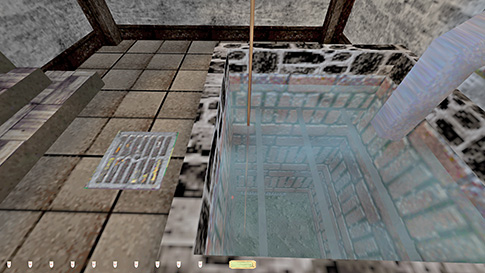
planned my moves here. I used the dumbwaiter secret to get the loot below the
well, though I struggled to find a way to get up and also close the grate
behind me. I couldn’t climb back up the dumbwaiter, so I used a rope arrow above
the well instead (left image below). Pulling the lever and quickly attaching
to the rope gave me a vertical boost so that I could mantle out before the
grate shut. It didn’t always work, but often enough to be a good move to use.
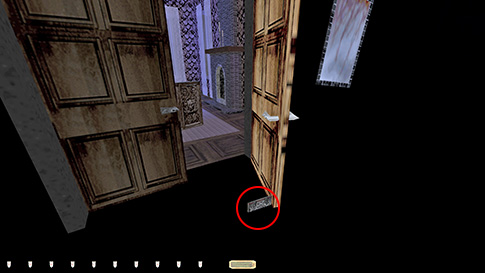
Upper Floors The library was
challenging, but not extremely tough. Just had to be careful not to be seen
while the servants were stopped so they didn’t give settling remarks when
patrolling again. Used the balcony to reach the proprietor’s office and get
updated objectives. Now I had to find access to the sealed wing and obtain
the Quinicine Torc
instead of the Cascabel. I also got ahold of the 4
stone keys that could be used on the hotel statues. The upper level of the
library had one of those. From this area I could also access the attic. This
was highly useful to avoid the third floor hallways. It was also crucial in
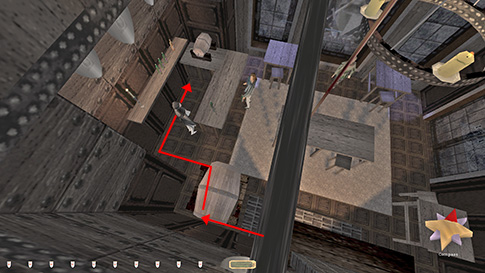
order to loot the lounge Supreme clean. The lounge was probably the
toughest room in the mission. The drunk lady didn’t alert, which was nice.
The bartender faced northeast permanently, while the servant roamed between
the window and the fireplace. I could drop from the southwest beam onto the
barrel unseen and unharmed (right image above). When the servant was by the
window, I could now slide down to the floor and creep along the western wall
behind the bartender. Fortunately, I didn’t have to resort to nudging, which
would’ve been a Supreme bust. In the far, dark corner I could grab both the
spice bag and the bottle of wine (left image below). An extra rope arrow was
needed to ascend back to the beam from the barrel. Nice.
From the attic I could
also access rooms 13 and 14. In the former, a pair of double doors locked up
once I read a letter in the bathtub. In order to avoid picking these open, I
dropped the chess book on the ground first (right image above). It was easy
to return later anyways. I had to read the scroll to spawn a ring on the
nightstand. An invisible entity started patrolling the bedroom too at this
point, but I don’t think it was anything but sounds. Nothing ever alerted to
me at least. Sealed Wing The only issue in the
sealed area, besides not getting hurt by the “training dummies”, was the
breaking of Elizabeth’s mirror. Both Galaer and marbleman reported this as a ghost bust due to property
damage, following some posts in the ghost discussion thread with yours truly.
I had not played this mission at that time, so I argued Elizabeth’s direction
to break the mirror not as an additional objective, since it didn’t show up
in the task list. That argument I stand by. However, I did not know the
details surrounding the mirror at that time. Although the storyline and the
sound given when hitting the mirror with the sword indicate it is broken,
there is no visible proof that it is. Rather, there is proof of the opposite,
that it is NOT damaged. The screenshot below is taken immediately after
hitting it with the sword, but before the screen goes white. All that really
happens after hitting the mirror is the cut to white and the player getting
teleported back to the previous room. It is an entirely scripted sequence,
where no item is visibly damaged. In the interpretation section of Ghost rule
#3 it says: “"No property
damage" means no visible damage.
Visible damage is when the object is destroyed or appears to be in a different
condition than before.” Visible damage is the main
indicator to determine whether this rule has been broken. This situation has
resulted in nothing of the sort, regardless of whether the situation implies
it or not.
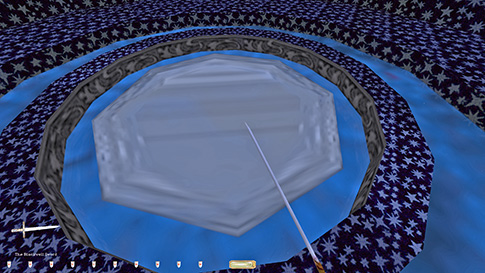
Following this sequence I
skipped taking Elizabeth’s balcony key, as it disappeared upon use and left
the doors permanently unlocked. Instead I approached the moonlit pool from below
and dropped the items in one at a time, timing the specter’s patrol route. Back in the manor I placed
Myron’s scroll on the proprietor’s desk and returned his key. Also put Nightingale’s
diary in the mailbox and returned the staff key. The front desk clerk had now
stopped moving and was only facing west. It didn’t matter. I ended up being
able to return all 16 chess pieces for Supreme. They all teleported directly
to the chess board, so it didn’t go against the principle of Supreme rule #13
to keep a clean inventory. Plus it gave me an extra bonus objective chime.
The only such objective that couldn’t be finished for Supreme was taking Mr.
Jim Jim. I took damage when frobbing
it the first time. This is allowed as a last resort for regular Ghost, but I
skipped it since it was avoidable. Statistics: Time: 3:04:08 Loot: 5650 out of 5650 Pickpockets: 7 out of 7 Locks Picked: 21 Damage Dealt: 0 Damage Taken: 0 Consumables: None Ghost: Success! Perfect Thief: Success! Supreme Thief: Success! Perfect Supreme Thief: Success! |