|
The Seven Sisters - Night Two This is the cream of the
crop, the best mission of the campaign, and one of the best missions of all
time. This is peak Lady Rowena and oh how we miss her creations. She manages
to take a virtually identical map and kick it up one serious notch. The new
areas are some of the best locations in fan mission history. Three more
sisters and lots more fun. Here we go! This report has been
updated for NewDark, as there are several moves now
possible that previously led to Supreme busts. I had to find and neutralize
three more sisters, while also obtaining three more stone keys. Additionally,
I had to steal 4,500 in loot and again heal all the infected in the area,
plus getting two holy seeds ahead of the third mission. I soon also learned I
had to meet Basso by West Gate to end the mission. Night two started similar
to the first. Even though I didn’t pick up the blackjack the night before, it
was in my inventory now. So were 2 water arrows, 4 moss arrows and 2 rope
arrows. There were a total of 9 zombies in need of healing. I had a hope of
only requiring 6 vials, plus the additional 7 water arrows. The key ring couldn’t
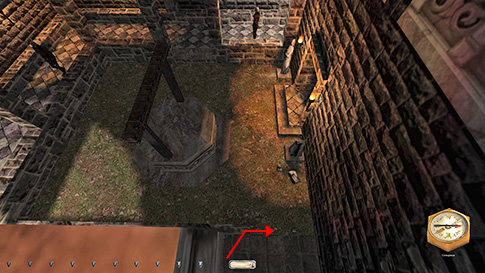
be taken until having read Basso’s note. It was also stuck to my inventory. East Grabbed the secret purse
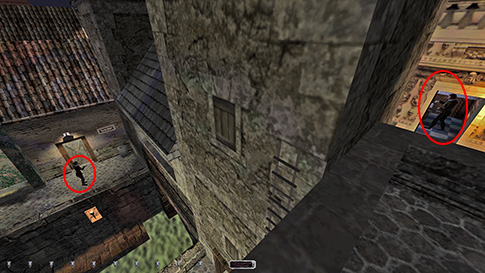
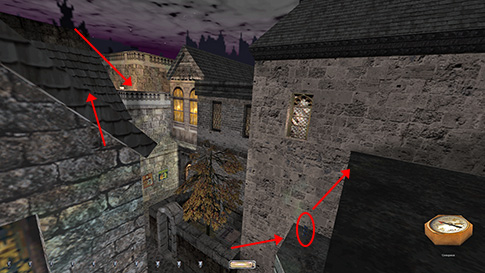
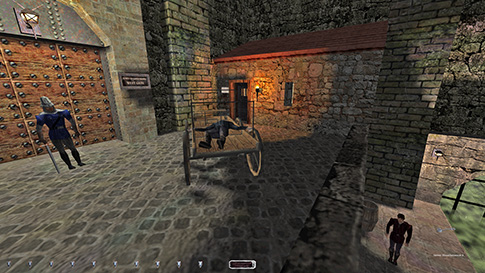
on the dead guy in the sewer and went for the mechanist lab. The patrollers were
easy to dodge, but the iron beast commented on opening the access grate (left
image below). Thus I skipped the nugget in there for Supreme. Exited to
Had to loot Basil’s from
the sewer, as the door here was unlocked. Dodged Basil in the tunnel as he
did his route. Brought four water arrows from Conor’s.
This night he didn’t mind me. The streets south of the police station were
completely empty. An officer sat sleeping by a table on the east side. I
could thus grab the candlestick on the hanging roof with a rope arrow. The
zombie baker alerted to me picking his door. This busted Supreme, as it
cannot be skipped due to the optional objective. He started patrolling the
streets after that. I opened the canal gate in the maintenance room and
fetched the holy vial from the underground alley. Managed to heal the station
roof archer, the baker and the guy locked in the upper library with the same
vial. They were all easily accessible from the roof up the ladder from sewer
maintenance 1 (right image above). The archer resumed his normal patrol. The
baker acted similarly to the dairy store owner; he stopped, but ran home as I
came close. The man in the library became stationary and highly alert. The police station
moreover wasn’t hard. Used the small dark spot in the northwest corner by the
gambling table to grab the coins and the cell key. The latter disappeared
upon use. Opened the front doors for Keef (the
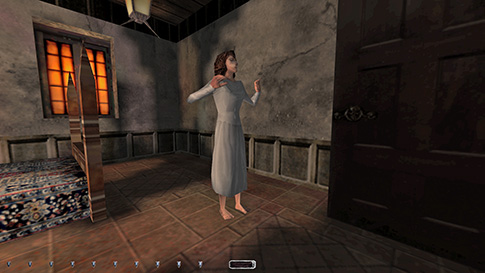
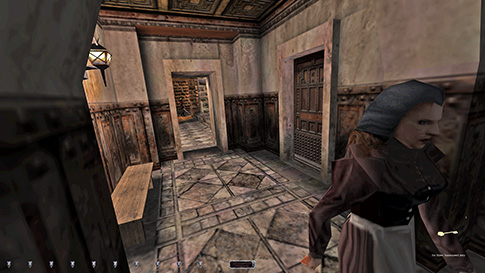
prisoner), otherwise he would get killed by the patrolling guard. Next up was Mrs.
Peacock’s through the inn. Nothing much to report, except for the lady
furthest down the hall gave a comment when opening the door. Although this
sounded like a normal first alert, I realized it actually wasn’t. Instead, it
was a scripted response to the door opening, but she didn’t actually hear the
door open. Such alerts always take a few minutes for enemies to settle down
from, but this lady never did. Furthermore, enemies are in a constant first
alert state until they give the settling remark, but this lady wasn’t. If I
made a jump further down the hall with the door open, she gave a first alert,
which proved she was previously unalerted. As she
patrolled away from the door, if I closed it, she likewise gave a first
alert. Scripted responses such as these are difficult to interpret. Due to
this comment clearly intending to be an alert, I skipped the loot in here for
Supreme. It was a necklace worth 200.
Southwest Entered the canal afterwards
and ascended at north end of Archway’s Walk. Snuck along the western walls of
Next I entered the plaza
in front of Sir Giles Deville. In NewDark I could
get in without picking any door or gate, by mantling up from the lamp south
on Archway Walk. I did not take the holy water vial in the room with the dead
guy up here, as it involved picking two locks. I could pass north on Manor
Street if both archers in the towers faced away long enough. Just a matter of
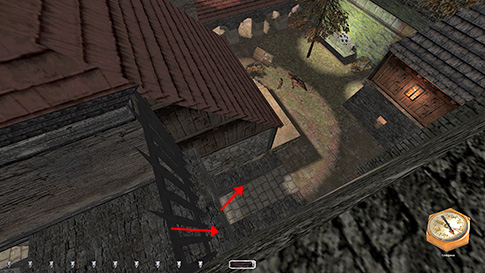
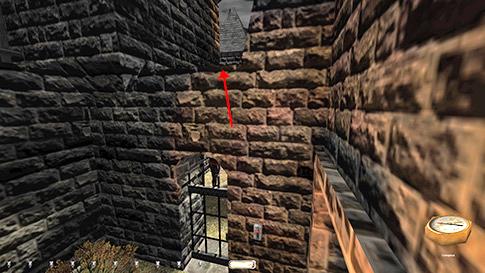
waiting. Got to the secret apartment to the north with a rope arrow. I had to
jump to the lamp across the road and retrieve the arrow in midair (left image
below). A big problem during my
run back in 2008 was the brothel’s ground floor. I had to turn off three
lights in order to get the loot there plus the key to the butcher’s plaza.
This time I wanted to avoid that by reaching the butcher’s backyard by way of
the rooftops. I also had to get to the brothel’s upper levels this way in
order to avoid the ground floor altogether. The best way I found to do this
was on Manor Street, on a ledge south of the small garden with basement
access (right image below). I needed a stack of three vials in order to leap
high enough.
I had planned on getting
the sister hearts from the brothel first, but realized that there was no way
to get back up to the roof without picking the lock to the top floor
apartment. This was avoidable, so instead I took the rooftops further north
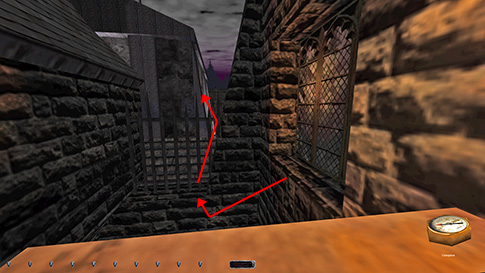
and approached butcher Lynch’s backyard from the northeast. Northwest I could drop from a tall
fence on the north side into the walkway by the back gate (left image below).
I had to hit the side ledge to avoid damage, but that was easily repeatable.
I could not enter the butcher shop through the back door. Mr. Lynch was
stationary right inside, facing the door. Instead I used the side gate to
enter Pigeon Court. Rope arrowed up to the balcony with loot in the
northeast. Dropped down on the southwest corner. This was the only way to
reach the butcher’s front door without first alerts. There was a small ledge
that softened the fall, enough to avoid getting hurt. If landing in the dark
spot (right image below), it could be done without getting seen also. The
door was reached by inching from top of the ramp. Inside, I realized
something I never knew from my first run. The butcher actually alerts to
picking the money box, though he doesn’t say anything, he just gives a
settling remark much later. This is very easy to miss for anyone ghosting. I
noticed it when I triggered his patrol route by approaching the open door to
the back room. This started an audio playback of him killing a burrick, then he started on his route. After that, he
gave an audible alert to picking the box, and it didn’t matter where he was
on his route. What I had to do was frob the back
door just before he got there, in order to get him to close it. Then I could
pick the box alert free and take the loot. Finally, I blocked it open when he
came through again. I didn’t find a predictable way to leave via the back
door, so I used Pigeon Court to reenter the side gate. Whichever side I picked
the barn door from, the stationary burrick outside
gave a grunt, so I had to skip the Mrs. Dowson loot for Supreme, a total of
400. Pinky found the way home by herself (she even opened the butcher’s
gate). She did not leave, however, if I hadn’t gotten the butcher’s key and
opened the gate to Westgate Wharf, but this was no problem to do for regular
Ghost. Could fairly easily traverse the pen to Argan’s
back entrance after all of this.
Cleaned Argan’s museum without issues, then headed for the
thieves’ den. Had to use the thief’s opening of the doors to go in and out.
If I opened or closed them, the bartender or the drunk lady would comment. I
also had to lighten my footsteps hugging the thief’s back. Running while
tapping the crouch key was a good method of keeping quiet while still moving
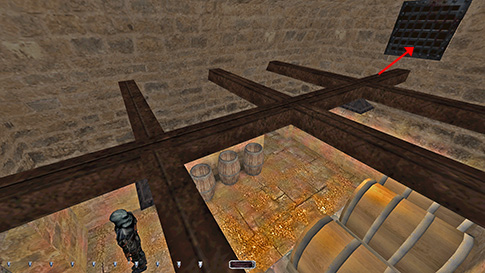
reasonably fast. In the basement, the stationary thief alerted to me opening
the hidden grate (left image below). The den beyond had 835 loot. Skipping it
meant I wouldn’t make the loot goal for Supreme, so I had to accept the extra
bust. Ghosting the treasure rooms took a bit of extra patience, but nothing
more than normal sneaking. Three of the corners in the first room had
shadows, plus the hallway beyond. The hardest thing was getting past the
stationary thief’s back. He had to turn conveniently while the others were
gone. Leaving Hobb’s Fine Wines was tough without spawning any more
comments. There was an unarmed thief doing a short patrol across from the
pub’s main entrance. He was gone for 13 seconds. I blocked the door when the
pub thief headed downstairs. I then waited outside until the outside
patroller left down the small alley so he couldn’t see me. I now had to wait
until they were aligned so that the alley thief was gone when the pub thief
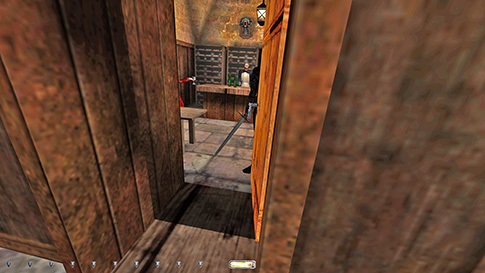
came back up. I had to wait outside and frob the
door so that the thief blocked it before it shut (right image below). It the
meantime I scooted into the shadows before the other thief returned. It took
3 rounds for me to get this to work, but it was a reliable method.
Brothel I didn’t want to pick Argan’s front door heading back for the brothel, so I
used a rope arrow to ascend the butcher’s back porch and got onto the city
walls again that way. I could now approach the brothel balconies, this time
from the north. I could enter Violet’s
room from the balcony without alerts, as long as Scarlet wasn’t in there. She
also patrolled out into the hallway, so I eavesdropped to hear her leave.
Surprisingly, I could also pick Scarlet’s safe and get her key without
alerts. However, Violet’s safe was too close to avoid the first alert. I left
it locked and would come back after they were neutralized. I got Violet’s
heart by blocking the door as Scarlet left, then leaned in and used the door
to block her vision (left image below). This was quite predictable and safe.
I know I got it without using the door back in 2008, but I couldn’t figure
out how. I had to time Scarlet and the thief to enter the hall. An alternate
method was to use the balcony and go through Baby Jane’s room to the north.
The hall leading to the lift was very useful to wait out patrols. Blanche’s
room to the south was easy. I went downstairs just to check things out, but I
couldn’t even enter this floor without alerts. The gambler facing south was
the ultimate problem, otherwise I might’ve been able to get the purse behind
the double doors. When turning off the lights, it was easy to get all the
loot for regular Ghost. Had to skip this for Supreme, which I already knew
from my last run.
I left through Baby
Jane’s room and entered Ophelia’s from the southern balcony. This avoided the
need to pick her hall door. Leaping across the balconies was tricky, as the
rooftop patroller reacted to every little clunk like the heavens were raining
fire. The middle balcony also had a flickering light that made the street
patrollers see me occasionally. I could leap from either the north or the
south balcony down to safety. I found mantling the statues around the
fountain was a nice way to get down undamaged. Neutralization I had planned on heading
to the cathedral via Westgate Wharf, but the area was too brightly lit (right
image above). It was possible to get there Supreme clean, but not without
tons of reloads and perfect luck on the pivoting guard. This wasn’t
predictable enough to rely on. I instead snuck to Stonebridge and looted the
manor and the public library without issues. There was nothing to
worry about in the northeast. The pivoting archer on Cathedral Street was
easy to dodge, as he always turned the same way. I had enough holy water
vials, so I didn’t need to visit the apartment with the dead guy east in St. Yora Square. At the cathedral, the two women were
patrolling close enough together to be healed with a single arrow (left image
below). This I remembered from my last run, so I had deliberately picked up
one arrow less for now. I cured them in the northwest corner with their backs
turned. That way they were of no concern going forward. This checked off the
mandatory healing objective. Since I hadn’t taken all three sister keys yet,
Basso still hadn’t spawned at Westgate Wharf. I thus headed back southeast
and dropped into the canal outside the library. I went back to Judge Fowley’s basement and got the secret necklace. Made sure
to close all the canal gates on my way back. Finally, I went back to the
mayor’s to heal Angelica. Zoraide had been killed
in the ballroom, but since Angelica became stationary once cured, I could
heal her in the doorway before she spotted the body.
Sir Giles Deville I continued through sewer
maintenance 2 to Deville’s manor. Had to lighten the string tension on the bow
when ascending the well, to avoid alerting the guards in the yard. Striking
the arrow with full force upset them. I also had to mantle the floating
barrel to shoot the rope; it could not be done from the water. And the barrel
slowly sank, so I had to shoot quickly. There were four
patrollers and one stationary guard in the yard. The stationary one was the
toughest by far. He only had two angles; south and east. To reach Deville’s bedroom
balcony I jumped across from the top of the well. I had to time the archer
and the swordsman on the walkway, and the stationary guard had to face south.
The drop back down again to the grass was too high, but I found a sneaky way
to break my fall. Inching off the balcony’s northwest corner, I could time
the patrollers and drop directly onto the edge of the basement railing (right
image above). If I inched off slowly enough, by the time I reached higher
velocity, I was already out of view of the torch. Thus I didn’t get any
alerts and didn’t take any damage. Great! The next task was to get
the basement key. Luckily, it couldn’t be dropped back, so I only needed one
trip to the bedroom. The fence of the lower walkway had shadows just behind
the last pillar before the doorway. I stood there and awaited my chance. I
studied the woman and the swordsman for a long time, probably 10 rounds. The
woman walked faster, and caught up with the swordsman about every third or
fourth round. The best time to go was when they were leaving the hallway and
passing my pillar at the same time. With a bit of luck, the patrollers on the
upper walkway was not in direct view of where I had to walk. The biggest
problem was getting unseen to the doorway without the woman catching me on
her way back. Once inside, I rushed around the corner to the bedroom. On my
way out, I could monitor the situation from behind the outcropping in the
hallway (left image below). I left at the same time, when the woman and the
swordsman patrolled together, preferable the man a bit in front.
In order to save Ophelia,
I had to open both the side- and the front gates. They had operating levers
in the side yard and the east guard tower, respectively. It was a little
troublesome passing the bright area between the statues to get to the side
gate. The problem was again the stationary guard. He had to be turned south
for the entire move. Creep-crouch-strafing was again the fastest way. The
front yard contained two guards. One was stationed, randomly facing east and
north. The other mostly patrolled, although he stopped at one point. The
stationary guard had to face north while I slowly followed the patroller
east. I could just sneak around the right corner before he turned and headed
west. Used the same method back. The guards in the basement were the most
wary I have ever seen. I could barely crouch-run anywhere without getting a
remark, even from the drunk. There were lots of shadows though, and ghosting
is all about patience, so I reached Ophelia in the end. As I cured and
approached her, she ran back to the brothel. Nobody alerted to her, so I was
clean. Made it upstairs and closed the front gates like before. I could not drop down the
well without alerting every guard in the yard, so I had to figure something
else out. Whether I landed with a crack on the barrel or a splash in the
water, I could hear Deville’s grumpy people looking for me. I turned my
attention to the guard towers instead. Both archers turned 180 degrees
randomly, plus the windows were big enough to enter. However, the archers
always swung to the east, so I had to enter either window on their west side.
There wasn’t enough room to squeeze past the archer in the east tower. I
would have to nudge, and that is not allowed (only as a last resort for
regular Ghost). The west tower also didn’t work, as the stationary guard in
the grass gave a first alert to the door opening. My last option then came to
climbing the walls. Although a difficult move, I found I could hop from the
torch in the northwest courtyard to the ledge above the side gate (right
image above). It was very easy to do if the gate was open, but I had to leave
it closed for Supreme. From here I could make it to the balcony via the
closest windowsill. From the next sill on the east side, I had to hop onto
the ledge by the fence further east (left image below). This was tough to do
without getting a comment from the aforementioned stationary guard. I had to
land in a mantle on the far southern end, and hope he didn’t say anything. I
did this move at least four times, so it was far from impossible. Then I had
to mantle up the fence itself without the archer in the tower hearing me. I
made a running jump up the sloped corner of the wall to the south. That
normally got me firmly on top of the fence without any clang. Home free!
Wrapping Up Climbed the vent shaft on
Desolation Row like before and entered the brothel. I managed to loot the top
apartment from the balcony without picking the lock in there. It was
difficult to leave without a first alert and also close the door, but I
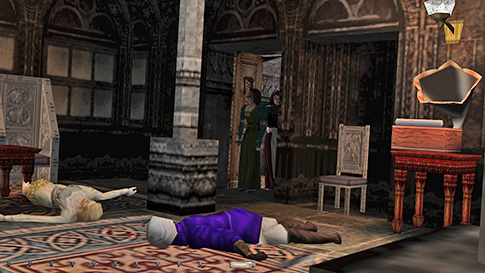
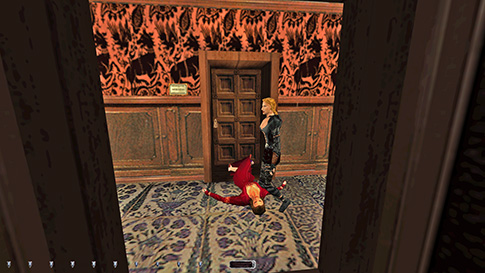
managed to time his and the woman’s patrols accurately. Downstairs, Brunhilde now patrolled the hallway, but the thief was
gone. Both previous customers were gone as well. Scarlett and Violet lay dead
on the floor (right image above), a result of me destroying their hearts.
This made Brunhilde very jumpy, and she
occasionally remarked when seeing Scarlett’s body. This is not a bust in any
mode, as it is an unavoidable consequence of the objective (classic
comparison is the alarm in ‘Undercover’) and perfectly follows the intended
storyline. I guess you can be lucky and destroy the heart while Scarlett is
in her room, but that would be hard to estimate. I imagine you could save
while in the holy pit and destroy one heart at a time. In between each heart
you could run to the brothel and check, then adjust it accordingly. Took Brunhilde’s loot easy enough. Left the brothel from Baby
Jane’s room. Circumnavigated the city
once again and met Basso from the cathedral side. I got his sewer maintenance
3 key. I could mantle up the street and grab the final piece of loot. I could
not, however, enter the maintenance door without a grumble from the
stationary swordsman (left image below). Although Supreme was busted, I
wanted to avoid this first alert also. So I (yet again!) headed back through
town all the way to Manor Street. Ascended the vent shaft one final time,
closing it behind me. Then I headed across the rooftops towards the butcher,
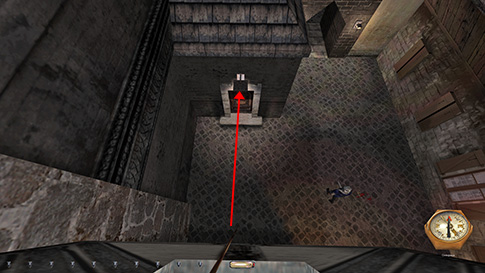
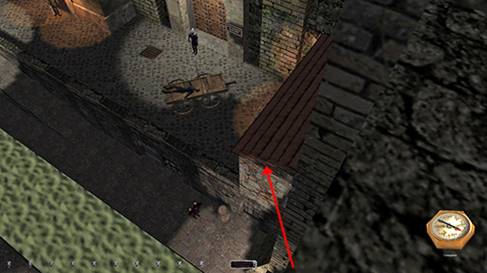
but instead took a northeast turn along the west side of Westgate Wharf. When
directly above the canal, I could make a leap southwest and mantle up the
maintenance station roof (right image below). I could then safely drop to the
street along the western wall and enter the station unseen. Awesome! I could
easily close the canal gate and also close the lower station gate and still
end the mission.
STATISTICS: Time: 2:39:50 Loot: 6009 out of 6009 (Supreme: 4964) Pickpockets: 3 out of 20 Secrets Found: 2 out of 3 Locks Picked: 24 Damage Dealt: 0 Damage Taken: 0 Bodies Discovered by Enemies: 1 Consumables: 6 Holy Water Vials & 8 Water
Arrows Ghost: Success! Perfect Thief: Success! Supreme Thief: Failed! Perfect Supreme Thief: Failed! Notes: -
Had to skip the silver nugget (50) in the mechanist safe
in the southeast. The iron beast made a comment when opening the grate. -
The zombie baker commented on me picking his lock. A
requirement to finish the optional objective. Supreme busted early. -
A lady at the inn gave a scripted response “Is that you
Kevel?” when opening her door. She never gave a settling remark and was
clearly in an unalerted state. However, due to the
nature of her comment, I skipped the necklace worth 200 in there for Supreme. -
Had to skip releasing Pinky and hence not getting the 400
loot available for Supreme. The nearby stationary burrick
grunted from the lockpicks. -
Got a first alert from the stationary thief below Hobb’s Fine Wines when opening the ceiling vent. I had to
loot this place in order to meet the loot goal. Supreme bust. -
Skipped 395 gold on the brothel’s ground floor for Supreme.
It cannot be obtained without turning off up to 3 lights. -
The body discovered is Brunhilde
finding Scarlett’s body at the brothel. Avoidable if you’re lucky, but no
bust. |
|
|