|
Ruins of Originia - Mission 2: Guilded Rivalry While
not nearly as epic or memorable as Mines of Margroth,
Guilded Rivalry still showcases YcatX’s
immense talent as a fan mission maker. We delve into the deeper ruins of Margroth and encounter trapped deities, a thieves’ guild,
and more of Bantar’s creatures. Though it is an
acquired taste, it is easy to see why this campaign is on many players’
all-time favorite list. My
main goal was to get through the mirror room in order to find Bantar’s lab. It was apparently located beyond a theives’ guild run by Guildmaster
Zilfin. I had to steal four weapons and a contact
book from Zilfin, while the lab held the Book of
Darkness. My loot goal would be met upon taking the first loot item, since it
all carried over from the previous mission. Finally, I was to leave through
an Eastern Passage. Most of my inventory items remained from Mines of Margroth, so I already had quite a few objects in my
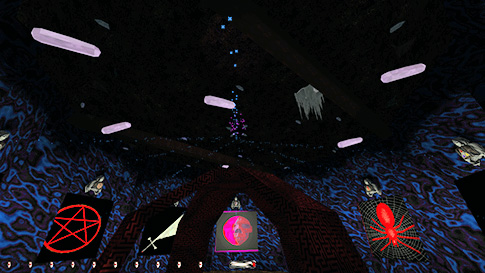
arsenal that could be useful. Mirror Room Area Getting
through the mirror room was easy once I knew how. I experimented for a long
time during playtesting to understand how all the
different paintings worked. I thought they had a link to the map with all the
same symbols, but I was wrong. It literally took 2 seconds once I realized
the solution. Beyond it, the painting on the wall worked like a ladder, which
took me a while to realize. I tried with stackables
and ropes before grasping the simple truth. My
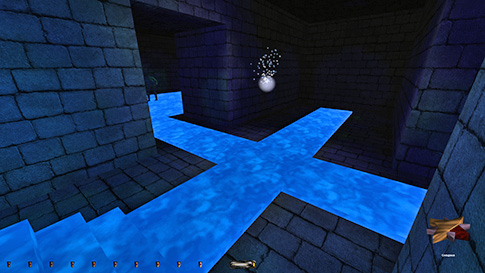
first problem came in the upcoming hallways. Three ways led to the main cave,
two of which went through hallways with blue crystals and some enemies. It
was the same crystals from the previous mission that deal damage on impact. I
could easily get past it as there were gaps along the wall where I could stay
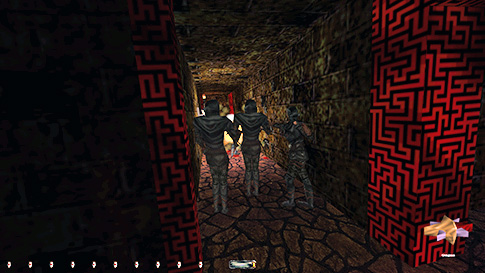
safely on the stone floor. A blue fiend was stationed close to either
entrance to the exit staircase, both facing south. A wisp was located just at
the foot of the staircase. It always alerted when I came from the southern
hallway, so I figured it was also facing south. There is no visible front or
back to wisps, so I couldn’t tell until actually alerted. Coming from the
north didn’t alert the wisp, but I got spotted by the fiend. I could use an
invisibility potion and get through clean (left image below), but this was
way too early to accept my first Supreme bust. Luckily, there was another way
through.
The
third way took me through a rushing, underground river system. The current
was extremely strong and swept me all the way to the end in a matter of
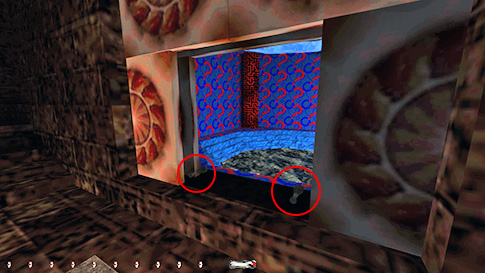
seconds. About halfway through was a dangling rope from a dry cave above
leading to some more loot. It wasn’t necessary to go to, but I always want to
get all the loot I can for Supreme. I managed to get up there first using my
speed potion carried over from mission 1. Then I read on the forum that you
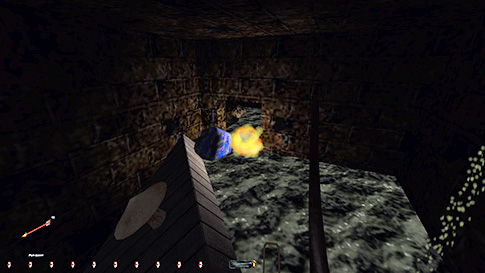
can get up there without using a potion at all. After a lot of trial and
error, I found a fairly predictable method. You have to stay close to the
bottom in order to fight the current better. Pushing against the water I
managed to get into an air filled cave underneath
the river. There was a fire down there that I had to stay away from. The
aforementioned rope hung down into this cave also, and I could grab it close
to the surface and climb it all the way up (right image above). This was a
very difficult move, but it avoided the use of a speed potion and has been
reported by several players, so it’s definitely repeatable. On
this floor, the only thing worth reporting was a trap room with a diamond in
the ceiling. The trap got triggered by ten ropes being shot into some wooden
pegs by the diamond, followed by fireballs being shot from the floor. I
managed to avoid triggering it by silently mantling from the side and not by
way of the main entrance. I had to use a rope of my own to climb up there and
could grab the rope and land softly on the metal frame. In
order to get to the main exit cave, I had to keep following the river to the
end. A tomb here had sliding door panels, controlled by a lever behind one of
the pillars. I couldn’t flip the lever to close the panels and run out before
they shut, so I had to use two potions to block the panels to keep Supreme
intact (left image below). If you don’t pick up any unnecessary items in
mission 1, which strictly speaking is the most Supreme-like approach, you
only start with one speed potion. In that case, you’ll have to pick up a
different potion later, then come back to close the panels before returning
the potion to its original location. I had plenty of potions in my inventory
as it was. Busts from previous missions don’t carry over, so I was still good
for Supreme.
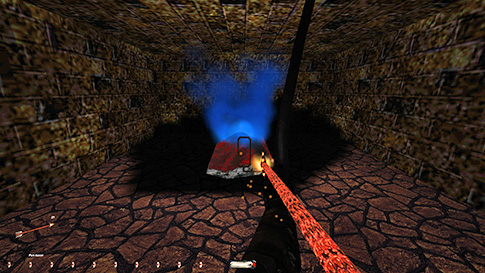
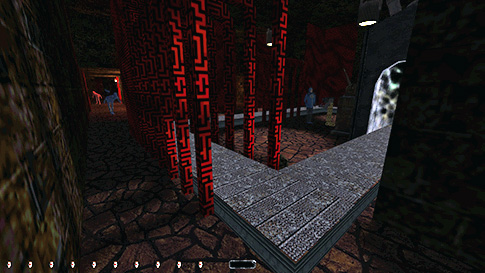
The
whole system of talisman caves wasn’t difficult. There were 3 shadow burricks in the south that were impossible to pass, but I
could navigate around them by coming from the northeast to obtain the earth
talisman. There were also 3 patrolling thieves in the northwest, but they
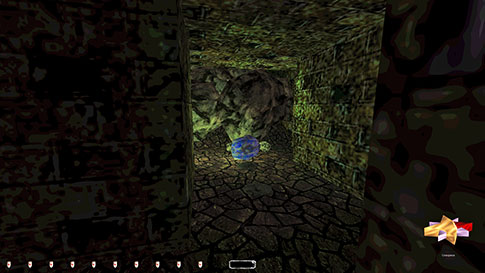
were easy to circumvent. The talismans were all protected by an elemental
cloud, each of which had to be shot by their respective elemental arrow
(right image above). The talismans didn’t spawn until you did so and they
were 100% necessary to complete the mission. Unfortunately, putting out the
clouds meant removing light sources, evident from each room going dark.
Although this is a design choice by the author and nothing to do with my
ghosting ability, it ended up being 4 unavoidable Supreme busts. Sad but
true. Thieves’
Guild Worked my way around the floor clockwise. Cleaned Residences A and B
without issues. It was very tedious picking all the locks for
the loot. There was no point to them either, as no enemy ever came into the
bedrooms. Zilfin was in his own quarters in the
northwest. I had to sneak in through the northern entrance (left image
below), otherwise he caught me. The hidden rooms behind him had no enemies.
I
skipped the prison and the flooded area of the guild halls. They involved
potential busts, so I’d tackle them later. After using the elemental
talismans, I had to return downstairs and get the deity stones, which was no
problem. They were used in the cave beyond in order to proceed. When using
the stones, the crystal monolith on top of the red support structure broke
(right image above). This seemed like a pretty clear example of property
damage, which is not allowed for any mode. However, it was a bust forced by
the mission’s design and completely unavoidable, and thus easier to accept. Had to descend to the caves yet again, this time in
order to obtain the two mystic eyes from the tombs of Ov
and Silvesta. I had to use a fire arrow in each tomb to clear the path. In both
cases I checked nearby to see if anyone heard the blasts; neither the thieves
nor the shadow burricks even flinched. Both eyes
could be obtained without leaving a rope behind, but I had to make some
unorthodox jumps and land in a mantle to avoid taking damage. Fully repeatable, so no issues. Finally
I could ascend all the way back to the snow cave entrance. Used
my sword to hack away the icicles, which has been deemed allowed due to
recent rule clarifications. Only objects made by intelligent creatures
are now considered property, not natural objects like ice or rocks. Also had
to use a broadhead on what I assume was a flat ice
layer blocking the entrance hole. If it is supposed to be glass, then that
was property damage and another bust. I couldn’t tell, but it seemed most
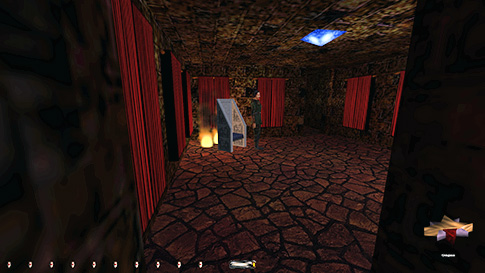
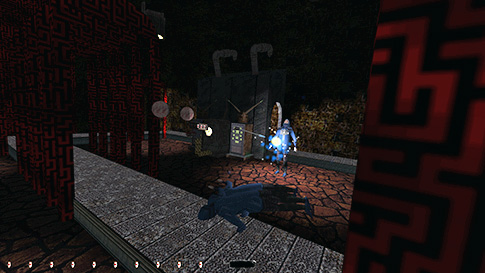
logical it was ice. Bantar, Bantar... and Bantar!! Lots of challenges in the lab area. The first came upon entry, where Bantar stared at his cloning device, but could spot me
coming from the hallway (left image below). Luckily, the lights within
flickered and I could use that to dart in to where the first red assembly
line archway provided hardcover. There were 4 patrolling fiends in the
distance also, but they couldn’t see me from here. Now I could time the light
gem and scoot over to the next hardcover. After the third one, I was
permanently dark. I
could sneak over behind Bantar and whack him with
my sword, but that didn’t kill him, so I needed two hits. Problem was, this always alerted the fiends. They heard the sounds
from the sword or his squeal, I couldn’t tell which. After downing him, I got
the lovely objective to kill his clones, all six of them! They appeared on the conveyor belt inside the cloning machine,
spawning in hunt mode. I tried releasing both mystic eyes to take care of the
clones. They did well for the most part, pelting holy water arrows at him,
but they always attracted the fiends, to which they had no offensive power.
The fiends didn’t take damage from the arrows. To them it was like getting
hit by regular water arrows. The fiends also distracted the eyes, to the
point where Bantar would get a few shots in and
destroy them. I replayed the scenario like this probably 20 times, and not
once did the mystic eyes finish the job. That was thus a lost cause. Plus,
this was only attempting to kill the clones; I needed them to take care of the
initial Bantar also. I had to find a different
method.
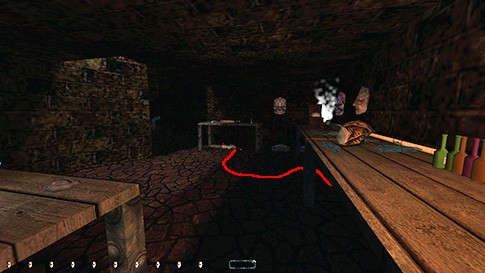
I
moved on to the inner chamber. I could follow the fiends counterclockwise
around the central pillar without getting spotted. Two more fiends patrolled
the area over by the lab room itself. Here was also a haunted
fireball-shooting mask on the wall. It alerted with regular haunt gasps for
first alerts, then started turning on the wall if second alerted. I found a
route where I could traverse from underneath the first table over to the long
table on the south wall without alerts (right image above). However, when
emerging in the southwest corner, I got spotted. The light from the burner on
the table hit me before I could hide underneath the final table. The screen
capture above to the right was the farthest I could get without Supreme
busts. I thus retraced my steps and looked for a different solution. Turning
on the iron beasts to fight on my side was now a necessity, if wanting to
stay undetected. Getting through the lab without a Ghost bust was impossible,
so completing the objectives while staying concealed was now my primary goal.
The bots did a great job at keeping it so. They had very accurate shots, much
better than archers. I found a nice spot to hide along the eastern wall while
monitoring proceedings (left image below). The biggest problem was that the
bots’ bombs could ricochet off the wall and end up back at their feet. Two
bombs like this and they were out of commission. It took a bit of saving and
reloading, but that isn’t against any of the rules. One time, the surviving
bot found its way over to the lab and started attacking the mask guardian.
Although I was hoping it would destroy it, all it did was set off a chain
reaction and blowing up all the explosives in there, while the mask still
lived on to see another day. Instead, the most preferable scenario was for
the bots to kill all the fiends, which they did after not too many attempts,
but also lure over Bantar himself. The best
scenario I achieved was the last iron beast killing Bantar
plus one of his clones. After this I had to release the mystic eyes. Without
the fiends to distract them, they efficiently killed the remaining clones
(right image below). They often ended up inside the cloning machine killing
the final two or three copies. In that case, the Bantars
didn’t stand a chance. I thus ended up getting rid of all the enemies in here
without ever getting spotted or dealing damage. Nice! The only bust the way I
see it, was destroying the fiends and possibly also alerting the mask.
Back
in the lab, the mask was now in a constant first alert state. I could thus
travel underneath the tables without further remarks. I could also grab all
the goodies I wanted while hiding in the shadows cast by the tables. The Book
of Darkness only appeared if I first took the other six books. None of them
could be dropped back. Guild Halls Since
releasing Loknara, all the spiders were now allies
of mine. I could thus safely release them from the cage holding the Dagger of
Power. They positioned themselves in the northwest hallway of the prison
area, attacking the first thieves that came along. The spiders ended up dying
quite quickly, but usually downed at least one thief before they perished
(left image below). I know Ghost rule #5 says: “Garrett must not cause suicides of AI or melees that intentionally
cause AI to attack each other.” However, I would claim that is not what
was taking place here. First, I did not have the intention, nor did I draw
any benefit from the spiders getting killed. Second, opening the gate
shouldn’t have caused any fight, as no thief ever patrolled past the cages in
the first place. It was only due to an apparent change in the spiders’ patrol
route that they ended up in the same vicinity as the thieves. Since there is
no way to enter the cage without changing the spiders’ placement like this,
I’d say it is due to the mission’s script that the spiders died. I thus take
no blame for their demise.
The
final obstacle came back in the guild halls, but it was a big one at that. I
had to blow up the two boulders that blocked the path to the flooded cave in
the southwest (right image above). This was quite close to the kitchen, where
a stationary fire elemental was placed in the stove. It alerted to hunt mode,
along with at least one thief, as well as a mechanist worker bot. I tried
using a mine under the water to muffle the blow, but the explosion still took
place above the surface. A coal crystal or an explosive charge yielded the
same result. I actually think those were louder than just a fire arrow. I accepted
yet another bust and finished the mission from there. UPDATE November 12th, 2021:
With much help from Galaer on the TTLG forums, I’ve been able to avoid the
vast majority of the Ghost busts in this mission. First, the boulders
blocking the entrance to Zilfin’s contact book can
be silently destroyed with a lit flare (left image below). The worker bot can
still alert to this, but only if it is nearby, which is easy to prevent. Furthermore,
Bantar’s lab can be approached from the back by
blocking the rolling boulders from reaching the bottom of the ramp (right
image below). The mask guardian second alerts to hearing
the boulders, but this isn’t considered a bust. The boulders trigger
as a script when getting close to this area, much like triggering a
conversation, not by setting off a trap. If bringing along 3 rubble pieces
and a geode, after a few attempts they create a barrier providing enough room
to squeeze past the boulders. Up above, you have to douse the torch by the
first fiend, getting a first alert in the process. The rest of this floor is
easy. This method of reaching the lab also eliminates the need to get the
mystic eyes from the tombs, as well as skips the objectives to kill Bantar and his clones, plus destroying his cloning machine.
Lastly,
you can prevent the spider-thieves fight when opening the cage to get the
Dagger of Power. If the thieves are patrolling together, something they
normally do when returning from Bantar’s lab, you
can time their patrol and release the spiders just after the thieves pass the
western hallway. That way after grabbing the dagger, you can quickly leave
through the teleporter and cause the engine to shut
off the thieves’ patrol due to lack of proximity. If the stats say no bodies
discovered, you know you prevented the fight successfully. Statistics: Time: 2:09:04 Loot: 14666 out of 14666 (Supreme: 13566 out of
13566) Pickpockets: 9 out of 9 Secrets: None Locks Picked: 44 Damage Dealt: 0 Damage Taken: 0 Bodies Discovered by Enemies: 0 Consumables: 1 water arrow, 1 fire arrow, 2 moss
arrow, 2 gas arrows, 1 broadhead arrow, and 1 flare. Ghost: Failed! Perfect Thief: Failed! Supreme Thief: Failed! Perfect Supreme Thief: Failed! Notes: -
Had
to remove light sources to obtain each of the four elemental talismans. An author design choice, but Supreme busts
nonetheless. -
Using the deity
stones broke the crystal monolith guarding the entrance to Bantar’s lair. I interpret this as property damage and a
Ghost bust. -
Mossed
the ground when throwing the rubble pieces in order to block the big
boulders. Supreme
bust. -
Doused
a torch when entering Bantar’s lair via the back
entrance. Also
got a first alert from the stationary fiend in the process. Supreme busts. -
Had
to release 4 spiders in order to get Zilfin’s
Dagger of Power. They normally
end up fighting the patrolling thieves, but I left through the teleporter before they met, thus forcing the engine to
shut off their patrol. Possibly an engine exploit and thus a bust to Supreme,
but not a bust to plain Ghost. |
|
|