|
A NIGHT IN ROCKSBOURG 3 - Ink and Dust The time had come to ghost
DrK’s third mission in the Rocksbourg-series, this one titled ‘Ink and Dust’.
His previous creations were out of this world good, and the most recent
installment was no disappointment. I had escaped the streets of Rocksbourg,
only to run into more enemies underground. The keepers had come to my rescue
yet again, and this is where my quest started. The South Star I was greeted in their
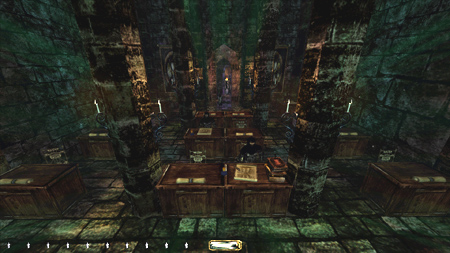
library with instructions to see interpreter Thales. The mission was split
into different keeper compounds, or stars. In the south star, I could walk
about freely without worry. I could steal loot and read books without a care
in the world. The only things the keepers alerted to were active weapons and
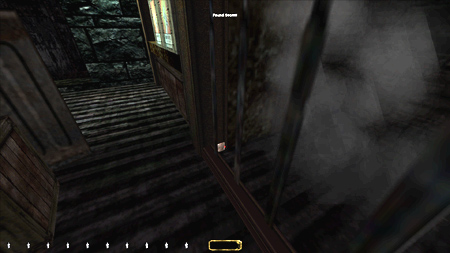
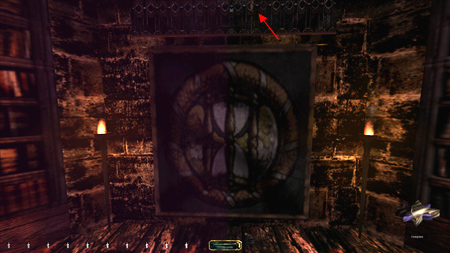
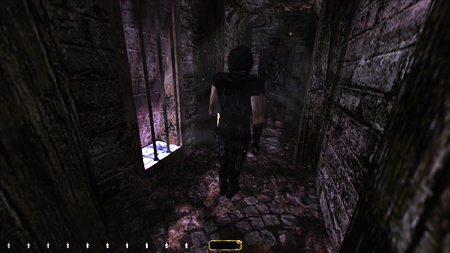
pickpocketing. I roamed everywhere possible before seeing Thales, enjoying
the magnificent scenery along the way (left image below). DrK is one of those
authors who lifts the dark engine to new heights. As mentioned, the keepers in
the south star didn’t alert, but they still gave settling remarks (i.e.
“must’ve been nothing”). A similar situation was encountered and described in
the report for ‘A Night in Rocksbourg: Discovery’. It was clearly the
author’s intention to go about unnoticed, so I disregarded their confounding
behavior. Interpreter Thales later confirmed this by stating he had made the
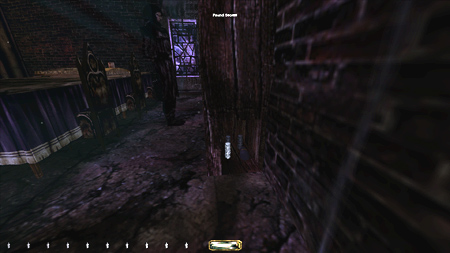
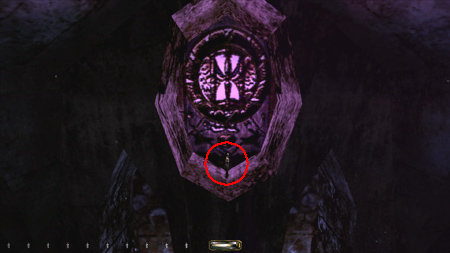
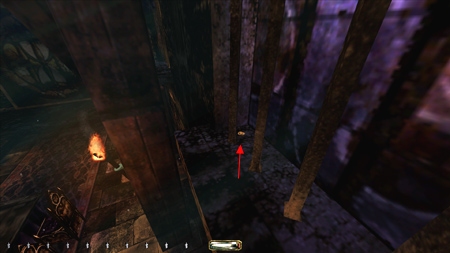
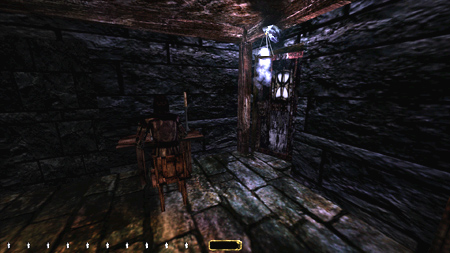
keepers unaware of my presence. A few clever secrets were
spread around the south star. I had a darn hard time finding the hidden compartment
in the Room of the Accession. The glyph was easy to spot, but I couldn’t for
the life of me find the loot. Eventually I did, at the opposite end of the
bookcase (right image above). After speaking to Thales, the
purpose of the mission got a bit clearer. I was to steal two stones from the
north star, hidden in the light and dark zones. These and six other zones
were only accessible through the creation of certain elemental specific keys.
I also needed to bring back the Book of Names and then find a way out. He
provided a key to various rooms around the south star and said to go see
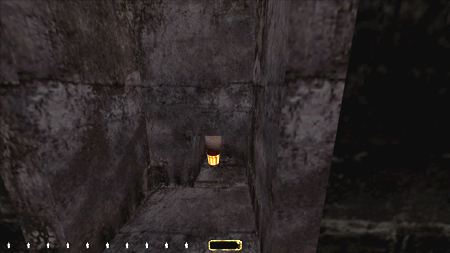
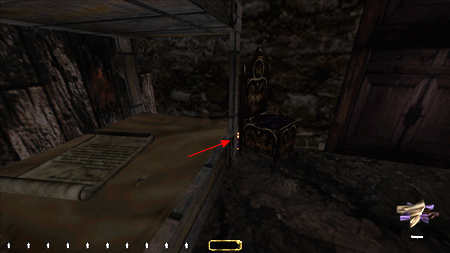
Vlain for north star access. His key gave admission to
the room of the readings, holding one more secret glyph by the foot of a hall
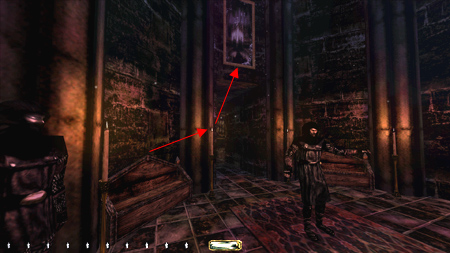
statue. It provided loot inside a nearby alcove (left image above). Also in
the inner chamber was an order painting on the wall above the entry. I leapt
from the bench onto a candle (!) to reach it (right image above). The storeroom was also
available using Thales’ key. It hid a secret passageway to a dusty loft with
another painting (left image below). The storeroom also held three “special”
elemental items used to make the elemental keys later. They all made a
distinct cling sound when taken, for easy recognition. The south star held 8
of these items, out of 16 in total. I made sure to grab all before wrapping
up this part of the compound. Vlain in the tower told me
to go get Drac’s scriptures before he’d let me pass to the north star. I so
did, using a key found in Uprov’s footlocker by the dining hall. It gave
entry to the ‘forbidden and dangerous books’ room where the tome was located.
The key disappeared upon use and thus couldn’t be returned. The last piece of hard
loot was in the sill of a stained window in soul Huso’s quarters, only
accessible by use of the south star key. I had to mantle over an archway to
even see it (right image above). North Star, Down
Below Well, if the first part
was effortless, the north star was anything but. All enemies were on high
alert and ready to chase. I knew my way around from before, but did a quick
blackjack run just to get the layout into my head. I needed to make a plan
for this to go smoothly. I schemed on getting Dumah’s quarters out of the way
first, but the giant zombie guarding the door alerted on me picking the lock.
It was only a first alert, but against Supreme rules nonetheless. There was
an alternate way in by use of a nearby ventilation shaft, although it would
require a lot of stackable objects and possibly a crate. I decided to wait
with Dumah’s and instead focus on retrieving all 16 elemental objects (which
I knew were stackable). The factory at the bottom
level was the most logical place to start. Two patrollers covered the
hallways in between the workshops. Descending the stairs from Dumah’s, I
listened at the door not to cause any commotion. Most doors were loud,
self-shutting, metal sliders; a huge pain for Supremers. I made sure to listen
carefully for alerts. The last thing I wanted was a settling remark directly
after a quicksave. Regular hardsaves were a safer bet. Found three elemental
objects in the repair workshop. The stationary keeper didn’t mind me
snatching the distilled water right before his eyes, and neither did he hear
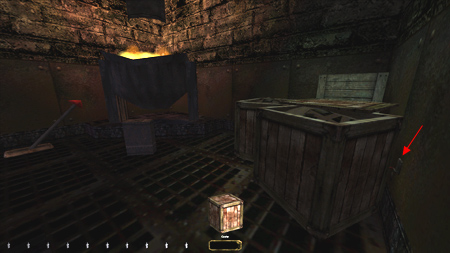
the storeroom door being picked. I found a usable crate in a control room on
the upper walkway (left image below). I brought it along for later use. A hidden passage to Tahsel’s room was
located in the foundry (right image below). It was clearly the intended way
of entry, as the main door was guarded by two enemies. His quarters held some
loot and a key under a piece of meat. Tahsel himself was found in a cave
opened by a glyph next to the bed. Poor guy... I ran into a tough spot
northeast of Kimal’s quarters (which I skipped for now). There was a flask
with blood of salamander on the bottom floor of the library that I needed,
but the entrance door alerted the upstairs souls. One of the souls (Traphael)
would eventually descend the stairs ending up in the downstairs library,
where he stayed doing small patrol loops between the different tomes. He
didn’t arrive until the mass conversation above was done though, so I waited
in the southwest corner of the room outside the library and snuck in along
with him. That only halfway fixed the problem, because I had to leave and
again got caught opening the door. I then got the brilliant idea of blocking
the door with the crate and simply remove the crate to let the door slide
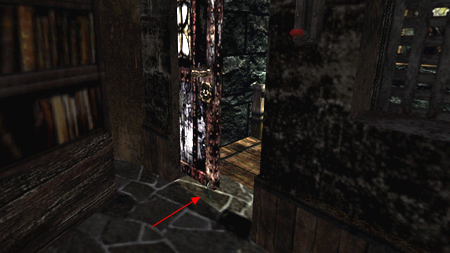
shut when leaving. Problem was, soul Traphael alerted to the noise from the
crate. I cycled through my inventory and found the most silent object
possible, the Trickster’s herb (although several other objects would serve
the same purpose). It successfully blocked the door and didn’t alert anyone
(left image below). I had to wait until the door opening was at its absolute
widest before dropping the herb, otherwise I wouldn’t get through. It was a
tight fit, and even tighter leaving. It felt good retrieving the salamander
blood without Supreme busts. North Star, Up
Above There was more action
further up. Patrolling soul Oderij (the guy with fiery hands) was by far the
most dangerous. He occasionally entered the middle level of the library where
Edrys was stationed. On the east side of this level was a tough piece of
loot. A partly hidden balcony above a large banner had a candlestick visible
from below. Initially I planned on rope arrowing up and started looking for
attachment spots. This proved too difficult and even unnecessary. The tome on
the east side could easily be mantled and had a dark spot that kept me hidden
from everyone but Oderij. From here I could leap towards the balcony and grab
the loot through the railing. The souls below alerted to the landing noise
though, so I put the bag of fish scales on the floor in the landing zone
first. The image above to the right shows me standing on the tome facing the
balcony; the fish scale bag is visible to the right of the light gem. With
this piece I reached half the mission’s loot count. Sneaking back along the
south side took me out before Oderij returned. Grabbing the remaining
special objects and loot around the premises was a little fiddly due to the
amount of patrollers. There were two conversations on the lower grounds that
triggered a total of four extra roamers. It was definitely worthwhile to plan
my route avoiding these triggers. The three-way chat in the barracks was
inevitable in order to retrieve the burrick’s excrements from the storeroom.
The three guards involved made the hallway outside the room of the keys
highly crowded, so I picked the lock on the door and got the outside items
ahead of time. One piece of loot, a goblet, was very well hidden in one of the bedrooms on the south side of the
barracks (right image below). The dining hall and
kitchen were a breeze compared to the rest of the compound. Another hidden
piece of loot was found here, on the windowsill by the dining table (left
image above). The secret passages were useful when needing shortcuts to avoid
heavily patrolled corridors. I utilized one to access the rafters above the
dining hall to steal the hard-to-reach order painting from the fireplace. I now had all the items
needed to attempt bypassing Dumah’s entrance door. As previously stated,
there was an alternate way in. The access chute was inside the ventilation
system by the door to the light area. A giant female zombie was positioned
right outside. The crate and all 16 objects were required to reach the proper
elevation (left image below). [NewDark
update: Due to the new mantle mechanics, you only need about 8 objects to
ascend the chute. The crate is also no longer needed.] I alternated
between soft and hard objects, to avoid alerts from the outside patrollers.
Dumah’s grounds were a bit tedious, due to quite a few snaggable objects, but
nothing to be described in detail. The zombie down below easily alerted to
sound so I treaded carefully. Heading For the
Elements I had cleaned the north
star bar the elemental keys and their specific doors. I knew from prior
playthroughs that the vine area was hopeless. There is a woodsie beast that
alerts upon entry, with no way to circumvent. [UPDATE: Actually, if you bring along an invisibility potion, you can
get the loot in there without any further alerts. You also have to use two
moss arrows on the metal walkway. This will add 170 loot to your total and
render the playthrough a ‘Chemical Success’.] I even skipped making the
key and could return the unused objects for Supreme. The ice key was also not
needed for Supreme, as the soul studying nearby signaled to the door with a
first alert. Standard Ghost was in the clear for that one though. The water,
earth, air and fire areas were cleaned without trouble. I absolutely loved
the creativity in creating each area with an emphasis on the specific
element. The air section was a personal favorite. Come time for the required doors (light and
darkness), I placed the crate back in the basement first (and the maintenance
freezing back in the storeroom for Supreme); it had served its purpose. To
open the darkness door I needed Kimal’s key. He was stationed outside
Tahsel’s quarters (right image above). Tahsel’s key (taken earlier) opened
the meters room, which lever exposed a wall panel in Kimal’s chamber. This
panel revealed a lever that further uncovered the lock responding to the
darkness key, which raised a gate in the adjacent room. I had to time the
final lock not to alert the patrolling haunt, as he heard some of the ruckus
through the door. I made sure to reraise all the gates and return Tahsel’s
key. I placed the latter on top of the body part on the counter; dropping it
onto the metal actually alerted the zombie outside the door. The darkness area was fun
enough, with a couple of scares. DrK sure knows how to make a player jump. A
couple of large beasts roamed around but they were easily avoided. Two things
worth noticing for Supreme. I couldn’t reset the code lock for the first
gate. I could barely touch any button before it closed behind me. The
starting code was ‘0000’ and the correct combination ‘6143’. I managed to
touch ‘8’ and exit, leaving the display at ‘1438’. I guess this constitutes a
Supreme bust, although no rule directly states to reset number displays. It
didn’t matter, as Supreme got busted in the labyrinth beyond. Three levers
had to be flipped to access a tiny ledge leading to the dead shadow stone.
The sliding gate couldn’t be closed as that would have prevented further
travel. In addition, this entire area was completely sealed off after
escaping the chasing phantom. Supreme rule #7 states: “Put Everything back
that can be put back: doors closed and re-locked if they are re-lockable,
chests and gates closed if closable…” Well, the gate was closable and it left
a trace of my presence. Busted, at least by my judgment. The light area brought no
problems except I had to skip Thesal’s bedroom for Supreme. The door was too
loud to go by undetected. The ice area also had to be skipped for the same
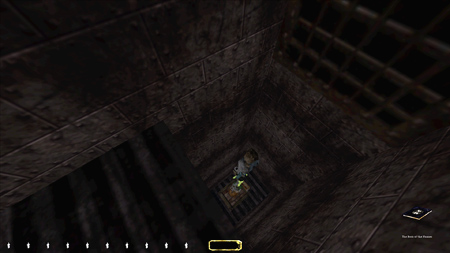
reason (left image above). Plain Ghost was good in both instances. The ice
area held two pieces of loot in a hidden chamber revealed by a wall-glyph
(right image above). Upon returning to the south star I had gone
from friend to foe. Only Vlain and Thales recognized me as an acquaintance.
The haunts seemed to be in constant first alert mode, endlessly whispering
‘join us, join us now!’ I still
kept my distance though. I lifted Nyth’s south star key off his belt before
heading for Thales’. He was patrolling the tower carrying a lantern. I needed
to return the copy I got from Thales’ for Supreme, thus leaving the compound
required a second one. The blocking-the-door-as-it-locks method didn’t work
for the entry gate, since it shut automatically. Giving Thales his book gave
me permission to leave. I carefully returned the Trickster’s herb, the bag of
cursed seeds and the ice dust to their respective locations (kitchen and
storeroom). Before seeing Vlain I simply dropped Nyth’s key along his patrol
route. Statistics: Time: 3:07:28 Loot: 6130 out of 6500
(Supreme: 6020) Pickpockets: 8 out of 12 Secrets: 8 out of 10 Locks Picked: 11 Damage Dealt: 0 Damage
Taken: 0 Consumables: None Ghost: Success! Perfect Thief: Failed! Supreme Ghost: Failed! Perfect Supreme Ghost: Failed! Notes: -
The north star keepers didn’t
alert but still gave settling remarks such as “too much coffee this morning”.
I ignored their behavior due to the author’s obvious intention of Garrett
roaming freely around the premises. -
I had to skip one piece of loot
worth 200 gold in the hallway outside Vlain’s office at the end of the south
star. Cutting the banner to gain access is property damage and not allowed
under any mode. -
A valuable book, worth 170 gold,
had to be skipped in the vine area. The woodsie beast alerted when emerging
from the doorway. The area and the key were skipped, and the items returned
for Supreme. -
Couldn’t reset the numbers in the
combination lock display in the darkness area. The metal gate lowered before
I was able to go through. I also couldn’t close up the sliding gate in the
labyrinth. Both sections were unreachable after taking the dead shadow.
Supreme busts. -
Had to skip a candlestick in
Thesal’s bedroom for Supreme. He commented on opening the door. -
Had to skip the ice area for
Supreme. The nearby soul commented on the door. -
The hidden order painting quest
couldn’t be completed for Supreme. One panting is located in a secret
storeroom accessible from the legends room in the north star. The entrance
door is pickable but has to be relocked using Thesal’s key from the light
area, due to Supreme rule #7. The key thus has to be returned which alerts
Thesal to hunt mode. [UPDATE: I found
you can complete this if you return the key silently to the stack of books on
the table. I guess this is close enough for Supreme.] |
|
|