|
A NIGHT IN
ROCKSBOURG The second chapter in the Rocksbourg
saga was next on my list. A brilliant campaign by the very talented French
author DrK. I was really looking forward to ghosting this one. After having been attacked in the
underground tunnels, I woke up in the apartment of an unknown speechless
individual. Rubbing away the stars from my eyes and disregarding the constant
pain shooting through my body, I rose from the bed and started tonight’s
quest. The mute’s name was Estobiaz, an acquaintance of Artemus, whose key
was left here for me. Apparently, the city had recently gotten infested by
zombies, putting a majority of the streets under quarantine. To make more
sense of the situation and to retrieve my equipment, I was to head for
Artemus’ room at the inn. My inventory was utterly stripped for now. 4,500
gold was my loot objective for the night. The Night Is
Still Young (Safe Zone) I skipped the equipment in
the footlocker for now. The rope arrow was highly needed, but I knew there
were a couple of single arrows to be found later. I don’t like cluttering my
inventory, especially not for Supreme. Estobiaz’ message was stuck to the
inventory, but the key was not, so I planned to return with it later. The streets were full of
guards and civilians, none of which paid much attention to me. But they all
gave settling remarks indicating first alerts. I have mentioned similar
conditions in other reports, but will explain once more. All AIs have paired
comments indicating their awareness to Garrett’s presence. These comments are
different every time depending on type of AI, source of trigger (noise,
vision, etc.) and alert level (first, second, third). In this case we are
talking about first alerts only. The first comment triggers when an AI
initially reacts to something being out of sorts; “Did I see something?” or
“What was that?” being common examples. If the enemy isn’t fueled with
additional exposure, he will settle down fairly quickly and forget the
incident, indicating this with the last part of the paired comment, such as
“I’m getting too jumpy” or “Too much coffee this morning, I’m twitchy as
hell!” Both types of comments are always given in circumstances where Garrett
isn’t allowed to roam freely. In conditions where Garrett is just another
citizen however, even though enemies aren’t supposed to alert, they might still give the last of the paired
comments. This ultimately has to do with settings in Dromed, or so I’ve
heard. I haven’t seen this discussed in terms of being potential Supreme rule
violations, so I don’t know what the general consensus is. However, these
types of remarks I have deemed acceptable for Supreme. Plain Ghost is
irrelevant, as first alerts are allowed across the board for that mode.
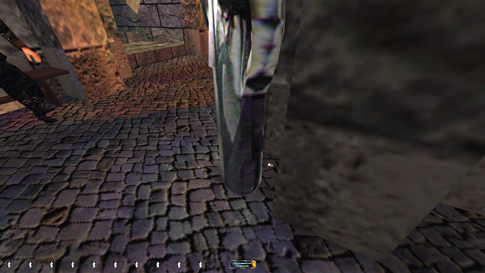
Sucking in the gorgeously
dark atmosphere, I traveled the streets and brought along whatever loot I
could find. Two pieces were fairly well-hidden; a ring behind a statue in the
starting alley (left image above), and a hammer in an abandoned side street
next to the inn (right image above). I went for Artemus’ room
to receive further instructions. His note had information pointing to the Soul
Heart as the source of the city mayhem. I was to steal it and bring it back.
I also needed to find two keeper brothers slain in battle, and drop them off
at Artemus’ and Estobiaz’. Lastly, I had to find a sword. With the lockpicks
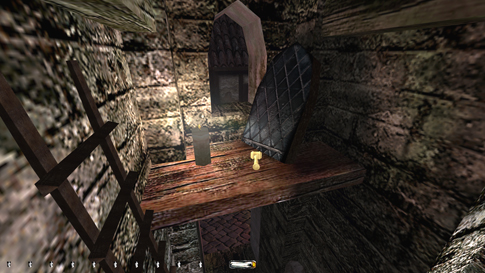
I could enter two more rooms down Artemus’ hallway. The room at the end had
two very well-hidden coin stacks in the corner (left image below). The
necklace in the footlocker had to be skipped for Supreme though; the guest
woke when I picked the lock. Despite facing the lit stairway, he couldn’t see
me leave. He must have been blind, as I was right in his view. In addition to
this loot, a footlocker in the barracks and a sleeping chamber downstairs
were now accessible. I noticed the locked sewer entrance beneath the
staircase also; my exit for later.
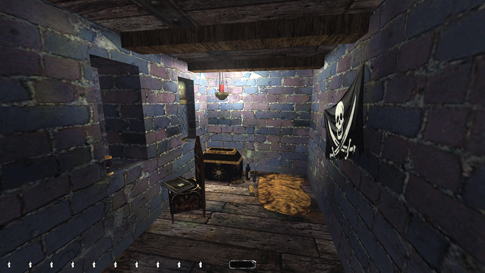
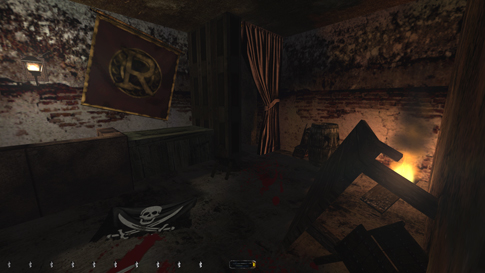
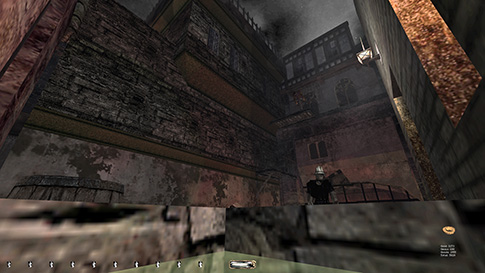
Security Zone Two pickable gates
accessed the security zone. I entered through the one leading to a stationary
captain studying some scrolls. There was a pirate’s hideout with some loot in
this area also (right image above). From the rooftops I passed an apartment
with an assassinated tenant. Some coin stacks were hidden behind his bed. The
toughest spot was an open court with lots of burning bodies and a robot. An
additional archer was overlooking the area from a plateau nearby. I could
enter the metal walkway above via an empty apartment in the southeast corner,
but couldn’t pass the stony ledge without a comment from the archer. About
halfway over, the bonfire below got too bright. Approaching from the opposite
side took me across a very narrow banner frame; this time without any
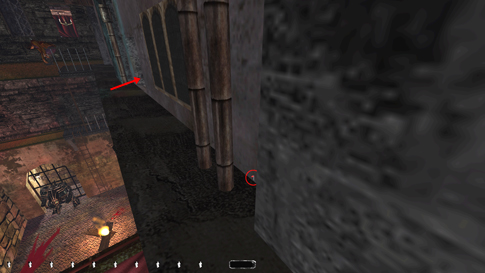
comments from either the bot or the archer. My goal was a hidden hammer study
on the ledge directly above the canal. A tiny switch in the wall behind some pipes
opened the entrance (left image below). Five pieces of loot inside made me
195 gold richer. The remaining loot in this area had to wait. Five lucky coin
pairs in the well were impossible to reach in any mode. Making a splash was
unavoidable and the well was too close to the aforementioned archer. Also, a
ring in the canal probably needed to be skipped for Supreme, but I would
return later after obtaining a rope arrow. I entered the mechanist factory from the
upper balcony. Dodging the crossbow lady wasn’t too hard. Grabbed the tunnel
21 key and brought whatever loot I could find. The last piece was downstairs
on a beam in the entry area; quite hard to spot that one. The factory workers
weren’t too threatening though; standard ghosting.
Danger Zone The ‘tunnel 21’-key took
me through the sewers to the most hazardous area of town. Along the way I
found another pirate hideout with more loot (right image above). The switch
for this entrance was located behind some pipes below the waterline. There
were some whispering voices when approaching that section of the sewers. I
couldn’t make out the words entirely, but think they mentioned something
about a “secret lair”. In fact, they reminded me of similar voices heard by
the burning court outside the mechanist factory. Anyhow, the streets
surrounding the Red Quarter were heavily guarded, but the shadows were
plentiful, and with patient timing getting around wasn’t that bad. A stationary guard blocked the bridge
leading southward. I knew the canal below held a hard-to-reach purse, and the
intended entrance was via the underground tunnels directly below the sentry.
However, plunging into the water from there alerted him to hunt mode, so I
needed to figure out something else. I could creep-drop onto the grate in the
western end of the canal from the garden above without alerts, but I lost
some unavoidable health points in the process. This is allowed for plain
Ghost, but frowned upon and far from my
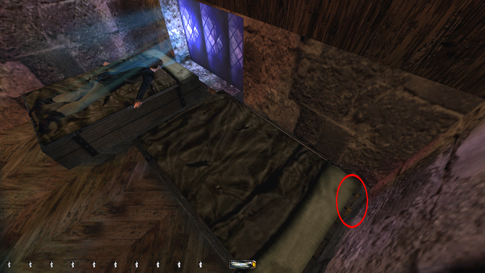
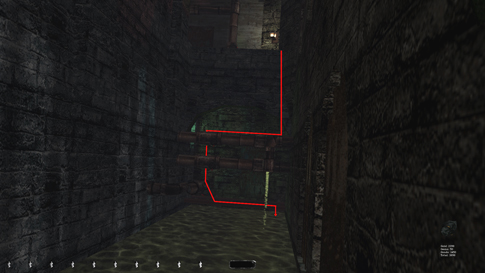
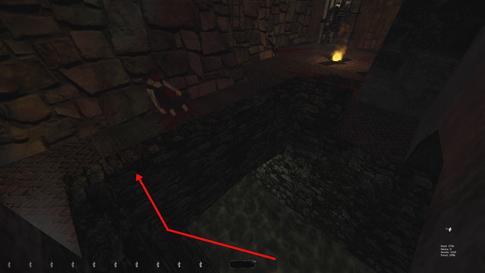
fancied outcome. The eastern end right above the purse had multiple pipe
levels, seemingly inserted by the author for this exact purpose. I could
reach that side of the canal with an angled mantle from the stairs leading
down to the Black Market. The bridge guard didn’t notice me dropping, and I
could finally reach the waterway alert-free and unscathed (left image below).
Nice piece of ghosting if I may say so. Well, I guess I just did.
I now approached the Black
Market opposite of the intended direction. The only place to obtain a sword
was in the armory shop underground. Unfortunately, picking the lock on the
door alerted both the storekeeper and the thief outside. They only commented,
so plain Ghost was still good. I couldn’t avoid this bust for Supreme though.
Some of the equipment could be taken through the display window without
detection, but the footlocker with the sword was positioned too far back.
Since I had to enter, I also brought along a rope arrow. The jewelry store
nearby was skipped for Supreme only, lowering the total loot amount for that
mode an additional 600 gold. Again, picking the door lock was too loud. The streets to the east
were blocked in the middle by a bot and a stationary mechanist. They stood in
a dark alley, with the bot facing the bright area of the street. I could leap
through the area quickly and only spawn comments, but those were additional
busts for Supreme. I reached the east side from the underground tunnels. I
found the wounded keeper Ramy in an abandoned apartment up above. Stole the
purse off the patroller here also. To get to the opposite side of the bot I
had to mantle up by the stairs just east of the Red Quarter; near the broken
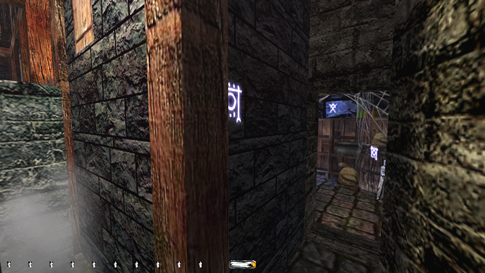
window with a spider and some loot. There was a hard-to-reach coin stack in a
chest on a ledge in this area, as well as a hidden wizard’s study in the
alley corner (right image above). This took me past the loot requirement for
plain Ghost. Wizards! One of the few complaints
I have of this mission is the entrance to the wizards’ compound. It was
located on one of the walls in the underground tunnels, not far from the
Black Market. It opened by frobbing a glyph on the wall a few feet away. I
needed help from the forums to find it, and even then it wasn’t that obvious.
The second time around I noticed the odd texture on the wall and the whispers
as I approached the area, but for a first-time player, it was a tad too hard. The souls in the compound
all spoke French, which took a bit getting used too. For plain ghosters I
imagine it doesn’t make that much difference, as you can still see them
entering hunt mode if busted. But for Supreme, I needed to know which
comments were alerts. Soul Tenethorm by the desk in the first room definitely
alerted from opening the door. Most of the compound required standard
sneaking. Two frobbable books in one of the libraries opened the cage to the
Soul Heart and the gate to the dungeon downstairs, respectively. The
wandering mage had a random patrol, which turned out to be a little annoying.
By far the toughest spot was on the lowest
level. Two haunt-souls protected the main cage, patrolling back and forth
from a nearby study. One of the souls in the study carried the archives key,
highly needed to finish the mission. The other stationary soul in there
watched the entrance. Both of the walking dudes had haunt-like alerts, thus
easily recognizable. They did pivot turns a few feet inside the study, and I
could rush in to the left before they headed back. The stationed soul saw me
enough to comment, but that was acceptable considering the circumstances. I
circled the room counterclockwise to reach Tahsel’s key. Grabbing the Soul
Heart took the most amount of time. Both guards were quite jumpy and the
wizard upstairs also spotted me on occasion. My path involved using the
semi-dark corners and following the souls around the room. I used the left
pillar by the opening to dodge the incoming patroller when leaning in for the
snatch. In the end, I managed to avoid any comments from this room. Fetching
keeper Lucien from the dungeon posed no real problems. Hung on to the archives
key when leaving the compound. Couldn’t enter the study again without further
comments, and I considered keeping the key less of a violation to the rules.
If you want to return it, on top of the two scrolls on Tahsel’s desk is the
best place. Granted, it isn’t at his feet, but it’s silent. The tunnel 13 key
was stuck to my inventory, so I wouldn’t have to return to the wizards later.
Remembered to flip back the books to close the gates downstairs before
exiting. Another comment spawned from the sitting soul up top when opening
the sliding door.
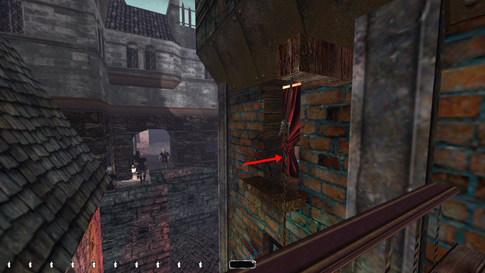
Wrapping it up Brought Lucien to Artemus’
room. Also fetched the secret bag of spice from the ledge west of Estobiaz’
(left image above). Firing the rope arrow had to be done from total darkness.
The guards still alerted to hunt mode occasionally, but I managed to avoid
any busts. Back in the danger zone I went for the last missing secret: a
hidden apartment northeast of the Red Quarter (right image above). All it
took was a rope arrow into the beam above, but it was unreachable for
Supreme. There was a stationary mechanist in the upper streets nearby; he
caught me going past the lamppost and the bonfires. Only a comment, so plain
Ghost was good. Brought Ramy with me and left the danger zone for the last
time. No big deal. Dropped off Ramy and
Artemus’ room key at Estobiaz’. Returned the tunnel 21 key to the mech
factory and headed for the last hard piece of loot. It was a ring in the
canal below the open court with burning bodies mentioned earlier (left image
below). With an accurate jump from the banner frame above, I could reach the
canal ladder without notice. I had to leap from the frame’s silent edge not
to alert the patrolling mechanists inside the factory. To get back up I fired
a rope into the sloped wooden overhang above the banner frame. The rope ended
just above a steam vent in the streets below. To reach unseen I tried
traversing the canal fence from the top of the ladder, but the archer caught
me halfway through. A torch beyond the portcullis further west was the source
of trouble. Instead I had to mantle the canal corner directly from below
(right image below). Angle-running from the waterline got me high enough to
reach the edge of the fence above, but there wasn’t much in it. Sometimes the
mantle took me straight into the light, causing the archer to throw a hissy
fit. Two times I managed to mantle up without hitting the light and keeping
it within Supreme rules. The rope was ascended slowly, past the shiny window
on the wall.
From there I returned to the
inn and exited the mission through tunnel 13. The best map I’ve played in a
long time! [UPDATE Dec 31st, 2022: The loot in the well can now be
taken, even for Supreme! Big thanks to spambotfodder for reminding me you can
use flares to lower yourself quietly into the water, just like in A Better
Tomorrow to get the Ghost success there. The only flares in the mission are
in Artemus’ footlocker at the inn. Drop several (or all of them) into the water
a bit away from the edge (left image below). The slowly inch into the water
without even a first alert from the archer. Then get the five coin pairs and
wait out the lantern guard to surface again unseen (right image below). For
Supreme, you also need to return the flares and the mine to the footlocker,
as well as Artemus’ key to the starting room.]
Statistics: Time: 1:56:13 Loot: 5828 out of 5828 (Supreme: 4753) Pickpockets: 8 out of 15 Secrets: 5 out of 5 Locks Picked: 19 Damage Dealt: 0 Damage Taken: 0 Consumables: None Ghost: Success! Perfect Thief: Success! J Supreme Thief: Failed! Perfect Supreme Thief: Failed! Notes: -
It was impossible to move around the safe zone without
spawning first alert settling remarks. The general consensus is that these
shouldn’t be considered Supreme busts. -
Had to skip a necklace (worth 200 gold) at the inn for
Supreme. My lockpick woke the sleeping guest. -
Couldn’t obtain the sword from the weapon’s store at the
Black Market without alerting the store owner and the thief guard. They both
commented on picking the door. Busted Supreme. -
Had to skip the 600 gold from the jewelry store at the
Black Market for Supreme also. Again the door alerted the stationary thief. -
The soul in the first study commented on the door
opening. Inevitable, but another Supreme bust. He also commented when I left. -
The stationary soul in the deepest study commented when
entering and leaving to grab the archives key. I didn’t moss the floor
though, but was unable to avoid the comments. -
Didn’t return the archives key as this involved more
comments from the aforementioned soul. -
Had to skip more loot for Supreme (275 gold total) from
the hidden apartment northeast of the Red Quarter. The stationary mechanist
nearby couldn’t be passed without a comment. |