|
PRECIOUS A
brand new mission this time, by AntiMatter_16. I had heard good things about
it from my fellow taffers at TTLG, so I decided to give it a go. It’s a great
mission with tons of fun gameplay crammed into a small area. Quite frankly, I
wish more missions like this were released. For me, quality beats quantity
any day of the week. This
was my first report after installing version 1.19 of the Dark engine, also
known as NewDark; a fantastic update that fixes a lot of the problems with
running Thief on newer systems. The graphics are vastly better, the game runs
faster and the menus are smoother. Seeing Thief today, 15 years after its
initial release, it’s tough to convince myself it’s the same game. I
had to recover Ariel from Lord Everett, find Captain Cassius’ sea charts, and
steal 950 worth of loot. The initial objectives gave my approval to gas Ariel
in order to bring her back to the starting position. This meant blackjacking
her was ok as well. Remember, I was going for supreme, where no loadout
screen purchases are allowed. There was no gas arrow available in the mission
either, so my club would have to do. Accessing
the warehouse was my first task. The only point of entry was up the ladder in
the alley with the patrolling thief. The thief was jumpy once I reached the
grated walkway. He heard the slightest clunk, and his comments were tough to
catch in the heavy rain. I had already done a blackjack sweep of the mission,
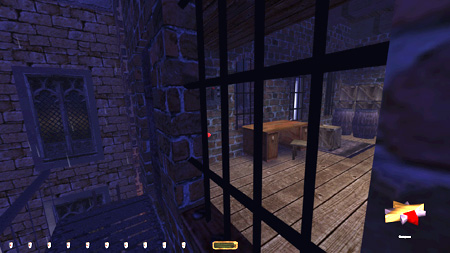
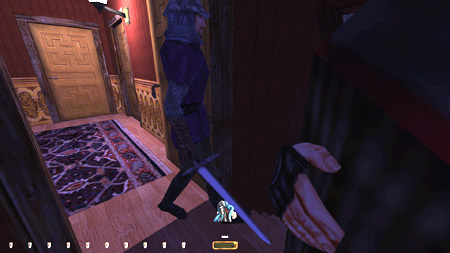
but I remember it took a while before I realized there were two levers you could reach through the
window; one for the gate below and another for the door. I had to inch
forward carefully in order to reach the latter without comments from the
thief, as the northernmost half of the walkway was lit up. The image below
shows me leaning right, facing the window. As you can see, the lever is
highlighted and my light gem is dark. I didn’t end up taking the warehouse
key, but instead left back through the balcony door. That way I could stay as
Supreme as possible in not altering the location of the key. Dropping back to
the streets was possible alert-free when the thief had his brief halt in the
north corner. Next
was Captain Cassius’ and his sea charts. He was found in the apartment right above
the starting position. The most practical entry point was through the window
in the northwest courtyard. A rope arrow into the top eave did the trick.
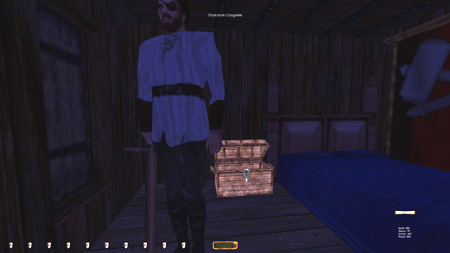
Most of his bedroom was dark, plus he pivoted to face the back wall, which is
when I made my approach. I could lean in and steal the charts like this
(right image above). I was worried he’d alert to the chest closing, but he
stayed quiet. Getting back out was tricky, not due to Cassius, but because of
a sleeping swordsman in the garden further north. He was stationed beyond a
locked gate I couldn’t access just yet. I didn’t see the guard, but could
hear him if I leaned into the gate. It was a complete fluke when I noticed he
commented on me falling back the streets when grabbing the rope. But sure
enough, whenever I headed over to the gate after dropping, he’d give a
settling remark. A clear indication of a first alert. In order to fix this I
had to get the rope arrow without dropping to the ground and making noise. I
ended up using the opened grate to the underground hideout. From on top of
it, I slid down onto its silent edge, then jumped to retrieve the arrow. I
then crouch-slid off the grate and closed it. I
had to make my way through the sewers in order to proceed. Again I had to
time the street thief by opening of the manhole when he had his halt by the
window. Only way to avoid a comment. There was another thief down below,
though he was less of an issue. Using the pillars as hardcover, I leapt
across the canal and continued over to the door when he patrolled the bridge. I
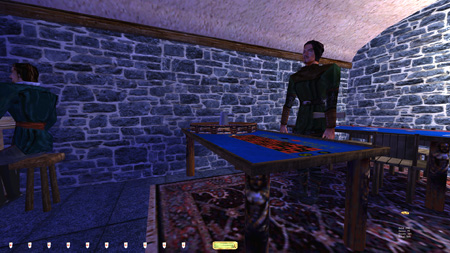
was able to get the purse above the wine barrel and all three coin pairs on
the casino gambling table without alerts. The table’s northeast corner could
be approached by creep-crouch-walking (left image below). All the loot was reachable
from here. Leaning spawned comments, but that wasn’t necessary. Alas, I
couldn’t reach the door to the basement without causing a grumble from the
bartender. The lamp was just too bright. He would leave if I switched off the
sewer lights upstairs, but that isn’t allowed following Supreme rules [#6].
Regardless, that didn’t really matter, as the closest gambler also gave a
mumble to the door opening. I skipped the basement for now and headed
upstairs. Perhaps a solution would come to me, but I doubted it. The light in
the stairs flickered and needed proper timing to prevent a comment from the
guy in the barstool. Headed
west and passed the spider by wading through the canal (right image above).
As long as I crouched along the west side, I was fine. There was a tiny gem
in the water here also. Mantled up to the east as the spider was behind
cover. The
entire apartment above was ghostable without much effort. The aforementioned
guard was asleep in the back yard. There was a tiny coin in the fountain and
two pieces of loot inside. Left the garden gate key untouched and headed back
down through the sewers. This time I ventured east and emerged in Everett’s
closet. During my first playthrough it took a long time before I noticed the
grate in the sewers leading to his apartment. I guess I should have read the
tip a bit closer, as this is the mission’s only hint to this entry Everett’s
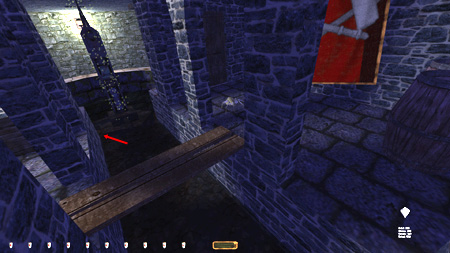
place didn’t end up being a difficult as first anticipated. It helped that I
could hide undetected at the top and bottom of the stairs while the patroller
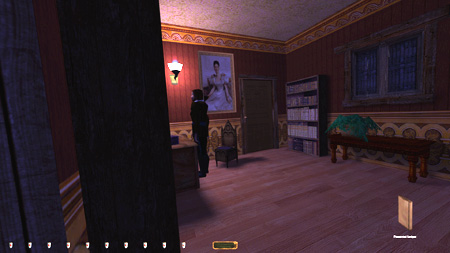
passed (right image below). He was the only real worry. The kitchen servant
downstairs was a joke, and I stole all the loot from this floor unbothered.
Everett did loops between the upstairs living room and his study. He had a
halt at both ends of his route. I stole his key and used the secret room in
his study to time further moves (left image below). Grabbed his ledger and
got the bonus objective. No real problem entering Ariel’s bedroom behind his
back. Clubbed her in order to bring her along, and dropped Everett’s key back
onto the living room carpet. Opted out of taking the guard’s back door key,
but instead brought Ariel back down through the sewers. I still had to hit
the catacombs anyway. Ended
up having to take the busts from the casino people when entering the
basement. No way around it. Disarmed the flash mine in the stairs to prevent
its setting off. No real problems getting all the loot from down there. The
haunt was immaterial and no worry. Thought the corpse would be a zombie at
first, but no; just a regular stiff. Brought Ariel back through the manhole,
remembering to relock the sewer door. Returned the sewer key and reset the
street gate by reflipping the lever. Had a hard time duplicating the descent
down the ladder without comments from the thief this time. Ended up having to
drop onto the large crate from the walkway fence. Carried Ariel back to the
alley and ended the mission. Highly enjoyable! Statistics: Time:
37:21 Loot:
1100 out of 1100 Pickpockets:
2 out of 4 Secrets:
1 out of 1 Locks
Picked: 0 Damage
Dealt: 1 Damage Taken: 0 Consumables:
None Ghost:
Success! Perfect
Thief: Success! Supreme
Ghost: Failed! Perfect
Supreme Ghost: Failed! Notes: -
Took a couple of comments crossing the casino floor
entering the sewer basement. The bartender saw me and the gambler heard door
noise. Supreme busts. -
Dealt 1 damage when blackjacking Ariel. This is excused
due to the explicit objective to bring her back. |
|
|