|
Patriot, Mission 2: Prisoner Prisoner
carries on the solid design and story from the campaign’s opening mission. A very
different setting from the open city; we are now thrown into a claustrophobic
prison, having to manage a jailbreak. Zontik’s talent continues to shine, but
he cranks up the difficulty and tension. You have been warned. I
was imprisoned by the city watch and my main objectives were to break out of
my cell, retrieve my belongings, and escape from the Jailrock facility. South Tower In
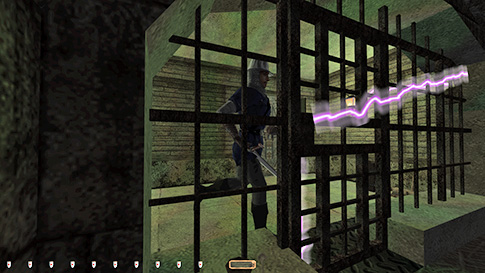
order to leave the cell, I had to alert one of the guards. I couldn’t grab
his key without him noticing. He either went into hunt mode, in which case he
usually triggered the alarm, or he ran straight for the door and got
electrocuted (left image below). His death and the lights turning off were
immediate and unavoidable consequences of completing the mandatory objective
of leaving the cell, so those were excused. But alerting him before any of
that happened, was not. You are not allowed to alert enemies even if they end
up dying. Silly I know. Ghost busted early.
In
the basement, I had to turn off the watcher for the belongings room. It was
staring straight at the shelves. I also needed the repairer’s key for later.
Luckily, the repairer himself would eventually disappear so that I could
return the key. Managed to get the purse off the stationary guard on this
floor without any alerts. He saw me through the door, but it was such an
acute angle that I could dart past his view quick enough to avoid the
comment. Did the same thing going back. I couldn’t come from the north, as a
prisoner alerted to me from his cell. On
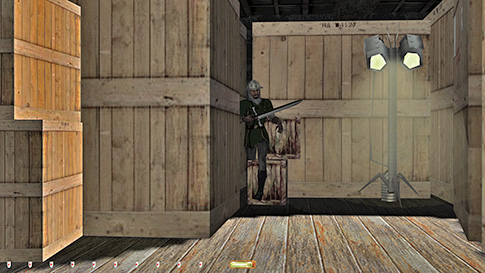
entering level 2, I had to douse the gas lamp across the hall (right image
above). The nearby stationary guard alerted to hunt mode if not. I tried
rushing out and hide in the dark bedroom to the southeast, but he still
second alerted, albeit sometimes with a delayed reaction. The patrolling
guards also alerted with a comment when passing, spotting the lamp being out.
Occasionally they would relight it as well. This was undesirable, as it was
too difficult to circle this floor unseen with that lamp on. The south hall
had a hammerite prisoner patrolling his cell who also could easily see me. I
managed to time the patrollers and get through this area with no further
busts. There was no loot on this floor, only a staircase to the next level in
the southwest. The
top floor was easy. The biggest problem was timing the guards when turning
off the security cameras to reach the main building. The guard upstairs was
no issue, but I had to be lucky with the two patrollers on the floor below. I
got through without any alerts in the end. The lockpick was a long one, but I
had around 5-10 seconds left to spare after closing the door.
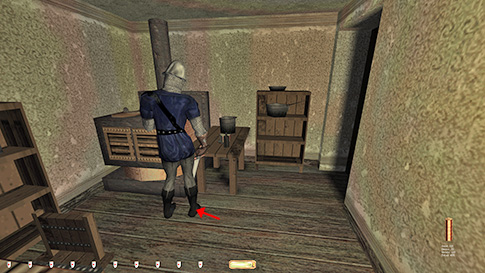
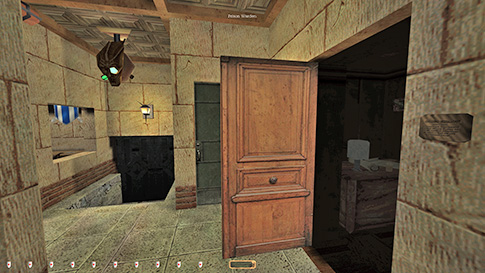
Main Building The
top floor had only one problematic room, the kitchen. A drunk guard was too
close to the staircase door to sneak by unnoticed. She didn’t give first
alerts, but still caught me. I had to nudge her over about a foot or so in
order to get the loot downstairs (left image above). This wasn’t allowed for
Supreme, so I skipped it for that mode. Dropped from the archive room to the
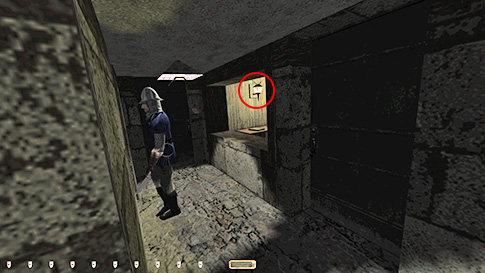
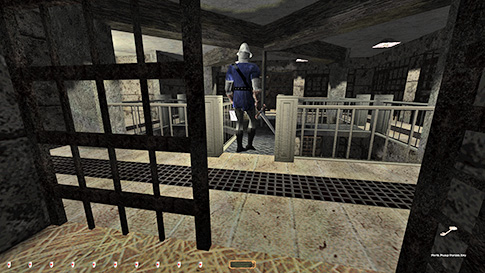
downstairs offices. The
lower floor was super tough. I couldn’t get to the north tower from the
staircase, so I used the office instead. I still got a first alert leaving
the doorway from the guard to the south. I had to turn off the lamp in the
guard station outside the north tower entrance (right image above). There was
no way to fool the swordsman in there with it on. I got another first alert
when opening the north tower door. I
tried my best to get into the warden’s office for Ghost. There was a secret
way to exit, so the only problem was fooling the watcher in the foyer (left
image below). I got to the dark doorway without alerts, but I couldn’t skip
across the few feet to the office without it going yellow. That counts as a
second alert. I tried 50+ times, but the camera hardly pivoted. The loot in
there was thus skipped for all modes.
North Tower This
place was utter hell. I stopped counting the amount of first alerts. I got a
whole bunch, that’s for sure. The biggest problem was the combination of the
watcher, the pivoting light, and the patrolling archer. There was only one
piece of loot and a key to get, and those could be taken from the same cell
to the east on level 4 (right image above). The staircase had small patches
of shade on either side, but I wasn’t safe from the archer. If he was on his
way, I had to scoot into one of the floors and hide in the dark around the
corner before proceeding. On the top floor there was a super annoying
prisoner who often alerted the guard on the third level. He ran upstairs and
started hunting. It caught me by surprise every time, because he didn’t say
anything before suddenly appearing around the corner fully alerted. I made
plenty of hardsaves to fall back on in case that happened. Finally got down
to level 1 with the key, but this area was a nightmare. The
basement and pump station was a breeze in comparison. I didn’t go all the way
up to return the pump station key. Instead I dropped it on my way out. I
would’ve taken so many extra first alerts that it wouldn’t have been worth
it. Leaving After
returning to the main building, I climbed up into the archive room using a
rope arrow, then descended via the staircase. I could sneak past the window
unseen, then drop into the sewers. Returned the repairer’s key and got the
BMI key. I had previously lock-blocked the door to the watcher switch in the
main building. By the BMI exit door, I had to douse the torch in order to
sneak past the guard. Once I went down the first hallway a bit, several
guards emerged from the door marked ‘?’ on the map. They ran super-fast and
soon caught up to me. Furthermore, a stationary guard behind the next door
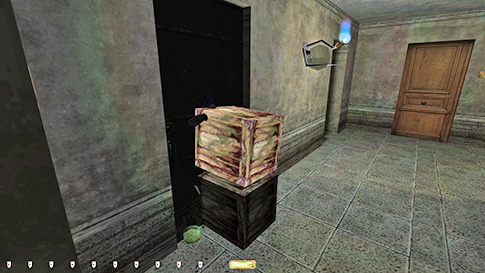
also caught me running by. I wanted to avoid these busts, so I started
experimenting. I fetched two crates from the south tower and tried blocking
the door. This didn’t work. The door’s physics seemed way too strong and just
pushed the crates away. However, a potion worked just fine. However, although
the door didn’t open, the guards could still run through it. I thus had to
use both the crates and a potion (left image below). The crates
prevented the guards from leaving and the potion held the door in place. The
latter I could grab from the doorway afterwards. I could also reach the gas
lamp and light it back up without the guard noticing. In the next hallway, I
could now use the invisibility potion to pass the watch station unseen.
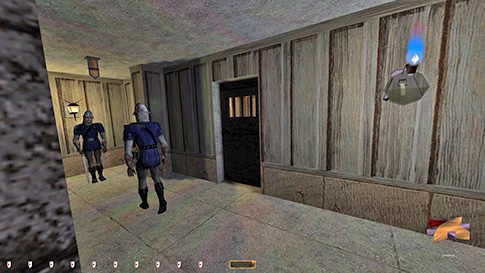
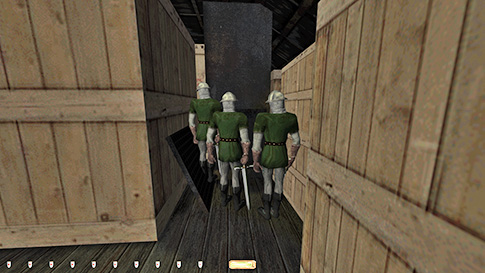
Arriving
in the BMI attic, one of the remaining objectives checked off. However, three
more guards triggered when passing an invisible line. They also ran much
faster than I did, but these ones didn’t come out of a door. They were
instead hiding around a corner, between walls of large crates. I could
trigger them without getting spotted, but they ended up blocking my exit
(right image above). There was no way of nudging them without getting seen,
and even if that had been possible, there was nowhere to push them. If I
instead used the invisibility potion up here, it ran out way before reaching
the exit chute. After
much experimentation, however, I found a way to block them as they started
running from their starting position. I had to bring two more crates from the
repair shop for this move. I had to inch out as far as possible without
triggering their script, then toss the first crate along the ground, as close
to the first guard as possible. I could see the front part of his face around
the crate corner. The second one I had to wait with, as the guard seemed to
hear the first crate, though he didn’t say anything or start moving. After a
minute or so, I could toss the second one. The best method was to throw it
high and have it bounce off the back wall, then land on top of the first
crate. If it landed close enough to the guard, all three would be blocked as
they attempted to run out (left image below). I could now sneak south, though
I can’t say for sure I wasn’t spotted. The guards kept running at full pelt,
but they never gave any verbal or visual cue that they saw me, although I was
brightly lit the entire time. Nevertheless, this was the best scenario in the
attic by far.
The
mission ended with an awesome in-game cutscene. Really looking forward to the
continuation of this campaign! Statistics: Time: 1:01:46 Loot: 825 out of 1000 (Supreme: 800) Pickpockets: 3 out of 18 Secrets: 1 out of 3 Locks Picked: 2 Damage Dealt: 0 Damage Taken: 0 Innocents Killed: 0, and Others Killed: 1 Consumables: 2 Water Arrows & 1 Invisibility
Potion Bodies Discovered by Enemies: 0 Ghost: Failed! Perfect Thief: Failed! Supreme Thief: Failed! Perfect Supreme Thief: Failed! Notes: -
Alerted the guard outside my cell before he got
electrocuted. Ghost bust. -
The kill in the stat comes from the first guard dying.
I believe this is excused, as it is an immediate and unavoidable consequence
of completing a mandatory objective. -
Turned off the watcher in the prisoners’ belongings
room. Supreme bust. -
Doused the gas lamp inside the entrance to level 2 in
the south tower. Also got first alerts in the process. Supreme busts. -
Had to turn off the security cameras twice in order to
get to the main building. Supreme busts. -
Skipped a stack of gold coins worth 25 in the main
building barracks for Supreme. The guard in the kitchen covered the exit too
well. -
Skipped three pieces of loot worth 175 in the warden’s
office. Couldn’t get in there without the watcher turning yellow. -
Got two first alerts and turned off a light to reach
the north tower in the main building lower floor. Took two more alerts
heading back. Supreme busts. -
Got a whole slew of first alerts (probably 10-12) in
the north tower ascending and descending the staircase. Supreme busts. -
I did not return the north pump station key to the top
floor for Supreme. It would require far too many first alerts. Dropped it on
my way out instead. -
I did not return the BMI key to the south pump station.
This would have required turning off the security cameras a third time. -
Doused a gas lamp by the BMI exit door. The guard also
first alerted to this. Supreme busts. -
Blocked the door by the BMI exit door with a potion and
two crates. The crates were not returned. Supreme busts. -
Drank an invisibility potion to pass the hallway with
the stationary guard beyond the BMI door. Supreme bust. -
Although I blocked the last three guards in the attic
with crates, I might have gotten spotted by the closest one. He didn’t make
any audible or visible cues, however. I obviously didn’t return these crates
either, which is another Supreme bust. |
|
|