|
MYSTIC GEMS II - HEART OF BOHN One of the most beautiful
missions you’ll ever see from this Finish author. Too bad he stopped there
and we never got a third part. This continues the rock solid architecture
from mission one, but increases in scope and difficulty. It’s great ghosting
practice for newbies also, with tight and challenging, yet forgiving patrol
routes. Lots of cool readables and eye candy make
this one mission you should not miss. My next stop was the Nothing worth buying at
the store, so I clicked my way through the loadout
screen. I started in the streets close to the museum basement’s back doors.
It was possible to enter that way, but it was far from the most discrete
approach. I went for the sewers instead, after picking up the coins from the
apartment above the canal. Skipped sergeant Willy’s armory key from the sewer
basin support beam. I knew the armory didn’t contain any valuables except for
a hint regarding the vault code, but I remembered that hint from
beta-testing. It would save me a trip back to replace the key later. The
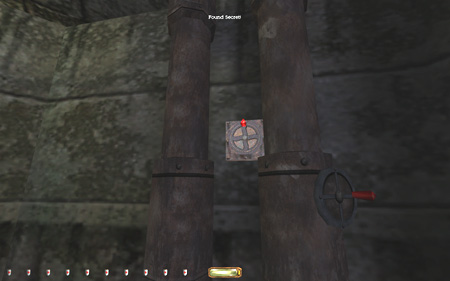
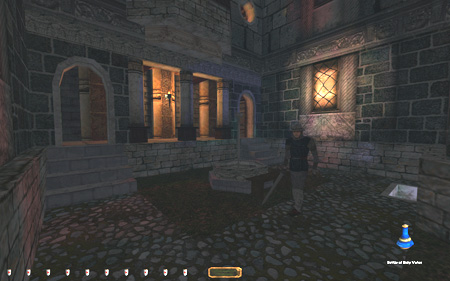
sewer key was also unnecessary, as I could enter the museum without it,
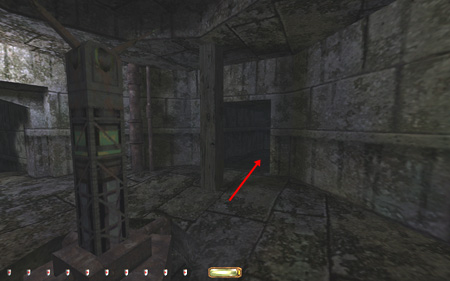
through a secret passage in the tunnels (images below). I emerged in the
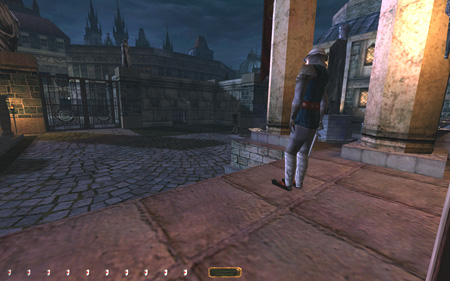
first floor library. First Floor Each floor was split into
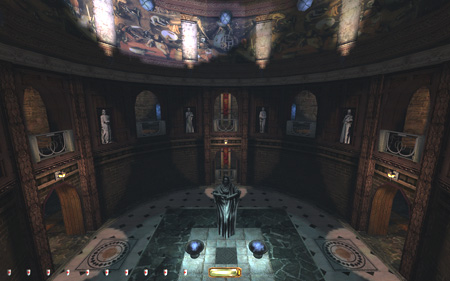
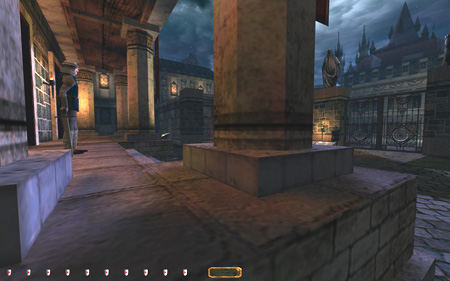
two main wings, separated by an astonishing central foyer (left image below).
I have included some extra screenshots simply to advertise, in my humble
opinion, one of the best looking FMs to date. Coupled with a beautiful
background score, this mission provides nothing more than perfect atmosphere.
The layout is made so that traversing the rooms is exciting yet challenging;
plenty of loot to keep you busy, but enough shade to help you along. The loot
placement and guard patrols seem realistic as well, which is not the case for
all indoor missions. Even though ‘Unlucky Soul’ was a solid first creation,
‘Heart of Bohn’ is a huge step up for a very
talented author. I will play anything Wille comes
up with in the future, I promise! I made my way westward,
cleaning the various display rooms. Nothing too challenging, and few
situations worth noting. The exquisite precursor gallery to the southeast was
tiled, and the patroller didn’t step out for long. One of the caskets had a
convenient dark spot where I could time my runs properly (right image above).
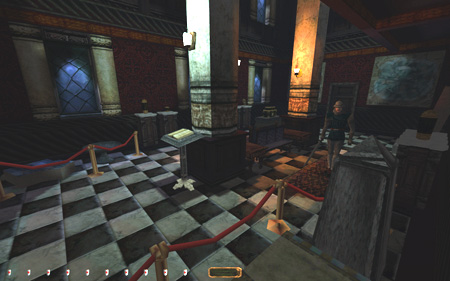
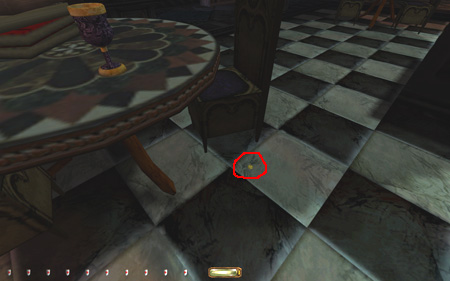
One small piece of loot was found in the library, a coin by the foot of one
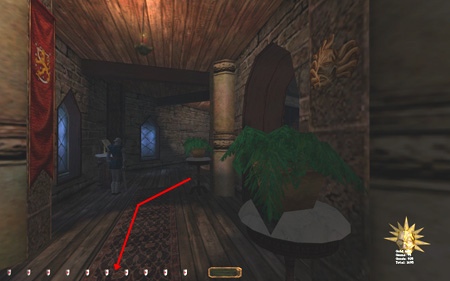
of the tables (left image below). I imagine it could get overlooked easily. Second Floor I ascended to the second
floor in the far west and cleaned this floor eastward. The most notable test
came north of the main foyer, where two masks hung on the hallway wall.
Stationary guards covered both entry points, plus several patrollers had this
hall as part of their route. I ended up coming from the east, dodging the
female guard through a patch of shade by the potted plant. She had two facing
angles, and timing her movements I was able to pass the lit area by the
banner (right image above). Got caught several times from downstairs patrollers,
so this was a tricky spot indeed. Needed to return the same way, as the male
sentry further west blocked that path entirely. The next challenge lay to
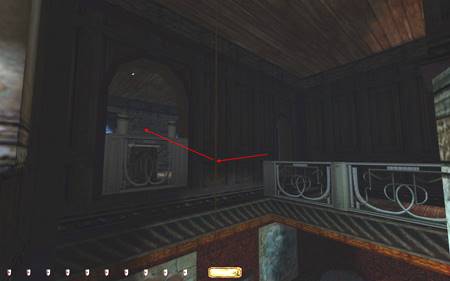
the southeast, above the precursor exhibit. There was a smaller gallery in
the upstairs corner, well guarded by an outside
swordsman. So well in fact, that it was impossible to get in that way. I
improvised with a rope arrow outside the arched window and entered the
display room by hopping from the metal railing (left image below). Getting
back was a bit fiddly though. I had to utilize a tiny ledge outside the
window and reshoot the rope arrow closer to the walkway. There was also the
patroller downstairs to worry about, but most of that part of the room was
dark enough. Third Floor After clearing the rest of
the second floor, I moved upstairs via the double stairway in the de Moren gallery. The rafters above the top flight of stairs
held a blessed candle needed later (right image above). Robbed the captain’s
quarters and the private study, in that order. Found information on a golden
rosary in the library, spawning an optional objective to retrieve it. Geniality from the author to have two pickable doors accessing the curator’s quarters. He had a
small walk between the two rooms and I could eavesdrop to track his movement.
Had to make sure he didn’t hear the lockpicks,
otherwise Supreme was busted. This was a tough task, as several patrolling
swordsmen came by on a regular basis. Luckily, both doors were covered in
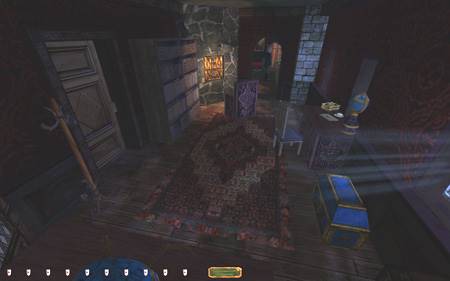
darkness. Finally got inside and could sweep the premises within a couple of
minutes (left image below). A letter on the desk explained the workings of
the abnormal holy water vial found in the spider-shaped jewelry box. I
couldn’t remember the order of which to put out the torches, so I’d have to
find the poem mentioned in the message. One of the coat hooks in the bedroom also
opened a wall-safe with some loot. One of my favorite parts of the mission
this. Accessing the
Shrine The new objective ordered
me to gain access to the shrine. This could only be done by extinguishing the
four torches in a specific order. Unfortunately, three of them spawned
comments from nearby patrollers (right image above), thus busting Supreme. I
remember discussing this situation with Wille
during beta testing, and even though we both agreed it was a bust, it seemed
too fiddly to fix. Besides, it’s only natural that guards would react to
unlit torches that supposedly have been burning for centuries. While putting
out the second torch in the basement, I also cleaned the vault. The code was
de Moren’s birth date. The fourth and final torch
was the hardest by far. One can clean the yard by the main entrance in two
sweeps; the west side coming through the door, and the east emerging from the
basement window. I didn’t bother with such a long route, which meant I had to
pass the lit part of the yard west to east, circumventing all three guards.
But before that I had to get off the entrance patio without getting spotted
by anyone, which was more than a pickle. Both doors were locked, and picking
it from the inside meant eavesdropping for comments, while also dodging the
inside patrollers. After successfully getting the door open, I could stand in
the doorway’s dark patch to monitor the situation (left image below). As the
guard passed the door eastward, I slipped out and dropped past the western
pillars to the bricks below (right image below). This corner served as a
breathing spot while timing the rest of my runs. The dry fountain to the
southwest contained a few lucky coins, while the cemetery held the second of
the blessed candles. Once lighting the last torch, my objectives changed to
enter the shrine itself. It was surprisingly easy to reenter the museum
coming from the east. Somewhat lucky I opened the door when nobody was
around. Grabbed the rosary by
placing both candles in the holders in the old library to the southeast. The
secret door couldn’t be closed, so no bust. Returned the book with the hidden
objective, the vault key and the private study key (dropped it along Willy’s
route), before plunging into the great unknown and ending the mission. What a
ride!! Statistics: Time: 1:23:01 Loot: 3600 out of 3600 Pickpockets: 5 out of 7 Secrets: 5 out of 5 Locks Picked: 12 Damage Dealt: 0 Damage
Taken: 0 Consumables: None Ghost: Success! Perfect Thief: Success! Supreme Thief: Failed! Perfect Supreme Thief:
Failed! Notes: -
Extinguishing the torches go
against Supreme rules of not removing light sources. Although finding the
shrine entrance is in the objectives, putting out the torches is not. -
Also got comments from patrolling
guards after putting out three of the four magical torches. More Supreme
busts. |