|
PREVIOUS MISSION THIEF GOLD NEXT MISSION Mission 12: Return to the Cathedral [This
walkthrough has recently been updated for TFix,
running NewDark 1.26. Although the original text
for OldDark has been preserved, situations affected
by these patches have been inserted in green. All screenshots have been
updated, and many new ones have been added. Keep in mind that there is a
difference between playing the game in NewDark with
or without TFix. TFix
updates the core mission files, as well as applies .dml
files that tweak the environment in numerous ways. These changes aren’t
supposed to have a significant impact on gameplay, but when ghosting, slight
changes could occur. If wanting as close to the “vanilla” experience as
possible, install just NewDark, without any further
patches. I have ghosted the game 1) in OldDark, 2)
in plain NewDark, and 3) in NewDark
with TFix. This walkthrough will discuss
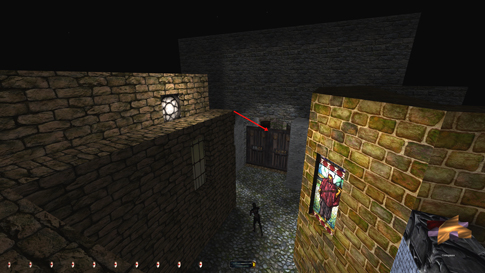
differences between all varieties.] The fourth best mission in Thief Gold. In my opinion, it’s among the best missions ever made, equaled only by the likes of ‘Break from Cragscleft Prison’, T2’s ‘Life of the Party’ and ‘Calendra’s Legacy: Midnight in Murkbell’. Undeads, side quests, story, ambience and design bring one word to mind: perfection. It’s also very fun to ghost. Along with being among the best, it’s also one of the scariest. An element that unfortunately got lost in Thief 2. So let’s plunge into the world of the afterlife and reminisce the early days of Looking Glass Studios. Huge thanks to Randy Smith & Mark Lizotte for giving us this gem! Overall score: 9.2/10 --- Entering the Cathedral
--- The objectives are simple.
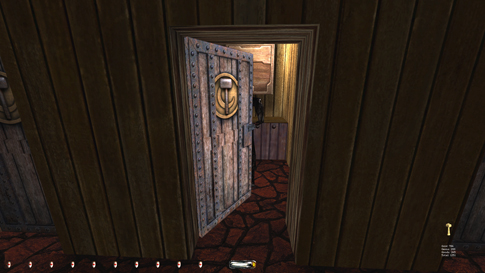
Enter the cathedral, grab the Eye and leave. I start outside the main gates,
carrying the usual gear and the four talismans. My rope arrows could easily
come in handy, and I brought two potions for stacking. It’s time to start
looting the dead! One could hardly call
using the four talismans a bust. I spent the last four missions obtaining
them for this exact reason, so it couldn’t follow the storyline any better.
Rules vs. common sense I guess. In The Dark Project you could prevent the
double doors from closing by blocking them with a skull. This has been fixed
in Thief Gold, so leaving through the back door and bumping into Murus is
absolutely necessary. Theoretically, I guess you can work your way around
Murus, but then you would skip objectives and bust Supreme. I like Brother
Murus anyways, so I don’t mind. All the doors and gates in this mission close
by themselves. This adds to the creepiness factor, and makes life a little
easier for Supreme ghosters (it actually turned out
to be more annoying than helpful), although that mode unfortunately is doomed
to fail regardless. To leave the cathedral area you either have to blow open
the cloister gates (property damage), or stack your way over the compound
walls (against Supreme rule #7). However sad this is, I won’t let it lower
the enjoyment of attempting to
Supreme. Most of the times, the journey through a mission far supersedes
whether I’m successful or not. More on that later. As the first talisman
slips into its slot, the Eye starts talking. So you didn’t think I would make
it huh? Well guess again. The remaining stones fit perfectly and the double
doors swing open. I enter and close the doors behind me. As of yet, there are no
patrols in the ground floor hallways. Even though the noises and atmosphere
are creepy, I’m not too worried. Nothing threatening happens until actually
grabbing the Eye, so I’ll finish everything else before taking my objective.
A journal on the floor describes the dying moments of a former inhabitant. At
one point in time something terrible must have happened here. I’d hate to
experience the same. The door to the east is unlocked. It leads to another
hall with an elevator out of function at the moment. The flooring is loud
here, so I tread carefully through the door to the north. Further on I pick
the lock on the door to the right. It opens to the bottom level of a clock
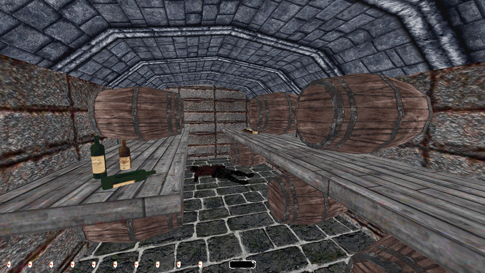
tower. A goblet (15) rests on the
floor. A sheet of paper in the corner tells of mystical surroundings
regarding the location of the Eye. Apparently it moves from the vault in the
cellar to the altar by itself! I will keep that in mind, but I remember
seeing it floating above the altar some missions ago. There is also a nifty
piece of loot in this room. On the ledge in the northeast corner I find a
hidden necklace (215).
Unfortunately, it is too high to reach normally. I have two potions in my
inventory, but even they won’t generate enough height. The skull outside the
entrance to the bell tower do the trick. Stacking the 3 objects gets me high
enough to jump up and steal it. I replace the skull afterwards. In NewDark (with newmantle enabled), you can mantle the open door to reach
the ledge above, eliminating the need for stackables
to get the necklace. From the bell tower I travel north, into the main
foyer.
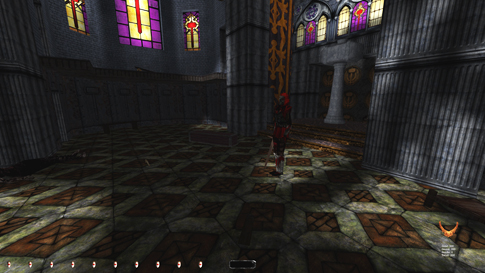
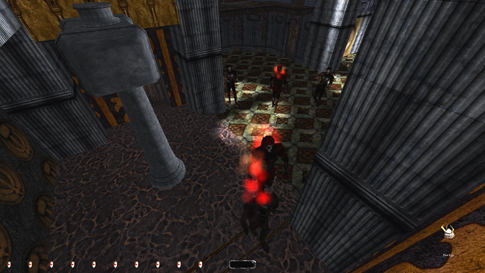
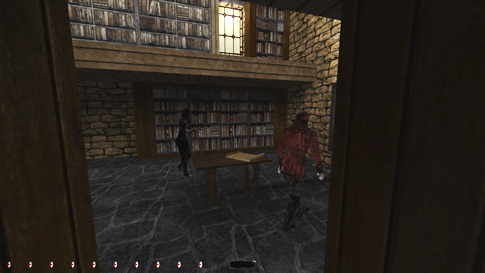
The foyer is scattered
with various elements of danger. Two haunts roam the area close to the front
doors. A stationary haunt is standing closer to the altar, facing south
mostly (left image above). Besides the haunts, there are also three sleeping
zombies surrounding the altar. I creep through the dark portion in front of
the standing haunt. Watching out not to wake the nearby zombie, I walk over
to the larger piece of wood on the floor. The room
to the northeast from here contains a goodie I wish to get my hands on. I can
lurk my way between the standing haunt and the sleeping zombie in the corner
behind the altar without alerts. This room has a healing font and in the
corner a holy water vial. I grab
it and return to the wooden structure in the foyer. The easiest way to
get upstairs from here is to fling a rope arrow into the side of the floor to
the southwest. A zombie patrols up there, but shouldn’t be too much of a
problem. I climb up the rope halfway and wait for it to pass. It eventually
leaves through the door to the south. I mantle up, grab the jar (265) on the floor and enter the
door the zombie disappeared through. It’s patrolling away from me down the
corridor now, so I quickly slip through the door to the right. The flooring
in here is noisy. Nothing of interest except a readable letter on the desk,
so I head down the ladder in the corner. Safe here! Two golden candlesticks (365) are everything of value, thus I
climb back up the ladder, but only partly. Obtaining the candlesticks this
way prevents me from having to pick the door to this room, hence avoiding
leaving it unlocked as there is no key for it. Might be a bit strict and not
against any rules, but that’s me. Getting back up I wait for the zombie to
enter the room and leave, I then mantle up the east side and head for the
door quietly. The zombie will pass right to left and when it’s gone I run
right. The next hall has a hammer (440) resting on a windowsill
on the far wall. I leave through the eastern door. The doorway across this
open area is barred shut; I’ll have to reach higher ground to travel further.
I fling another rope arrow into the beam above and ascend the line. The east
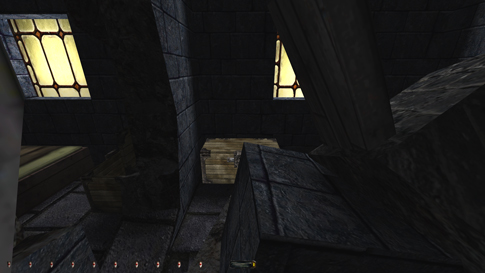
door on this floor is unlocked. The next two halls are empty, except for a chest holding two water arrows in the bell tower. Further on yet another
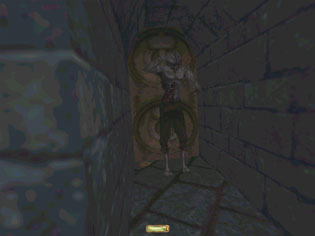
beam awaits passing, this one a bit more tricky. The diamond (540) is reachable from the shadows, but the area ahead
is very bright. Watching the stationary haunt below, I time my travel so that
he is facing west. Luckily I can pick the lock quite hidden. Inside this
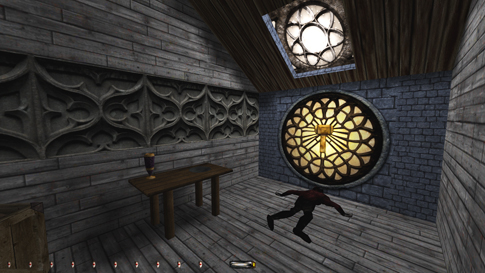
chamber I find another jar (590).
On the floor lies a dead priest, Brother Martello (right image above). I will
need his body later, so I might as well bring it along now, to avoid a rather
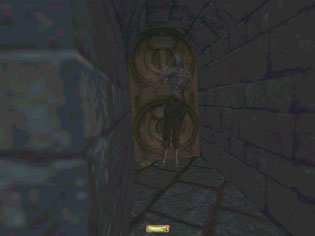
lengthy trip back. Balancing my way across the beam again (left image below).
I pass the bell tower and round the corner westward. Traverse the next beam a
tad carefully, as there are bright portions toward the western side. The next
two halls contain chests with a golden
goblet (615) and a ring (715)
respectively. Crossing the beam to the north is the easiest so far, and the
room beyond is quite uninteresting. The door leads to the armory, appealing
only if you are looking for equipment, in which case you have to come back
much later. The chest contains a moss arrow. Instead I utilize the other door and take the
winding staircase down two floors (still carrying dead Martello).
I always try to take the
easiest and most efficient route through a mission, while keeping all the
rules intact. This is why I won’t go for the Eye just yet. I want to clean
the basement first, but this requires a small trip outside. The door to one
of the storerooms down there needs to be relocked, and the key has to be
molded using the apparatus in a nearby building. Again to avoid lengthy
backtracking, I’m gonna mold the key before
visiting the basement in the first place. So let’s take that trip now. I use
the back door to exit the cathedral entirely. Apparently, the Eye doesn’t
like me leaving. The portion right outside is dark, but also heavily
patrolled by two zombies, a haunt and an apparition. My exit is through a
hole and down a set of broken steps to the right. Down there I drop Martello
past the corner ahead, he should be safe in the shadows. The plaque on the
wall reads ‘Cloister’, beside the archway I wish to take. The area beyond,
however, are covered by no less than seven enemies, so stick to the shadows
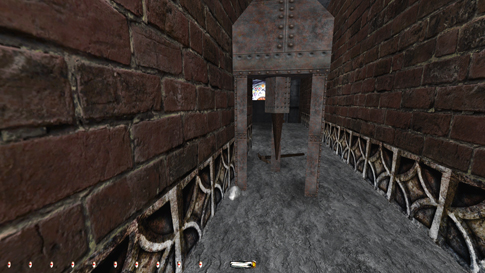
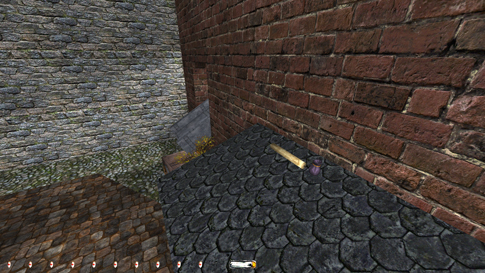
from here on! Fortunately, the entrance to the old factory is just to the
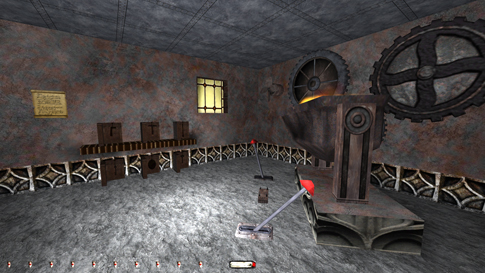
left, and quite unexposed. Inside, I enter the first doorway and make a left
into the molting room (right image above). Patrollers won’t enter this room
directly, however they will walk
the hallway outside, and could sneak a peek occasionally. Six molds hug the
southern wall. Two of them are interesting to me. I will only need one for
the basement door, but I might as well finish this room while I am here and
do both. The molds I need are on either side of the lower row. I first place
the mold on the pegs in front of the melting cauldron, then push the left
lever to close it. Pulling the right lever fills the mold with hot iron. The
gauge in the background signifies when the mold is filled, so I push the
right lever back. I open the cast and retrieve my wine cellar key. Doing exactly the same using the other mold
creates a holy symbol, which will
come in handy a little later. I then put the molds back in place like they
were before, and backtrack to the broken staircase. One can actually mantle
up the ledge to the top of the stairs, although it requires accurate
positioning. I then reenter the cathedral by the back door, and head down to
the basement. The entire basement is
easy (unless you flip the switch to the left), so I’ll be quick about it. A
zombie and an apparition patrol these halls in a circular pattern, but there
are plenty of places to hide. Wading into the shallow water I make a left and
left again to the wine cellar (left image below). I unlock it with the newly
molted key and take the 3 bottles of
fine wine (865) from the racks inside. I also grab Brother Renault from
the floor (I’ll let you know where to drop him). Back out, lock the door and
make a left into a storeroom. A small alcove to my immediate left holds a golden candlestick (915) (watch out
for the pressure plate). Between the barrels to the
right I find 2 water arrows. Within
the small fenced-off kitchen area is another golden candlestick (965). I continue south around the bends and
make a left at the junction. There is some light up ahead, but the patrollers
won’t enter this area. Two silver
nuggets (1065) on the shelf to the right, and 5 stacks of copper coins (1090) and 3 stacks of silver coins (1126) to the left. I have never been
able to figure out the construction in here, although I suppose it is some
kind of safe. That’s it for the cellar, so I return to the ascending
staircase. On a side note, the switch to the elevators is situated in the
southwest room in the basement, although I wouldn’t recommend flipping it for
Supreme. Getting back down to turn it off is a real pain. One last thing
remains before grabbing my elusive prize. I need two crates to leave the
cathedral ground in the least illegal way possible. I’ll get back to that
later, for now just trust me. There is no need to
grab these crates in NewDark (with newmantle enabled), as I will explain later. Therefore,
I ride the staircase to the very top and bring two of the crates here down to
where I dropped Martello. This is also where I drop Brother Renault.
Finally, the Eye. I return
to the room inside the cathedral back door. A journal resting on the floor
tells of ghastly visions in the local cemetery, and a late Brother Murus and his
living friend Martello (whom I know is not living anymore). The door on the
east wall leads directly to the hammer altar. I have never heard of this
method being used before, but I found it easiest to obtain ‘the precious’ by
flinging a rope arrow into the wall behind me (west). It’s got to be placed
high enough to reach the top of the hammer statue, but low enough not to get
hurt or make too much noise when retrieving it and dropping to the ground.
The jump onto the statue also needs to be done from the perfect height. My
feet clunk if I hit the top, so I need to land on the infamous silent edge,
without falling down of course. This can
be done with a little practice, and the easiest method is to aim for the
hammer statue’s backmost (northern) egde. In NewDark, you can easily
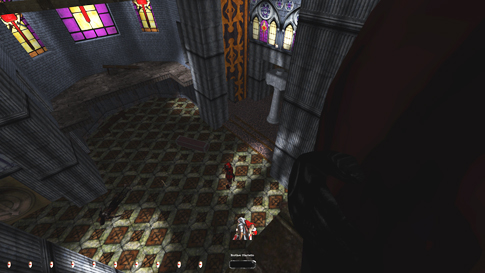
mantle the hammer statue from any side. Now, grabbing the Eye will
wake up all the sleeping zombies, set all the haunts and zombies to patrol
the entire cathedral, as well as spawn one additional hammer spirit to patrol
the same route. This is a triggered event similar to the alarm in
‘Undercover’, and as I discussed then, it is generally accepted not to
constitute a bust. However, if AIs alert after
the fact, it is most definitely considered a bust. The easiest way to
detect this is whether the haunts or the zombies make alert noises. The
toughest one to evade is the sleeping zombie beside the altar. The most
concealed way to grab the Eye is
while leaping back onto the rope on the wall. If I turn back towards the wall
quickly enough, Garrett will grab ahold of the rope at the same instant as
everyone is made aware the Eye is gone (right image above). This will
probably take a couple of tries, but is far from the hardest move in the
game. I can monitor my enemies from atop the rope and wait for them to leave.
Doing it this way, a few of the haunts run towards the altar, and I can hear
some of the zombies make alert noises, but nobody enters hunt mode, as in
changing their movement pattern. That means I triggered the script, but was
never actually seen. When the time is ripe, I climb down, grab my arrow and
leave the cathedral for good. The Eye has sealed the front doors, so I will
have to find another way out. [UPDATE 10/14/2020: My latest attempt at getting the eye yielded the
best result I have ever had, and must be the ultimate outcome for Supreme.
All three sleeping zombie awoke, but didn’t start walking, never made alert
sounds, and remained standing for the remainder of the game. The screen
capture below shows all three zombies in an unalerted
state. Interestingly, if any of them now noticed me (as to what would
constitute a first alert) they started patrolling, but quickly gave a
settling remark. This indicated to me that if the zombies start patrolling
when taking the eye, you have indeed been alerted to what would signify a
Supreme bust.]
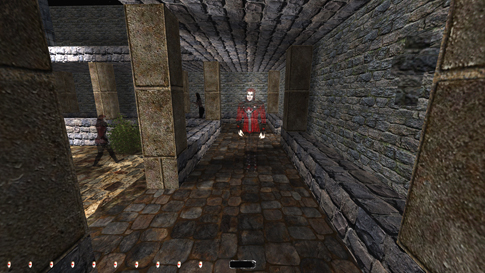
Immediately upon exit, I
run into the ghost from the previous journal, Brother Murus (left image below).
For now, all he says is he’ll assist me if need be, and that he can be found
down by the entrance to the Cloister. Before going
there, I need to loot the garden for some equipment. The southern part has a
fountain with a single water arrow.
Dodging the enemies can be a little tricky. The apparition is the only one
that patrols the garden exclusively, so I wait for the others to leave. Murus
positions himself close to where I dropped the crates and the bodies. He says
he wants to help, but that I need to gather some items for him first. Every
time he is stationed here to collect, giving new instructions. Additional
objective is to ‘aid Murus in order to escape’. The first item he asks for is
his rosary, which he left in his room. He hints to it overlooking the
fountain in the garden. Well, checking the map I know that has to be in St. Yora’s, the old hammer dormitory. I mantle back up the
broken stairs and enter through the door to the northwest.
Remember, two zombies and
a haunt has a rather lengthy patrol route between the outside garden and the
first floor of the dormitory. It is one of those random routes with no
prediction as to when they suddenly turn around and head the other way, but
they all have the same route as far
as I know. My drawn map of the area should outline it quite precisely. There
are no additional patrollers on the first floor, so you only (if such a word
can be used) have to worry about the three. I duck into the shadows to my
instant left. From here I can calmly watch them go by undetected. The ideal
situation is to get them all outside, but this rarely happens. When the
hallway to the south is open I slip into the office on the right corner.
There is a vase (1226) sitting on
a darkened shelf here. I hide beside the desk and wait for the haunt to pass
outside due east. Quicksave. Slipping outside in
the opposite direction as the haunt, I take the second passage to the right,
and stop halfway up the stairs to the 2nd floor. The lower part is covered
in shadows, so I can calmly study the patrollers passing by. Only zombies
this time, three of them. Examining the map before moving is the best bet
here. There are plenty of tight rooms, most of which are checked by enemies
on a regular basis. Two zombies in succession head east. I follow when the
coast seems clear. Looking down this hallway I see two exits to the right
before the open area in the distance. I enter the first doorway following the
two patrollers. Often that is the best bet, at least you know where they are.
Through a room with two bunk beds and into a tiny hallway. The door across
leads me to yet another bedroom, with a chest in the corner. The window
provides a view to the fountain, so this must be Murus’ old room. Both
zombies leave through the other door, so I quickly pick the chest. Indeed,
the rosary beads. The other door
leads to the main hallway, north of the blockade to the left. To the right,
through an open area is another set of bedrooms on either side. Lots of
zombies surrounding me now. The jammed doorway to my right has a pitch black
area where I can stay hidden and observe. I can also reach through the junk
and open the chest across the room (right image above), yielding a purse (1326). The other reachable
chest only contains a bowl. This completes the required pickups for this
floor; only thing left is to get downstairs again. I sneak after the zombies
through the door across the hall, then the door on the right wall and through
the cracked wall ahead. Phew, safe! 3 water arrows can be
gotten from the edge of the altar. The stairs in the corner leads back
down to the 1st floor.
To the right is the
entrance to the dining area. There is a healing potion on the table just
within reach of two stationary zombies’ view (left image above). The book
tells of an explosive device that can blow up the main gates…nice! The
north doorway leads to the kitchen. I should be quick, as patrollers could
come around any minute. Behind the table lies a golden plate (1376) and in the stove a golden goblet (1401). On top of the
wooden beam under the ceiling is a niftily hidden fire arrow (right image above). Use a rope arrow to reach it. I
take a left exiting the kitchen and leave through the door here. Delivering
the beads to Murus I get another assignment, retrieving the Prayer of
Consecration. Murus also delivers one of the best outbursts in the whole
game: “Confound it!” The order of items brought
back to Murus is irrelevant, which is why I won’t head for the prayer book
just yet. Normally he asks for a holy symbol after the rosary beads, but
since I already carry that, he conveniently skips that dialogue altogether.
Entering the cloister I head for the building directly to the front, St. Jenel’s, the old meditation center and observatory.
Fortunately, all the patrollers are busy in the northeast part of town, so
the coast is clear to enter. The door to the left opens to a room with a stack of gold coins (1426). Nothing
else, so I leave this room. Among the cadaverous debris in the foyer lies a
well-hidden hammer (1501). I
approach the doorway to the east when a haunt opens the main door behind me.
I quickly crouch-drop to the lower level and wait for him to leave. None of
the elevators work because the power isn’t on. I shoot a rope arrow into the
wall to get back up, but I mantle onto the north ledge instead, then retake
my arrow. I hear a zombie nearby, but I can’t see him. Yeah ok, he is
stationed behind the lowest staircase pillar, facing east (left image below).
I can maneuver down to the ground floor off the main stage. The chest holds
the cemetery key, which will come
in great need later. On the table is a jar
(1551) for me. I retrace to higher ground and fall back to the lower
level by the elevator.
This floor is a strange
one. There are five doors to the right, all leading to tiny rooms resembling
study chambers or confession booths. The fourth one down also contains a
zombie. Also, the door to this chamber will open automatically if I get close
to it from either side. If I hug the left wall and approach it from the
direct front, it will remain shut (this effect is a little unreliable).
What’s even stranger, if I open the door manually, the zombie, even though
facing me, will only alert with grunts, but not move in place. His grunts
signify 1st and 2nd alerts, but he will stay hanging his head regardless. I
don’t really know what to make of this, other than it could be an engine
glitch. There is probably a script saying he is to take a small patrol after
the door opens automatically (which he does), but when that never happens, he
somehow freezes. I’ll come back to this one later; perhaps I’ll figure
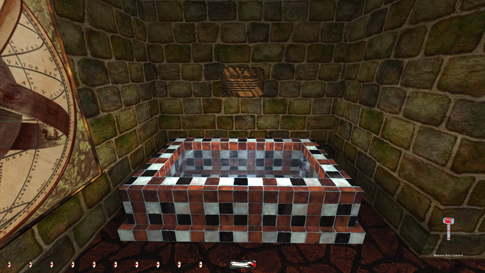
something out. Beside the altar on the floor are 3 moss arrows. The locked but pickable door leads to the observatory. In the steps I find a fire
arrow and another moss arrow. At
the top, a book explains how the Lunar Pool will bless holy symbols. Again to
avoid backtracking later, I drop my holy hammer into the tub and retrieve it
blessed (left image above). Ok, time to leave. Down the tower, past the chambers
and up the elevator chute with a rope arrow once again, this time into the
foyer. As I leave dodging the haunts, I take a left through the portcullis
ahead. The next door to the right leads to the
public bath house and 3 more water arrows. The path continues
east through a narrow passage behind St. Jenel’s,
but it’s a dark and enemy-free path. I stop and observe once reaching the
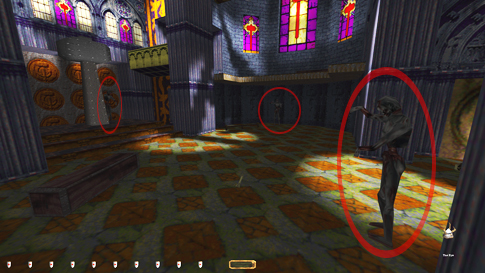
light. Entering the library
relies mostly on patience. The seven patrollers have quite a big area to cover,
so the time should come when nobody is around. Otherwise, following one of
the haunts inside and hiding in the dark nook to the immediate left is also a
clever tactic (right image above). Once indoors, sticking to the shadows
below the upper walkway is a good idea. All the haunts come to a halt in the
southern part of the building before continuing their patrol; the apparition
and the zombies do not. I keep this in mind as I round the left corner. The prayer book is located on the upper
level, but it’s reachable from the ground floor. I suggest roping up first
and memorize its location, then reload and attempt the grasp from below. The separate room to the north has a healing potion on the floor, that’s all. The scroll on the
table in the east end talks about Brother Renault’s blessing ability in the
observatory. I like how the designers always leave clues around for new
players. I leave St. Vale’s and head back to Murus, using the same route
behind Jenel’s. Next he requires the candle from
the night he died. Needy character, isn’t he?
Back to the factory then;
I know the way by now. Where I made a left earlier to get to the melting pot,
I now head right to the workshop. At the end, a staircase ascends to a long
metal walkway. A wrong step will alert whoever is downstairs, so
crouch-tapping is absolutely necessary. It can be a tedious crawl, but needs
to be done. Once on the upper concrete, I look to the south for a mechanical
device. Under one of its legs lies a silver
nugget (1601, left image above). Directly to the
west of this device is another room with an altar. On the left side of it are
two more fire arrows. The west side of this floor has a metal
tunnel leading to what used to be a conveyor belt for waste products. At the
end of it is a slide leading to the outside workyard.
I quietly drop into that, watching for patrollers below. The only thing of
interest here is an old shed. The shed itself carries useless mining
equipment, but on its roof I find Murus’ candle
and a purse (1701, right image
above). In the northern end of the yard is a ladder taking me back to the
streets. I sprint back to Murus as soon as the streets are empty. We now have
everything he needs, so he tells me to meet him at his grave in the cemetery.
Now would be a good opportunity to bring along one of the dead bodies from
the alley here. I bring Brother Renault first. So I take the walk back to the
cemetery entrance, dodging whoever comes in my way. I have to unlock the
cemetery gates, enter with the body, and avoid the looks of any of the four
zombies walking the graves. I also have the seven patrollers in the streets
to worry about. I know it sounds hard, but patience is virtue. I relock the
entrance for safe measures. The zombies patrol all over the place, but are
not really that tough to maneuver. There are walls separating the cemetery
into four quarters, providing plenty of cover. The only area of danger is by
the main gates. I head to the quarter east of here and drop the body in the
southeast corner. There is a hammer
(1776) in front of a grave here also. The north archway leads to the largest
quarter, with yet another hammer
(1851) by a grave to the northwest. Directly south of this our friend Murus
is waiting. He starts giving directions in order to perform the proper ritual
of consecration. It is all self-explanatory. When done, he directs me to go
get Brother Renault and place him in his grave. I therefore head back to the
southeast quarter and bring him to his plot. He thanks me and lets me in on a
secret about the winter tunnels in return. Next up is Martello. Without
further explanation, I go back to the cloister entrance and bring his body to
the northwest area of the cemetery. As before, I put him to rest. The last
assignment Murus puts me up to is to take care of all the haunts; in other
words, kill them! This can obviously be done in countless ways, but Supreme
rule #5 eliminate the use of weapons “that would leave a trace or remnant of
evidence”. Although the definition of this wording could be discussed more
closely, I will only use my sword. One overhead swing to an unalerted haunt is enough to bring it to the ground. Yes
I know some players talk about damage showing up in the stats and therefore
fling hammers at them instead. The reason is that since you don’t carry a
hammer as a weapon per se, the game
doesn’t recognize Garrett as the one inflicting the damage. I am not a fan of
this method, however irrelevant my opinion is. Damage has still been dealt, even though it is not
counted in the normal fashion. This follows quite logically from the haunts
actually dying. They all have a certain amount of hit points (<30), and
damage is the only thing that can reduce it. Supreme rule #12 even specifies
this by equaling hammers and normal weapons “whether they show up in the
stats or not”. But people are entitled to their own interpretations, so if
you see things differently, be my guest and throw hammers till your elbows
fall off. There are nine haunts in
total: four in the cloister, one in the winter tunnels (yet to be seen), one
in the dormitory (St. Yora’s), and three in the
cathedral. I usually kill them in that order, without going into details.
Remember that it’s illegal to alert a haunt before killing it, or to alert any other enemy (including haunts) from
the victim’s dying scream. No other rule than killing an enemy and dealing damage
can be broken. A small hymn will signify the death of the final haunt. I
enter the winter tunnels by the ladder in the basement of St. Jenel’s. I watch out not to trigger the scripted chamber
as I pass. I follow the tunnels and go straight at the first junction,
watching out for the single patrolling zombie. At the next junction, I can
hear the haunt rattling his chains. To the right lies the laboratory
mentioned in one of the journals from before. The haunt has a crisscross
pattern between the various shelves and counters. Whacking him from behind at
any point is good. The laboratory moreover contains a silver nugget (1901) and a diamond
(2001) in the shelves, and a healing potion and a holy water vial on the back counter.
I leave the way I came and make a left. Choosing the
left path at the next crossroad eventually takes me to the room with the
mural pointed out by Brother Renault. On the northern wall in this room there
is a cleverly put button in the upper right hand corner (left image below).
When pushed, it opens a secret passage to a weapons cache containing a holy water vial, a moss arrow, a mine and 4 water arrows.
I then make my way back to the ladder leading to St. Jenel’s.
Ok, for the last two
pieces of loot. The first is the one up the ladder and around the corner to
the left. After experimenting with this chamber, I realize that the zombie’s
patrol is somewhat dependent on where I stand as the door automatically
opens. I assume the trigger sets off at a certain proximity to the door.
Approaching from either side makes the zombie appear and head to whichever
side I’m on, usually catching me instantly. Approaching from the front
however makes him take a straight patrol, turn around if he doesn’t see me,
and head back inside to a standstill. This should be the desired situation.
But there is more to the story than that. If approaching from the front, and
before letting the zombie see me I sprint to say the right side, he sometimes
limits the patrol to only a step or two, and ends up well inside the doorway,
hanging his head. This is the perfect
situation, and having managed this, I am already halfway to my goal. As you
may already know, it is not possible to grab the loot from outside the
chamber; Garrett’s hands just aren’t long enough. And entering the chamber
itself puts me right in the lion’s den. But there is a way to make the zombie
move without causing a 2nd alert.
No, stationary zombies don’t fidget by themselves at all, but nice try. This
zombie is special (well, not that special, as we shall see in a bit). If I
lean in and cause a grunt (1st alert), then lean back out of his view, he
suddenly turns around only to slide back to face the door, as if he is
uncomfortable and fixing his position. A most peculiar behavior for a zombie.
Perhaps his joints are stiff, who knows. I suggest you try it a couple of
times to observe his movements. It can be done several times in succession
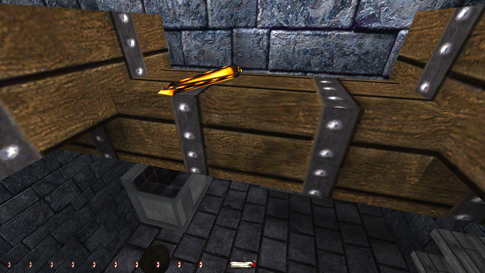
with the same result. As he turns like this, I can rush in, grab the hammer (2076) and sprint back out
without causing any further alerts. I assure you the turning is not
from relaxation after hunt mode (2nd alert). I have played enough Thief to
know that with the current light gem he won’t alert that much. In fact I was
surprised he even gave a growl. [Update January 15th, 2019: The piece of loot above can be
taken for Supreme after all. After the door is open with the zombie stationed
halfway inside, I can close the door, then rush in to block it before it
fully closes. The zombie will give a first alert if it actually shuts, but
leaving it ajar triggers no alert. I can then inch my way closer by opening
the door little by little, blocking it every time. I manage to open it
without getting spotted as much as seen in the right image above. Here I can
lean forward and grab the hammer unseen. I can’t actually see the hammer, but
when the door no longer highlights, I know it’s because the hammer is
highlighted instead. I also make sure to leave the door in the fully opened
position before leaving.] The other piece of loot is
very similar, although perhaps a tad tougher, as I also have to dodge two
patrolling zombies. 1st floor St. Yora’s, beside
where I made my first trip upstairs there is another passage going north,
approaching the dining area from the south. Two stationary zombies are
positioned in two alcoves to either side upon entrance. The left alcove also
contains loot. Same procedure as last time. Lean in from the left (left image
below), relax and wait for the zombie to do his turn (middle image below),
then rush in to grab the golden plate
(2126) (right image below). Congratulations, full loot! It all has to be done
from the southern side of the alcove, both the leaning and the exiting, to
avoid the view of the other zombie. In NewDark, this piece of loot has to be skipped for all
modes. Stationary zombies no longer do their little pivot as a result of a
first alert. Unfortunately, this means Perfect Thief is unattainable in NewDark.
When returning to Murus in
the cemetery, he gives you his gratitude and hands you an armory key (leave it for Supreme).
Notice the objective to aid the ghost now is checked. He says there should be
something in the armory I could use to leave. Yes there is, but unfortunately
it busts all modes. It involves explosives to blow open the cloister gates,
the worst case of property damage by far. I consider it the same way as
whacking a wooden door with your sword until it opens. No objective prevails
here to allow breakage of rules, and there is only one other way to leave the
compound. It saves Ghost but busts Supreme. Before all that, I return the
cemetery key and the rosary for Supreme. Several weird issues have popped up
by now during my escapades through the cathedral proper. The apparition by
the garden fountain has totally vanished, and one of the zombies on the
cathedral ground floor has turned stationary?! The thief world never ceases
to amaze. For Norwegian mode I need to fetch the
stuff from the armory in the cathedral attic (2nd floor). I found the best
way to get there was by the way of rope arrows like before, as the stairs are
too packed. Inside the armory are 2 fire
arrows, the explosive charge
and a scroll explaining how to use
it. Dropping to ground level is easy enough on my way back.
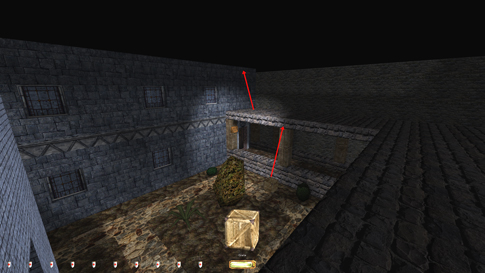
To exit the compound I
need to stack my way out of the garden area (left image above). The overhead
roof of the stony walkway can be reached with the two crates I brought out
earlier. I can only get a proper mantle at the location of the support
pillars. Sadly, the crates cannot be put back; however I can bring one along
in the mantle (pressing jump and use at the same time as I ascend). The
second crate is needed to mantle the western wall from the top of the
walkway. I bring this along too for completion. Strangely, dropping to right
outside the cathedral’s main entrance isn’t recognized as leaving the area. I
only need to follow the thin wall of the fountain garden all the way to the
end. The Eye then has a comment and the mission ends! In NewDark, you can quite easily pass beyond Cloister Gate
without using the explosive device. A nicely timed leap from St. Vale’s
southern ledge gets you across more often than not (right image above). Of
course, this also eliminates the need for crates and avoids the previously
inevitable Supreme bust of leaving one of them behind. Only one crate is
needed in NewDark anyway to climb the garden at St.
Yora’s, since the tree now also can be mantled. The
needed crate can be brought along like before, which still is an arguable
bust, as you are technically not returning it. Time: 1:38:59 Loot: 2126 out of 2126 [NewDark: 2076 out of 2126] (Supreme:
2076) Pickpockets: None Locks Picked: 5 Back Stabs: 9 Knock Outs:
0 Damage Dealt: 270 Damage
Taken: 0 Innocents Killed: None,
and others Killed: 9 Consumables: None Ghost: Success! Perfect Thief: Success! [NewDark: Failed!] Supreme Thief: Failed! [NewDark: Success!] Perfect Supreme Thief:
Failed! Norwegian
Thief: Failed! Notes: -
Grabbing the Eye triggers all cathedral AIs to start patrolling. Some
of the zombies alert, but this is part of a preset script. Hence, no bust. -
Killing the 9 haunts directly follows the mission objectives and is
allowed. -
Skipped the gold plate valued at 50 gold in the zombie-protected
alcove at St. Yora’s for Supreme. The zombie makes
a first alert pivot when spotting you.
Also has to be skipped for regular Ghost
in NewDark. The zombie no longer does a pivot along
with the first alert, which means there is no way to get into the alcove and
get the loot without busting Ghost. -
Exiting the compound required leaving a stacked crate in a patrolled
area. A second crate also wasn’t returned. Busts Supreme rule #7. In NewDark, you can mantle
over the cloister gate with a nicely timed jump from the ledge across the
street to the west. This avoids busting Supreme. |