|
Thief 2 - KATHARSIS Due to several requests to
play and record this mission, I decided to give this brand new release a try.
I have absolutely no regrets. A stellar creation by Personne, a debutant
author, which apparently took him two years to make. A nice changeup from all
the stock texture missions we’ve gotten lately, this takes you to a mechanist
mining facility in a flooded, misty cave system. If you want a challenge,
Katharsis should be right up your alley. However, the story also has a deep,
melancholy tone to it, which I think hits harder than its difficulty and high
level of detail. Two thumbs up! I was to break into Lord
Tomas’ mining facility and locate his precursor mask, which he had been
gifted by the mechanists. Besides that, 5,000 in loot was my other main goal.
I also had an optional objective of no knockouts, which ghosting already
required. Outside Absolutely nothing to
report from the first compound ghosting wise. Didn’t pick the lock on the
first door, but instead swam to the southern building, since that door was
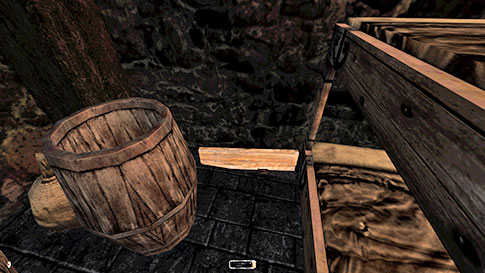
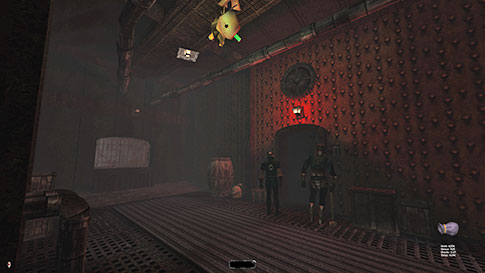
unlocked. Dodged all the guards without issues. Couldn’t fully replace the
board that covered the loot in the barracks. It could only be put sideways,
so I replaced it as best I could (left image below). After getting the key, I
left the elevator on the top floor, knowing I had to return later. Got all
the way to the water tower without issues. I knew where all the loot was from
my practice run; some of it was quite hidden.
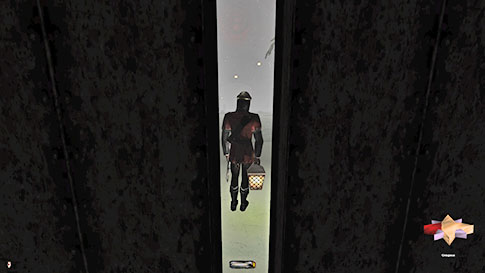
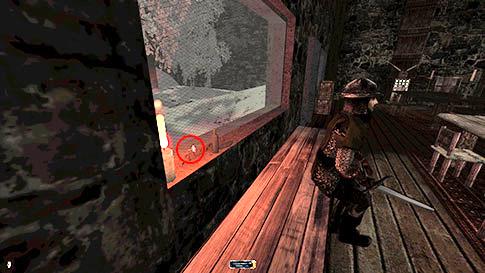
The first problem came
when trying to enter the courtyard outside the mining complex. A stationary
archer was located just inside the entrance gate (right image above). He
commented on the doors opening, which was a bust for Supreme, so I needed to
find another way around. I could easily climb the surrounding walls from
either side. I found a good method from the hidden forest to the north. There
were snowy outcroppings in the wall on either side. I could drop from the
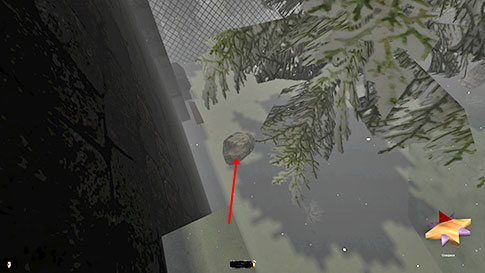
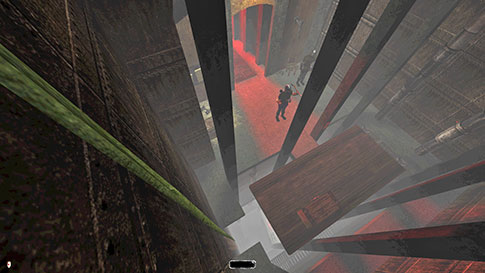
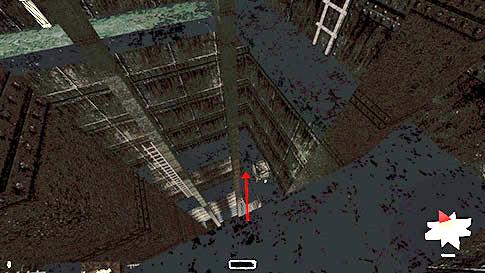
fenced section down to one of these and plan my final descent. I found a
reliable method in the courtyards northwest corner, where I could run off the
aforementioned outcropping and land in a mantle on a boulder below (left
image below). In order to get back up on my return trip, I’d have to use my
only starting vine arrow. I was planning on not needing to pick up any more
equipment for that mode. If you choose to instead use a vine to climb down,
then leave it there for later, I don’t think that would be considered a bust.
Mining Complex The central hub, although
exposed, wasn’t difficult at all. It was bright, but enemies were so far away
that they never heard anything. I could run and jump on the upper walkway
without even a comment from anyone. Cleaned the western end on ground level
first. Could take the purses from the patrolling guards from either of the
dark tunnels in the southeast and southwest. Used one of the wires to get to
the top floor of the central hub. Here I could open the main entrance to the
whole facility, the laboratory gate, or the treasure room gate. I didn’t
touch any of the control panels. If so, I’d have to come back to reset the
switch for Supreme, plus there were other ways into every single of those
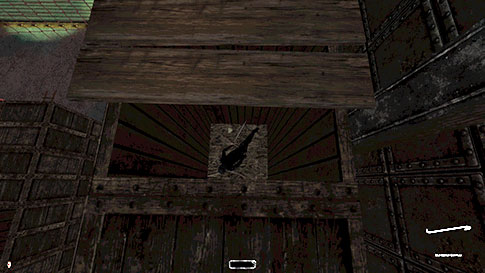
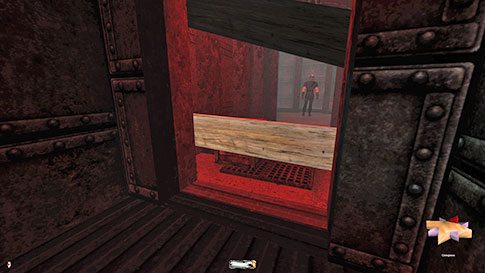
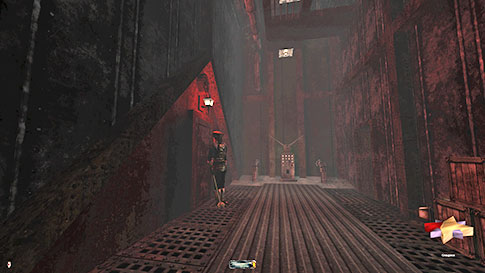
locations. Accessed the laboratory
storage room via the top floor vent. Had my first loot skip in this area. A
sleeping thief was boarded up in one of the crates (right image above). The
only way to get in there was by breaking the boards, so I skipped his purse.
There was a silent crowbar in the mechanist chapel that would remove the
boards without alerts, but it still destroyed the boards and that is
disallowed both for Ghost and Supreme. Had to take the lift up to
the laboratory entrance. It was impossible to reach the ladder any other way.
I could fasten a vine to the metal walkway, but that alerted both guards on
the top level. Getting the crystal shard on the top walkway was very tough. I
had to experiment a lot with vine arrows into the ceiling. There was a
convenient pillar that blocked the guards’ view just southwest of the ladder.
I could hop onto a vine unseen from here, then furthermore mantle up the top
walkway. If I placed the vine so that it hung directly onto the ladder, then
when going back down, I could grab the arrow and catch the ladder in the fall
(left image below). The lamp in here pulsated on and off slowly. If I timed
this drop so that the luminosity was at its lowest, I could quickly hide
behind the aforementioned pillar without any comments.
The biggest challenge in
the mission so far came when entering the laboratory itself. Two boards
blocked the entrance, and as mentioned before, destroying them wasn’t
allowed. Although the lab wasn’t strictly speaking necessary, there was over
500 worth of loot in there. I first tried squeezing through by leaning
forward. I could get my head through on the west side quite easily, but
couldn’t get the rest of my body to follow. Then I tried stacking boxes and
get through in the top left corner, but with the same disappointing result. I
finally accepted defeat and was going to see if I could clip through the
boards with the block-crouch-lean-jump technique I had applied in The Haunted
Cathedral to avoid the Ghost bust there. Placing myself in the western
corner, facing east, I looked slightly down, blocked, crouched, leaned right
and jumped. This got me almost all the way through, but my sword clanged
against the boards and this alerted the guards. After a reload, I tried doing
that move again, but this time without the sword, just with a crouch,
lean-right and jump. It worked!! I got all the way through on the first
attempt! I tried it again just for good measure and was successful a second
time! This was great news, as what I was doing now wasn’t an engine exploit,
but instead a Supreme-clean move. I was simply hopping in between the boards
sideways. It didn’t work forwards or backwards, only from the side. That is
why it didn’t work earlier. After grabbing all the
loot, getting back out was a lot harder. I managed to do it using a fairly
predictable maneuver, but it required using the crate near the guards to
block the jump (right image above). In the same corner as before, if I
crouched, leaned left and jumped, I got my head through, but nothing else. I
realized if I in this position turned to face north and kept jumping and wiggling
the mouse, eventually I got through. This move isn’t reliable more than 1 out
of 5 times or so, even after a lot of testing. The reason I needed the crate
was to stop me from landing on the metal floor. I would instead silently bump
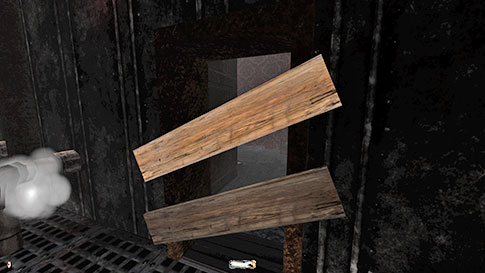
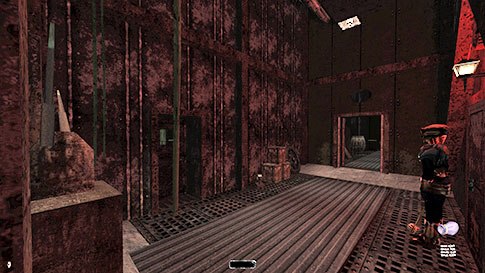
against the box. Mechanist Facility Cleaned
the rest of the central grotto and entered the mechanist facility via the
underwater tunnel. This was the absolute stealthiest way in. The upper floor
was full of metal floors, but had enough shade to dodge the patrollers. I couldn’t
enter the boarded up room in the southwest to get the doll in there (left
image below). The boards were much closer together than in the laboratory, so
there was no room to squeeze through. The upper left corner was the only
place I could get my head through, but only after stacking some items. This
hall was on a patrol route, so that method wouldn’t have been allowable for
Supreme anyway. Regardless, I couldn’t get my body through at all. I tried
the block-lean-jump technique as well, but to no avail. This meant the
diamond from the doll bonus objective had to be skipped.
The
area around the eastern staircase was difficult. The two patrollers covered
the grounds well, plus there was a wary maid downstairs. Although there was
plenty of shade, very few areas had any perfect shadows. If moving, most
guards could see me across the room unless I creep-crouched. Some lights also
flickered or pulsated, which made progress fairly unpredictable. I descended
to the chapel via the big windows instead, then headed to the northeastern
hallway via the windows on the north side. From here I could more easily get
to the coins northeast of the aforementioned staircase (right image above). I
imagine coming from the south to be possible, but very difficult. Now
I could access the vertical mine shaft and the coal tunnels below the
kitchen. There was nothing to report from here, other than having to skip
another piece of loot on the top level of the mines. The mining tunnel was
boarded up, without possibility of getting through. Reached the loot goal up
here though, which was a plus. Reentered the mechanist facility and snuck
west to the main foyer. Had to be super careful moving fast here. The camera
could give clicks indicating first alerts from far away. I cleaned the kitchen
and headed up to the northwest hallway. This area was empty for now, so I
dodged the camera here and robbed Lord Tomas’ quarters. Found the vault code
and his body in the cellar. Also cleaned the cold storage from this
direction, that way I didn’t have to get there from the foyer. On my way
back, two mechanists had spawned outside Tomas’ front door. I got into the
hallway again via the window and stole the slave’s purse (left image below).
It was somewhat tricky dodging the camera while avoiding comments from the
guards.
Another mechanist servant
with a purse had now spawned outside the door to the mine shaft. I tried
approaching from the western hallway, but couldn’t get farther than in the
screenshot above to the right without a comment. For regular Ghost it was
easy to rush around the corner to the left and snatch the loot along the
wall, but for Supreme that wasn’t possible. Coming from the other door was
even brighter. My thoughts then went to the above walkway. I could drop down
from the pipe along the northern wall. The best place would be the northeast
corner, landing on top of the sloped metal wall stud. The problem was how to
get back up there. It took a long time before I finally realized the top of
the walkway was carpet! With angled vine arrows I could perhaps be able to
climb back up. But the only location to mantle up was the southeast corner,
and even that was a very difficult mantle. The pipe here allowed enough room
to mantle, but it was very hit or miss. I experimented a lot with proper
arrow locations and came up with the successful configuration in the screen
capture below to the left. I had to use 3 arrows, so 2 more had to be picked
up for Supreme. The most important rope placement was in the aforesaid
southeast corner. The attachment was also tough to get right, because the
arrow had to stick up, yet the line had to be far enough out from the walkway
to clear the edge when ascending later. I tested to make sure it was
climbable before going for the loot. Dropping into the corner was silent,
luckily. After getting the purse, there was a small pipe sticking out from
the wall in the corner where I was concealed from all patrollers (right image
below). Here I hopped onto the closest vine. Climbing up a bit, I suddenly
turned dark. I leapt onto the second rope over the radio looking device. I
couldn’t climb too far up to make this jump, since a pipe above me would push
me back down. The last jump was easy, but the mantle to the top level very
hard. I saved on the rope and probably needed 10-12 tries. Very happy to get
this move done Supreme clean, despite the reward being a measly 13 gold.
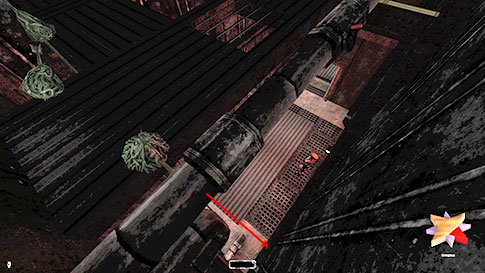
Treasure Room Entered the treasure room
via the top vent, just like earlier in the laboratory. The biggest problem
was dodging the cameras heading down to the vault. I got stuck
troubleshooting for a long time going from the first floor that had a camera
to the floor below. I first tried using the intended ladder, but the cameras
were badly synchronized, so that didn’t work. The light stayed dark quite a
while, for then to go bright for 1-2 seconds. The problem was even at the
darker setting, it wasn’t dark enough to prevent the cameras clicking, which
is considered a first alert and a Supreme bust. I abandoned the ladder idea
and instead looked for other ways down. I tried various locations to drop
landing in a mantle on the level below. The problem was the mantle animation
was slow and the camera below always caught me in the act. I had to find a way
to stay concealed while mantling, which meant dropping to an area protected
by hardcover. The best area to do this was just north of the crate with the
coin stack next to it (left image below). In the southeast corner on the
level above I had hardcover from the camera on this floor. Timing the
watcher’s pivot, I dropped and landed behind hardcover down below. The
maneuver was difficult, but definitely repeatable.
In the vault, only a
single patrolling spider bot was the issue. It wasn’t hard to dodge, but
occasionally it would just stop, never to continue its route. Once, it
stopped right outside the vault door, staring straight at it with no
possibility of entry. Then I had to reload to an earlier save and redo it
all. This time, it didn’t stop until I was in the vault, and then it was
staring straight into the corner of the storage room. I imagine this could be
quite random. Couldn’t reset the code panel to all zeros, so I did ‘1111’
instead. I imagine it doesn’t matter what you put it to, as long as the vault
door closes. It was absolutely impossible to climb back up past the cameras
undetected, so I used the alternate ventilation exit instead. The vents
couldn’t be closed up, but there was no way around that. I then made my way out of
the mining complex and returned to the guards’ barracks. A few new enemies
had spawned by the water tower, three of whom had purses, but none of them
were difficult to dodge. The final thing to do was to return the elevator
key. It couldn’t be put onto the actual sill without waking up the guard, but
it could be placed on the tiny lip of the window just above it. This was close
enough for Supreme, so I deemed it ok. I’m not sure why, but this tiny ledge
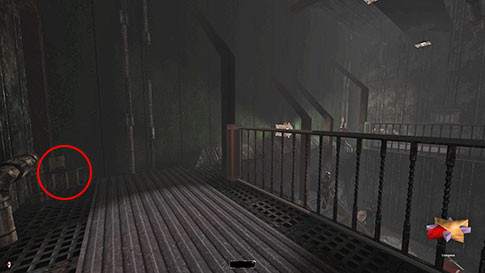
was quieter than any of the other surfaces. Not long after finishing
my run, Matt99 told me the grate above the elevator could be reclosed, so I
went looking. I found a hidden lever underneath the top floor that I never
noticed during my ghost run (left image below). I thus reloaded my last save
and went back to close it. If it can be closed, this is required for Supreme.
The pipes leading up to that floor can be climbed, plus the underside of the
top floor is rope attachable, so getting the elevator key not even necessary
for any ghost mode.
Statistics: Time: 3:17:10 Loot: 7623 out of 7989 Pickpockets: 40 out of 42 Locks Picked: 0 Damage Dealt: 0 Damage Taken: 0 Secrets: 7 out of 8 Consumables: None Ghost: Success! Perfect Thief: Failed! Supreme Thief: Success! Perfect Supreme Thief: Failed! Notes: -
Skipped a purse worth 13 on a thief in the laboratory storage
room. Breaking the boards to his hideout is property damage and not allowed. -
Couldn’t obtain Atropos the doll from the boarded up room
in the mechanist facility. Thus, I had to skip the bonus objective and the
diamond it yielded worth 253 gold. -
Skipped a gold nugget worth 100 on the top level of the
mine shaft. The tunnel was boarded up, with no way to enter. |