|
HEARTCLIFF ISLANDS By
many said to be the hardest fan mission ever made. I agree that puzzle-wise
on a first playthrough, it can be very difficult. But gameplay and ghosting
once you know what to do, isn’t that bad. Moreover, it is an extremely
well-made mission, with a unique, but clever story, plus eerie, tense places
to visit. It reminds me a bit of Into the Odd, where surreal, dreamlike
locations are mixed with more realistic areas. If you give it the attention
it deserves, Heartcliff Islands could easily become one of the most complex,
yet intriguing experiences of your Thief career. Don’t let this one slip you
by. I
had deliberately been thrown into Lord Edward’s prison on the Heartcliff
Islands, mainly in order to obtain a family heirloom known as the Foreseer.
That was my only mandatory objective besides leaving the prison and escaping
the islands. Optional objectives included getting my equipment back, finding
Captain Heartcliff’s pirate treasure, and acquiring 4,000 in loot. It’s not
often obtaining loot is optional. Of course, Supreme requires all objectives
to be accomplished, even optional ones. Prison I
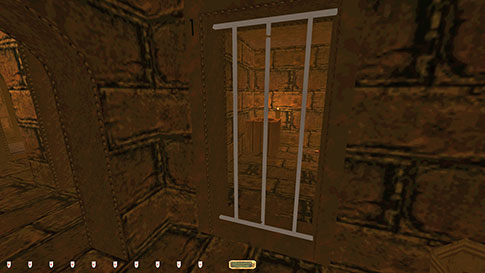
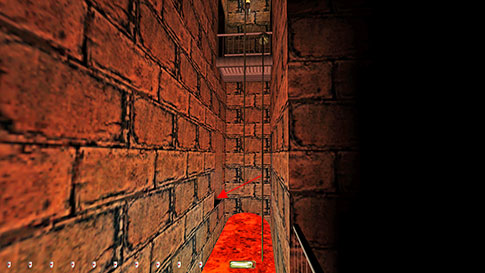
didn’t end up removing the metal rod from the cell door. It would be
necessary in order to complete an optional objective that would spawn later.
However, this seemed like clear property damage to me, not allowed by any
Ghost mode. I could bend the rod after using the file on it, but then bend it
back after escaping. This maintained the integrity of the door and nothing
was actually damaged (left image below). I knew this would be a Supreme bust
by not fulfilling the objective, but property damage is a more serious
offense. [UPDATE: As a response to the
reaction of the ghosting community, I have counted the small cut to this rod as
property damage, and thus a bust to Ghost. I found you can even flip the
lever in the cell block to make the door unfrobbable and thus permanently
locked, but that wasn’t enough to convince them this wasn’t damage. I
reluctantly agree.]
There
were three ways out of the prison area. The western one was only possible to do
for regular Ghost, but not for Supreme. I had to open the door to the control
room and the guard inside heard the door and commented. I couldn’t reach the
lever to the main door from outside the window. If taking this exit for
Ghost, you have to block one of the doors with a potion in order to escape,
since the lever operates two doors simultaneously. I still wanted to take the
confiscated goods key from this guard for Supreme and that I could take from
outside (right image above). Getting to this position without triggering the
watcher was difficult, but I eventually found a discrepancy in the nature of
the cameras that made it possible. The cameras were the old style ones from
Thief 1, but they still made sounds like the mechanists watchers from Thief 2.
However, their viewing angle wasn’t following the light colored patch that
you would expect from Thief 1. Instead it was almost 90 degrees to the right
of this patch. This meant if the camera seemed to be looking straight towards
me, it was actually facing somewhat to the right. Getting past this weird
bug, it wasn’t that tough to dodge any of them. This one by the main entrance
was the hardest though, as there was only a small opening when it pivoted
“north”. There
wasn’t much loot in the prison overall, so it was basically just a matter of
escaping. I found the Foreseer on the lower levels, controlling three haunts
by magical beams. If I got close enough to it, my controls reversed; highly
annoying, but a cool effect nonetheless. Each haunt had a small hammer (not
loot) attached to its upper back. If I took it, a few seconds later, the
haunt passed out and turned (back) into a regular guard. There was a readable
outside one of the prison entrances that talked about this effect being known
by the warden. For each haunt I did this to, the Foreseer dropped one level
down, until eventually disappearing into the bottom lava pool. I was hoping
there would be a way around this, as causing these “knockouts” to the haunts
were obvious busts. I couldn’t find any way into the cage with the Foreseer
either, although there were three non-frobbable locks on the lowermost level.
So I left the haunts patrolling for now. I
realized afterwards that I didn’t need to take the confiscated goods key at
all. I could instead leave via the sewers and fairly easily reach the west
end of the basement after a small swim. In the sewers I also didn’t need to
get the key from the patroller. It worked on three of the doors here, but I
wanted to leave through the drain to get the loot by the eel. In order to
fool the electric eels, I had to use dried burrick pee (yeah, that’s right!),
but although this caused them not to attack, it still triggered a reaction.
The eel hid under a wooden board until the effect wore off, then it came out
looking for me. Once I realized this I understood using the burrick pee
couldn’t be done without busting Ghost, so I skipped the coins in the
compost. I could still leave without it seeing me, I just couldn’t dive down
to the grate to get the loot. I only counted a bust if the eels turned or
moved directly towards me, or started emitting electricity, which seemed to
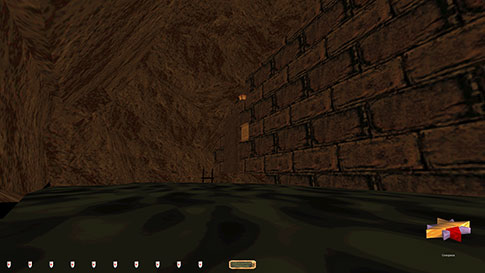
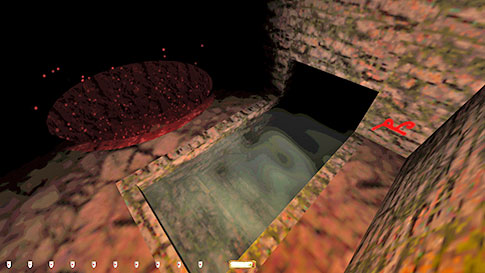
be more proximity based. A grotto just to the east of where I emerged took me
back to the southeast staircase (left image below). Here I could access most
of the floors on the east side.
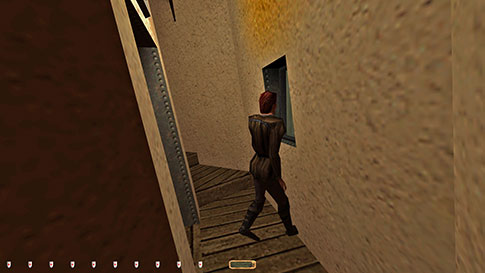
Compound The
upper floors to the east were easy to ghost. I got the armory key from the
guard captain so I could obtain my gear and especially the lockpicks. Cleaned
the hospital floor and the warden’s afterwards. I had to reach the warden’s
quarters from the balcony. A roof to the northwest was close enough to jump
from (right image above). There was a pivoting archer on a roof further
north, but he wasn’t a problem to avoid. Generally, there were many archers
outside the grounds to the north and east, but there were also many patches
of perfect shadows. One
of the parts for the pirate key was in a locked attic above the kitchen. It
could only be accessed by breaking open the shutters from the outside, using
either fire arrows of the sword. This was a clear example of property damage.
Sadly, not only did this mean the pair of coins in the attic had to be
skipped, but also the entire pirate treasure worth 1,527 gold. Of course, I
would try to find a way around it, but my hopes were not high. [UPDATE: Huge news!! The SJS told me there
is a button in the fireplace room that opens the window without having to
break it (left image below).]
Not
too far from here was a room with two sleeping maids. The loot in there also
had to be skipped for Supreme, as picking the lock on the door alerted not
the sleeping maids, but the awake ones in the upstairs kitchen. [UPDATE: WheretIB2 discovered you can open
this door without any alerts using the Hand of Glory. That adds 17 to the
Supreme run.] Once
I visited the holy font below the guard floor chapel, I could obtain and
drink the holy blood potion. This would render the status a ‘chemical success’
for regular ghost, but was not allowed for Supreme. Luckily, drinking this
potion only accessed a few extra loot items and some more convenient
passageways, but to my knowledge is not necessary to finish the mission. Thus
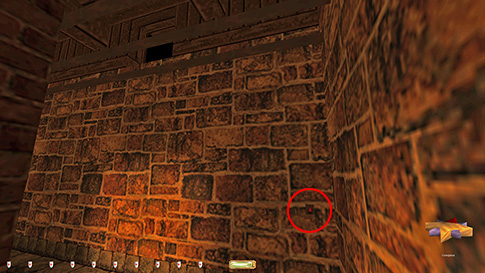
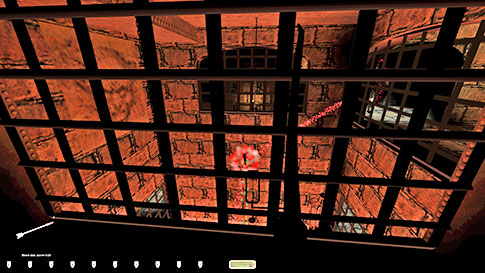
it was skipped for Supreme for now. Prison Again I
now revisited the ventilation shafts in order to finish up a few things in
the prison. One secret in cell block 1 was not possible to get for Supreme. I
had to open up a specific cell with loose bricks in it, but I couldn’t reach
the cell without the control room guard seeing me. First I had to blind frob
the levers through the outside window to find the right one. I could go
through the back door instead but that yielded a first alert. However, I got
a first alert regardless when creeping along the western wall to reach the
cell (right image above). There was no way to avoid this, as the torch on the
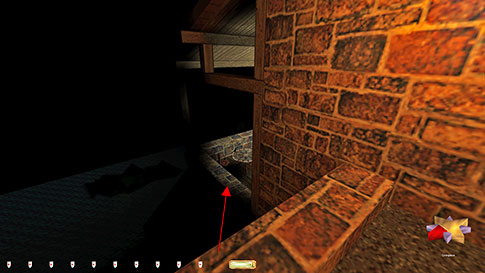
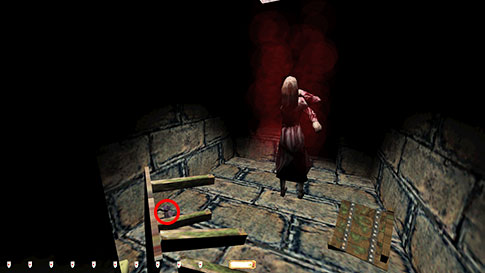
wall was too bright. With
the lucky hand of glory I could also now visit the scary cell on the bottom
level of the prison. It turned out I didn’t need it, however, as there was
nothing but hints to more obscure puzzles later on, but nothing vital to pick
up. I couldn’t pass the weird female zombie in the back room in order to
access the loot beyond anyway. In order to do that I used two vine arrows
from the metal railings above (left image below). I realized later I could’ve
done it with only one, directly from the top railing. Then I could hop into
the back doorway and access the purse by her feet from behind (right image
below). Since I hadn’t drunk the holy blood for Supreme, I couldn’t frob the
glyph down here for that mode and thus not obtain the secret horn. I could
easily get it for regular Ghost.
Next
I accessed the hidden section on the prison’s fourth level by shooting a
water arrow through a grated wall. This lowered a drawbridge that gave me
access to a key and furthermore some secret loot. I could’ve skipped the key
for Supreme, but then I’d have to pick up an extra water arrow to reclose the
drawbridge, so that canceled itself out. This was it for the prison, so I
exited via the cave to the east where I had entered before. Outside None
of the underwater caves were really that difficult. The eels I could gauge
and just enter semi-blind without the lantern on. If they couldn’t see me,
they never reacted. I tried clipping through the entrance to the pirate
treasure lair with the NewDark sword-blocking maneuver, but couldn’t do it. I
was actually quite relieved, as this technique feels like cheating. [UPDATE: All the pirate key parts can be
taken for Supreme, so the lair can be entered and most of the loot gotten.
The diamonds behind the banner cannot be obtained, as they don’t spawn until
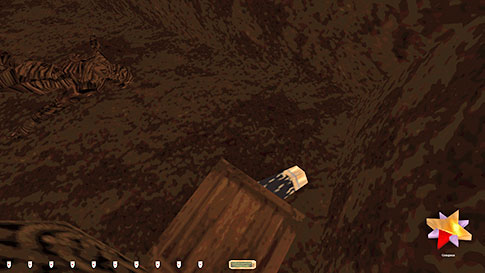
you have slashed it.] Entered the lighthouse where I needed to call the
ferry. Thomas the lighthouse keeper had gotten himself stuck in the hallway,
and no amount of reloads seemed to fix the issue (left image below). This
wasn’t a problem, except I couldn’t return the fuse for Supreme. Technically,
this was a bust, though I know the early days of the community excused such
busts if due directly to a dark engine glitch. Supreme was already gone, so I
didn’t spend any more time thinking about it.
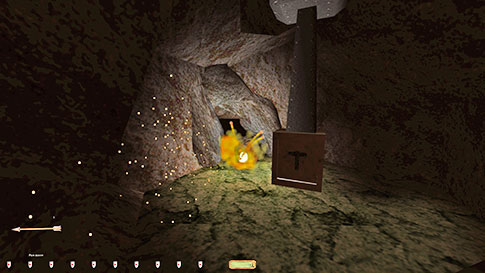
Western Island The
most convenient way of getting to the western island was by traveling inside
the coffin. This also gave me access to the cross once the coffin got burned
in the crematorium, which ultimately yielded more loot. I didn’t count this
as property damage, since it was a scripted event triggered by the female
guard and not by me. I soon, however, realized something quite game changing.
The intended way to enter the underground cave system was by removing some
boulders using an explosive charge (right image above). Unfortunately, this
alerted both stationary guards on the top level. There was no variation to
this result, meaning they both alerted to hunt mode every single time. I thus
had to find a different way into the caves. The only way to do this was by
frobbing a glyph below the compound’s southern well. This accessed a
teleportation pool that took me straight into the caves (left image below).
However, I had to drink the holy blood in order to see this glyph, which
meant Supreme was now forced into drinking this potion. That was another bust
for that mode, but it meant the Horn of Quintus in the prison now could be
taken for that mode after all, which was a nice bonus. The
rest of the buildings on the western island were easy. The crematorium master
key was not necessary to pick up for Supreme. I remembered to send the ferry
back to the eastern island using the button in the control room. I could get
all the loot in the holy water font cave, but I couldn’t ascend via the well.
Instead I had to take the elevator back up and slide into the water, then
emerge in the room with the rowboat and sneak out that way. Then I headed for
the flute and entered the red caves from there.
Caves I
could now reach the tomb beyond the blocked path I was supposed to blow up
earlier by using a teleporter in the room with the sleeping mummy. There was
a glyph on the wall behind a casket, and if I frobbed it and quickly ran into
the pool, I would appear in the cave above. It was interesting that the
rubble could not be blown up from this side. It was difficult to get back
down and still close the casket. I had to use the rat’s blood potion to block
the lid, then grab it as I fell down (right image above). One of the
artifacts from the room with the sleeping mummy was also tough, because the
mummy was too close and always gave a growl. I had to go get a crate from the
sewers in order to get high enough to grab it (left image below). There was a
very convenient portal in the room
to the north that took me directly to the old sewers. Beyond
the colored gem puzzle door there were some more loot that had to be skipped
for Supreme. I had to trigger a trap in order to get covered with a white
mist (right image below). This was the only way to make a door in that area
frobbable and access the loot. The only way to get rid of that mist
afterwards was to drink a healing potion, although that wasn’t necessary to
do.
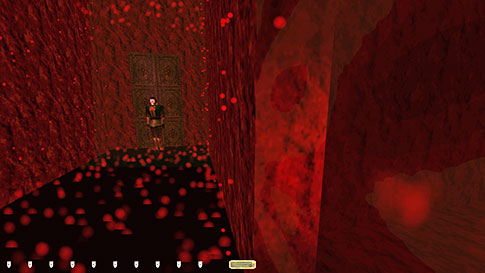
When
I finally reached the cave with the Foreseer, since I hadn’t released it from
the grasp of the haunts, it wasn’t there. I would have to go back to the
prison and try something else. Instead I brought back Dewdrop and the small
mummy and burned the latter in the crematorium. From this I could get the
blood ash vial, which I was hoping would be able to release the Foreseer
without interacting with the haunts. The vial turned my water arrows into
blood ash arrows for 30 seconds. Back at the prison, to my astonishment, all
of the grated walls leading to the lava chamber with the Foreseer were
penetrable to arrows (left image below). And when I used a blood ash arrow on
it, it disappeared!! This triggered a first alert from the top level haunt,
but that was only a Supreme bust. All the haunts kept patrolling too. Back on
the western island, the Foreseer had teleported to the area behind the
dormitory. If I now used the green Dewdrop on the pool of tears, the Foreseer
fell to the ground and completed the objective. Awesome!!!
Endings The
stats below are from the “normal” G-ending. The I-ending is also possible to complete
Supreme clean. It requires the collection of a few extra items, but none of
those would bust Supreme to obtain. The remaining S-, R- and Y-endings cannot
be completed without Supreme busts, because they all require items from the
Heart Realm. Once you enter that realm, upon leaving the first flooded
chamber, you have to take a first alert from the closest haunt (right image
above). I think you have to take several more as you obtain the two Dewdrops,
since each doorway is brightly lit and in view of enemies. The S-ending is
perhaps the most honorable, but requires you to set up a fight between the
two Genowefa witches, which goes against rule #5. However, they only end up
merging into a new green witch, thanking us in the process, so I’m not sure if
that counts as “attacking” each other. The R-ending forces us to kill both
witches individually, so that’s totally out of the question. The Y-ending is
in my opinion the coolest conclusion to the story. It is possible to complete
for regular Ghost, as it only involves an alternate ritual and no further
enemy interaction. But it does require the red Dewdrop from the Heart Realm,
so it cannot be completed for Supreme. In
summary, two endings can be completed for Supreme (G and I) and one more for
Ghost (Y). Two endings (S and R) cannot be completed for either mode. Please
let me know if anyone finds ways to improve on this. Thanks to qolelis for
this amazing mission. I am sad to hear he has retired as a mission author. Statistics: Time: 4:30:43 Loot: 3652 out of 7014 (Possible for Ghost: 6814.
Possible for Supreme: 6149) Pickpockets: 25 out of 27 Secrets: 13 out of 14 Locks Picked: 12 Damage Dealt: N/A Damage Taken: N/A Consumables: 3 Water Arrows, 1 Blood Ash Vial, 1
Holy Blood Vial Ghost: Failed! Perfect Thief: Failed! Supreme Thief: Failed! Perfect Supreme Thief: Failed! Notes: -
Due to the reaction of other players, I have ruled
(reluctantly) that cutting the metal bar in the first cell is property
damage, thus this busts Ghost and makes the run a failure. -
Obtaining the metal rod from the jail cell door is
property damage, so I skipped it. This meant I couldn’t complete the
sabotaging vital equipment objective on the western island, which was a
Supreme bust. -
Removed a light source when taking the lantern in the
prison. It was needed to navigate the vent shafts. Supreme bust. -
Skipped three coins (15) in the compost. The eel
reacted to my presence whether I used the burrick pee or not. Others have
reported being able to take this without getting a reaction from the eel, so
this might be possible to obtain after all. -
The diamonds worth 200 behind the flag in the pirate
lair have to be skipped. They can’t be taken until you cut the flag. -
Skipped a purse worth 17 on a sleeping maid on the
laundry floor for Supreme. Picking the lock on the door alerted one of the
upstairs servants. This can be avoided if using the Hand of Glory on the bedroom
door. Thanks to WheretIB2! -
Skipped the golden bone worth 225 in the prison for
Supreme. I couldn’t reach the cell without a first alert from the closest
prison guard. -
Couldn’t return the lighthouse fuse to the room where I
found it. Thomas had gotten stuck just outside the doorway and heard the
noise. Supreme bust? -
I had to drink the holy blood in order to avoid the a
Ghost bust on the western island. This is not allowed for Supreme and thus
another bust for that mode. -
Triggered a first alert from the nearest haunt when
shooting the Foreseer with a blood ash arrow. Supreme bust. -
Skipped 440 worth of loot behind the gem puzzle door in
the red caves for Supreme. I had to trigger a trap in order to access this
room. -
The remaining deducted loot are those items I didn’t
find during my initial run, instead I used a loot list to locate them. Since
loot lists aren’t allowed for any Ghost mode, I lowered the total to reflect
this difference. -
The damage dealt/taken stats are omitted because they
are not shown in the in-game end stats, along with several other ones.
However, I didn’t deal damage at any point, and naturally didn’t incur any
knockouts or kills. |
|
|