|
THE VIOLENT END OF DUNCAN MALVEINE This
mission was chosen by DirkBogan as the winner of the third Thief Ambience
Competition. It was selected as a changeup from my traditional predictable
romps. This is a highly variable, but superbly crafted detective story set in
a Victorian mansion. Most of the essential plot details are randomly
determined upon starting the mission. I absolutely loved The Turning of the
Leaves, my previous endeavor by nicked, and this one is up there on the same
level. Top tier stuff! Before being given any objectives, I had to choose
my point of entry into the Malveine proper. There wasn’t any real gameplay
difference between them. I chose the default service entrance in the
southwest. Once spawning on the property, I received all my objectives. At
this point, all the randomized elements of the mission got set. My main task was
stealing the Star or Seraphine from the main vault. However, I was to frame
someone else for the crime, meaning I had to sacrifice 1,000 of my loot and
leave it in their quarters. Additionally, I had to find out who killed Duncan
Malveine and identify that person by turning on his or her portrait light in
the Armour Gallery. Whether this was the correct person wouldn’t be revealed
until after I finished the mission. However, even if I got it wrong, the
objective remained checked off as successful, so it wouldn’t be a bust to any
mode regardless. Furthermore, I had to find out who hired me to do this job,
probably in a readable somewhere. Lastly, in addition to the 1,000 loot used
for framing, I had to procure 3,300 more in valuables. Bottom Floors In
climbed into the southwestern part of the garden immediately and cleaned the
entire outside. There would be no need to return here later, so it was better
to get it out of the way. I reentered via the northwestern basement entrance,
arriving at the bottom of the foyer staircase. The entire basement was easy,
except for perhaps the kitchen. The cook had a predictable route and there
were a couple of dark spots. Nothing worth reporting. Found the murder scene
in the wine cellar. This was different from my first playthrough, so I had no
clue who the murderer was at this time. Climbed the ladder in the southeast
to the ground floor. On
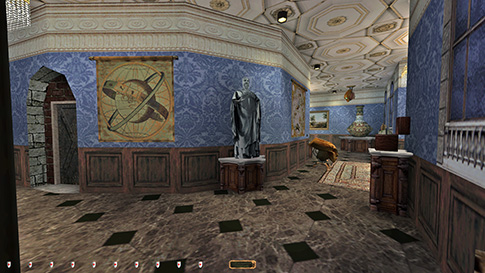
this level, the entrance hall to the west was difficult, though I didn’t
really need to deal with that area. The art gallery to the north was horrible
(left image below). Tiled floors, bright lights, and two cameras pivoting
asynchronously. Not to mention two guards who patrolled through here. The
three pieces of loot in the gallery were all located close to exit doors, so
I used the adjacent areas to visit the gallery from multiple angles,
relieving me of the need to pass through the room.
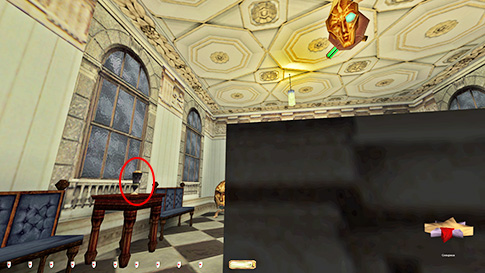
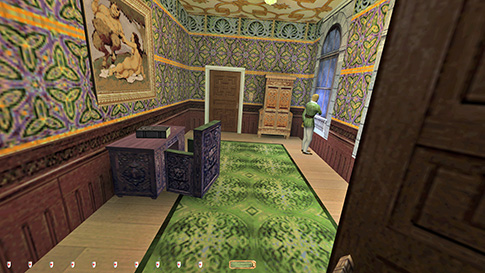
The
first floor was worse, especially the areas to the east. A lot of patrollers
occupying multiple hallways made it tough to anticipate safe areas. The tiled
room above the downstairs pool had a difficult piece of loot on an end table
(right image above). I didn’t find a way to pass this room without getting
caught by the watcher. I could stay hidden behind the fencing on the north
and south ends, but not along the eastern rim. There was also a guard going
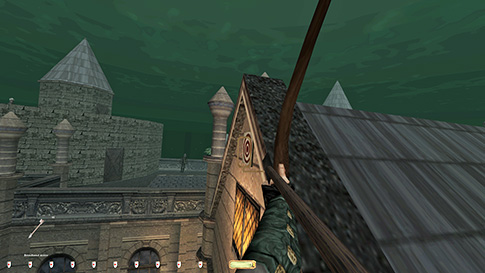
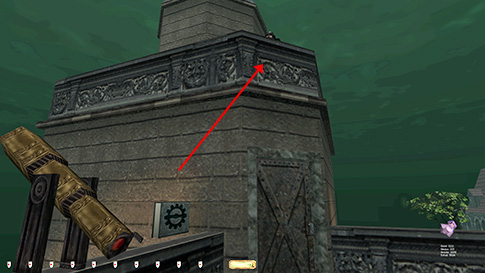
through here at times. Instead I had to ascend to the roof through Duncan
Malveine’s quarters. Up there I got a few pieces of loot, including the
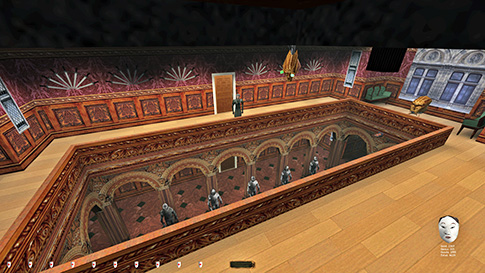
hidden chest from shooting the targets (left image below). Further
south I could climb down to the upper level of the Armoury Gallery. In this
room, the only safe spot was at the top of the ladder I was coming down from
(right image below). From here I could time the watcher and grab the four
masks. I didn’t need to drop to the lower level yet. I would return once I
knew the murderer for certain. I already had a pretty good idea.
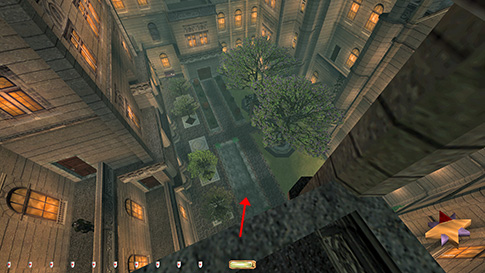
Rooftops Circumnavigated
the second floor clockwise and ascended to the roof via the north tower. Had
gotten all the cards by now and made the keys in order to get the idol later.
This objective really wasn’t in the spirit of Supreme to complete, as it
required a lot of extra pickups and necessitated multiple irreversible
changes. I knew the mission couldn’t be Supreme ghosted up front, but if it
had been, I probably would’ve left the playing cards be and skipped this objective
altogether. It isn’t a bust if you choose to finish it though. The
biggest problem so far for Supreme came in the northwest tower. A stationary
guard on the balcony had a purse worth 100. However, he commented on both
doors, and first alerts aren’t allowed for that mode. I hadn’t skipped any
loot as of yet, and I wasn’t about to start now. I was really surprised he
alerted to the door to the bottom floor, as none of the other tower guards
did. If he hadn’t, I could’ve mantled the door and taken his purse by leaning
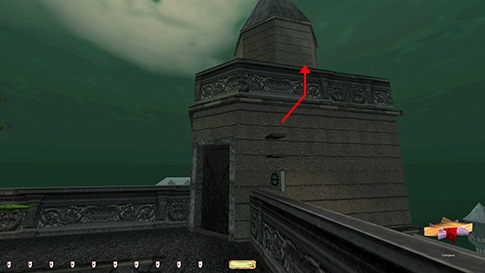
towards the railing. Instead, I fetched the security manual from Duncan’s
bedroom and jumped on top of it on the railing next to the telescope (left
image below). From there I could lean over and grab the purse. Luckily,
nothing else of importance was located in this tower. If the electrified
floor switch had been here, it would’ve forced a Supreme bust.
The
southwest tower had a similar, yet much worse, problem. Another archer
guarded the top balcony. He didn’t alert to the bottom floor door, only to
the top one. There was a piece of loot in a toolbox on said balcony, not
reachable from anywhere below. I would have to get onto the balcony unseen if
I wanted the loot for Supreme. I first tried jumping from on top of the door.
Although I managed to mantle up, it was smack in front of the archer and he
went to full alarm mode every time. I would have to make a stack, but a
bigger one than just the security manual. I tested a bit and found I needed
two more books. Any of the books with hints to the card locations would do. I
grabbed the book of spades from the clocktower and the book of clubs from Duncan’s
quarters. I would have to return the security manual to his quarters anyway,
so it seemed the most logical. The ledge northwest of the tower door was
best, as it was dark (right image above). I had to time the other guard
patrolling the balcony, but he stopped and faced away at several points
during his route. There was also a patroller on top of the vault roof to the
east that could see me. I had to leap towards the west and mantle up as far
away from the balcony guard as possible. After just a few tries, I got it.
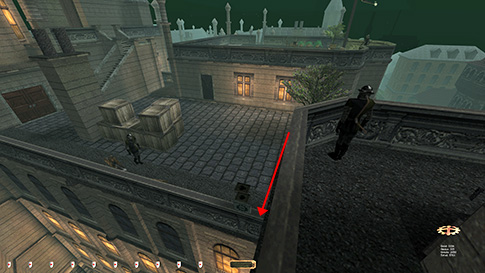
Getting back down was also a bit tricky. I had to drop to the same ledge I
ascended from, but I had to reduce my velocity to a minimum. I couldn’t run,
jump or generate any speed whatsoever. I inched along the balcony railing
until I was right above the westernmost edge of the fence below (left image
below). As slowly as possible, I slid off the edge. If done perfectly, I
would land between the stack and the wall, bumping into the books some. Still
no alerts! Awesome!
The
vault security room door was nearby, so I tackled that next. Unfortunately,
the whole vault situation was an inevitable Supreme nightmare. I had already
turned off the electrified floor. There was no way of setting foot in the
vault without that being off, though I don’t consider that a bust. However,
the vault camera or the outside lights also had to be taken out. I chose to
temporarily switch off the camera; it seemed the less severe. I also realized
the first time around that the vault guard springs the alarm if he finds the
vault door open (right image above). I thus had to time his movements and
punch in the code the instant he left his stationary spot. He had a fairly
long route, so there was enough time to do my deed in between his rounds.
Luckily, the outside camera couldn’t see anything on the floor outside the
vault door, only up by the controls. I had brought the bag of compost from
the vault roof as a counterweight to the diamond. Since the bag could be
picked up again, it was a Supreme bust to leave it there. Two busts in total
for Supreme.
Cleanup I
returned the book to the clocktower and robbed Raymond and Lucy Malveine’s
quarters. Picked up his key so I could visit his dungeon. Disappointed not to
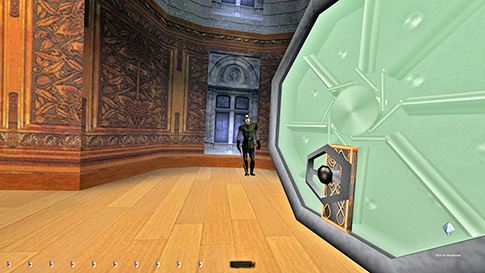
find loot there. Leon Malveine’s chambers was in the same hallway as the
dungeon, and it was quite tough to rob. I had to block his bedroom door open
and hide behind it to stay concealed (left image above). The door blocked the
light source and actually made my light gem darker. Don’t think I’ve seen
that before, to be honest. He stayed with his back turned in his bedroom, so
I could loot the chest without worries. Returned
Raymond’s key and went back to the roof. One bonus objective was jumping into
the courtyard pool from the vault roof (right image above). It could easily
be done without alerts. This was a great way to get back to the lower levels
quickly. Returned the books to Duncan’s quarters and went to the Armour
Gallery. It seemed like Dorian Thornwood had falsified the testament in order
to inherit the vineyard. However, there were not a lot of hints to this. The
biggest clue was a half-burned document in the fireplace in his bedroom, but
this could easily be missed. There was no murder weapon either, as he was
drowned in a wine barrel. Next
I reset the electrified floor switch and grabbed the sack of loot from my
starting location. Since the lawyer wasn’t a member of the family, he could
also be framed for the diamond theft. I felt this was the most honorable thing,
as framing an innocent person for my actions seemed harsh, especially when it
led to hanging. The lawyer was already corrupt and had himself killed
someone. The last thing I did was grab the idol from the basement vault.
Again disappointed there was no loot in there either; it seemed a lot of work
for not very much gain. Finished the mission in the sewers. Statistics: Time: 2:31:30 Loot: 5011 out of 5011 Pickpockets: 1 out of 1 Secrets: 11 out of 11 Locks Picked: 2 Damage Dealt: 0 Damage Taken: 0 Killer Successfully Identified: Yes You accused Dorian Thornwood of the murder. You accused Dorian Thornwood for the theft of the
diamond. Pages of Gregor’s missive found: 13 out of 13 Iron Playing Cards found: 52 out of 52 Consumables: 2 Broadhead Arrows Ghost: Success! Perfect Thief: Success! Supreme Thief: Failed! Perfect Supreme Thief: Failed! Notes: -
Had to turn off the watcher in the vault in order to
obtain the Star of Seraphine. Supreme bust. -
Also had to leave an item on the pedestal when taking
the diamond in order not to trip the alarms. Since this item can be retrieved
and returned, it was another Supreme bust to leave it behind. |
|
|