|
Thief 2 - DISORIENTATION Hands down one of the best
thieves’ highway missions of all time. Melan shows his highest quality in
this astounding sequel to Bad Debts. A difficult, yet mesmerizing trip
through the city’s network of aristocracy, corruption and crime. This is a
mission everyone should play at least once. You can truly tell he has matured
as an author since his debut mission. Although it’s built on a similar
premise, the layout, progression and detail is on a whole different level.
Top notch! My tasks were really
simple. I was to break into Lady Azamlarg’s and steal her scepter. My loot
goal was 2,400 and I had to make it back to the starting street. That was it.
I also had instructions from an unknown associate to bring the body of Issin
the Exchanger from the Widow’s Way gallows to the cellar of the Old Bell
tavern. In exchange I would get a key accessing Azamlarg’s palace. These
instructions, however, were not a part of my objectives and thus not required
for any ghost mode. For Supreme, I would even say it would be a bust to
complete this task, as it involves moving a corpse from a public plaza to an
indoor location, plus spawning and picking up a key unnecessarily. Not to
mention the risk involved in meddling with affairs of this nature, especially
if it doesn’t give Garrett a required benefit. I knew from playtesting that
there was a different way into the Lady’s grounds, one that didn’t involve
the key. Likewise, there were exits that also didn’t necessitate said key. So
whether accomplishing this task was doable or not for Supreme, since it
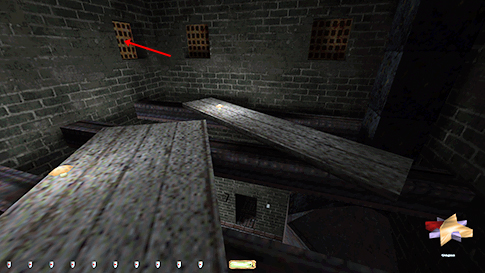
wasn’t mandatory, I’d rather steer clear. Lady Azamlarg The city layout forced me
southwest. I couldn’t pass on street level beyond the market, so I ascended
the attic just south of the canal (left image below). From here, I had to go
through Beaurigard’s. The watch station had two entrances, a door and a vent,
but both were in plain view of a stationary guard triggering first alerts.
Beaurigard’s wasn’t difficult, except I had to skip the torc in the treasure
room for Supreme (right image below). It was linked to unavoidable spitfire
traps, which aren’t allowed for that mode. I could easily take it and avoid
damage for regular Ghost though.
I got to the mercantile
guild by leaping across the market. Passed this building by climbing the
chains and approaching it from the vent panel. That way I could get the torcs
from the ceiling statues. Nothing else to report here. Exited north of the
clocktower where I found a harp in one of the windowsills. Descended to
street level and headed back east. The establishments at the market had to be
cleaned coming from the south. The owner of the produce store entered his
shop occasionally, so I didn’t have to pick his lock. The key to the
alchemist’s could be taken behind a loose stone on the top floor of the stonemason’s
(left image below). Very clever design element that. This was the only store
that necessitated lockpicking. Lockblocked the alchemist’s door so that I
could return his key before leaving.
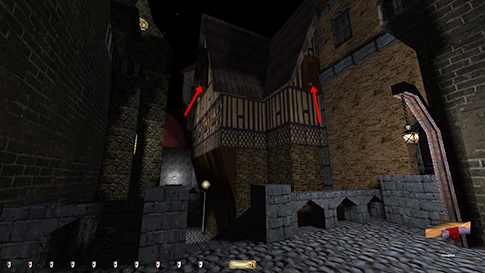
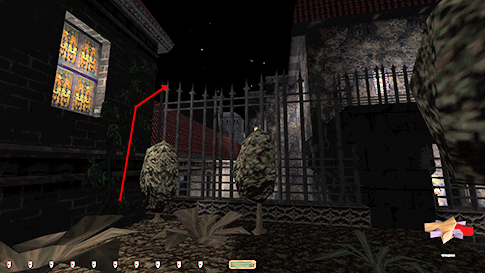
Followed a patrolling
archer further east to Bailiff Street. There was a gate here into an elevated
garden, but I wanted to avoid picking it. Instead I went across the roof of a
thief’s apartment to the north. Some hidden valuables in his attic also. From
this garden I could climb a vine and jump the tall fence to the west (right
image above). How Garrett can walk on top of spear-tipped fence posts is
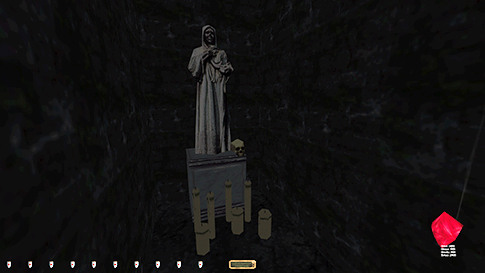
certainly a conundrum, but regardless. This was directly above Azamlarg’s
backyard, and with a precise drop, I could either land in the fountain or
mantle onto one of the statues (left image below). Soon inside her premises,
I realized a problem. The vault accessing the main objective was behind a
pickable door that couldn’t be relocked. It couldn’t even be closed! Although
Supreme doesn’t disallow leaving doors open that cannot be reclosed, this
seemed like something I really should try to avoid. Her prized scepter
missing and the vault door is wide open? That doesn’t seem like much of a
ghostly thing to do. The workaround lay in the fact that the vault could be
accessed from the outside, using one of the two ‘escape route’ keys. One of
those keys was located inside the vault, which was pointless. The other one
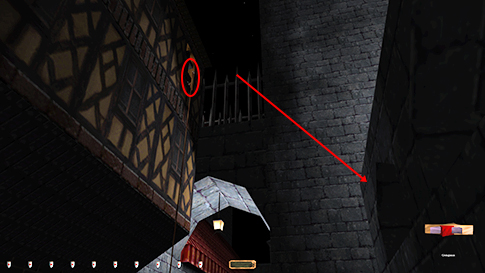
was found along the other escape tunnel, close to the tavern basement. This
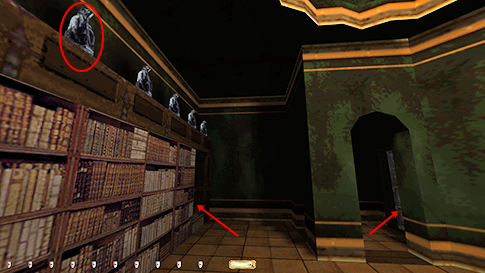
was the one to use. I could get to it by frobbing one of the statues atop
Azamlarg’s bookcase (right image below). I could then leave through the
tavern and make my way back to the street where I dropped from the mercantile
guild.
The issue now was I
couldn’t get back up to that plateau to access the palace vault. The market
was also blocked by a swordsman outside the courthouse, and there were
nowhere to attach a rope arrow along this entire street. Instead I had to
return to the plaza on Bailiff Street and climb back up the side of the
canal. Then, instead of heading towards the palace, I went north against the
canal current (left image below). This wasn’t a route I had planned on taking
until later, but it was necessary in order to avoid first alerts. I could now make my way
north completely unbothered. Traveling along the canal from one end of the
city to the other was probably my favorite aspect of this brilliant mission.
I could now also clean out the east end of the watch station with no alerts.
There was a hidden purse on top of a rafter in there that was easy to miss.
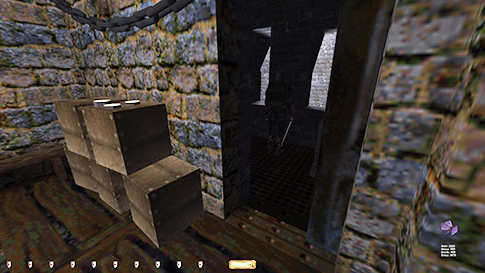
Further north I passed through a power station, robbed an apartment with lots
of crates, and even found a hidden keeper compound with loot far above the
city. I ended up through the gate right by the starting point far north on
Trundle Street. I could ascend the roof
just north of the market and pass through the mercantile guild like before.
Just outside the guild’s southern window I found the back door to Azamlarg’s
vault (right image below). It felt good to steal her scepter without touching
the intended door. There was a button on the inside that opened it, but that
also didn’t work for reclosing. Another copy of the escape route key was here
also, but I left it be, as I naturally had to return the one I already got to
the other location.
Back in the streets I
looted my way southwest. Nothing much to report. I stayed on the thieves’
highway as much as possible. A few wine bottles and goblets on ledges and
balconies, but nobody in the streets below could spot me. Only a lone archer
wandered the walkway up here. I had opened the side gate to Azamlarg’s
courtyard from the inside earlier, so I reentered her palace the same way as
before, through the courtyard window. I then went down to return the key and
returned upstairs to leave her premises. It was more tedious yes, but it
avoided the need to sneak in or out of the tavern again; that place was just
too crowded for my liking. It didn’t feel Supreme-like to risk the heavily
patrolled streets there either. Tarnished Key Since I wasn’t getting the
body from Widow’s Way, the only task remaining was stealing valuables. What
forced my hand in that regard was the tarnished key from Gill’s place. It was
needed to access the keeper sanctuary in the power station, and it also
needed to be returned for Supreme. My route was also limited by a few pickable
doors that I wanted to avoid, plus a few other less Supremeable pathways.
In order to avoid the
streets, I made my way through the steel mill and the warehouse to the south.
There was only a single guard in there. I could drop from the crane lines
directly into the canal below. From here it was a straight shot to Gill’s
place and the aforementioned key. There was also a very well hidden purse
here behind the canisters on the top shelf (left image above). On my way back
to the canal I looted the poorhouse. There was a patrolling thief in there
that was tricky to dodge. The best way I found was to wait in the ladder for
him to go through the door below (right image above), then quickly head for
the door at the end of the hallway. It was a long pick, but I could just make
it before the thief came back. Used a similar method leaving. There was
another pickable door upstairs that would’ve taken me straight back to the
warehouse from before, but it wasn’t necessary. Instead I took the long haul
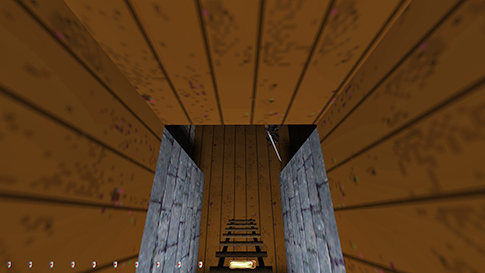
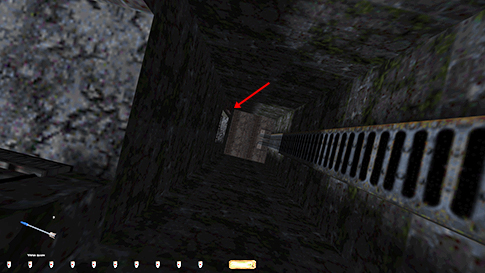
along the exposed streets. This time in the warehouse
I took a ceiling grate towards the north (left image below). I had a hard
time finding this the first time I played this mission. It took me to a
sealed off section spoken of in a few readables. For Supreme, all this really
did was enabling me to access the power station in the cleanest way possible.
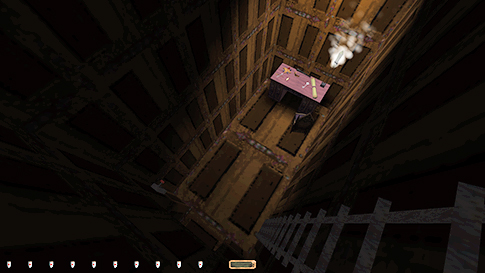
More on that later. In the elevator shaft, I had to ride to the bottom level
to retrieve a key. This unlocked the top floor, but I had to return the key
immediately, as I was not planning on returning this way. Resetting the
elevator was also a bit tricky, as most of the lift panels had broken
buttons. Luckily, the button for floor three (which is where the lift was
stationed when I arrived) was working on the floor below where I was at. If
leaning out, with an accurate aim I could shoot an arrow into the correct
button (right image below). I chose to use a water arrow, but any starting
arrow would do. A moss arrow would probably be discouraged for Supreme, as it
leaves visible evidence.
Unfortunately, two more
pieces of loot up here had to be skipped for Supreme. Fireballs shot out
before I even got close. I could take the rubies for regular Ghost though
without getting hurt (left image below). This area gained access to a ledge
system above Ore Street. If I accessed this area directly from the warehouse,
I had to loosen a floor panel that couldn’t properly be replaced, which I
didn’t like. This felt like a better approach for Supreme. I could jump
across the street, but had to quickly scoot in behind the lowering gate
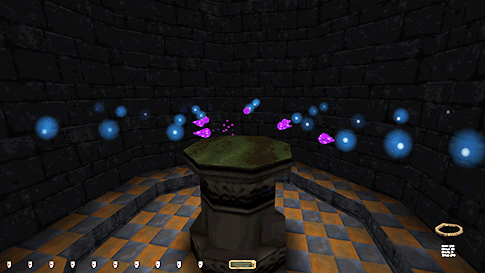
closing behind me. Further north I found my way into the power station above
the canal falls. This was where the tarnished key was used. The readable at
Gill’s place had talked about the corpse on which the key was found came from
a person living in the canal maintenance system. Under his bed was a lock on
which that key worked (right image below). It accessed a hidden keeper
sanctuary with three more pieces of loot. I simply dropped down the waterfall
to get back to Gill’s and replace the key afterwards.
Going Home I decided to now take the
route home via the Hammer Priory, as this was the only area of the map I had
yet to explore. There was a couple of very alert hammerites just outside the
priory entrance, especially the archer was particularly wary. A few coin
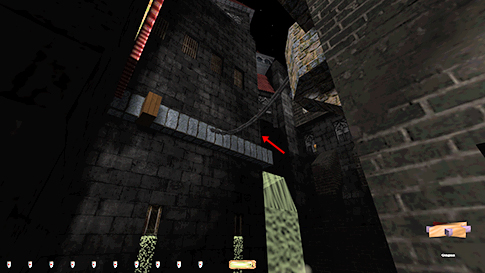
stacks sat in a windowsill just north of a bridge here. In order to avoid
picking the lock on the door leading to the bridge, I instead used a rope
arrow into the window frame (left image below). The outside wall of the
building wasn’t wood, neither were the window panes, but the actual inside of
the frame was wood. It was a bit tricky to attach the rope successfully, but
after not too long I found the right angle and velocity. Timing the guards I
climbed up, quickly grabbed the loot, and mantled the bridge fence. From on
top of the bridge I could hide from the wandering archer and grab the rope.
Then I had to hop back onto the stony fence outside the priory entrance.
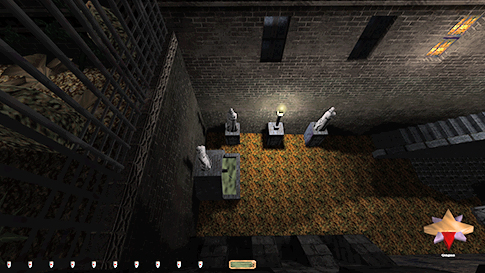
Landing in a mantle was the best way; silent and harmless. The final challenge came
on a balcony with a patrolling thief just south of the Brosius Estate. He had
a scripted patrol where he checked a locked door. Since the door didn’t open
by just frobbing it, he continued along his patrol path. Once I unlocked the
door, strange things happened. It seems like he was just scripted to operate
the door, and if the door was then
open, he’d run inside. So if I closed the door after picking it, he would
frob it open and run inside. If it was open, however, frobbing it would close
it, so then his script told him to just resume his patrol. Strange. If he
ended up inside, a few different things could happen, and this is where his
script seemed incomplete. If I just hid in the shadows inside this room, he
sometimes just turned around and headed back out, usually leaving the door
open in the process. Other times he would run through the other door and
station himself closer to the canal windows (right image below). The latter situation
was for me the most common. I could take the loot before this happened, or I
could sneak out there and steal it behind his back. The sliding door usually
was left open, otherwise he would most probably have alerted to the sound of
it. I don’t consider this scenario a bust to Supreme. The thief never
verbally alerted to seeing or hearing me, nor did he ever encounter a door
left open by me. The only argument against it would be him triggering to the
door being unlocked, but picking locks are not against Supreme rules.
Additionally, his behavior is scripted, which has previously been ruled as ok
when ghosting, as long as nobody sees or hears you in the process.
The rest of the trip home
was without further issues. I emerged from the gate on Trundle Street like
before. Excellent mission! Statistics: Time: 1:53:10 Loot: 3500 out of 3500 (Supreme: 2950) Pickpockets: 3 out of 5 Locks Picked: 11 Damage Dealt: 0 Damage Taken: 0 Consumables: 1 Water Arrow (to reset elevator in
abandoned warehouse) Ghost: Success! Perfect Thief: Success! Supreme Thief: Success! Perfect Supreme Thief: Failed! Notes: -
Skipped the torc worth 250 in the treasure room at
Beaurigard’s for Supreme. Taking it triggered spitfire traps around the room. -
Skipped two rubies worth 300 in skull in abandoned
warehouse for Supreme. Again the triggering of traps necessitated the skip. |