|
DIRTY MONEY - [72 Hour Contest] This
is probably my least favorite DrK mission so far,
although that says more about his other creations. It’s very impressive to think
about this being made in less than 3 days. It’s very good looking, and The
Pit is plain awesome, though it does suffer from very confusing navigation in
the sewers and city section of Knavesbury. If those
areas had been simpler, this would’ve jumped from a good to a stellar
mission. Rest assured, I will continue to play DrK’s
releases until the sun swallows the moon. I
mainly had to find my way to The Pit in Knavesbury
and procure a holy hammer stolen from a local chapel, as well as obtain some
reports on the Ivory Rose Casino. My loot goal was 1,700, before needing to
make my way back to Aberstreet, the initial part of
town. Aberstreet The
area surrounding Aberstreet wasn’t difficult. At
first I thought I had to wait to trigger the extra patroller involved in the
bridge conversation, but this wasn’t necessary. The streets had enough dark
spots to dodge them all. The only slightly tough area to ghost was to the
east, surrounding a street with a patrolling archer on a patio above. There
were a few coin stacks on the rafter in the staircase that I had to grab from
a rope. He didn’t hear me drop to the ground afterwards. Just west of this
was another stack of coins in a windowsill. I had to grab it from a beam and
then quickly jump to dark statue nearby before the aforementioned archer
emerged. This took a few tries to get right, but quite repeatable. Another
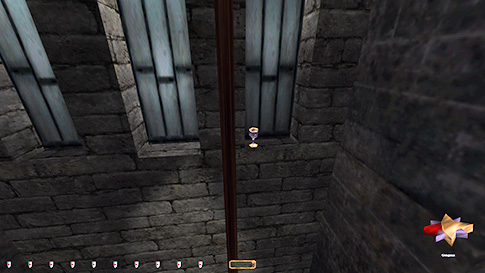
windowsill had loot above the canal. I couldn’t get to it from below, so I
utilized the wooden beams sticking out from the top (left image below). I
couldn’t retrieve the rope safely, so I returned to the roof and approached
the bridge again from the south.
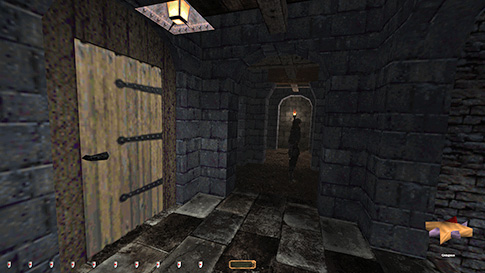
I
didn’t have any big issues west of the guardhouse. A sleeping lady in an
apartment owned some loot that I stole. Getting back down took timing of the
patrolling swordsman. I grabbed the rope and fell to the street. It was loud,
but if he was at the eastern end of his patrol, he didn’t say anything. Snuck
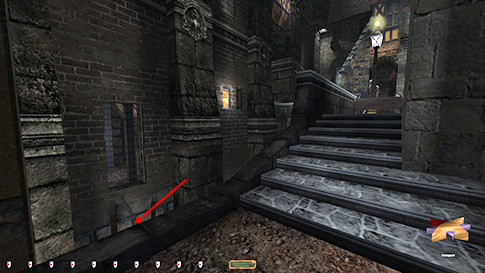
along the left side to pass the bridge guards alert free. There was a ladder
here that brought me safely down to the canal (right image above). Got a few more loot pieces at the far eastern end before entering
the sewer section. Knavesbury The
streets and sewers of Knavesbury were my least
favorite parts of the mission. It seemed to have been made with no other
purpose than to confuse the player. Most areas had 3-4 different ways in, but
without much point, as the streets alone had easy ways to dodge enemies. This
was one of those rare cases where making a section of town non-linear made it
less fun. The
only difficult area was surrounding a thief’s hideout in the west (left image
below). I could pick the lock on the back door coming directly from the
sewers to the south, but this was not necessary. A gate to the east could
also be used, but this was very difficult due to a stationary thief on the
nearby overlook. The third entry from the north was the easy choice.
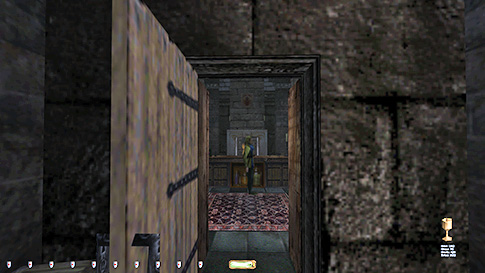
The Pit I
entered via the front doors. Needed Roderick’s key in order to get Herwin’s key, in order to clean the bottom floor, so this
seemed like the most logical entry point. It was very difficult (or near
impossible) to pass the restaurant from west to east. Instead I lowered
myself by way of a rope in the northwest corner (right image above). I found
the best rope placement to stay hidden from the barmaid’s view when
descending. She had three facing angles, the same as Roderick; east, north
and west. I timed the patroller and leaned in to grab his key. Climbed back
up the rope and approached the eastern part of the bar by using the lift. I
traditionally don’t like using loud machinery, but I caved in this time.
Nobody alerted to it regardless. From this end I could grab the rest of the
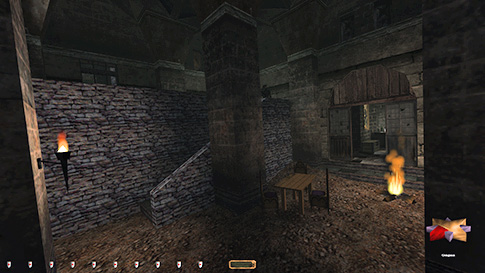
loot. A door directly to the barmaid’s south was perfect for grabbing the
goodies on or behind the bar counter (left image below). Since neither she nor
Roderick faced south, I could fairly easily get everything from this
location. From
here, I used the vent system to access the western living quarters. There was
a door leading there from the restaurant also, but it required lockpicking, which I don’t do if I can avoid it.
Triggered a conversation here and stole a key off the guard’s belt. Next I
cleaned Roderick’s bedroom and his treasure pit without issues.
Used
what I assume to be a well to reach Herwin’s
quarters, where I found the Ivory Rose documents. A bit disappointed it
wasn’t readable. I could now approach the four other guards’ bedrooms on this
floor from the south. They were all guarded by a lone stationary thief archer
(right image above) and an unimportant wandering servant. The archer pivoted
south, east and north. Waiting for his angle to be convenient, I could quite
easily move past him in either direction, staying on his west side. I could
not, however, enter the bedrooms to his southwest or northwest for Supreme,
so I skipped the loot in there for that mode. He didn’t alert to picking the
locks, but rather to either door opening, which I don’t think I’ve ever
experienced before. The lockpicking sounds were
very faded, so I assume something to be off with the sound propagation. The
opening/closing sounds were normal and that’s what triggered him. The
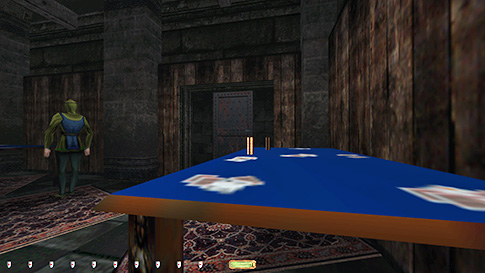
final challenge was the casino, which I approached via a ventilation shaft to
the south. Five coin stacks on the tables and a goblet on the floor were my
targets. I went for the goblet first. It was placed directly underneath a lit
torch. The goblet could not be reached without getting hit by the torch’s
light. The only gambler that consistently alerted to the torch lighting me up
was facing south by the gambling table to the far west. He was, however,
involved in a conversation, and if using that to my advantage, I could avoid
his comment. The two thieves could also comment, but one of them was
patrolling and the other on a rotational pivot. Both of them could be timed.
After not long, I leaned in and grabbed the piece of loot with no busts.
Nice!
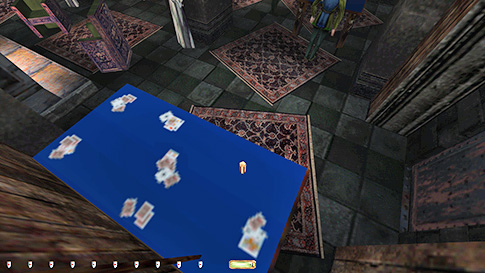
The
only other items worth mentioning were two coin stacks in the far northwest. I
could use the ceiling rafters to move around the room easily enough; the
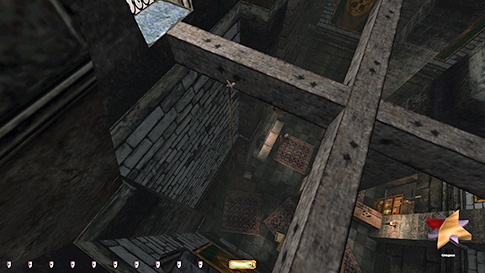
problem was safely descending to obtain the loot. The eastern stack I ended
up taking from the east side of the table (left image above). I dropped onto
the mantelpiece and slid off into the shadow next to the fireplace to get to
the floor. I couldn’t sneak all the way over to the table, but had to lean in
from the slightly more shaded area a foot or two away. The lamp directly
above the table was the light source in question, and one of the gamblers by
the northeast table could easily catch me. Had to mantle back up the
fireplace and the rafter and approach the final coin stack from the west.
Here I used a rope arrow into the north wall and dropped onto the top of it.
It had to be fastened at the very top for two reasons: 1) Only the top
portion was dark enough to avoid comments when dropping,
and 2) I had to be able to retrieve it from the top rafter afterwards.
Climbing down a tad kept me concealed enough to
avoid any alerts, but low enough to grab the coins (right image above). The
final piece of loot was in the elevator shaft, but it wasn’t hard to get at
all. Before
leaving the compound I returned Herwin’s key, the guard’s
yellow key, and finally Roderick’s key, in that order. I originally had
planned on dropping Roderick’s key from high up on the ceiling rafter, but he
gave a comment from the drop, even if it landed on the rug. Instead I had to
again use a rope arrow and time everyone’s angles in order to drop it back
manually. Although this wasn’t difficult, it did require some patience. On
my way back, the only thing worth mentioning was I couldn’t use the chain to
cross the canal emerging at Aberstreet. The bridge
guards saw me immediately, so I used the sewer entrance to the east instead. Statistics: Time: 1:11:37 Loot: 3000 out of 3000 (Supreme: 2940) Pickpockets: 5 out of 6 Locks Picked: 16 Damage Dealt: 0 Damage Taken: 0 Consumables: None Ghost: Success! Perfect Thief: Success! Supreme Thief: Success! Perfect Supreme Thief: Success! Notes: -
Skipped four coin stacks worth 60 in the two bedrooms
closest to the stationary thief in the living quarters at The Pit for
Supreme. He commented on either door opening. |
|
|