|
THE CHALICE OF SOULS - Mission 2: Beyond the Secluded Passage The
second mission in the Chalice of Souls campaign is another masterpiece. The
brothel underneath Fidgewick’s Hollow is certainly
a place to remember, for more than one reason. It’s highly welcoming to see
such quality missions are still made for Thief Gold. There’s a certain
simplicity to the brilliance too, which I enjoy more than most. I appreciate
the variation in tone once you leave the brothel also; a healthy change of
pace if you will, similar to the break between the city streets and the
sewers in the first mission. My
ultimate goal was of course the Chalice of Souls. Rumored to be in the
brothel itself, it was probably going to be more challenging than that. I
also had to obtain a ledger with some information on the rich clientele.
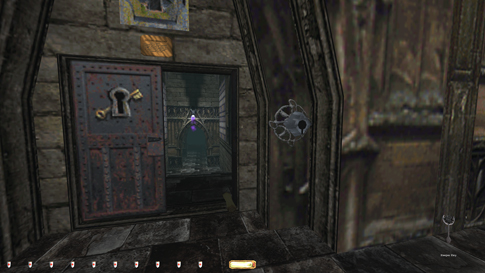
Besides that, I needed 2,000 in loot and to find a way out. Brothel, Main Floor
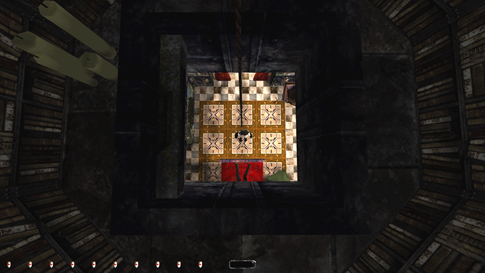
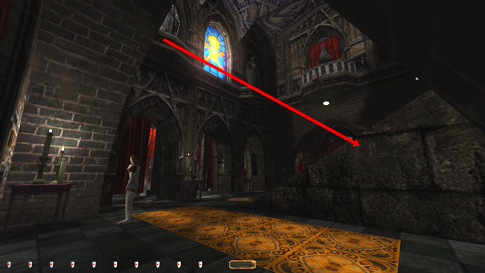
The
picture above says it all. The first story of the brothel was one of the most
intimidating areas I’ve ever had the pleasure of ghosting. Imagine the parlor
in A Winter’s Eve, except an entire floor of it. The brothel foyer was my
first challenge. There were no less than ten people in, patrolling through or
situated near enough to alert. Behind me was a patrolling swordsman from the
starting entryway. He only made loops in the outside hallway, so not much to
worry about. You likewise had two swordsmen patrolling either hall up the
stairs to the east and west. One can be seen to the left in the picture. Then
there was a pivoting archer facing north, east and west. North meant he
stared straight into the foyer. Yet another swordsman (also in the picture)
had a longer patrol route coming down the stairs to the left and leaving
towards the north. Two noblemen and two girls also passed through the foyer
on a regular basis, one of the girls and both men coming to a short halt
close to where I’m standing. The second girl stopped in the east hall before
returning. Lastly, you had a stationary nobleman with loot in the sitting
area in the back right corner. Not enough to make you scared? Does a bright
chandelier and tons of candles boost the fear factor? Hardly any shadows
either except for the area where the capture is taken. Before
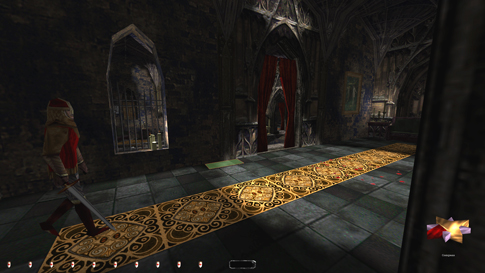
tackling this room, however, I stole the loot from the bedroom in the
southwest. The door was pickable, but I don’t like
to pick locks unnecessarily. An alternate access through a vent and an attic
space enabled me to circumvent the main entry altogether (left image below).
The woman went back and forth between the bed and the fireplace. I could
descend and hide by the door if need be. There wasn’t much time to spare, but
I got all the loot Supreme clean. I headed back to the foyer and continued to
plan my route.
I
stood in the foyer entrance watching the patrollers for a while. When I
thought the coast was clear, I made a run for the nobleman’s purse. I found
any time two patrollers were leaving to the north simultaneously, usually a
5-10 second window of calm followed. Sneaking was not at option, so I ran. I
grabbed the purse and barely got up the stairs to the east before the
nobleman in gold emerged from the western hall. Close, but good enough. Timing
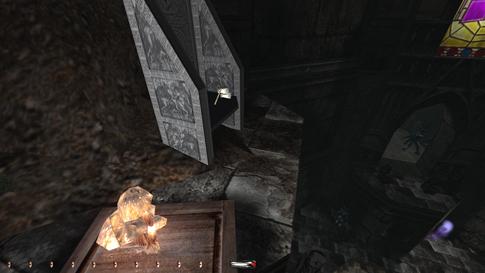
the patrols, I could enter both bedrooms in this hall alert-free. One of the
doors was pickable, and the swordsman heard the lockpicks if too close. Inside were three women and two
pieces of loot (right image above). Had to skip the flute on the desk for
Supreme. One girl was stationed in the back corner and the only way to avoid
her gaze was by dousing the fireplace flames, only allowed in regular Ghost.
Using the water arrow also spawned first alerts. [UPDATE: When re-ghosting this mission
for my YouTube let’s play, I realized at least three of the women on this
floor are chosen a randomly selected facing angle at start. The girl in this
room is one of those three. On my second playthrough,
she faced east, which meant I could obtain the flute without busts of any
kind (see image). That meant Perfect Supreme was still intact!] The
east hall was impassable to the north. A woman facing south by the pool
commented every time. [UPDATE: This
is the second girl that randomly change angle. If facing east, you can easily
enter the bath area without getting spotted.] In order to proceed, I had to
return to the foyer and take the west exit. Again, this took a long time,
basically waiting for a break in the patrols. At least the stairs and the
floor to the south was rock and not tiled. It meant I didn’t need more than a
5 second window to make it. Even more difficult was getting up the western
staircase. An extra swordsman covered that hall, plus a blue-coated guest
roaming between first and second level came by from time to time. As if that
wasn’t enough, the stationary nobleman in the foyer commented if I headed up
the stairs too fast. There was a pillar that blocked his view for a part of
it, but I essentially had to creep-crouch-strafe my way to safety. The
initial safe spot was a few feet into the hall and to the right (green area
in the left image below). Between the doorway and the next window was a dark
spot. I could stay here until the man in gold came along. His patrol went
right along that wall, where he jumped to third level alarm mode. Nobody else
would catch me here, but I had to get across the hall to the door on the west
side to be completely safe (left image below).
Brothel, Upper Floor Looted
the bedroom here. Next, I aimed for the top floor. In order to avoid needless
backtracking, I wanted to hit the two glyphs accessible from upstairs first,
before getting the keeper key from the kitchen. At least the upper floor was
less crowded. Two patrolling guards, Lady Demetra
and the nobleman in blue occasionally visiting from downstairs. More shade to
work with also. The swordsman coming down from the nearest walkway was the
hardest. He could see me through a window atop the stairs in Demetra’s study. Plus he alerted to every little shoe
tap. I managed to reach the bathroom without detection first (right image
above). To
move around further, the smartest thing proved to be using the pillars as
hardcover. Getting the rest of the objects in Demetra’s
quarters this way didn’t prove to be that grueling. As long as there’s only
one patroller to worry about, most situations can be Supreme ghosted with a
bit of tact and patience. Found a dark area in the corner to the left in her
bedroom. The lever on top of the mantelpiece opened the sanctuary access
passage. Another lever under the armoire revealed her ledger. I quickly
scooted down to the sanctuary entrance to frob the
first glyph there. Then sprinted back to Demetra’s.
Nothing to report in between. I
entered the hallway to the north by mantling past the fenced window up the
small flight of stairs. It was a difficult move to repeat consistently,
especially dodging both patrollers on the other side. I got to the dark
corner beyond after a few tries. The main reason to be here was to loot the
bedrooms to the northwest. The entry door was pickable,
but could be circumvented by using the shaft directly above (left image
below). I told you I don’t like picking those locks! Watching the guards
complete their loops a few times, they ended up patrolling conveniently
enough for me to slip out and climb up unnoticed. Got the loot and returned.
Next,
I had to try a bold move. The second glyph required to obtain the keeper key
was located behind an ornamental statue in the foyer north of Demetra’s bedroom. A woman in the small foyer downstairs
gave unavoidable first alerts if jumping from her balcony (the intended
method, by the way). [UPDATE: This
is the third woman that could change angle. If she faces west instead of
south, you can’t use the methods described below. Instead, you have to
descend/ascend by use of a rope arrow into the wooden beam sticking out from Demetra’s balcony.] My only remaining possibility was from
the archer’s balcony across the room. There was some shade to the left, but
the archer caught me every time when restarting his patrol after a little
stance. He always turned to his left, right into my corner. It took me quite
some time to figure out the somewhat easy solution. Mantle the northern fence
post and wait there (right image above). Once he turned his back, hoping for
no keen eyes below, I leapt for the window on the wall, then hopped and
mantled up the ledge by the statue (left image below). Piece of cake!
Well…not really. It took me a staggering long time to figure out these moves.
But it was fun! From
here, the most convenient (though not the easiest)
way to get downstairs was a direct jump to the northern side of the stairs, preferably
landing in a half-mantle. Testing it out a bit, I realized the perfect jump
made me bounce back somewhat upon impact, landing on the nearby carpet (no
sound), yet absorbing the impact enough to prevent damage. From here, I could
scurry into the dark corner directly to the north (right image below). I
needed a good 8-10 second break in all the patrols below to make it work. The
biggest problem actually turned out to be the archer and Lady Demetra on the upper floor. Every time the archer turned
his back and Demetra was elsewhere, I leapt down
and observed my surroundings. When the coast seemed clear, I reloaded and
retried until I got it. Once grounded, the swordsman patrolling the pool saw
me from across the way unless I creep-crouched across the rug. It took a
while to get this right, but not nearly as long as it would’ve taken to go
back the same way as before.
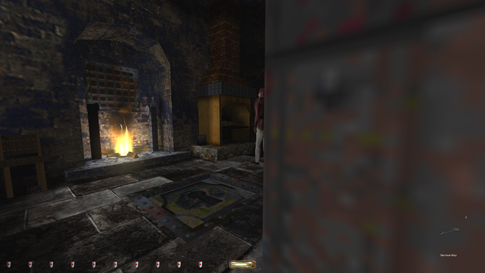
Wrapping Up the Cathouse My
next goal was to get the service key from the servant. This proved more
difficult than anticipated, as he had an awkward patrol route on the bright
side of the hallway, in clear view of the entire foyer. The swordsman
alternating between this hall and the dining room didn’t help the situation.
I ended up having to go into the kitchen to get it. There was only one spot
of shade in there that I could find; to the right of the fireplace. However,
the servant caught me when about to leave. Instead I waited in the opposite
corner, behind the shelving unit, wherefrom I snuck out and stole his key as
he waited (left image below). The bedroom next door and the basement posed no
challenges whatsoever. Had to reenter the kitchen to get the keeper key
(right image below). Made sure to leave the panel open, as I’d have to return
the key later (ugh). Snuck west in the hall and prepared to tackle the dining
room.
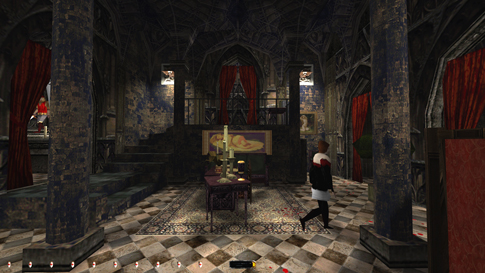
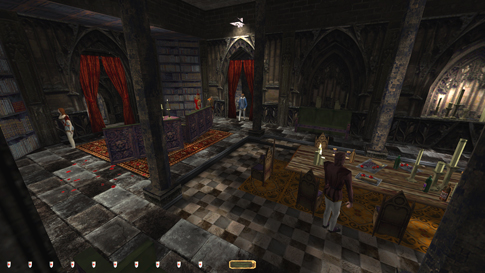
The
right corner atop the stairs was safest. The dining hall had a few new
enemies. First, there was a stationary woman over by the fireplace; no big
deal. Second, the swordsman from before came up the same flight of stairs as
me. He waited at the top for a bit, only to turn around and leave. Third, the
servant from the kitchen also came up and positioned himself by the dining
table. Fourth, the two patrolling guards from the upper level walkways could
easily spot me. One other guard and three civilians also patrolled through
here with regular intervals. Needless to say, this room was a pickle. Coming
from the north was easier than leaving out the southern exit. Both benches
along the walls had spots of shade. This was my first area of rest (left
image below). Three pieces of loot could be snagged from the north side, two
were on the mantelpiece, and the last three from the south. I used the
pillars as hardcover where possible, and after all was taken, hid atop the
bench on the south wall. From here, I could monitor the swordsman that
patrolled the hallway going down the next set of stairs (right image below).
Every time he turned, I emerged and scoped the territory. After a few loops,
the coast was clear. Sneaking my way back to Demetra’s
was the same as before.
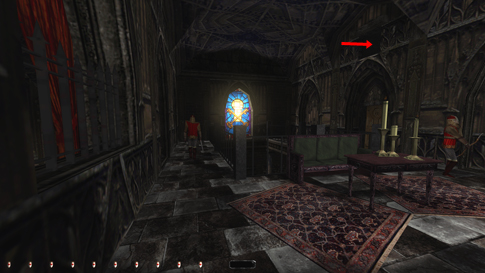
The Sanctuary Opened
the sanctuary doors, but then came the conundrum. I needed to relock the door
due to Supreme rule #7, yet I also had to return the keeper key for the same
reason. The doors weren’t frobbable, so I couldn’t
lock-block either of them. If I stood in the way, the doors just went
straight through me. I was just about to give up when I (for some reason)
thought back on my Supreme run of Kidnap. There was a strange situation there
where you have to separate Cavador from his
entourage by using the patrol route of a mech bot.
Long story short, bots get blocked by single crates while human enemies
don’t. I was hoping perhaps this situation would be similar. Perhaps the
doors would be blocked by objects, even though I didn’t. I first went looking
for boulders or crates. They would have to be on the sanctuary side, as I’d
have to return whatever I ended up using. I didn’t find what I was looking
for close by, at least. Then, merely as a fluke, I decided to try the keeper
papyrus just beyond the sanctuary entrance. Voila! It worked!! That
insignificant piece of paper kept the door from budging as if Superman
himself was holding it (left image below). That of course meant Perfect
Supreme was still intact! I still had to return the keeper key though, which
was a pain all in its own right. It alone added probably a whole hour to my
playtime. The kitchen panel could be closed up from above easily enough.
Returned to the sanctuary, grabbed the papyrus, and saw the door lock up
behind me. Wonderful!
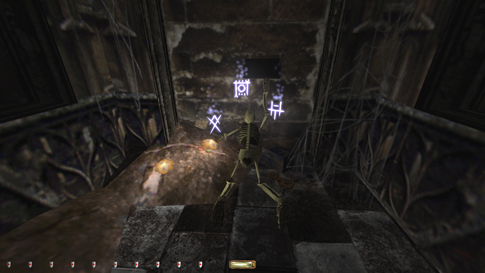
The
sanctuary itself was a nice change of pace. It was almost too easy to sneak
through compared to the first half of the mission. A few craymen
wandered around, but everything could be taken without any trouble. One piece
of loot, a gold goblet, was cleverly hidden outside a railing in one of the
two story towers (right image above). Another piece of loot towards the south
was hidden on a high ledge above a stationary crayman
(left image below). I could get up by use of a rope arrow, but getting back
down was tougher. I found dropping onto the statue while the crayman was facing the wall didn’t spawn any first
alerts. From there I could fall onto the slanted metal grate. I
didn’t find anything of value in the multi-floored tower except for a gas
arrow at the bottom. I really thought climbing to the very top would yield
something, but no such luck. Several times though, one of the craymen alerted on the floor above or below without me
making a peep. There must be an error in the transparency of some of the
structures there; unless he alerted to the dead crayman
at the base level and came looking automatically.
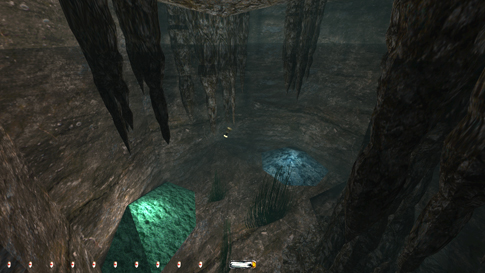
Jumped
into the water next. I could feel the chalice getting closer. None of the
blue floating orbs in the grotto gave first alerts, as far as I could tell.
They reacted differently to spotting me though. Two of them sunk to the
bottom, while the last two started to inflate. Unless I saw a change in their
behavior, I considered myself undetected. Found the chalice and the final
nugget in the innermost grotto (right image above). After
taking the main objective, more swordsmen spawned back at the sanctuary
entrance. It made me wonder how they got there, as the doors were still shut
and the key sealed beneath the kitchen. Regardless, one of them carried a
scroll with an interesting read. This was the last pickpocket too, for those
prioritizing that stat count.
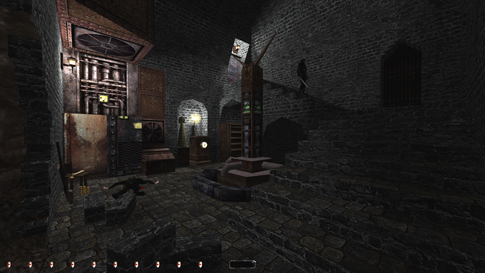
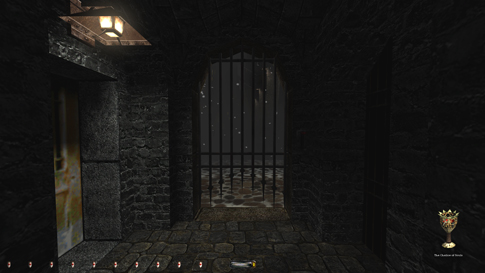
An
alternate underwater cave took me to the exit. I had to pass an engine room
with a patrolling thief. He carried the key for the exit door. Was slightly
tricky to get the final loot here without him commenting. Got it eventually.
Lock-blocked the door and dropped the key atop the staircase before escaping
back to the snowy streets (right image above). Thank you dear authors for a
wonderful campaign! Statistics: Time: 2:21:14 Loot: 2500 out of 2500 Pickpockets: 6 out of 7 Locks Picked: 4 Damage Dealt: 0 Damage Taken: 0 Consumables: None Ghost: Success! Perfect Thief: Success! Supreme Ghost: Success! Perfect Supreme Ghost:
Success! J Notes: -
If the woman in the bedroom in the southeast on the
first floor of the brothel faces south, you have to skip the flute in there
for Supreme. Her angle is chosen randomly upon starting the mission. The
second time I ghosted it, I got lucky. |
|
|