|
CALENDRA’S LEGACY Act 2: Midnight In
Murkbell This mission is one of my all-time
favorites. Purah created something I thought I’d never see from a fan
mission. There are practically no flaws except for minor details. Any Ghost
mode is a challenge for such a huge and diverse mission, but I was up for it.
I will mention the hardest pieces of loot, but for general valuables or
equipment please consult the loot list. My schedule for the night
involved stealing two prized items from the local museum; the Baerulian
Diamond and a painting called the Red Arrow. Selling the cylix was the
night’s main purpose, but still wasn’t listed as a separate objective. Again
no loot requirement was specified, which is quite unusual for back-to-back
missions. My starting arsenal was stripped for everything except a couple of
rope arrows. The loadout screen contained a black lotus potion with
continuous healing, prized in at 3,000 gold. Even with full loot from the
previous night (plus the 100 extra for tonight) it was too expensive. Moss
arrows were noticeably absent. No trip to the shop for Supreme meant no tip
and no objective of stealing Kharras Drahg. It was still available in the
mission though, so plain Ghosters could easily save the 100 loot for
something else. In fact, that magic sword ended up being a savior for
Supreme, as explained in a bit. St. Trinett’s I started at the Black Die
pub, about to sell the cylix to one ugly duchess. The objectives soon changed
to instead delivering the cylix to Cardinal Alcandor at St. Trinett’s within 10
minutes. I was released from captivity at game time of 1:43. I attempted a
pure Supreme run in the past, but stopped when failing to pass a stationary
priest after delivering the cylix. Subsequently Kharras Drahg (left image
below) had entered my mind as a possible solution. Among the sword’s magic
powers is the ability to make you darker. If I could manage to fetch it
before visiting the cathedral, I might be able to pass the priest without
busting Supreme. Several arguments favored this approach. First, the streets
were practically empty prior to the delivery. Second, the few existing guards
didn’t alert yet, which would make the detour quite fast. I took the route
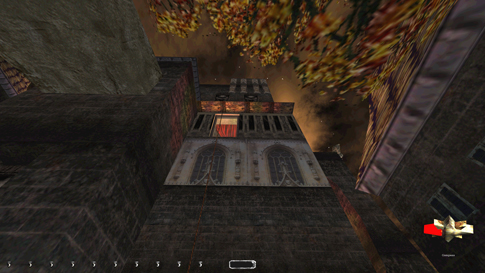
through the canal from the pub’s balcony, opening the gate at the water pump.
I mantled up at
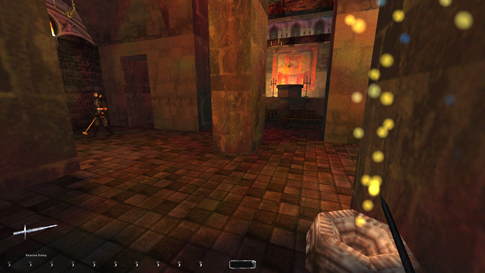
The candlesticks on either
side of the downstairs foyer were protected by noisy tiles and regular
patrols. The most efficient way of moving was crouching while tapping the
run-key. This was fast and quiet, but could generate sudden clunks. I used
the method of taking 4 or 5 steps forward, then quicksaving. There was a
small, dark portion beside one of the fonts where I stood watching the guards
and timed my runs (left image below). Naturally, I had Kharras drawn at all
times. Both candlesticks were possible to obtain this way. From here I moved
into the cardinal’s bedroom, took the loot there and dropped the cylix.
Clocked in at 8:45, plenty of time! Outside guards heard the drop a few times
so I had to wait for them to move off. I frobbed the cup and quickly jumped
outside before the secret passage closed. Some of the guards outside were
running around, seemingly alerted. However, they didn’t react to my presence
more readily than normal. Guess this was a timed event triggered when the
alarm went off. Those are allowed. The priest in the right picture below was
the one I couldn’t pass without a comment last time. Now, equipped with the
sword, I could inch past the mosaic window undetected. YES!! That is one good
piece of Ghosting if I may say so! The capture below is taken from the
brightest spot. I had to dodge all the running guards, but that was just a
matter of waiting. The exit door was just beyond this point.
The Streets of
Murkbell Assembling the complete
Zjilich amulet is not required or even remotely necessary for any mode of Ghosting.
Other write-ups have reported tedious maneuvers trying to obtain the various
parts, six altogether. I gladly skipped them. Thus, the canal gate key in the
cathedral was not needed (to get the unfinished amulet from the grotto). As a
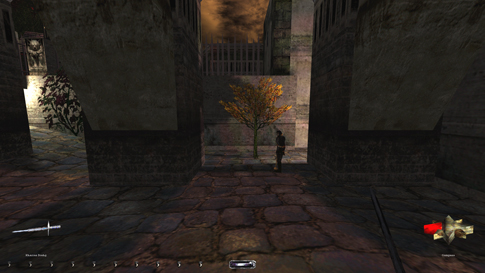
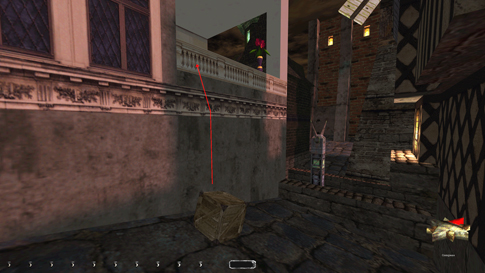
result, I was forced eastward upon exiting the cathedral grounds. Brought
along a water arrow from the canal bottom, to get into Vilrath’s garden (left
image below). Only a 5 gold purse in return but every penny counts. The gate
couldn’t be closed up. Picked up the loot from
Meepwood Bridge, but skipped the key. I knew I’d be able to access the other
side from the cemetery later and wanted to avoid the unnecessary pickup.
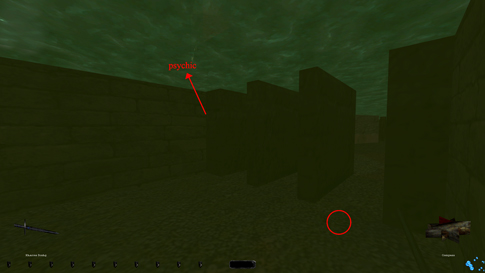
Usually, valuables are
located in places you are somewhat likely (or perhaps expected) to look.
Well, not in Murkbell! A pair of coins lay in the canal just southwest of the
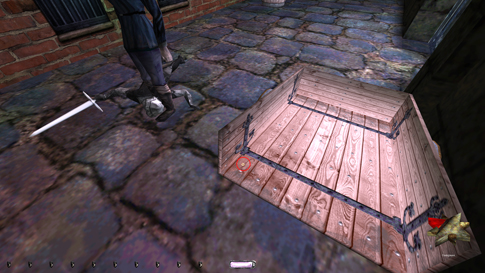
bridge between the psychic and To reach Dr. Provost’s
balcony I needed to think of something clever. The intended route involved
picking a locked gate, but the tools alerted a nearby female archer. I could
have waited to see if the zombies cleared the road, but I saw another option.
East of his balcony was a sloped street, ending with the canal to the north.
With one crate I was able to mantle the southern part of the marbled fence
(right image below). I used the crate from outside Falstaff; put it right
back afterwards. The invitation was only helpful for plain Ghost mode; it was
useless for Supreme. All three guards inside the museum still did 1st alerts
even though they weren’t supposed to, just like the street guards in act 1. They
didn’t have alerting comments like “did I just see something?” or “that
better not be the sergeant checking up on me” but settling remarks like “I
need a nap” or “probably one of them grubbers again” were still present.
The Museum So I skipped the
invitation and ended up hard ghosting the museum, which wasn’t a pleasant experience.
Tiles, random patrols and a wandering lantern made things extremely
difficult. The front door guard luckily didn’t react, with or without the
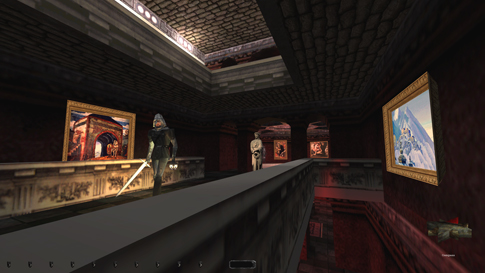
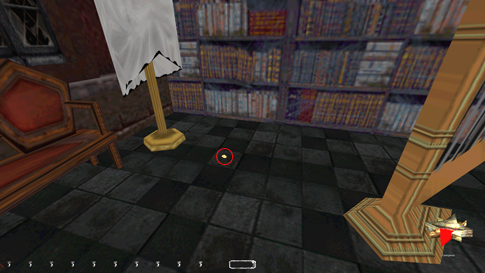
invitation. Downstairs I used the carpets and the display cases to move
around, hopping from box to box grabbing loot along the way. The staircase
railings were stone and I could monitor upstairs patrols hidden from behind
either one (left image below). This is ultimately how I stole the red key as
the lantern guy passed by. Crept behind the archer on the 4th floor as slowly
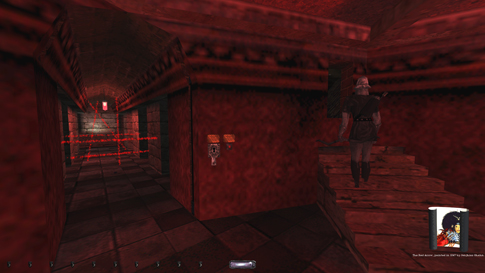
as possible. The key disappeared upon use, and the gate was not closable. I
had taken the ultraviolet lens before entrance, so the beams were visible. In
OldDark the second beam had an invisible hole on the left, discovered by
Nightwalker. It meant the vault could be ghosted without mossing the floor.
This hole isn’t present in NewDark, so instead I had to find a way to leap
over the beam silently. The only way to do that is to drop an item on the
other side, in order to land on it when you make the jump. Any potion or
common food item would do. I used the fruit from the canal ledge south of the
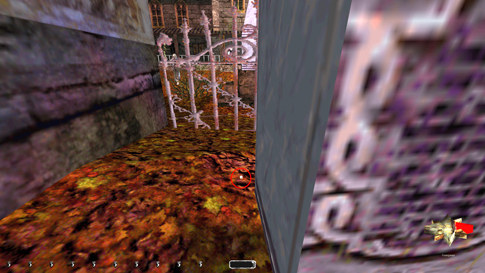
water pump. It took about 15-20 tries heading into the vault, but only a
couple going back. The vault was thus cleared without any Supreme busts (right
image below). I left through the bottom
floor main entrance, skipping the Baerulian Diamond. Turning off the security
system busted Supreme, and I wanted to see if there would be a solution after
the undeads roamed the streets. I am wondering though, is raising the alarm a
bust? It has been deemed allowed in ‘Undercover’, why not here? It is the
same circumstance; the alarm goes off from taking an objective, not from getting seen or heard. The
only difference is you have a chance to turn off the alarm in advance. But
had there been a button to turn off the alarm in ‘Undercover’ would that
suddenly have illegalized tripping it? I always follow the rules and bust
when in doubt, so I had a feeling this would be it for Supreme. I hoped my
feelings were wrong though. Returned the lens and the fruit afterwards.
Night of the Living Dead Found more coins in a shed
near Picked Mercedes’ pocket
and read her diary. I was to leave it at the police station. How convenient
my room was at Back at the Black Die the
killings continued. The stationary guard just north of this heard commotion
and ended up getting killed at the fishmonger’s. I think a zombie had spawned
in there and he heard the thief’s whacking from a distance. Two noblewomen
came along and got killed also, the two patrolling zombies made sure of that.
Fish and corpses lay scattered; it was not a pretty sight. One of the zombies
even had a fish on its “belt”. It only got weirder, as another one carried a
cat! This turned out to be Bob Grenadine's lost pet, and if returned would
yield the reward of a holy water vial. One zombie patrolled in and out of the
fish store; probably Pete, the guy mentioned in the readable. He seemed to
have a fish up his butt at least. The top of the counter by the door was a
safe place to wait for him to leave (left image below). I picked the box and
took the coins while he was out.
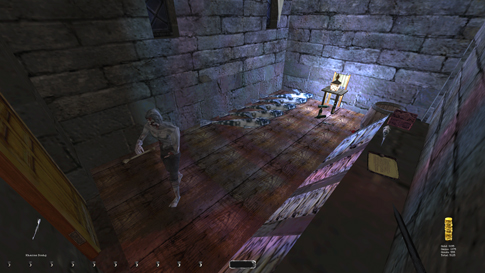
Alcandor and His Pets Entered the cathedral
again through the loft and continued to the side window. The place was full
of zombies now, but they were a lot easier to dodge than the priests. Found a
very cleverly hidden basement key under the desk in the study (right image
above). It must have spawned along with the zombies. I loved how the entire
city changed when the undead scenario triggered; almost like playing two
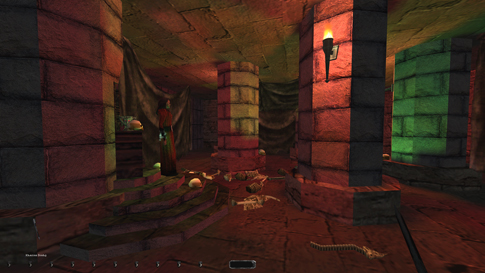
different missions. The catacomb hallways had four enemies. The first
skeleton was very unreliable. I never saw it turn, but every time it was
positioned differently. With Kharras drawn I could pass it despite the
flickering torch. Bypassed the wandering mage by hiding in the power station.
Reached Alcandor’s lair up the slope and could easily snatch the cylix. Nice!
Last time I played I
remember Alcandor facing the throne. I could therefore rope arrow up the hole
and enter the caretaker’s manor that way. This time he was angled northeast
(left image above), the way I assume he is supposed to be facing. The ramp to
the east then became my only option. I circled the room clockwise and waited
for all the zombies to move away. Easy enough. Closed up the tomb from the
inside, as I knew I wasn’t headed back that way. I don’t think there is an
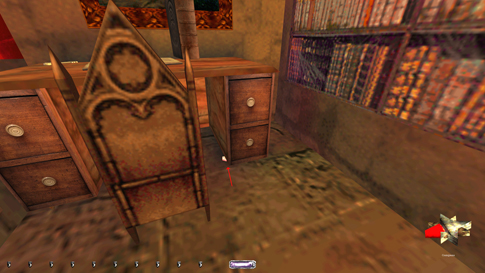
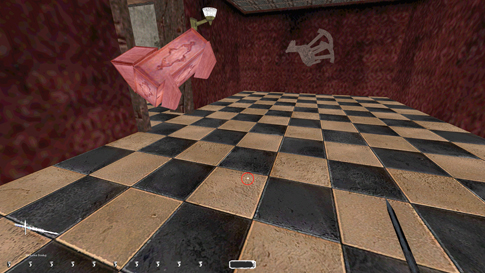
outside switch for that door. Took the ring by one of the graves at this
point also (right image above). I then had to sneak through the cemetery to
the back yard along the southern wall. Not a desired option, but necessary
nonetheless. The vampire mist was the most difficult enemy to dodge, as it
didn’t give much noise before suddenly being upon me.
The caretaker’s manor was
so dark I didn’t even have to draw the sword. Most was tiled though, so slow
movement was necessary. Some hard loot in here: a coin pair by the harp on
the ground floor (left image above), and not to mention the minuscule ring in
the baby’s room upstairs (right image above). Took the same route back
through the cemetery afterwards. Got scared for a second thinking I couldn’t
unlock the entry gates from inside, but the mechanism was reachable through
the bars. Two zombies were patrolling outside. The third was sleeping while
standing on top of a dead guard. Took the ring on the carriage (left image
below) and dropped back into the canal at the west end. Wrapping It Up Stole the purse off the
vampire at
The museum was harder
than I thought with the mummies around, even if the lights were dimmed
compared to last time. The invisible beast was also poking around, making
life much harder. I reached the third floor eventually. I have experienced
the archer on the top floor dying, but not this time. I think she sometimes
alerts to the commotion downstairs, then ends up walking into the vault
beams. I found her in there once at least. I don’t see any other way she
could die, unless mummies suddenly learned how to use elevators. I ended up
having to turn off the security system, but I finished it the other way as
well, by triggering the alarm. Just in case one of them is deemed legal for
Supreme, nobody can say I haven’t Ghosted it. Returned to After finishing my
ghost-run I stand by my initial opinion: Best STATISTICS: Time: 2:32:53 Loot: 5130 out of 5230 (the last 100 is
unobtainable unless you apply the recent .dml fix) Pickpockets: 7 out of 27 Secrets: None Locks Picked: 7 Damage Dealt: 0 Damage Taken: 0 Bodies Discovered by Enemies: 4 Consumables: 2 Water Arrows (Vilrath’s Garden and
Murkbell Police Station), 1 Moss Arrow (Peabody’s Forge) Ghost: Success! Perfect Thief: Success! Supreme Thief: Failed! Perfect Supreme Thief: Failed! Notes: -
Had to turn off the security system to get the Baerulian Diamond.
Supreme bust. The alternative is setting off the alarm, which alerts the guards
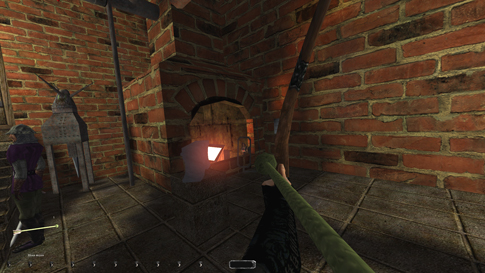
and busts even regular Ghost. -
Used a moss arrow to deaden the noise from destroying the
Cylix in Peabody’s forge. Another Supreme bust. -
The 4 bodies discovered are from the fights around the
city. I am surprised this count wasn’t higher. |