|
THE BLACK FROG - Mission 4 The Lady and the Thief Another
astonishing mission from Gaëtane! What I like most
about this campaign so far is the variety of atmospheres present. It is
similar to the feeling I got playing The Dark Project for the first time;
something that unfortunately got lost in Thief 2. You don’t get to play an
outdoor, pagan, village mission of this quality every day. Word is the
concluding mission is even better. The
keepers wanted me to retrieve the glyph called The Black Frog. I wasn’t to
steal it just yet, rather just gather some information on it. I figured
things would expand as I went along. One
technicality to note first. Discussed some time back on the Eidos forums was the interpretation of Supreme rule #2: “Complete all objectives.” The
question was whether this pertained to optional objectives and/or
hidden/bonus objectives, that is, objectives you don’t even have to disclose
(be aware of) in order to finish the mission. The entire ghosting community
present at the time agreed (after a few days discussion) on the following
specified wording for said rule: “Complete
the mission without leaving any incomplete (unchecked) objectives. Objectives
declared irrelevant (a red circle) do not count.” Essentially, this means
whatever objectives are listed at any given time are required for Supreme
(whether marked as optional or not). This does mean, however, that you can
deliberately circumvent disclosing objectives not necessary to finish the
mission. This would come into play a total of three times during the course
of this mission. The objectives in question were 1) finding a map, 2) saving
the village chief, and 3) discovering the treasure of the Children of the
Black Frog. My plan was to attempt all three, then trigger the readable
linked to the objective’s disclosure after the fact. If a bust incurred, I
would simply skip it. For plain Ghost, all optional objectives are exactly
that, optional. Grabbed
the rope arrow on the shore at start. The initial camp with the rusty lever
posed no real problems. Snuck along the left rim and evaded the guards that
way. Creep-crouch-strafe is the fastest way of moving without altering the
light gem. It almost seemed the author was aware of this, as many situations
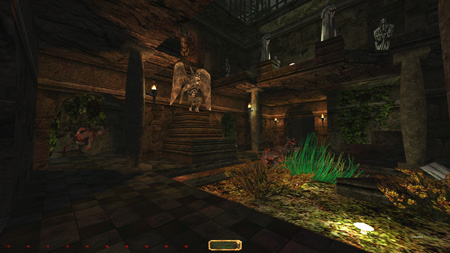
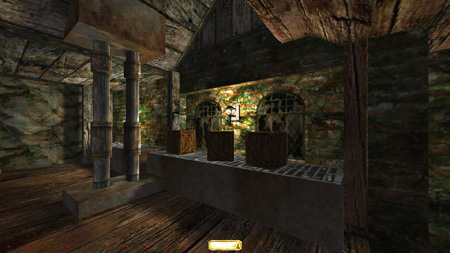
spawned first alerts if moving faster. The Village The
village was a daunting challenge. A total of 8 guards were inside or at some
point within view of the central courtyard. Two had routes crossing the
bridge, but they were the least of my worries. In fact, the three stationary
swordsmen ended up being the biggest pain in the butt. Initially I thought of
entering east, but a wooden railing stopped movement in that direction. I
couldn’t mantle up it, and rounding the corner at the south end caused a
comment from the well guard. Remember, we’re doing Supreme Ghost here, so no
first alerts of any kind are allowed. Directing my attention to the west
side, it almost seemed too good to be true to evade the same guard’s looks
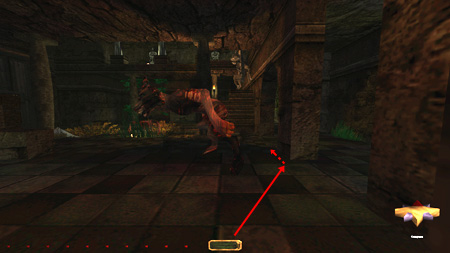
over here. But that’s exactly what I did. I had to creep-crouch through the
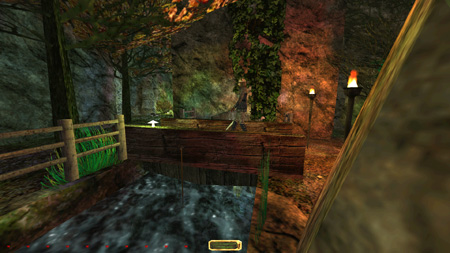
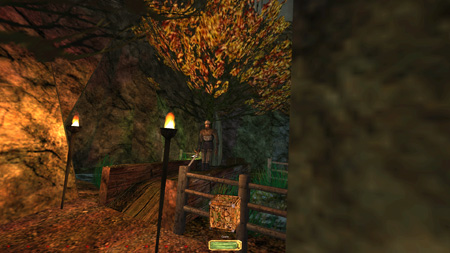
weeds hugging the rock (left image below). I was almost sliding up the rock
at one point. The slightest move out into the open would make the guard
comment. I also had to finish this move before the guards patrolling the
route around the house and past the well returned. I rushed in between the
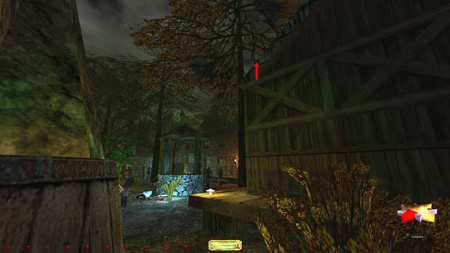
barrels here and hardsaved. To
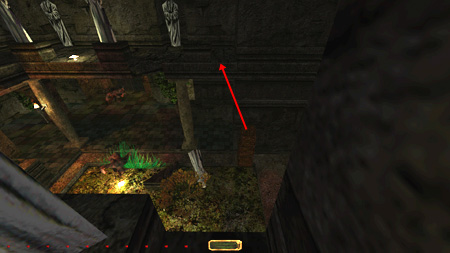
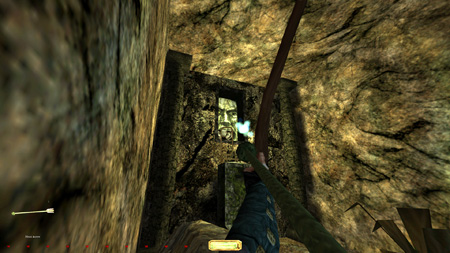
continue on I found the only way was to mantle the roof. Rounding the house
corner left me too exposed. The only place to successfully utilize a rope
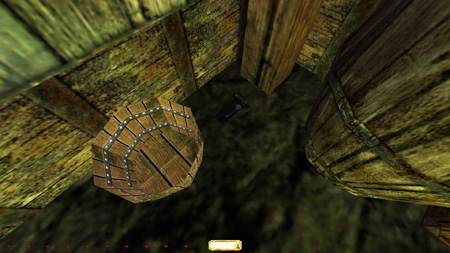
arrow was toward the east end of the eave (right image above). There was an incropping in the wall higher up that made the rope
unreachable. It didn’t matter, as the elevation made me darker. The roof
itself was quiet also. I crossed to the other house further south. Here the
sound of the roof tiles reappeared. I could slide down to the wooden walkway
below unharmed. From
here I had to plan my moves (left image below). The only way to enter the
house with the rusty key was through the double window on the west side of
the building. However, passing the yard straight across from here caused
comments from the guard by the well. Instead I mantled the fence on the south
side and dropped down inches east of the large rock. This was just out of
view of the south-facing guard by the well. I could creep-crouch into the
shade on the east side of the wall. The mushroom kept me lit up, but at the
wall’s short end I was pitch black. Staying out of the fungus’ radiance, I
crept up to the ledge by the boat. This entire wall was black and I could
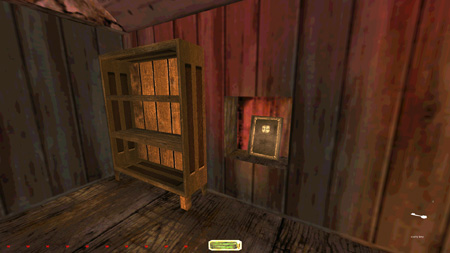
easily enter the window from here. On the second floor behind the cabinet was
the key (right image below). I didn’t read the book as that would spawn the
optional objective to find the treasure of the Black Frog Children. I wasn’t
sure yet whether that could be completed within Supreme rules. I
had also skipped Keeper Gerald’s message from the shore in the beginning, but
I still wanted to attempt to steal the map in the shack south of the village.
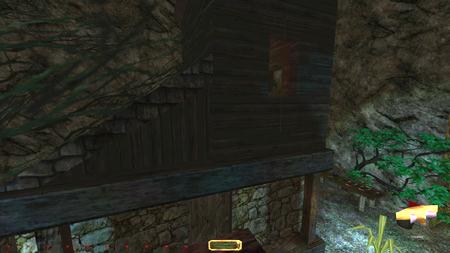
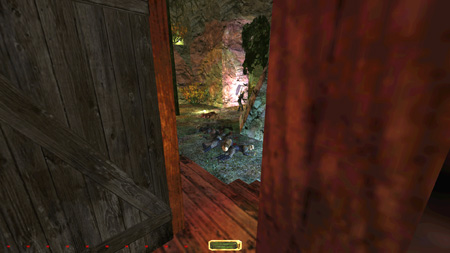
The shanty key was in the basement of the tower. A stationary swordsman
guarded the main entrance. I couldn’t pass his view on the east side along
the ground, but the roof of the house to the south provided an alternate
approach (left image below). I could have dropped to the ground to the
guard’s right and picked the door, but that would leave the door needlessly
unlocked. It’s not against any of the Supreme rules, but I felt it in the
spirit of that mode to enter the tower differently. As it turned out, the
alternate method was just as easy. A rope arrow placed above the upper floor
window could be reached with a precise jump from the roof corner. Given none
of the patrollers were near, it spawned zero comments. The key was hidden
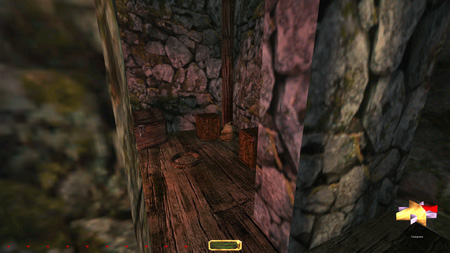
underneath a bucket in the prison (right image below). I
utilized the eastern window on the main floor to exit. The outside patrollers
could see through these windows,
which necessitated intensified cautiousness. The canyon to the east had a
single patroller, easily dodged by mantling the grassy ledge on the left. The
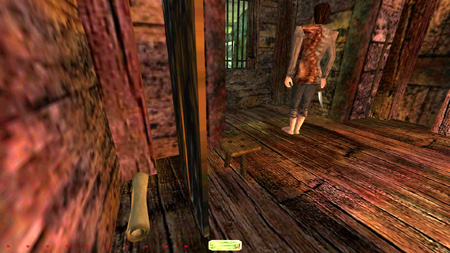
nearest corner was dark and I could wait for him to pass. Lize’s
father was especially wary in the shack; a single stumble on the wood floor
and he commented. I took my time and stole the map (left image below). The
way back to the tower was equally unchallenging. Dropped the key back in the
basement and left through the west window this time. Although the outside was
bright, the stationary guards here failed to comment. Instead
of taking the long way back around the village, I flung a rope arrow into the
tower wall and hopped onto the fence (right image below). I could reach the
arrow from the top of the fence afterwards. The top surface gave a metal
sound, so the landing had to be soft not to cause alerts. After a few tries I
found the accurate height and trajectory. Dropping to ground level from here
and rounding the corner took more stealth. Inching off the fence bounced me
out into the yard a tad after hitting the stone foundation. This little
acceleration was enough to trigger a comment from the stationary guard. I
fiddled a bit with it before I managed to press against the wall after
dropping by the smallest of inching known to man. It didn’t cause any alerts
this time so I rushed into the dark corner to the north. From here the path
back to the bridge wasn’t too hard. I dropped into the canal and followed the
waterway west. Children of the Black Frog Before
disconnecting the tower beacon, only one patroller was present. The rest were
locked in the temple. I had no trouble retrieving the spring wiring and
getting the lift up and running. I took the moss arrow from the tower’s
bottom floor also. I would need it later. Used the cave to get back to the
main entrance safely. About 6 or 7 new patrollers had emerged from the
temple. The gate was locked and the door to the lever was unpickable.
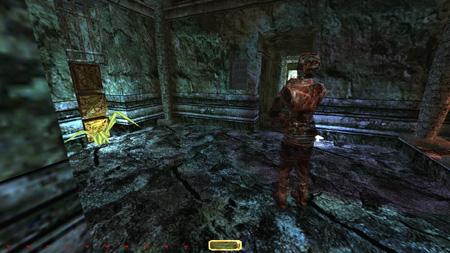
The key was on the temple keeper’s belt. I could reach it from the shadows by
the tunnel easily enough. I had worries that he would alert to it being
returned, but he didn’t utter a peep (left image below). The
optional objective (not yet disclosed) required teleportation to a different
section of the temple by frobbing the stone in the
pool. It was reachable from the encircling walkway. Beyond the portal was a
torture chamber with one caged zombie. He didn’t alert normally, only if
wielding my sword. Garrett gave a cue when frobbing
the fountain of youth. Although the objective didn’t show yet, it would now
trigger as accomplished later, if I
could get out safely. Frobbing the stone from this
side took me back to the pool with the guardian. To my astonishment, there
was no splash from the water. I had assumed this a certain bust, so it was a
pleasant surprise indeed. I mantled the east side and with a little luck made
my way back to the hallway. The patroller didn’t have first alerts it seemed;
instead he went straight to hunt mode if triggered. I lock-blocked the gate
door and returned the key immediately. I didn’t close up the temple door. I
figured it part as a script and out of my control as a result of disabling
the tower. After opening the gate I flipped the contraption again and rushed
out before it slammed shut behind me. I also remembered to reset the lever on
the outside. It was set to the ‘open’ position from before; flipping it
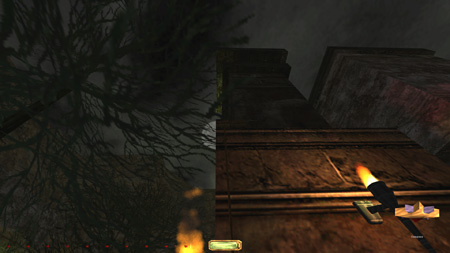
didn’t do anything, but was still required by Supreme rule #7. I
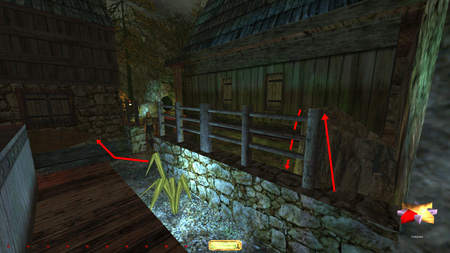
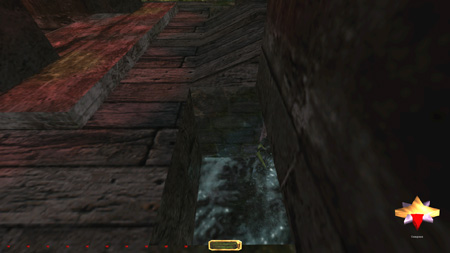
got out of the river on the south side. I couldn’t jump the bridge fencing
without alerts, so I flung a rope arrow into the wood and ascended it from
the water (right image above). I could mantle it alert-free, as mantling
doesn’t register as a speed enhancer. All I had left in the village was to
return the rusty key and read the book to trigger the already completed
optional objective. I found it incredibly much harder to sneak west along the
grassy mountainside this time. The well guard facing my direction commented
every single time. It was so tough I starting to doubt whether I actually had
managed it before. Then I found you have to hug the rock all the way from the
torch by the bridge. Garrett gets partly stuck to the material then, enough
to avoid the comment. Before reaching the barrels I had to do a small hop to
get released, but no comment spawned, surprisingly. I hid in the corner on
top of the nearest barrel before patrollers returned. The
rest of the village was trouble-free. I entered the house like before to
return the key and traversed the roof over to the tower guard. Jumped onto
the railing using a rope arrow further west and waited for the perfect moment
to leave. It took a bit of patience to hang around for the best time, but in
the end I crossed the bridge safely. I returned all the way to the starting
shore to read the scroll and get my second optional objective ticked off.
Gerald’s message was droppable, so I left it there. The Sanctuary I
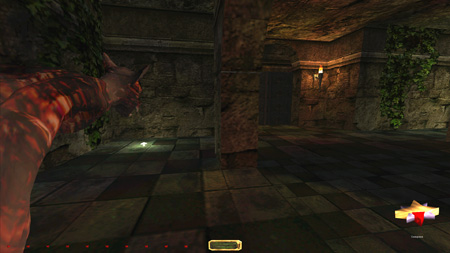
couldn’t find a way to enter the waterfall close to the main tower. The
swordsman there covered all entry points (left image below). I tried every
conceivable angle, speed and height, but came nowhere close. I was thus
forced to head north up the stony ledges. This took me to the sanctuary
entrance village, which presented a choice. Further north would take me to
the Old Black Frog Temple. A side path from its entrance led me to the old
mill, where my third and last optional objective was present. A lantern guard
and ill-placed stationary swordsmen made that an easy Supreme skip. I doubt
even plain Ghost would’ve been able to pass that test. The temple would also
have to wait, although required to finish the mission. For now, I was headed
toward the sanctuary. There
was a scripted fight between two dogs and the four swordsmen that took place
as soon as I entered the farmer’s house here. I could drop via the west edge
of the roof without damage and trigger the incident in the living room. I
replayed the scenario until the dogs had killed all the guards. The last
remaining dog hunted its way north and ran into the other guards there, who
eventually killed it. They came looking but left fairly quickly (right image
above). The rules explicitly state such scripted events to be allowed, as
long as Garrett isn’t seen or heard in the process. Supreme rules don’t
mention them, which made me assume regular Ghost rules in this case.
Regardless, the sanctuary entrance was now completely free of guards. The
bridge up ahead held one swordsman facing the entry doors and another
patrolling east-west. Despite the bright lights, I could easily sneak around
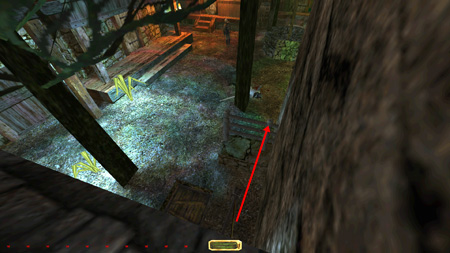
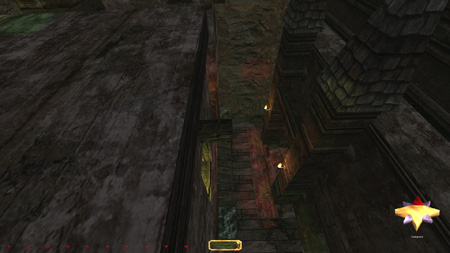
on the south side. Mantling up the rock here I could position a rope arrow
into the south end of the wooden frame above the brazier (left image below).
The outer ledge going east was metal, so I had to be careful of the guards
below. Two conveniently placed wooden beams made the following section
passable. It was tricky to jump off the aforementioned metal ledge without
making noise. The clue was to jump with the walk-key pressed instead of the
run-key. That sometimes eliminates the takeoff sound of the jump. The south
tower had the lever to the main gates, accessible via another rope into the
wooden overhang (right image below). I really must praise Gaëtane
for her mission design. Such incredible effort has gone into making
challenging yet realistic situations for sneakers like myself. If placing the
arrow onto the far eastern tip of the overhang, I could mantle it on my way
out and jump across the gap to the main sanctuary building. Furthermore,
there was a useful ledge above the main gate (now open). I finally cushioned
the drop onto the burning torch and fell to the ground unscathed. The
sanctuary itself had four more dogs. One was stationary, staring straight at
the entry door. Another was patrolling the same area, doing fast clockwise
loops. The south side was out of the question, due to an abundance of light
sources and said patroller. The north looked more promising. The stationary
guard gave a first alert before reaching the hall though. The picture to the
left below shows the furthest I could move without any growls. No matter how
slow I went I entered a patch of light from the surrounding torches. It was
tough to dodge the patroller too once I was out of view of the sentry, so I
started looking around for other alternatives. The only likely way to avoid
the alert was reaching the walkway above. The northwest corner had a possible
mantle point, between the wall and the nearest statue. If I could find say
three boxes, I might be able to reach that ledge unseen. It was definitely
worth a shot, as I saw the rest of the sanctuary as potentially Supremable. It sure would be nice to evade that first
alert. I decided to reload and head for the fishery instead. I might be able
to find what I was looking for there. I
could enter the waterway underneath the bridge through the hole in the
northeast (right image below). There was a small outcropping that prevented
sound when dropping. From there I inched into the water. If slow enough it
didn’t make a splash. The patroller above caught me a few times when heading
for the cave entrance. It was tough to hear from underneath. I learned the
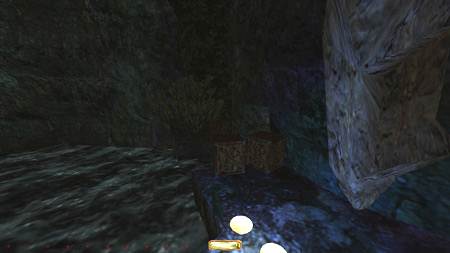
safe pathway after a few tries. The Abandoned Fishery I
grabbed all the loot and passed the frog unseen. Entered the westernmost
ruins by a rope arrow into the northeast corner. I dropped inside and could
time the spider patrol on the ground floor (left image below). The adjacent
building had a small spider patrolling two rooms. To avoid her and the big
spider stationed in the next room, I had to follow her into the corner where
she turned. There was nowhere to hide once she returned. She normally turned
left, so I slipped right into the corner with the barrel (right image below).
I had to be very close, otherwise
she’d alert when pivoting. Many times I got a first alert from the
floorboards creaking. Crouching while tapping the run-key got me past her in
the end without any chirps. I got quite good at this method after a while,
and I needed to be for later. The
lever for the basement gate was upstairs. It was in a tiny alcove on the
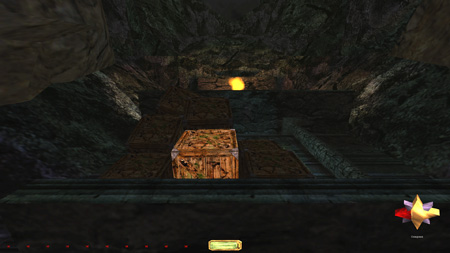
wall, quite difficult to see. My three needed crates for the sanctuary stunt
was also located here (left image below). I didn’t bring any right now as the
lights were on downstairs. Instead I watched the guard’s beheading and opened
the tower beacon entry from the basement. Then I went back upstairs and reset
the gate/lights and brought along the first crate. I left it outside away
from any patrols and flipped the now accessible beacon lever. I then had to
return to the basement to close the entry in the same fashion as before. I
brought along the second crate on my way out. Then had to return for the last
crate a third time. Tedious, but worthwhile. I left all the crates on the
shore in the frog cave (right image below). I couldn’t enter the water from
this side; I had to utilize the alternate exit to the main tower and
backtrack to the sanctuary like before. Sanctuary … Again I
fetched the crates from the canal one by one. Brought them into the courtyard
and started stacking on the north side. The stack went easy enough without alerts,
but the jump was tougher. I’m not talking about finding the exact spot to
mantle, although that was also tough, but instead there was a mushroom on top
of the walkway that lit me up at the apex of the jump. I studied the light
gem closely throughout the hop, and there was a slight yellow flicker midway
through the air. This gave a growl from the stationary dog below. I tried
jumping from various angles using different degrees of velocity, but there
wasn’t much room to work with. The mantle was too narrow to allow for
flexibility in the variables. Instead I looked to the south side. I noticed
there was no mushroom on that side, so if the stack was possible, that might
just work. I couldn’t stack the crates as far east as I could on the north
side, due to this side being brighter at ground level. The dog also heard the
crates knock together here. I’m not sure why that didn’t happen on the
opposite side, but I think it might result from him sliding to his left.
These dogs exhibit the greatest level of fidgeting I have ever seen. They
knock the hammer acolyte from Cragscleft right out
of the woods. Not to mention Angelwatch’s golden
boy. I could still create the stack, just a tad farther west. From the top I
needed to find the perfect angle
and speed to make the mantle successful (left image below). I think I tried
30-40 times before nailing it, but no first alerts spawned and Perfect
Supreme still intact! I
crossed to the north by mantling the gap by the gargoyle. The secret door
alerted the patroller unless he was over by the inner sanctuary doors. I
dropped through the hole and planned my way over to said doors. I found a
perfect shadow in the hallway outside the tomb, along the west wall (right
image above). As the dog passed, I creep-crouch-ran over behind the pillar
before he swung north. I needed to make my way to the doorway shadows before
he returned. Opening the double doors also had the potential of alerting the
patroller on the other side. I was lucky this time and received no remarks. I
closed the door when both were away, just to make the progress easier. Either
side of this yard had dark alcoves, perfect for traversing the path. I
reached the back room without growls and could shut off the tower beacon
here. Used the same method to return to the doors. Back
on the north side I had to plan differently to return to safety (left image
below). The southeast corner by the door gave me enough shade to observe the
patroller without comments. Since he traveled clockwise, the path to the east
hallway wasn’t as straight-forward as before. I needed to use the pillar to
the right to block his view. Then, as he passed the pillar going south, I
inched north a bit to stay out of his view. If not, he would catch me as he
emerged around the pillar’s south side going west. As he headed north again,
I could reenter the perfect shadow pictured to the right above. I
couldn’t drop from the south walkway where I mantled up. The ground was too
lit up and Garrett can’t land in a full crouching position. He does a little
half-stand, despite pressing the crouch button. That was enough to spawn a
growl from the stationed dog. Instead I could drop alert-free from the
equivalent north side, where the above picture was shot from. The mushroom
that previously made me unable to mantle this side was blocked by the statued pedestal. If hugging the edge and creep-sliding
off it, I never entered its patch of illumination. Now all I had to do was
bring the crates. The sanctuary passed without a single first alert! The Old Black Frog Temple I
left the crates in the shade outside the sanctuary entrance. I had a feeling
I mightn’t be done with them. Remembered to close the sanctuary’s main gate
also. The only place of significance left to venture was the old temple to
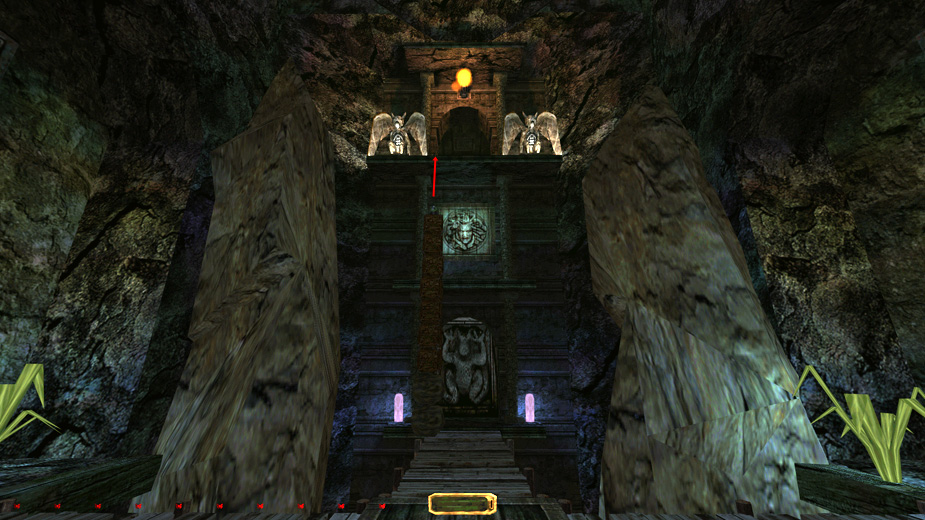
the north. It brought the first, yet inevitable, Supreme bust. The only way
to unlock the entrance (and finish the mission) was to shoot the mouth of the
incropped face with a moss arrow (right image
above). Nothing else would unlock the sliding monument. This directly
violates Supreme rule #6 which specifically mentions moss arrows as being
forbidden. No ifs or buts about it, so there it was. Personally, I think
there should be a clause in the rules to allow consumables for intended
mandatory puzzles, as long as you don’t alert other enemies in the process.
But hey, I don’t make the rules now, do I? [Update 10/28/14: Due to newly
revamped rules for Supreme Ghost, this moss arrow is no longer considered a
bust. Rule #6c now states “The use of moss, water, and other arrows is
allowed for other purposes, such as to hit a switch or to complete a puzzle
element.” Yay!] The
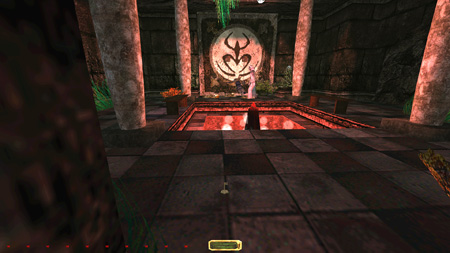
temple itself posed some serious problems. In order to access the beacon
lever in conventional fashion, I had to flip two skulls, each behind puzzles
in chambers on either side of the main cave. One of those skulls was
protected by a zombie-like monster, who I was required to kill so as to
advance (left image below). When doing so, a gate raised providing the exit.
I could block said gate with crates or boulders, but that blocked my own exit
also. I wasn’t able to squeeze through with the captured configuration at
least. Even so, that didn’t remove the problem regarding the zombie. He was
the most alert-sensitive enemy I have ever come across. He appeared at the
end of a hallway some distance away. I think I was able to reach a dark spot
in the opposite hallway (leading to the abyss) before triggering hunt mode. I
cannot be sure, as he still kept looking for me. I think he might in fact
have spawned in second alert state. If giving up, he retained a position in
the middle of the center room. Normally he faced south, which was bad. One
time he stopped like in the picture, towards the northwest. I experimented
with him in this position, but found no way around. The moment I crept into
the light behind him, he turned around and started slashing. I waited for a
good 10 minutes to make sure he was fully settled, with the same result.
There was no other place to hide where he wouldn’t find me. I needed to be
pitch black also, otherwise he would sniff me out like a hunting dog. I
thought perhaps I could’ve nudged him forward to the corner, then been able
to sneak down the opposite hallway and finally get past the crates somehow.
Of course, nudging is only allowed as a last resort in regular Ghost, being
considered an engine exploitation. A different last resort exploit was
transmigrating the gate which closed off his hallway. If I could get through,
I would never even have to trigger his presence. There were wooden frames on
the walls under the ceiling, and I could use that to swing myself into the
frame of the gate. I got all the way to the opposite side but couldn’t
release myself from the last layer. I tried for a good while but gave up in
the end. I would’ve had to penetrate it the opposite direction afterwards
anyway. I fiddled with this situation for so long I ended up taking a break
for a day or two. Perhaps new ideas would come to me. And
one new idea did come. It had actually been in the back of my mind all along,
but never really seemed like a feasible option. Could it be possible to stack
my way directly to the beacon lever? It seemed like an endless distance, but
there was a ledge underneath that could pose a solution. The general problem
when making big stacks is that you need additional side-stacks in order to
reach the stackable items. The taller the main stack, the more extra items
you need, an exponentially baffling enigma. But if I could throw items up to
that middle ledge, then no more than the main stack might even be necessary.
I would be able to reach the items there as I ascended. An additional help
are stackable items that stick to your inventory list, such as potions and
fruits. There weren’t too many laying around, but perhaps enough to help me
out. All large stacks’ basic unit is the crate, and I already had three over
by the sanctuary. I would need quite a few more, but there were none
available anywhere close. The old mill held a few, but that entire area was
completely inaccessible. Although intimidating, the village seemed to be my
only option. It felt like going back into the lion’s den. I
experimented with the save from my blackjack run and found that at least four
extra crates were needed, plus a few smaller items. The three boxes in the
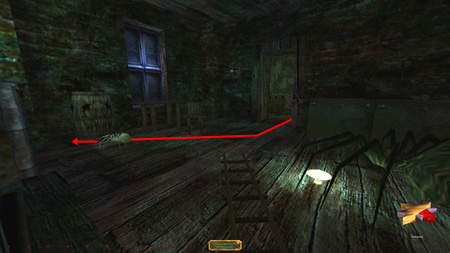
village’s tower basement were easy picks. I also chose the fruit atop the
waterfall outside the village, and the invisibility potion in one of the
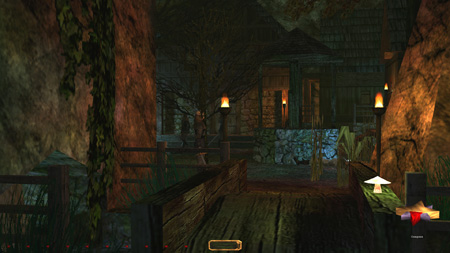
village attics (right image above). When entering the village to get the
crates, I found to my astonishment that you can mantle the fence along the
mountain to the left after all. That would’ve saved me much trouble last time
around. It was a tricky mantle and discovered merely as a fluke, but highly
repeatable once I knew how. I still couldn’t mantle it from the east side
though, but I still had my previously developed rope jump from the roof eave.
To prevent repetitive bridge-crossings, I flung the crates across the canal
from the south side without alerts (left image below). I made sure not to
place any crates along patrol routes, as that conflicts with Supreme rule #7.
That rule is a bit tough to interpret, but I think it refers to crates placed
in shadows near a patrol as ok, and
crates placed in direct light as ok if nobody patrols near it. I kept all my
crate-drops to the shade, just to be on the safe side. I know Supreme was
already busted, but I was determined to keep busts to a minimum. For the
fourth and final crate, I had planned on visiting the shack where Lize’s father was held captive. I was pleased to find
several crates there, but none could be returned without triggering alerts. I
even tried dropping the crate up by the entrance and push it down the slope,
but he alerted every single time. Gaëtane must have
deliberately cranked up the sensitivity on some of these enemies. My only
option then was going back to the Children of the Black Frog area. There were
a few crates in the old ruin at the end of that section (right image below).
This of course meant I had to retake the rusty old key from the village also. Hauling
everything into the temple was a long and tedious process. The guards by the temple
entrance never gave first alerts it seemed. They jumped straight to hunt
mode. Perhaps they were in constant first alert state due to the dog they
previously killed. They were still as easy to pass as any regular guard
though. Inside
the temple I stacked all seven crates up on the middle ledge like previously
explained. I had to actually throw them into the air judging their
trajectory, but with a bit of practice it went just fine (left image below).
I started with the two boulders from the water. They had to form the base as
their sheer weight broke anything underneath. All the crates were now
reachable as I kept building my stack. I finished with the fruit and the
invisibility potion, eleven items in total. The mantle from the top was
anything but easy. I had to reach the ledge at the very apex of the jump. I
had to rebuild the stack once to make it work. I think I was too close to the
ledge the first time. The relief was sensational once I finally pulled myself
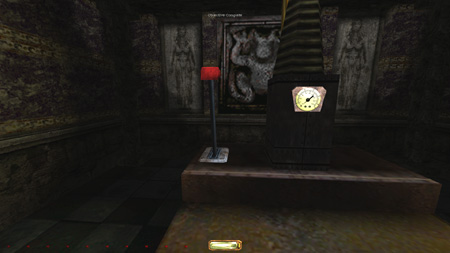
up. Hearing the ‘objective completed’ bell as I pulled the lever was equally
satisfying (right image below). To get back down I went back onto the stack
and then slid via the ledge back to the walkway. The
view from down below was mesmerizing: The Sentinel Tower My
final job was to return everything to their respective locations. That didn’t
pose any additional challenges compared to before. One of the patrollers in
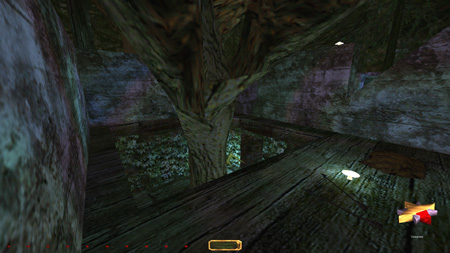
the village had gotten stuck to the tree by the bridge (left image below).
Luckily, he was facing southwest and no problem to sneak around. It actually
made returning the crates easier. Getting into the canal silently was the
only tricky part, but nothing major to report. Remembered to return the rusty
key and the fruit from the waterfall also. The
tower was now open. All four beacons had been deactivated. The lever for the
side gates couldn’t be reset, as that would prevent further advancement. I
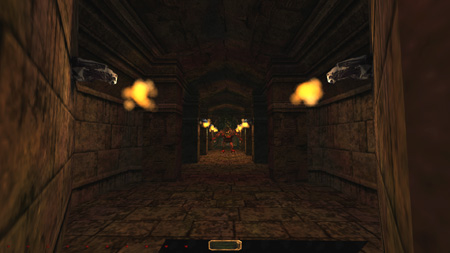
guess this is another Supreme bust, but that mode was busted already. The Charaka spawned right outside the castle entrance as I
crossed a certain point early in the hallway. It didn’t spawn in hunt mode
but came running to a certain spot before halting (if unalerted).
It also had radically increased alert awareness. The entire hall was lit,
save for a few shady crannies behind the side pillars. There was no way to
reach the room at the end without second alerts. I had to use an invisibility
potion to make it there safely (right image above). I felt very very cheated
not to get a regular Ghost success here, especially after all the work at the
temple. I think there should have been a way to avoid Charaka’s
trigger or sneak past him. But alas, such is life. It
didn’t take away from thoroughly enjoying my time through yet another Gaëtane masterpiece! I feel fairly proud of my
accomplishment despite the last hiccup. No first alerts was a challenge I
didn’t think I would pass, but the dark engine showed its versatility yet
again. On
to the frog… Statistics: Time:
5:04:07 Loot:
125 out of 125 Pickpockets:
1 out of 2 Secrets:
1 out of 9 Locks
Picked: 5 Damage
Dealt: 0 Damage Taken: 0 Consumables:
1 Moss Arrow & 1 Invisibility Potion Bodies
Discovered by Enemies: 1 Ghost:
Chemical Success! Perfect
Thief: Chemical Success! Supreme
Ghost: Failed! Perfect
Supreme Ghost: Failed! Notes: -
Had to use a moss arrow to enter the Old Black Frog Temple.
Violates Supreme rule #6 and is therefore a bust. [Update 10/28/14: No longer a bust due to updated Supreme Ghost rules.] -
Used an invisibility potion to escape the Charaka’s view when ending the mission. Necessary to save
plain Ghost. Renders the stats a ‘chemical’ success. -
Couldn’t close the gates accessing the area behind the
sentinel tower. Unsure whether this directly follows the objectives. It
didn’t matter, as Supreme was already busted. -
Setting off the trap in the last room is arguably
another Supreme bust. However, it follows the intended storyline and is the
final mission-ending trigger. If Supreme had relied solely on this event, I
wouldn’t have called it a bust. -
The body discovered is probably the final dog that
attacked the guard outside the temple entrance. The other patrolling guard
here must have seen its body later. |
|
|