|
BETWEEN THESE DARK WALLS I
can’t believe I waited nine years to play this Skacky gem. One of the best,
yet most overlooked fan made missions of all time. Yes, it probably doesn’t
quite reach the levels of Endless Rain or Sound of a Burrick In a Room, but
those are also quite exceptional missions in comparison. If you like
verticality and the thieves’ highway, this is for you. If not, you’ll hate
it, but your loss. All
I had to do was teach Messer Beric a lesson and steal his amethyst necklace.
His castle was on the other side of town and most likely difficult to enter.
I also needed to find 2,850 worth of valuables and make it back to the
starting point. Time to get climbing! Go West After
taking the purse from the guard in the initial streets, I immediately
ascended the balcony to the south. I wanted (and was forced to) stay elevated
for the majority of the mission. Moved west into the Tyrell estate without issues.
I took the northern exit first and cleaned the area around Tol Camrick &
Sons as well as Castle Spaulding. I was sad to find you couldn’t enter the
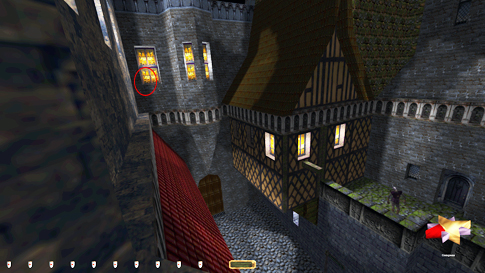
latter. I was worried I was going to get spotted along the upper ledge on the
north side of Harcourt Street, going for the coin stacks in the window (left
image below). The guard across the street faced north for a bit, but there
were intermittent patches of shade that kept me safe.
Had
to return to Tyrell’s to continue westward. I eventually ended up at the
hammerite priory, looting what I assume was the high priest’s quarters. Found
a key there that I brought along, but I couldn’t continue further west past
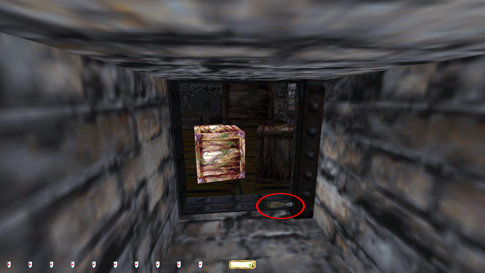
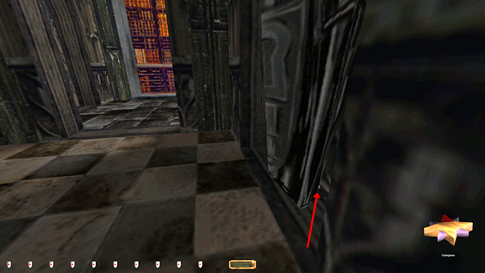
this point. Instead I found a hidden chute that took me to the adjacent
public works building. I couldn’t close up the chute on my way out in
conventional fashion. I had to block the sliding panel with a healing potion
and replace the crates from the inside, which was a bit fiddly (right image
above). I could have gone back up there from the inside and closed it up
later, but that would involve an awful lot of backtracking. This solution was
a lot easier. I would have to return the potion for Supreme, but the one I
brought along was located pretty close to the starting position. The gate on
the roof was easy to close from the inside, then run out. To
loot Grimshaw’s estate I had to leap across the marketplace from the balcony
below the sleeping thief (left image below). Like before, I thought I would
get caught by guards below, but the lights from the surrounding buildings and
street lamps didn’t illuminate as far as I anticipated. There were a few convenient
patches of shade inside the estate also that kept me safe from the patroller
and Grimshaw himself. Leapt back to the roof afterwards by timing the
wandering archer, grabbing the rope in the jump. Dodged
the aforementioned archer going north by waiting on the railing, stealing his
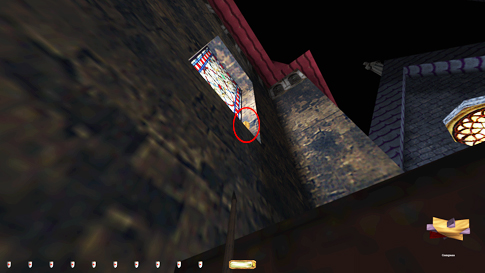
purse in the process. Finally entered Beric’s castle through a window in the
northeast. There was a hidden goblet on a sill above the entry window, and it
was very tough to safely get back down from the outcropping beam. I ended up
grabbing it from the rope without ever mantling up fully. That way I could
mantle into the castle and continue on.
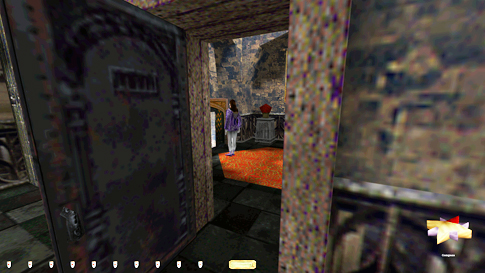
Beric’s Castle The
only issue before reaching the sanctuary was the woman in the western bedroom
on the top floor (left image below). Her door had to be picked open in order to
get the basement study key, and unfortunately she heard the lockpicks and
thus busted Supreme. I could return to her room later without further busts,
even returning the key to the floor without as much as a peep, but those
lockpicks tickled her ears just a tad too much. The rest of Beric’s estate
was no problem. Next
I cleaned the sewers and the hammerite wine cellar. This was the only way to
approach it without picking the lock on the doors to Beric’s basement or the
Public Works from the streets. The secret panel accessing the wine cellar had
to be timed well, otherwise the patrolling swordsman heard it, but other than
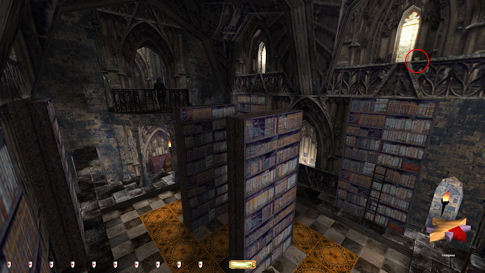
that this section posed no issues. The
sanctuary also went trouble free. The only minor problem was getting the gold
nugget atop the bookcase near Ingvar’s chambers (right image below). A
patrolling keeper with a long route walked through here, but he wasn’t the
issue. Of bigger concern was the stationary guy on the balcony. He pivoted,
but did so quite frequently, plus he heard me drop to the ground unless I
landed on the rug. The best way I found was to attach a rope to the bookcase right on top of the ladder. From
atop the rope I could reach the nugget and then drop straight onto the
ladder, lowering myself silently to the floor from there. The keeper had to
face south the entire time not to give any comments.
There
was an insanely well-hidden piece of loot in the hallway just outside the
barracks. It was a diamond behind the foot of a statue (left image below). It
was so concealed I almost couldn’t see it even when I knew it was there. The
only hint to its presence was the patrolling keeper in this area who walked
out of his way a bit when he did his patrol. He didn’t stop by the statue,
but walked at an awkward angle, enough for me to notice something was off. I
didn’t see that during my practice run because he was already knocked out, but
when ghosting it was apparent. This was the only piece I needed help from the
forums to find. After
taking the medallion, I went back and replaced the shrine key, the wine
cellar key and the basement study key. Had to lockblock the wine cellar door
in order to get back in there. Reset the switch and lever for the sanctuary
entrance too. I left via the small study on the floor above the dining hall.
There was a secret exit there that led to a machine room in the southwest
corner of the marketplace, and it didn’t require the picking of any locks.
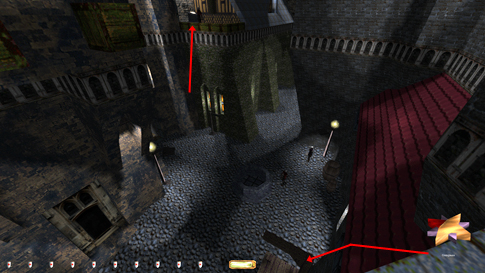
Back East I
could now leap across to the north and grab the windowsill goblet. This I
could’ve taken from Beric’s castle earlier, but that would’ve required
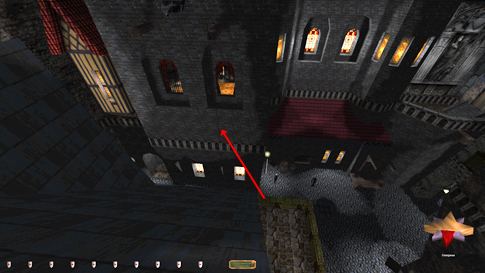
picking open the balcony door. I got down to street level via the red roof to
the south, landing silently onto the gallows (right image above). The
patrolling archer was wary, but the stationary swordsman on another planet,
hardly noticing anything. The shadows in the plaza dictated quite well where
I could walk safely. The northern side of the well was dark, and approaching
it from the west was possible, though challenging. From here I could access
all the side alleys with no alerts and get the two remaining purses off the
wandering guards. Since I had to return the hammerite key, I realized it had
been a mistake closing up the gate and panel to the public works building
from earlier. I should much rather have left them open and climbed the
balcony in the northeast corner of the marketplace. There was a convenient
ladder there that, coupled with a rope arrow, would’ve provided easy ascent.
I’ll definitely do that for the let’s play. Instead, I had to go back via the
streets and return to the high priest’s bedroom the same way as before. Statistics: Time: 1:21:00 Loot: 4000 out of 4000 Pickpockets: 7 out of 7 Locks Picked: 4 Damage Dealt: 0 Damage Taken: 0 Consumables: None Ghost: Success! Perfect Thief: Success! Supreme Thief: Failed! Perfect Supreme Thief: Failed! Notes: -
Got a first alert from Lady Beric when picking the lock
on her bedroom door. You have to enter that room to get the basement study
key. Supreme bust. |
|
|