|
THE CINDER NOTES - [1 Million Units Contest] This
is DrK’s spiritual successor of Sliptip’s
Ashen Age, which he released anonymously for the 1 Million Units Contest.
Plenty of players thought Sliptip himself had
returned from a decade long hiatus, but were just as shocked to find out the
real author. It’s a beautiful, well-designed daytime mission, with venetian
streets and a hammerite seminary. The ending lacks
a bit to make it stellar, but definitely a solid experience. I had to retrieve information from Carlin at the
inn regarding The Cinder Notes. Next I was to obtain a painting from the art
dealer, as well as 1,200 in loot. I had to end back at the warehouse. The
map was split in two, east and west of the main gate. Most areas required
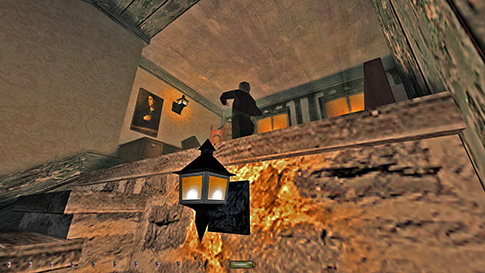
standard sneaking, but nothing extraordinary. Carlin’s room was a bit tricky,
but I could hide by the bench on the lower level and monitor his patrol (left
image below). I quickly mantled up and grabbed the items. Would have to
return his key later. Skipped the streets for now. Instead used the canal to
move east towards the gate. Could go underneath it and emerge on the east
side. The best way into the seminary was via the basement, accessible via a
ladder just south of the guard station (right image below). The stationary
watchman faced west and south. In the former position I could creep-strafe on
by and descend.
I
couldn’t blow the basement generator. That was property damage and it removed
light sources around the compound, plus it spawned extra enemies. The only
good it did anyway was provide an alternate route into the catacombs, which
wasn’t necessary at all. In fact, the entire seminary and catacombs were
without any ghosting issues. Nothing to report at all. Simply dodging the
patrolling guards. When
returning from the seminary, I had to deal with the central part of the map,
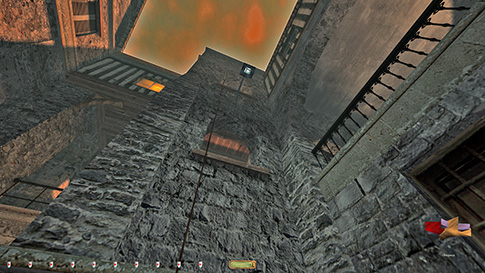
which was by far the most difficult area in town. To get into the guard
station and get the piece of loot from the top floor, I had to enter via the
top floor window. There was a door on the lower level, but opening it
triggered a first alert from the stationary guard. I used a rope arrow into
the northern end of the windowsill instead (left image below). Climbing it
without alerts took a lot of waiting. There were three patrollers in the
area, all with a very good view of the rope. They all had to be gone at the
same time. Also, the stationary guard inside had to be facing south when I
passed the lower window. At the top of the rope I was dark and safe. To get
back down I slid south off the lamp, landing directly into the canal. Nobody
heard the splash which surprised me.
Fratelli’s
was next. I could enter via the top floor window here also, but this was in
bright sunlight and extremely difficult to pull off unseen. I ended up
picking the lock on his front door instead. This just seemed like the
stealthier option. His bedroom was still very difficult. I experimented for a
while, realizing he didn’t alert to the door opening. This was tough to gauge
as he didn’t give verbal remarks when stopped, only when patrolling. When by
the window, I could creep-strafe over to the chest and hop into the corner by
the north wall (right image above). This was the only place in the room where
I was completely safe. I had to make rounds from here to get the various
items one at a time. His key was needed for the nugget in the attic. Luckily
he patrolled partly on top of the carpet, so I could return the key silently. The
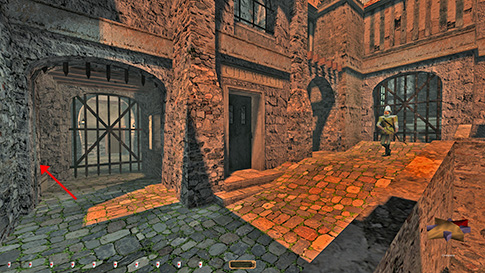
coins in the fountains were next. The most difficult was the fountain
southwest of the main gate. The coins weren’t difficult to take once there,
but getting to this location without first alerts was a pain. In retrospect,
I should’ve taken a different route, as I needed to cross the lower courtyard
too many times. I ended up mantling up the railing from the ledge above the
canal, but I think dropping from the top floor window after cleaning the
guard tower would’ve been better. I’ll do that when I record my let’s play. I
could stand in the western end of the water trough and observe patrollers
(left image below). This was a good method to reach the art dealer’s.
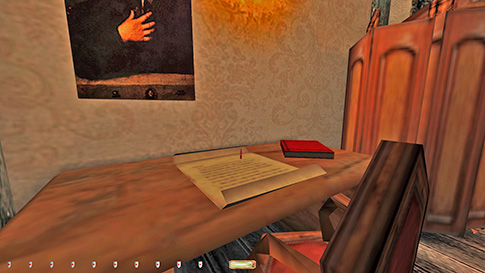
The
final challenge was returning Carlin’s key. It had to be dropped onto his
desk, and the only place to do so silently was a microscopic spot in the
middle of the paper (right image above). If I didn’t hit this spot exactly,
it made a wood sound and alerted him. It would’ve been so frustrating to bust
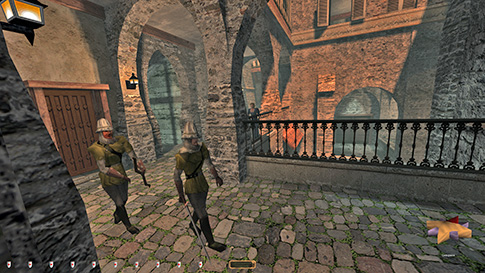
this late, but luckily I got it. Two
extra archers had spawned close to the warehouse when going for the exit. It
made my return a bit more tense than expected. I challenge everyone to get
both of these archer’s pickpockets without any Supreme busts. Statistics: Time: 1:08:52 Loot: 3383 out of 3383 Pickpockets: 13 out of 13 Secrets: None Locks Picked: 20 Damage Dealt: 0 Damage Taken: 0 Consumables: None Ghost: Success! Perfect Thief: Success! Supreme Thief: Success! Perfect Supreme Thief: Success! J |
|
|