|
Lost Among the Forsaken [Thief: The
Dark Project 20th Anniversary Contest] I had wanted to try DrK’s
entry in this contest ever since the results were in and the anonymous authors
were revealed. An obvious throwback to The Haunted Cathedral, and in my
opinion a huge improvement at that. A tense, confusing, but well-built map
chock-full of nostalgia. Lots of loot in hidden places rewards those with a
keen eye for detail, but can be a real challenge for inexperienced taffers. This mission comes highly recommended! Cutty
had tasked me to locate his informant Harren, dead
or alive, in the ruined Sealed Quarter. Entry was in a district called Lower Hilrem, where I also was to find a relic by the name of
the Right Arm of St. Lucard, as well as 2,700 worth
of valuables. Lastly, I was to make my way back out of the quarter. The
loadout screen offered another objective by way of purchasing a contract for
50 gold. It required the pickup of 6 out of 8 relics from the Sealed Quarter.
It couldn’t be completed for Supreme, as purchases are not allowed for that
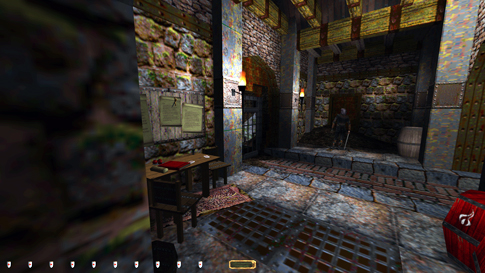
mode, but I bought it for regular Ghost. The Sealed Quarter The
only area of concern before reaching the abandoned part of the city was the
thieves’ hideout. After their conversation, one of them soon left, only to
return not long after. The other one stayed in the initial room and did small
patrols there. He had three stopping locations, to the east, west and south.
When in the eastern spot, I could leave through the double doors (left image
below). Outside I still had to be careful, as the gates were see through, and
the first thief ended his patrol just beyond them. I thus quickly ascended
one of the wooden rafters using a rope arrow. From here I could leap across
the chasm to the ladder on the other side. Ladders can break a fall from any
height; strange but true. Don’t try that one at home though.
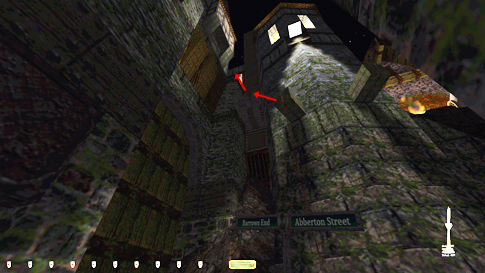
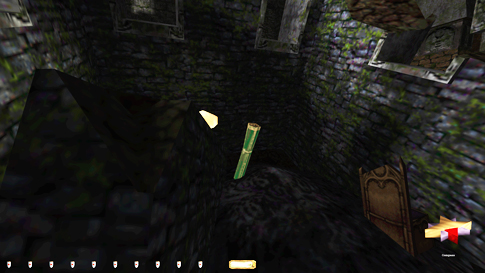
A
few pieces of loot around here, but no enemies. The toughest one to find was
high above some pipes in the southeast. I had to make good use of my rope and
some mantling to get the candlestick up there (right image above). The
switch in the power station raised three nearby gates. I couldn’t proceed
without raising them, so I had to pick up the key from the thieves first.
Turning on the power also switched on the lights in the area. That doesn’t go
against Supreme rules, only turning them off
do. Luckily, only the lights in this part of town (which was devoid of
enemies for now) turned on.
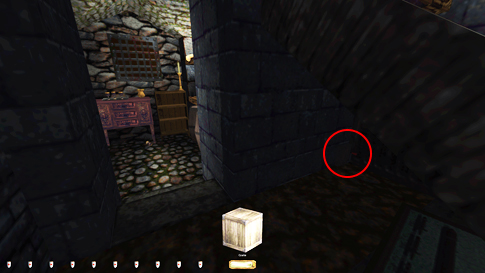
Found
a hidden treasure cache in an apartment north on Sullensgate.
The switch to open it was behind a crate underneath the stairs (left image above).
Stealing the treasures spawned a sleeping zombie on the outside balcony. I
didn’t realize this the first time through, scaring the living crappers out
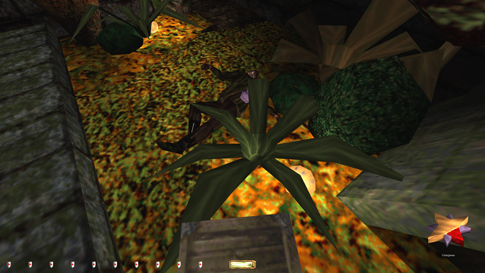
of me. Nice job, DrK. The crate I brought along and
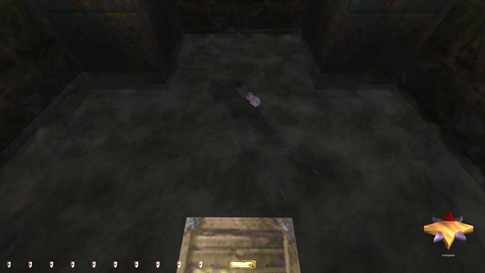
used to steal two purses off sleeping zombies nearby. One in a roof garden
just to the south (right image above), and the other in the sewers beneath
the adjacent power station (left image below). Zombies give growls based on
proximity, but only at their height level. If slightly elevated, they won’t
detect you, and thus crates can get you close enough to steal items off their
belts. Just move as close as you can and drop (don’t throw) the crate towards
the body. Then hop on top and lean over to grab the item. I think this is the
first time I’ve ever had to use this tactic, so it was odd to do it twice in
the span of a few minutes. Coghill I
had no issues besides some well-hidden loot until I got to Coghill. There
were a total of five entrances, though only two were viable for Supreme. The
main gate was only possible to open from the inside. The sewer entrance
required picking a lock, which was unnecessary and I always avoid those. The
cave entrance in the northeast had a falling rubble and wooden rafter piece
triggered when passing. I treated those as traps and thus skipped that entry
as well. That left two entries on the north side, both accessing the main
hallway of the market. Coghill
had three main areas: the market, depot, and warehouse. None of these were
difficult once you knew the patrols. The depot was most heavily patrolled,
but enemy routes were fairly long and there was plenty of shade to go around.
A conversation outside Craster’s bedroom yielded
one more patroller in the southwest section of the depot, so it was highly
desirable to clean that area first. The biggest problem was I needed three
different items from the scrappers before leaving; Caster’s key, the
warehouse key, and the Builder’s Scriptures. These would all have to be
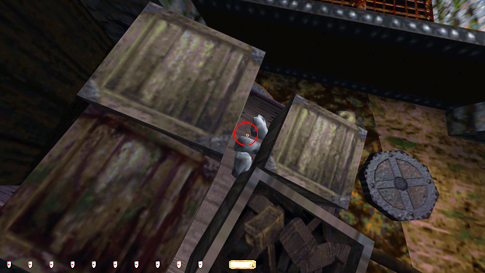
returned later, which required some planning. The warehouse was the toughest
location, as the scrapper in here had a randomized patrol path. To begin
with, he patrolled only back and forth between the door to the east and the
closest shelving unit, so I thought that was the extent of his route, but
then he suddenly started walking all over the place. There was a tiny ring
underneath some nuggets on a cart in the northwest of the warehouse (right
image below). Tough to find that one. On
my way back out I could visit the cave to the north and get a silver nugget
here that I couldn’t get earlier. This was the aforementioned cave with the
falling rubble and board. I still couldn’t leave from this cave, so I
reentered Coghill to exit by a different route. Also found a piece of loot in
the market hidden behind a whole slew of crates. I did find a spot where I
could lean in and take it though, without moving any of the crates. It
would’ve been tough to replace all those crates for Supreme, as I was quite
exposed.
Medwick Tower Made
my way north through the stables and furthermore west on Thorin
Floodgates. There was a piece of loot I thought I could get from this side, a
ring behind a chair in a ruined loftspace, but a
stationary zombie blocked the inside of the door to the adjacent building
(left image below). I could sneak through the window, but I got a first alert
inching over the inside footlocker. I had to go south on Trystane
Alley to find a different entrance instead, a caved-in floor above a flooded
basement (right image below). This set me back some, as the streets outside
were heavily patrolled. I eventually hopped into the waterway and accessed
the back entrance to the power station on DePurcell
Street.
This
mission’s biggest challenges came in the area surrounding Medwick
Tower. The main problem was the flaming spirit. It was stationed on a lookout
extending from the inaccessible church. It was facing south, but could spot
me anywhere in the southern half of the tower area. The fallen tower was
split into three parts, each piece of which had loot. The two northernmost
ones were easy enough to take; the main issue was obtaining the rug in the
tower’s base to the south. There was also a patrolling burning skeleton on
the ground level, but that could easily be timed to circumvent. I mantled the
tower on the north side of the middle piece. I approached the flaming
spirit’s back by traversing the eastern rim. I could even do a small run onto
the northeastern most corner of the tower with the rug without getting
spotted. I couldn’t jump or mantle up here, only run. Mantling onto sloping
surfaces usually doesn’t work that well. I could quite easily hear the spirit
intensify its flamy emissions once first alerted.
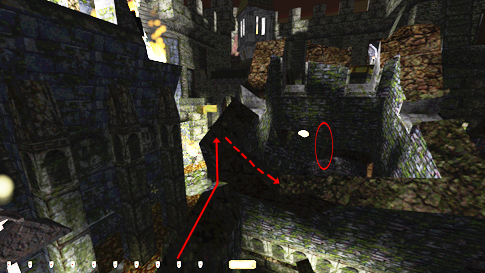
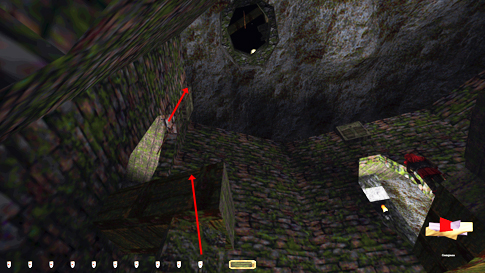
The next part was the most difficult. See the screen capture below to the
left for my route. I had to inch down the steep northern rim of the tower
until I reached the lowest point. The best method was to crouch-strafe up the slope. Due to the steepness,
this actually made me slide down, but
it slowed me enough not to get spotted. I couldn’t drop inside the tower
itself, as such a speed enhancement was enough to set off the flaming spirit.
Once at the bottom, I inched over towards the west until I could lean in and
highlight the rug (right image below). Going back to the northeast corner was
easier, as the upward slope naturally slowed down my movement. From there I
could drop north and to ground level without further complications.
Excellent!
The Catacombs If
doing things in a certain order, the catacombs only had one problem: getting
out. Four haunts spawned once I triggered the Harren
objective, but that could be delayed until the very end. There was a
proximity trigger close to Harren’s body that
triggered the script, but everything else could be done before that. I
grabbed all the loot first, then picked up the hammers from the bottom pit. I
then placed the hammers on the casket to open the tomb, and finally blessed
the two remaining graves in order to extend the tomb bridge. I had to use one
water arrow in the process, but that is allowed for Supreme, as long as it
isn’t used to douse torches. I could now return the hammers to the lower
level, which did not close the tomb
back up, by the way. I obviously couldn’t hang the hammers back on the wall,
so I dropped it on the ground below. That is ok for Supreme. The rule says to
return items to “the nearest logical place”. I also grabbed the scripture
book before taking the tomb treasure, since I’d have to return it to Coghill
later. Taking the arm started closing the tomb entrance, but I had plenty of
time to get out of there. I didn’t count the door closing on its own a trap,
and thus not a bust to Supreme. I
believe the rule refers to traps that are directly meant to inflict pain or
kill you instantly, like spitfire traps, falling boulders, or spiked
ceilings. Besides, I already opened the door, so it was in my best interest
that it closed back up, in order to remove evidence. Furthermore, without
having checked in Dromed, it seemed like the
scenario is a script linked with obtaining the arm of St. Lucard.
If so, this makes it highly comparable to taking of the talisman in
Undercover, a well-known setup where there is no possible outcome where the
player can avoid alerting the enemies. I vote no bust, but I’ll leave it up
for debate.
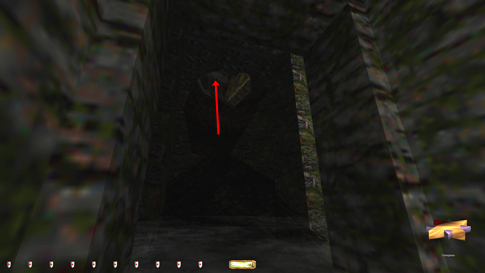
Before
triggering the haunts, I placed my second rope arrow (the first was still
hanging from the entrance hole) above the doorway to the east on the middle
level (left image above). There was a wooden plate above each doorway,
perfect for rope attachment. I could mantle the broken walkway here and wait
outside the doorway on the north side. This spot was dark and I could observe
the haunts in peace. One patrolled the walkways on this level, but it never
ventured over to the eastern side. A second patrolled the staircase between
the top and middle level in the southwest. The third circled the mossy cave
at the top level. Finally, the fourth only stayed in the tombs to the north
on the top level and was the least of my worries. Climbing the rope from the
middle to the top level left me very exposed, so I had to time the two
closest haunts well. I got it alert-free on the third attempt. From here I
could monitor all haunts from the eastern end of the top cave. In the screen
capture above, the three visible haunts all have their backs turned (the
farthest is heading down the stairs), so this would be a perfect time to go. Up
above I had previously attached the rope far to the west on the beam, so that
when I climbed back up, the beam would cover me from the street lamp to the
south. Several new enemies had now spawned in the streets, probably from
taking the treasure in the bottom tomb. Medwick
Tower now had an extra patrolling apparition, with seemingly the same route
as the burning skeleton. During my test run, the apparition was in hunt mode
when I ascended the rope, but this time it hadn’t alerted. I thought it might
have spawned in hunt mode, but users on the forum had already confirmed that
it didn’t. The only item left to take in this area was a tiara in the white
tower to the southeast. It was a little tricky getting back down without
taking damage or being seen by the flaming spirit, but I found an angle where
I could land in a direct mantle and also stay concealed. I
mostly utilized the sewer system in order to get back to Abberton
Street. I had a detour to Coghill to return the Builder’s Scripture, the
warehouse key, and Craster’s key, in that order.
One new patroller had spawned in the sewer system, and two new ones on Abberton. I remembered to shut off the lights at the
power station, which also reclosed the three gates I opened the first time I
was here. I also locked the power station door and returned the key to the
thieves’ hideout on my way out. Awesome mission! Statistics: Time: 1:48:28 Loot: 4790 out of 4790 Pickpockets: 8 out of 8 Locks Picked: 12 Damage Dealt: 0 Damage Taken: 0 Consumables: 1 Water Arrow Ghost: Success! Perfect Thief: Success! Supreme Ghost: Success! Perfect Supreme Ghost: Success! |
|
|