|
THE DARK MOD - TRAINING MISSION A
straightforward, but nice introduction to The Dark Mod. Its capabilities are advertised
in a simple, yet rewarding way. It covers most aspects necessary for regular
play, with enough handholding to avoid making it frustrating. Still, there
are almost enough secrets to make it feel like its own mission. I look
forward to other maps for this mod already. The
only discussion point before starting is the lack of proper objectives. Since
it’s a training mission, with no proper way to finish, I considered the
instructions given throughout the various sections a replacement for a
regular task list. Anything directed in the in-game notes or books would
supersede busts towards the ghost mode, as if it was explicitly stated in a
given objective. That would excuse for example knockouts or use of weapons if it was stated in a parchment for
that section. If stated in a different section, it was not excused. This was the only way to keep it fair, yet
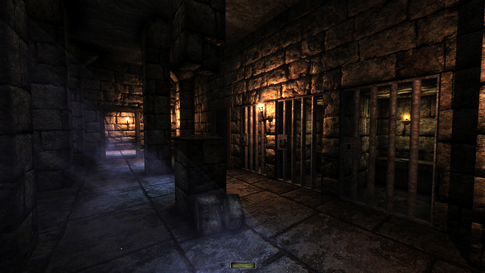
challenging. 1. Keys & Lockpicking My
settings were on ‘hard’, but the whole lockpicking
ordeal wasn’t that tough (left image below). The only thing that changed
between the various settings was how long the pause lasted when I had to let
go of the ‘use’ key. ‘Auto’ unlocks each tumbler at the end of the third
round. The loot reward increased with increasing lock difficulty; the
quadruple tumbler door yielded the biggest treasure (right image below). The
most difficult thing was returning the keys while still locking all the
doors. You can’t lock-block the doors like in the original games; instead you
have to either lock the door when it’s closed, or use the key on the door
when it’s open and wait for it to shut. If you frob
the door as it shuts, despite having used the key, it remains unlocked. You
can hear the locking sound as the door slams shut. For the three cages, I
could throw the key back in place between the bars. For the door however, I
had to throw the key against the back wall while it was closing. I
double-checked a few times to see where the key had landed. As long as it was
on the back counter I considered it ok. I never even bothered to unlock the
machine room. I could pick the safe over the noise anyway. Threw the key back
into the safe as it locked shut. I made sure to lock up the chest at the
start of this section also.
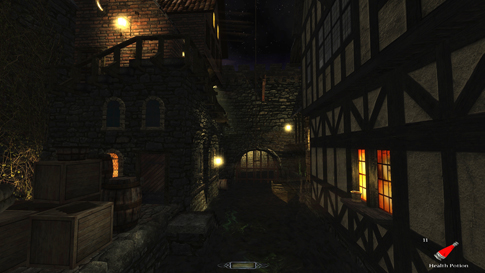
2. Jumping & Climbing Not
much to report from this section. Very few ways to bust, besides breaking an
arrow or taking damage. I didn’t do either. I wanted to find all the healing
potions though, as that seemed to be another in-game pseudo-objective. As it
turned out, there were 11 vials, not 10 (left image below). Check the loot
list for their locations. Accessed the room above the canal as well (right
image below). Found it tricky to return the footlocker key to the top of the
door. Had to use a rope arrow to get the right angle.
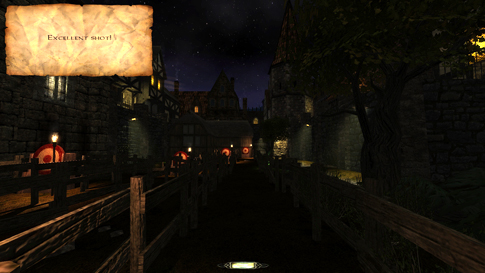
3. Melee & Archery Headed
for the archery range next. Picked up one broadhead
so I could get the announcements for hitting the targets. It seemed to be the
intended way through the mission, so why not? ‘Easy shot!’, ‘Not bad!’, ‘Nice
shot!’ and ‘Excellent shot!’. The last one was very tough from all the way behind the gate (left image below).
Found the hidden alley and picked the swordsman’s purse there. Brought along
one of the vine arrows from the tower also.
Entered
the hand-to-hand combat section afterwards. I had cranked up combat difficulty
to expert, which disabled the auto-parry option, but still managed to beat
all 7 combat scenarios. For some reason, it seemed a lot harder in version
2.02 than in pre-standalone releases. I just did it to see if there’d be some
kind of reward. There was none, so I reloaded and never even picked up the
sword. Found two pieces of loot above the arena, which is what I needed the
rope arrow for (right image above). Needed to descend using the rope also, to
avoid falling damage. Found the contestants start throwing rocks if you’re
out of combat range. Rather hilarious. Grabbed the last piece of loot behind
the boxes at the bottom of the stairs before leaving this section. Made sure
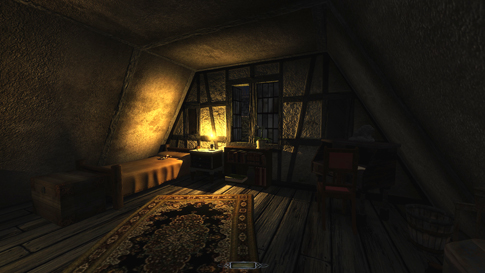
to reconfigure the boxes after moving them. 4. Objects & Handling No
worries here whatsoever. I only picked up the loot and left everything else
intact. Much loot here, including two hidden rings under a red hat. Checked
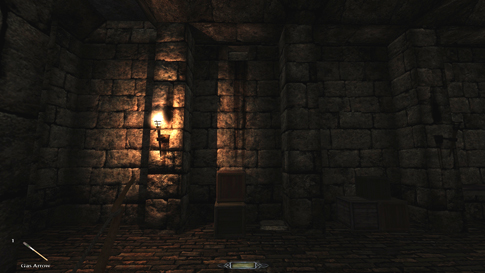
all the cups for valuable content also, but to no avail. Found the hidden gas
arrow behind the loose brick (left image below). I think I managed to light
all the torches in the last room but never got any confirmation. Couldn’t
light the lamp that was toppled over in the corner. Don’t know if that’s even
possible.
5. Stealth & Shadows The
first problem in this area was getting the loot from the locked chest outside
the guard post. The chest key was on the shelf on the back wall, so I needed
the door key from the guard’s belt first. Had to monitor his positioning from
a crouching position before going for the grab. It’s a lot more difficult to
sneak up on guards in this mod compared to the old games. Even directly from
behind they notice the slightest of movements. It’s all for the better
though, as it forces you to be more cautious and produces a heightened sense
of realism. With his key I could enter the room and get the old chest key
from the shelf. Both keys had to be returned for Supreme, and therein lay the
conundrum. The actual returning maneuver has been made a lot easier in The Dark Mod. You can now manipulate the angle,
drop height and distance from body of every inventory item in need of returning.
No more letting keys fall from waist height, guaranteeing alerted guards.
Thus, I could carefully place the chest key back on the shelf without as much
as a pinhead’s worth of noise. The problem was the other key, since I had to
replace it from the outside after
relocking the door. I could place it on the windowsill without trouble, but
that wouldn’t follow Supreme rule 7’s wording of “at their feet”. In order to
get this right, I found I had to do the entire move from a crouching position
in the shade next to the chest. I was completely concealed from the guard’s
view here. First, I clicked the ‘drop inv. item’ key. This put the key out
into the air in front of me, ready to be dropped. Then I could hold the
‘manipulate’ key and rotate it so its flat side faced down towards the floor.
The point was to be able to eliminate any sound when lowering it. ‘Mousewheel up’ moved the key away from me as far as
possible. Once positioned the way I wanted, I swung Garrett’s body so the key
went over the windowsill, down the other side to the left of the guard’s
body. At this point I couldn’t see the key nor the guard. I had to estimate
when the key was close enough to the floor to be silent when dropped. It took
a few tries to learn the correct distance, but in the end I clicked ‘frob/interact’ and the key disappeared from my inventory
without the guard noticing (right image above). In
the next hall I again had to return a key taken from a guard’s belt. Since he
was patrolling, I could return it anywhere along his route. Guards do give
comments on stuff missing from their belts in TDM, and this guy was no
different. I consider this more part of the in-game atmosphere rather than an
alert though. And unless you want to count every pickpocket in the game as a
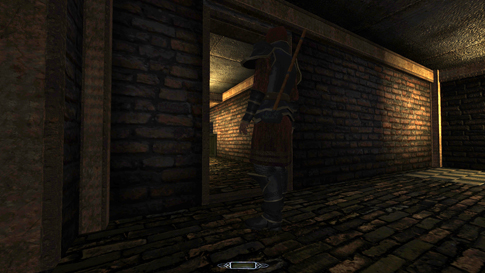
bust, I’d say these are excused. If I unlocked the door at the end, the guard
extended his patrol out into the next hallway (left image below). I could
therefore lock the door and drop the key out there, since that still was part
of his assigned route. Again I had to be careful with the drop and rather
“place” it on the floor instead of letting it fall.
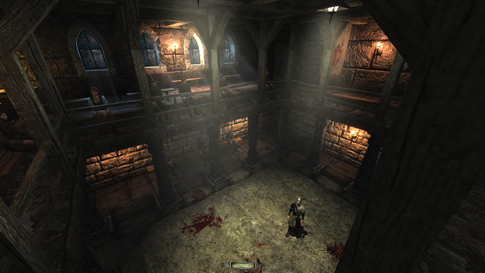
Used
two moss arrows in the next, tiled hallway. This was instructed in the note
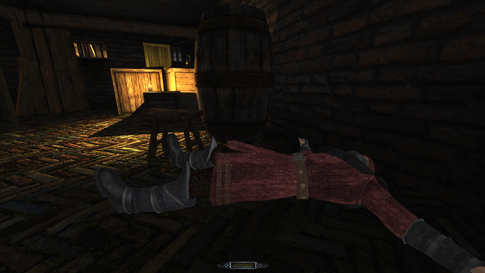
and therefore excused. As was the inevitable knockout. Managed to steal his
key before using the blackjack. As instructed, I dropped the body in the
storage room up the stairs (right image above). I
also excused the use of one water arrow, one flash bomb and one noisemaker
arrow in the last two sections. Again they were intended in the notes given.
However, I realized I couldn’t return the exit key when leaving the final
section. I don’t know whether this would’ve counted as a bust, as there is no
way to return it when you can’t lock-block doors in this mod. I guess Supreme
rule #7 talks about putting it in the “nearest logical place”, but that’s
only when the engine prevents you from physically putting the item back to
the original location. Due to TDM’s lack of lock-blocking, I think keys
should have to be returned as close as possible, while still prioritizing
relocking the door. I was able to circumvent the whole situation however, by
instead backtracking through the entire section, skipping everything beyond
the guard post with the trophy. There was nothing important for me to pick up
back there anyway. If you want to complete this area instead, you’ll have to
go back through the entire stealth course and replace the exit key. Then of
course, you’ll have to avoid replacing the tiled passage key and the hall key
on your first way through, then put them back as you backtrack through the
course after having returned the exit key. I hope all that made sense. You’ll
also have to use another two flash bombs to reenter and leave the storage
room where the exit key is. I guess multiple flash bombs are allowed due to
the explicit instructions. Not sure about this though. Statistics: Since
I couldn’t end the mission in normal fashion, no end stats were available.
And since I don’t know the maximum loot count, Perfect Thief and Perfect
Supreme Ghost verdicts have been omitted. Ghost:
Success! Supreme
Ghost: Success! Consumables:
None Notes: -
Skipped the stealth and shadows course beyond the first
guard post. It just involved too much damage and use of equipment for my
liking, but the ultimate reason was the inability to return the exit key. If
that had been possible, I would have completed this section. |
|
|