|
PREVIOUS MISSION THIEF
2X NEXT MISSION Mission 8: The Art of
Deception [This report has been updated for TFix/NewDark 1.27. Situations
affected by these patches and differences between them and OldDark have been inserted in green. All screenshots have
been updated, and new ones have been added.] I like this mission. Although not as suspenseful as
the previous one, it offers a nice change of pace. It has pockets of hostile
guards, a nice city layout, and an intense finale in the priest compound.
Some interesting readables and amusing
conversations offer a welcome comedic relief. A successful Perfect Supreme
Ghost usually means the mission is too easy, but that is not the case here.
This campaign continues to impress. First I had to make my way to the smugglers’ candy
store and leave the Orb of St. Basmus among their
merchandise. I couldn’t let them see me or attack them in any way. I was then
to find my way to the hammerite priest compound via
a secret passageway in the sewers. There I was to leave a note for brother Cavador, telling him about the smugglers and the Orb. 650
worth of loot was also required, plus making my way back home afterwards.
The Goodie Bag The district around the
inn, the market and the cathedral streets posed no Ghost challenges
whatsoever. Only a few hammers in this entire area even reacted to my presence.
The only problem was scouring closely to find all the loot. The secret above the inn I liked (left image above), it
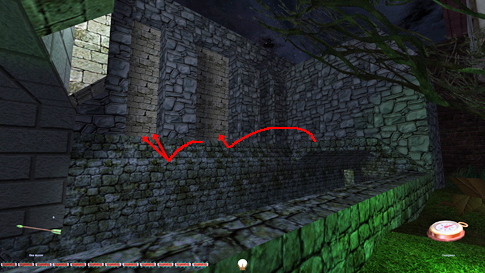
rewarded a consistently determined climber J. The gas arrows by the canal
in the west seemed hard to obtain at first without the use of an ice arrow,
but there are a couple of ways. I did an angled running jump from the ledge
to the north (where the canal
disappears), mantled into the middle alcove across the waterway (right
image above). From there I made another hop towards the arrows and caught
them in mid-air (I could even get both in one leap). Imagine the grin on my
face after those moves. You can also drop down from the rooftops, but I
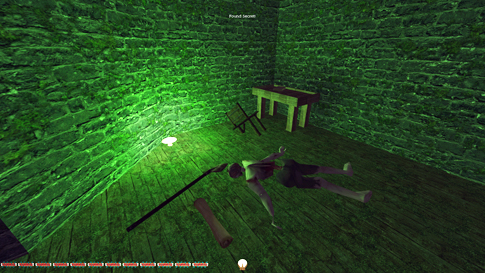
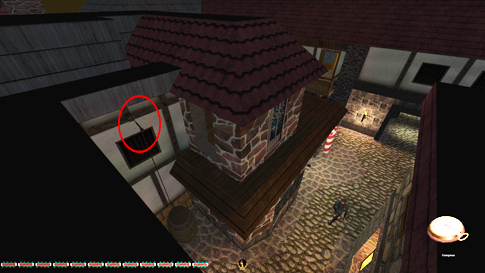
figured that as the least intended route. Big
Willy’s abandoned apartment held another secret, a safe behind a shelf unit
(left image below).
I arrived at the
smugglers’ store from the bedroom balcony just west. Leaped onto the wooden
roof from here and slid down on the south side walkway. I picked the lock on
the door to the shop and grabbed the loot from the box under the counter. I
could keep in the dark while doing all of this, dodging both guards’ patrols.
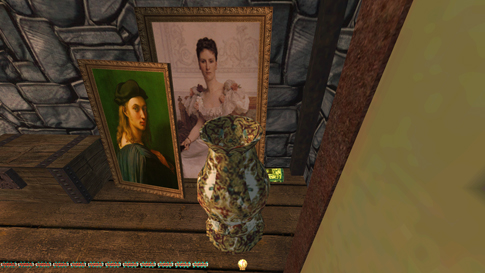
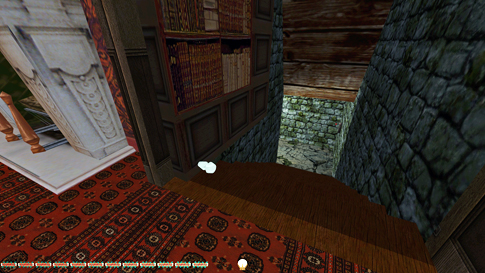
Entered the hallway next and headed downstairs. Placed my Orb and picked the
loot. A very well-hidden rug behind the paintings here has probably slipped
many a keen eye (right image above). The streets in the back got far more
crowded after this, as the members of the conversation now had started
patrolling. The archer patrolled faster, so he kinda
screwed up my runs a time or two. I tried with several ropes to reach the
roof again, as one can’t even enter the yard in front of the shop without
getting alerted. Finally settled on the wooden supporting block of the
western building (left image below). In NewDark, the roof of the candy store can easily be
mantled from the walkway railing to the south. The big problem from
here was to reach the train station area without alerting ANY of the 4
smugglers protecting its entrance. I quickly realized my only solution was
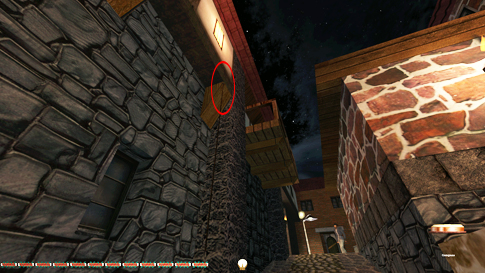
the roofs. Luckily the designers have placed a tiny wooden rafter underneath
the eave to the east of the shop, probably to help reach the open window
here. However, one can also use it to mantle onto the roof of the east
building (right image below). I was more worried about how to get back
without being alerted though, so I started planning my return before even
dropping down to street level. There is one window frame very close to the
smuggler shop that can serve the purpose. As far as I know, it’s the only
place where you can get back onto the roofs from the station side. But to
keep Supreme intact I had to be able to retrieve my arrow. Thus fastening the
rope from higher grounds and making the arrow tilt upwards was imperative
(left image further down). Every ledge has an invisible outer shelf; a very
thin area seemingly existing in mid-air. It can be very useful for quiet
sneaking, and in this case for reaching hard-to-get arrows. Perfect Supreme
still intact! If wanting to get the gas arrow
outside the train station, you need to bring along the first rope arrow.
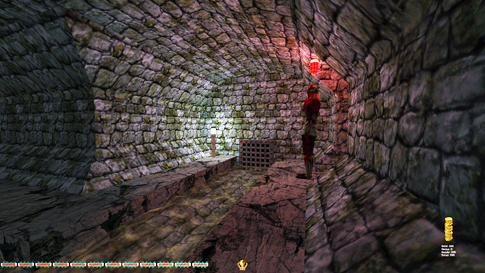
The Lighthouse Cathedral Found Big Willy’s purse
in a closed-off section of the sewers. Was one more tricky piece of loot down
here, in a power room protected by hammers. The stationary guard wasn’t
troublesome, but the patrolling archer needed to be dealt with. Plus there
was a stationary iron beast close to the entry door. The beast can be fooled
by creep-crouching. I lurked forward as soon as the archer left, all the way
in and grabbed the coins, then back out. I had plenty of time before she
returned. The image to the right below is taken at the closest point without
spawning comments. The door to the power room had a tendency to disappear
also, so it was a juggling act making sure I got through the doorway without
it being removed from existence.
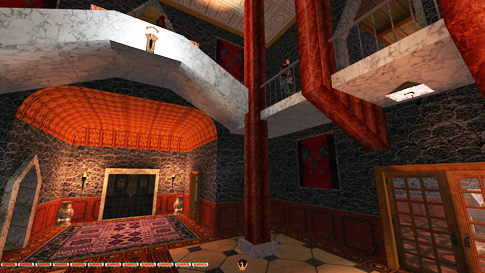
Inside the cathedral, the
main thing worth mentioning was getting upstairs. Without a single first
alert it was quite difficult, however, doable. The trick was to reach the
point in the lowest flight of stairs where Zaya is
in total darkness (left image below). From there I waited for the perfect
moment and ran to the lounge in the northwest. The moment of running is
different every time, and it depends on all five guards not looking. The
bright light made it difficult. Once upstairs, spots by the walls on the
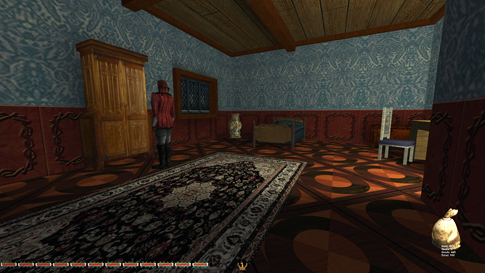
pillared walkway made it easier to maneuver discretely. The only loot upstairs
difficult to obtain was the spice bag from Brother Davis’ quarters. He had a
weird patrol route where he stopped at random points for anywhere from 5-15
seconds. He had at least 4 different locations where he stopped, but the only
one that kept him from hearing the lockpicks on his
money box was when he stopped by the cabinet on the north wall (right image
below). When I ghosted this mission back in 2005, I didn’t find a way without
him first alerting. This time I waited for over 5 minutes to double check for
a settling remark, and I assure you he remained unalerted.
I could drop down on the
west side of the balcony without alerts or damage. I noticed the secret
entrance had been closed, probably an in-game script to boost the challenge.
At one time I actually thought this would bust Supreme, as there was no way
of closing the portcullis outside and still leave unnoticed. I scratched my
head for long, and then almost got embarrassed when I realized the simple
truth. Merely leave through the manhole in the courtyard and enter the
cathedral once again through the bookcase door. Lower the gate and leave via
the living room. Simple! If planning ahead, you
can even bring an item along with you to block the secret entrance from
closing (left image below). The concealment potion from the power station
just south of the cathedral works nicely, as it can easily be returned for
Supreme and doesn’t require picking any locks.
STATISTICS: Time: 1:11:10 Loot: 1000 out of 1000 Pickpockets: 2 out of 2 Secrets Found:
2 out of 2 Locks Picked: 14 Damage Dealt: 0
Damage Taken: 0 Consumables: None Ghost: Success! Perfect Thief: Success! Supreme Thief: Success! Perfect Supreme Thief: Success! Norwegian Thief: Success! |