|
PREVIOUS MISSION THIEF
2X NEXT MISSION Mission 5: The
Redistribution Game [This report has been updated for TFix/NewDark 1.27. Situations
affected by these patches and differences between them and OldDark have been inserted in green. All screenshots have
been updated, and new ones have been added.] This mission has a very nice premise and a fairly
good execution. Unfortunately, it suffers from being too small and easy.
Forced ghosting objectives are never a good sign for a mission’s durability.
Once you know the layout, the map becomes a walk in the park and most of the
tension disappears. Architecturally, the smugglers’ hideout is impressive,
but I wish it was a lot bigger. My first task was to find out if the Free Traders had
any obvious enemies. Next, I had to get the names of the smugglers’ boss and
his next in line. I also had to obtain a map of the place, plus 750 worth of
loot. An additional requirement was to avoid any kills, knockouts or
detection, but the Ghost rules already enforced all that. It was time to get
to it. The Caves Interestingly, I didn’t start with any rope or vine
arrows, which is quite rare, and although one was available for purchase,
Supreme rules disallow any pre-mission transactions. There was one rope arrow
available inside the hideout, but I had a feeling I would be able to ghost
this mission without it. Two entrances to the hideout existed. The closest
one to the starting location required picking the lock on the main gates.
However, this entry could be avoided entirely, so I wanted to take the
alternate (and tougher) way in, through a top floor door at the docks. As
I’ve mentioned many times before, I don’t like picking locks that can be
avoided, especially if they don’t have a key assigned to them and thus can’t
be relocked. That was the case here.
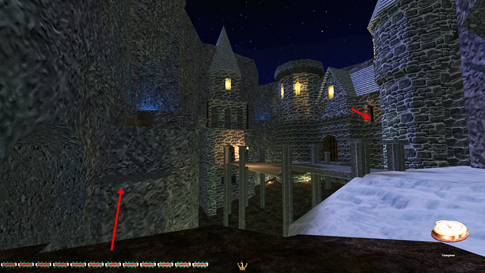
Two smugglers had a conversation outside the main
gates. However, I noticed it didn’t trigger until I approached the patrolling
archer. I could see when I crossed the invisible trigger line, as the archer
suddenly deviated from his normal patrol route and headed over towards his
buddy. I could avoid this conversation by taking the side cave down to the
docks. If so, the conversation would start here instead, with the archer
walking all the way over to this cave. I don’t think I’ve ever seen that sort
of setup for a conversation before, but it was quite intriguing. I used this
to my advantage by triggering the conversation in the cave by the main gates,
then running over to the docks via the side tunnel, thus having this entire
cave all to myself (for at least 30 seconds). I could now traverse the rocky
ledges up to the top floor entrance without worrying about the patrolling
smuggler below seeing me (left image above). He returned right after I
reached the entry door. This conversation checked off one objective and added
another one; I now had to find more information on the hammerites. The Hideout Entered the hideout above the great hall. I skipped
Neeson’s quarters for now; I needed the
square-toothed lockpick from downstairs first.
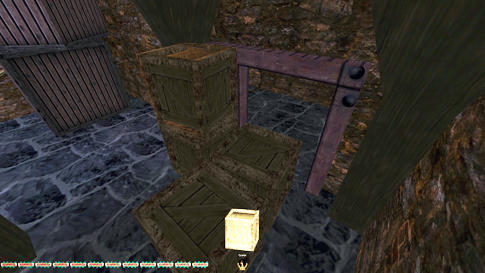
Cleaned Grissam’s bedroom instead. He was the
second in command after Neeson. Looted the secret
under the stairs next and put the crates back as I found them (right image
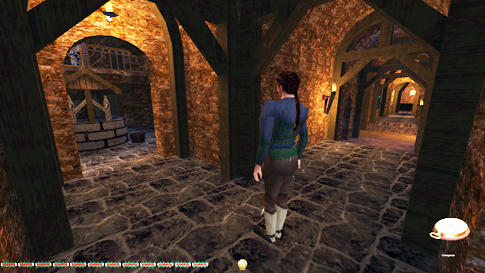
above). I then got to the most difficult section in the mission. A smuggler
was stationed in the middle of a hallway, randomly turning to face east and
south. I had to sneak along the north wall of the hallway to his east in
order to get in behind his back and slip into the nearby engine room (left
image below). It was just a matter of him facing south long enough, I’d say
around 10-15 seconds. I guess it took me about 8-10 tries before I got it.
Cleaned the dining hall and the kitchen across the
hallway to the east next. Totally empty rooms those. Outside the kitchen’s
southern exit I triggered another conversation. This initiated the patrol
route of one more smuggler, while the other one headed for a stationary spot
further south. The patroller did counterclockwise rounds in the southern part
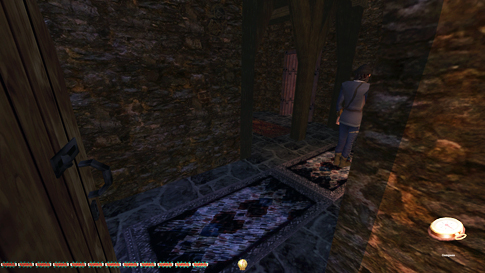
of the compound. I reloaded and utilized their conversation to sneak up the
hallway to the west. This took me up the stairs approaching the smugglers
from the south. I could now enter the barracks from this side, something that
wouldn’t have been possible after their conversation was done. The stationary
smuggler was then too close to the door and gave a first alert when it opened
(right image above). The barracks had lots of goodies, including the
aforementioned rope arrow. I left it be for Supreme, as I realized I didn’t
need it. More importantly, this room gave me information on the guy in
charge, Neeson, and provided the square-toothed lockpick. Then took the same route back up to the second
floor as I did coming down. Typically, this time I passed the stationary
smuggler in the hall on the first try. Cleaned Neeson’s
quarter as the last stop. There was a patrolling smuggler that covered the
hallway outside, but his route was too long to be of worry. Nothing of what I
had picked up along the way was droppable, and thus not possible to return
for Supreme. I headed back out to the docks and stole the purse
off the patroller here. That was the last item to pick up, so I finished by
heading back to the starting cave. STATISTICS: Time: 21:42 Loot: 1394 out of 1394 Pickpockets: 2 out of 2 Secrets Found: 1 out of 1 Locks Picked: 6 Damage Dealt: 0
Damage Taken: 0 Consumables: None Ghost: Success! Perfect Thief: Success! Supreme Thief: Success! Perfect Supreme Thief: Success! Norwegian Thief:
Success! |