|
The Seven Sisters - Night One This is one seriously
good campaign, and one of the many memorable creations by the late Lady
Rowena. A perfectly balanced city mission, with elements from all the beloved
aspects of the thief universe; hammerites, mechanists, city watch, nobility,
undead, thieves and witches. The story is absolute top shelf, with an easy to
follow progression throughout. The map design is very challenging, yet also
non-linear, yielding excellent replay value. It just cannot get any better
than this folks. After reaching Basso’s
house and getting updated objectives, my tasks were clear. Meet Basso at Dr.
Knox’s house and find a cure for the plague victims. For Supreme, I had to
cure all such victims (which were seven), while for regular Ghost five was
enough, including Jenivere. I was also to pick up 2,300 in loot and return to
Basso’s place. There would be plenty more objectives to come, however. Heading for Knox’s The prologue was easy
enough, just grabbed the note and the key off the table and headed upstairs.
Night One started there. Oddly, a lantern was in my inventory. I left the
blackjack in my room and brought the rest. Basso’s shop key couldn’t be
dropped back so I was stuck with it. There was a clash between
the outside guards and a zombie in the streets outside Basso’s. This made
them edgy, so I replayed the scenario until only 4 was alerted. The most I experienced
was 6. That zombie did not count against my objective to cure all the plagued
victims. There was no holy vial anywhere near, so that would’ve been an early
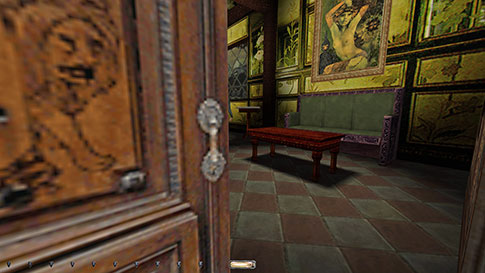
bust. The thieves at Market
Square did fake alerts as part of their patrols. No bust of course, but it
made me jump on occasion. Took the loot by the fruit stands behind the locked
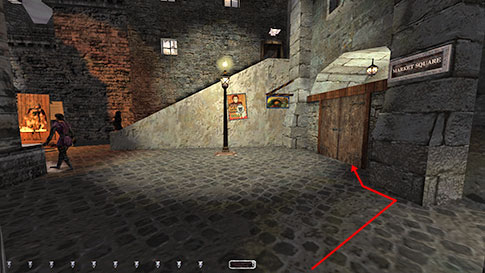
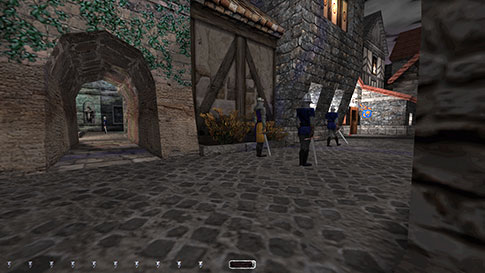
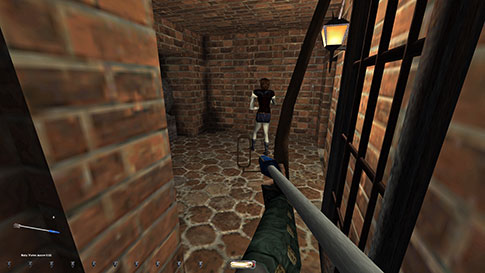
double-doors first. Had to approach from the east (left image below), as the
area between the ramp to the thieves’ hideout and judge Fowley’s main
entrance was too bright. I couldn’t pick the lock without going yellow
either, and that caused serious problems considering I had four thieves to
dodge. Good thing the doors were easy to pick. The patrollers could hear me
pick the money box also. It was a sweaty few minutes, but I got out in the
end.
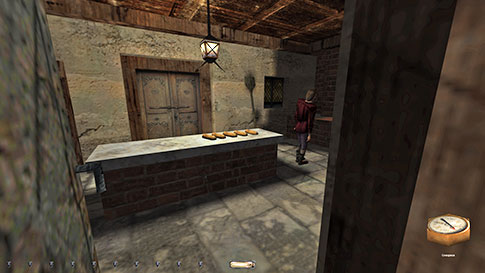
The dairy store was easy.
Didn’t close the door entirely while looting the place, to better monitor the
outside patrollers. I took the donut also, as it was needed to obtain loot
later. The rope arrow through the portcullis in the southeast was also very
much a necessary pickup. I did the thieves’ hideout next. Maneuvered in between
the empty food stands at the market and reached the dark wall east of Oldgate
Close (right image above). Realized I could stay on the ramp while the thief
walked up, but not as he came down again. The best time to enter was when he
did his fake search and the stationary thief was turned west. The guy inside
had a short patrol and stopped for a few seconds in each room. Found the best
way of moving was creep-crouch-running; it proved to be fast, yet silent.
Again the money box gave me trouble. The man downstairs heard my tools if he
was in the western room, so I had to unlock it in two rounds. I followed the
thief outside when returning to the streets. I entered Fowley’s by
rope arrowing up the wooden block above the portcullis. The female thief
caught me once or twice there; she was very sensitive. Fowley’s cellar key
was necessary to proceed, although it had to be dropped back before ending
the mission. I cleaned the middle floor and the wine cellar and returned the
key immediately. I left the sewer door locked but open so that I wouldn’t
need the key later. I like to get things done quickly, otherwise I might
forget. Sent the elevator back to the top also. Initially, I had planned
on bringing the water arrows from Conor’s, but he alerted to me picking his
door. I brought the arrow from the sewer pour out instead. Most of the canal
was dark at the bottom, and ended up being a great way to move about. The
problem was finding quiet places to jump in. The loot at the bakery had to be
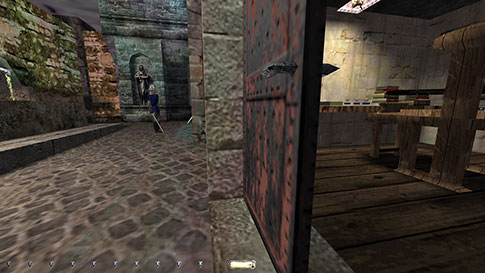
skipped for Supreme, as the owner alerted to the lockpicks. However, like all
enemies, he didn’t give a first alert if he was waiting at the end of his
patrol (left image below). For some reason they fail to give a verbal remark
then, despite entering a first alert state. If waiting a few minutes for a
settling remark, I realized he had indeed alerted. I ascended the police
station through the west window. That way I could stay close enough to make
sure nobody heard the arrow impact. There was a tiny portion of shade in the
window where I could stay completely hidden (right image below). From the
roof, I entered sewer maintenance 1 and opened the canal gate behind the
zombie’s back. Is the sewer maintenance 1 key an unnecessary pickup? Well,
from the objectives I eventually had to cure the zombie, and the only way to
do that is to pick the door lock. Following Supreme rules, that door then has
to be relocked, hence it is a required pickup. The key couldn’t be dropped
back either.
I climbed back up the
ladder and crossed the roof to the monkey. The top of the gate wall was good for
traversing. The cash box key was a necessary pickup and disappeared upon use.
Neither this loot nor the guard’s purse were hard to obtain. The coins from the prison cell were tricky
though. Sneaking in and out I followed the guard. If he opened and closed the
prison door, nobody said a word. If I did, the prisoners gave a comment. So I
stuck close enough not to block the door. Dodging his turn at the end of the
cell hall was easy. The prisoners didn’t react to me walking or jumping right
in front of them, but one (I think the circus performer) alerted to me
opening the door to the cell with the coins. I am in doubt whether this is a
bust as they are not supposed to react to me, but I ruled against myself and
ended up skipping the loot for Supreme. I left the police grounds via the
wall by the monkey. The police station roof
archer spotted me once before I managed to enter Knox’s safely. Couldn’t pick
the safe in Knox’s underground lab as the female zombie gave a grunt. Would
have to come back later and see if I could figure something out. Could mean I
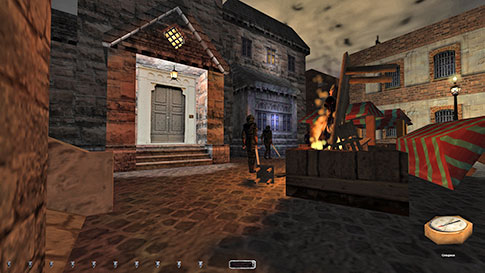
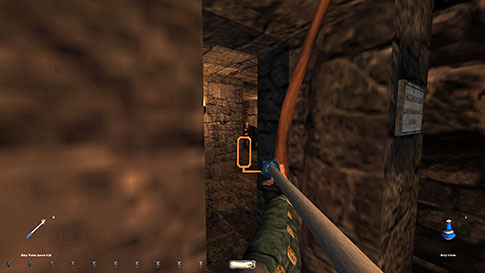
would have to do with 6 vials total. Cleaned Malthus’ store and entered The Hammers The party by Stonebridge
didn’t alert to me as long as I stayed out of their turf. The bridge fence
covered me for the archer also. I passed East End behind the three guards
(left image below). One of them turned randomly, while the other two had
predictable angles. Had an honest attempt at reaching Printing Works within
Supreme rules, but failed inevitably. I managed to reach the door by
creep-crouch-strafing as the patroller went north and the stationary guard
was turned east. I could also make it inside, but not without quite a few
attempts. The last foot before I reached the dark doorway was just within his
visible range (right image below), but if I rushed into the doorway,
occasionally he gave no alert. However, when going back out, he always
alerted. You cannot use the rushing trick when moving into their field of vision. Supreme busted. Only a comment though
(given he continued to face east), so plain Ghost was still intact, but I had
to skip this loot for Supreme. I could only skip 699 loot in total to stay
above the requirement. I still had 409 to go, but it worried me nonetheless.
The hammer cathedral
posed few problems. The cathedral key was necessary and couldn’t be dropped
back, same with the crypt key, except it disappeared upon use. Took a little
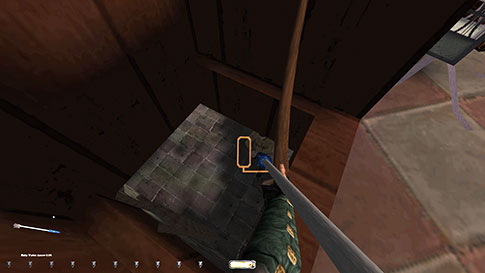
time to drop from the bell tower without taking damage. Needed to frob the
ladder to move it back in the fall. The objectives are a little vague
regarding the whole hammer/Martino ordeal, but I assume obtaining the crypt
key is implied. The objective was neither failed nor checked off, it just
disappeared from the list as Brother Martino went to rest. Both the hammer
and the key were nonetheless necessary to finish the mission. Torches were
lit in the main chapel as I placed the holy hammer, but this doesn’t go
against any specific rule. Rule #6 only speaks of removing light sources, not creating them. The crypt was much easier
than anticipated. All the caskets had dark alcoves beside them, and the
patrols were predictable. To start the elevators in the hammerite complex I
had to turn on the engines by flipping the switch. This is not a bust in
itself, but it had to be turned off also. I solved this problem by standing
on the elevator hitting the top button, then quickly leaned in to shut off
the engines before riding to the top. It seemed the engines only ran the
basement buttons, as the buttons on the top two floors still worked. The hammer apparitions
were difficult to Ghost. Not because there were many tough spots, but because
they didn’t seem to have defined first alerts. Especially in the upper floor
hallway, picking the lock to the bedroom with the holy vial, I had a hard
time telling whether the apparitions heard me or not. Same with the double
doors downstairs. I ended up skipping the bedroom vial for Supreme for that
reason. Although I cannot give a guarantee I supremed the complex, it was
done as close to perfect as possible. I won’t call it a bust if I cannot tell
the alerts, but I can assure everyone I was more careful than normal.
Whenever I passed a bright area and a hammer was walking with his side or
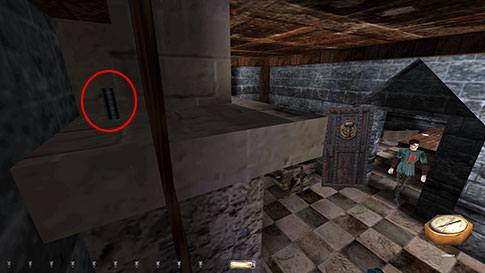
front towards me, I reloaded. Found a very well-hidden coin stack on the
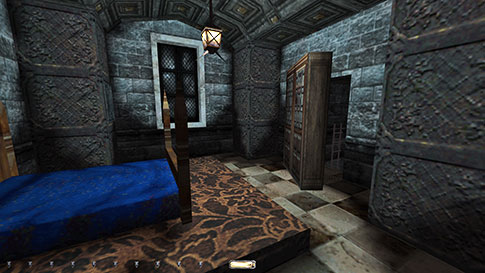
fireplace mantelpiece on the middle floor (left image below) The secret door
behind the bookshelf couldn’t be closed fully. I had to block it by running
into it or putting a vial on the floor (right image below). I could not
backtrack and exit through the crypt caves. And I had to finish the mission
in my room at Basso’s, so I could not let the Thelesius objective be the last
and close the passage from the inside. It has been discussed in the Ghost
forum to call it a bust when in doubt, to avoid dilution of the rules, and I
agree with that statement. The bookshelf must be left open, if only ajar, and
that is a bust. Sad but true.
A Little Curing I had to creep-crawl out
the doorway entering Westgate Wharf from the cathedral grounds. The bright
lights and patrollers busted the slightest of speed enhancements. I dropped
into the canal alert-free and cleaned the sewage room by Nils’ body. Took one
of the water arrows floating by the west gate also. That made 7 in total.
Then cured the bum below the streets. He went from patrolling to stationary
when cured. He didn’t alert to me after the fact, except for when I opened
the secret grate leading to the lucky coins. To avoid this I shot him on the
north end of his patrol instead. The streets between Before heading toward the
southwestern part of town I decided to cure Jenivere. I thus went back
through Fowley’s basement. Entered the streets from the roof near the dairy
store. Took the hidden bag of spice from the window in the alley here also.
Since the vial from Knox’s basement seemed hopeless, I needed to cure at
least two zombies using only 1 vial. I figured the guy in the bedroom and
Jenivere could be possible, in that order. I opened all the doors at Basso’s
and flung a rope arrow into the adjacent house. The rope had to be far enough
out from the concrete wall to catch dropping from the top, and so close that
I could grab the arrow and fall onto the tiny ledge of Basso’s building, and
avoid making any sound. Looted the chest inside before standing on the
windowsill flinging the healing arrow. The man stopped patrolling but
remained highly alert to my presence. Quickly shut the blinds, descended and
grabbed the rope, flew down the stairs and cured Jenivere (left image below).
Think I had around 5 seconds left of the potion. Locked up the shop and left
through Fowley’s basement again.
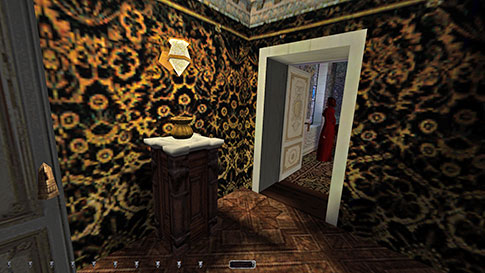
The two pieces of loot at
Maxim’s were a little tricky, only because the patrolling lady could see me through the secret panel to the
adjacent apartment (with the caged spider). So I couldn’t eavesdrop to hear
when she left the bedroom. Had to time the patrol by listening from a
distance, but that was hard because the swordsman outside made much noise.
The lady commented on me opening the panel also, so she had to leave and
close the door before I could enter. Also, she didn’t always close the door
going into the bedroom with her sleeping husband. Then she would alert to me
opening the hallway door. Finally I got into the hallway safely, and could
frob the doors as she passed (right image above). Next, I wanted to cure
the guard at Oldgate Close and Olivier the clockworker using the same vial. I
also wanted to avoid grabbing Olivier’s shop key, as it was unnecessary and
disappeared upon use. This combination of requirements forced me to heal the
guard first, then Olivier. The problem was the gate leading to Oldgate Close
from the north could only be opened from the south side. I needed this to be
open so I could reach Olivier’s place through his window within the vial’s
time limit. I thus circled around the mechanist facility using the canal and
Archway Walk. I could traverse St. Tennor Square west-east, due to the blue
swordsman doing his patrols counterclockwise. I snuck down the alley to the
plagued guard and opened the gate. Before curing them, I struck a rope into
the wooden beam outside Olivier’s window. The guard remained alert and
patrolling after being cured, so I had to be careful. I quickly ran through
the gate, then dropped into the canal and climbed into the clockworker’s. With
a bit of luck, I could shoot Olivier from atop the ladder before the timer
ran out (left image below). Very happy to avoid the shop key pickup here.
The Mechanists Tried reaching sewer
maintenance 2 by passing the mayor’s front doors, but that was too hard
without dousing the torches. Instead I reentered the canal northeast of
Olivier’s and climbed the ladder north on Archway’s Walk again. Back at St.
Tennor Square, I snuck along the western wall to reach the sewer door. The
foot of the big monument helped block the view to one of the patrollers. Opened the doors and
gates leading to Basso’s basement first, to help him escape later. However,
after some experimentation I realized that wasn’t necessary at all. Basso had
a master key for all the doors and gates along his path. Ironically, the only
gate he couldn’t get through without my help was the gate in his own
basement. Looted the entire mechanist building (dining hall, chapel, upstairs
bedrooms) alert-free. Rufus had a small patrol in his chamber, from the desk
to the bookshelf. He had to be stationed by the shelves when I opened the
door, otherwise he uttered an annoyance. Maya’s key couldn’t be taken unless
reading the book first. Luckily, the key couldn’t be dropped back. Rufus
didn’t mind me picking the chest. Neither Rufus nor Murdock left their rooms
upon sounding the acolyte bell. That was a problem because the security room
key had to be returned to Murdock’s closet. At first I didn’t think there was
a way around busting Supreme and dropping the key on the carpet in order to
avoid waking him. However, if picking up the healing potion, I found I could drop
the potion back and leave the key on top of it successfully (right image
above). This was not a bust, since it was returned to the same shelf of the
closet. Sent everybody to the chapel afterwards and quickly freed Basso. The
lockbox key disappeared upon use. Closed the cell gate as he left and ran
upstairs to open the front doors. I didn’t have to turn off the watcher, as
this would also have busted Supreme. The first guard emerged from the chapel
no less than 5 seconds after Basso escaped. I then headed for Maya’s. This was a tough place to
ghost. Not only were there few places to hide, but Maya and the guard had
opposing routes. When Maya left her bedroom, the guard would enter 10 seconds
later, and vice versa. I could easily snag her heart and the vase downstairs,
but the bedroom was frustrating. I found the best method was blocking the
door as the guard entered, then quickly scoot around the right door and hide
behind it (left image below). Here I was safe from either of them coming or
going. Before Maya returned, I could quickly open the secret chamber and take
the stone key. In between patrols I rushed out again to close the passage.
Then finally I followed Maya as she left. I had just enough time to reach the
dark spot in the hallway before the guard appeared around the corner. I could
also close the bedroom door during this without any alerts. Outside I dropped
into the canal on the east side and used Minerva’s Place and East End to
return to the cathedral to destroy Maya’s heart.
Wrap-up In order to cure the
final two plague victims using only one vial, I had to maximize my efficiency
immensely. The two victims in question were Knox’s patient and the patroller
in sewer maintenance 1. I first tried curing the girl first, because I was
planning on mantling up the grated section in the canal and cure the other
guy from outside. Although I was successful in doing this with quite some
time to spare, there was no way for me to drop into the canal again
afterwards without getting detected. Instead I decided to do this guy first,
but from the main entry door over by the boat (right image below). In order
to save as much time as possible, I stood outside the door and timed his
patrol to cure him at the northernmost part of his route. I couldn’t see him
from this position, but my arrow could still cure him if hitting the ground
just next to him. He usually started whistling right away, a sure indication
of success. I immediately hopped into the water and swam over to Knox’s sewer
entrance. I had left all the doors here open ahead of time to save the last
precious seconds. The next problem was I had to sneak over to the cell when
crossing the last half of that room, otherwise the girl growled with a first
alert. Unfortunately, this slowed me down and I ran out of time a few feet
away from the door. However, a trick you can use to extend the time is to
draw the bow when the time says 1 second, and as long as you don’t let go,
the shot will still carry a holy water arrow. The benefit of doing this is
you can still move while having the arrow drawn. It’s slow and cumbersome,
but it was enough to get into the doorway and cure her. This finished the
optional objective of curing all the plagued citizens also; and by using only
4 holy water vials. Nice one! Went back and locked up
sewer maintenance 1. Closed the canal gate, along with the sewer gate outside
Conor’s. Headed back up through Fowley’s, finally returning his key. Back at
Basso’s I had to go down to the basement and open the gate for him. This
objective checked off as soon as Basso entered the kitchen. This was one
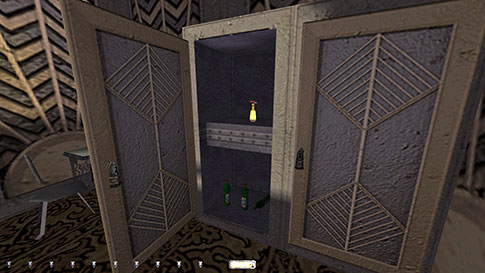
seriously challenging, but astonishing mission! STATISTICS: Time: 2:32:37 Loot: 2999 out of 2999 (Supreme: 2709) Pickpockets: 8 out of 8 Secrets Found: 5 out of 5 Locks Picked: 21 Damage Dealt: 0 Damage Taken: 0 Consumables: 4 Holy Water Vials & 7 Water
Arrows Ghost: Success! Perfect Thief: Success! Supreme Thief: Failed! Perfect Supreme Thief: Failed! Notes: -
Skipped the coins worth 20 at the baker’s for Supreme.
The owner alerted to my lockpicks, though this alert is easily missed. -
Skipped another coin pair worth 20 in the prison cell for
Supreme. One of the prisoners gave a comment when opening the cell door. -
Also skipped the 150 loot at Printing Works for Supreme.
The nearby guard gave a comment when picking the locks, and another one when
leaving. -
Couldn’t close the secret bookshelf door exiting the
hammerite complex. Had to obstruct it as it swung shut and leave it ajar.
Supreme bust. |