|
Ruins of Originia - Mission 1: Mines
of Margroth Hands
down one of the best, yet most difficult missions I have ever played. And it’s
certainly unlike anything I have ever ghosted. Very difficult to describe,
it’s a mission that must be played in order to be understood. That OldDark was capable of something this grand and complex,
is very surprising. The fact that YcatX put this
together by himself is even more astonishing. And it’s only the first in a
four-mission campaign... Hats off to a very talented author. A
renegade hammerite by the name of Bantar had taken off with some of their precious relics.
Apparently, he was hiding deep below an old miner’s complex, with the rest of
their organization and the bluecoats trailing. I needed to sneak in disguised
as a guard, procuring some maps and information about the mines. In the hammerite headquarters was located a soulstone
called the Gem of Oldorf, which I needed to steal.
Supposedly, it had some strange powers. Furthermore, I had to enter the
mines, find and kill Bantar, steal his amulet,
along with his Book of Darkness. My final object of interest was an enchanted
whistling stone, besides 6,000 worth of loot. Evidently, there was also a
different way out of the mines, once all my other objectives were finished. I
knew this mission was nowhere near Supreme Ghost attainable, there were just
too many confrontational scenarios for that. I focused instead on basic
Ghost, with the intent of trying to minimize the amount of busts for both
modes. I never throw caution to the wind once I bust the first time, not
caring about the remainder of the mission. The end stat ‘success’ is a nice
bonus, if possible, but shouldn’t kill the joy if unachievable. Instead, I
many times challenge myself to successfully ghost individual situations
within missions. To me, the types
of busts I take also matter. Getting spotted (rule #4) to me is worse than a
knockout (rule #2), which is worse than bashing a door or breaking a window
(rule #6). As long as busts are reported and the choice of bust justified,
you are covered. Also remember that taking damage from falls or traps,
drinking potions, or even severely exploiting the engine, although frowned
upon, are allowed in plain Ghost mode. In this difficult of a mission, you
need all the help you can get. Miner’s Town As
long as I didn’t use any weapons or got caught pickpocketing, I was safe in
the entrance caves and in the miner’s town. There were no less than 8
stationary guards in the main cave, plus 2 patrolling archers that
occasionally entered the hammerite headquarters. If
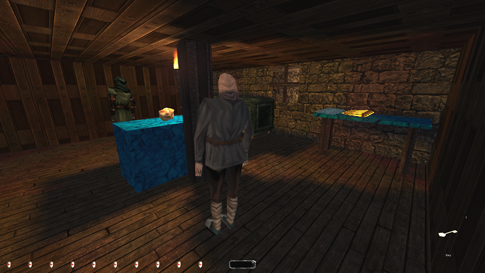
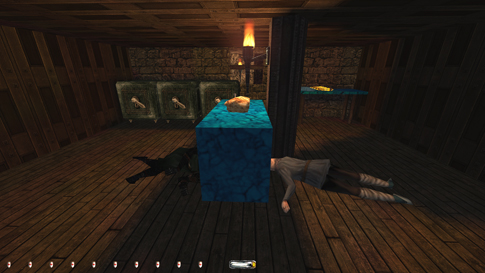
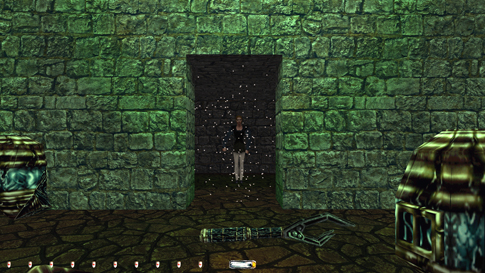
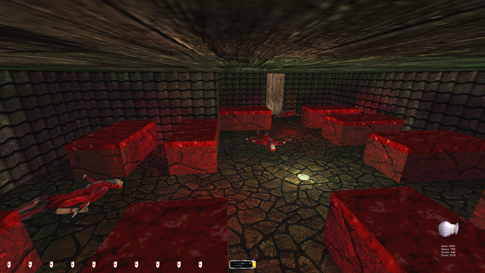
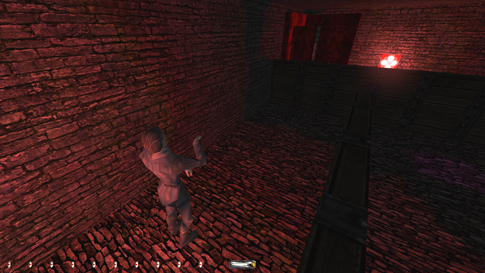
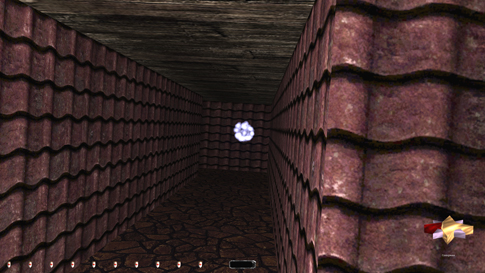
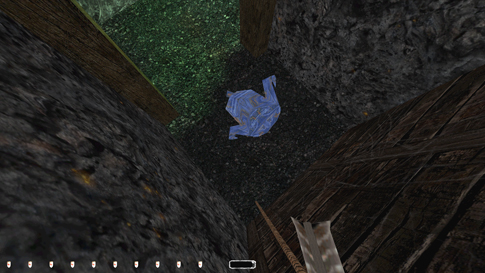
I went in there, they’d all come chasing. Found a lone coin by one of the
carts (left image below). I needed to use the upcoming thieves vs. city watch
fight to my utmost advantage. It is allowed to replay fights in order to
perhaps get a more desirable outcome. It is not allowed, however, to
manipulate circumstances in order to maximize casualties, like leaving a door
open to make individuals hear the commotion and come looking. I was
particularly thinking of the door to the weapons shop. In order to get the
loot in there without alerts, the two shopkeepers needed to die. You can get
the loot without busting Ghost, but it necessitates dousing the torch and
taking a first alert. I still wanted to avoid Supreme busts and reduce
consumables where feasible. I could get both of their keys without any
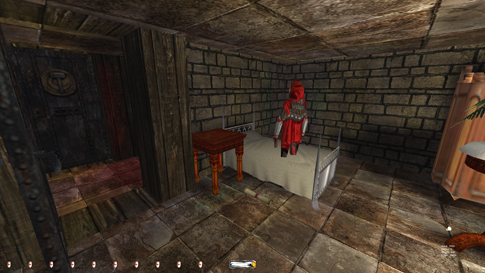
comments, along with some of the equipment from the corner table (right image
below). They freaked out if I took any of the arrows, unlocked any of the
safes or got the nugget/potion on the island.
My
only chance to get the shop loot without Supreme busts was to hope they got
killed in the upcoming fight. Before that, I cleaned whatever else I could. I
challenged myself to try and get all the pickpocket counts. Of course, this
meant I had to get them while they were still alive and without getting
spotted. Neutral guards will not react as long as you steal their pockets
without them reaching a second level alert state. This can be difficult to
detect since they don’t give any verbal remarks. The patrolling archers in
the outer cave stopped once I took their barracks keys (left image below).
Although it slightly changed the circumstances for the upcoming fight, it
shouldn’t count as busting ghost. I wasn’t manipulating the situation to my
benefit. The archers only spent a few seconds inside the barracks before
heading back out anyway. A similar thing happened with three guards carrying
keys in the miner’s town. They needed to unlock the kitchen door as a part of
their route. They stepped no more than three feet inside before turning
around and leaving, but after I stole the keys, they took a whole different
route to get there. They instead went through the bar, across the upper
walkway, and down the stairs to the kitchen, only to head back again the same
way. It seemed like they had to flag this spot in their path by whatever
means necessary. To prevent this, I tried leaving the kitchen door open when
triggering the fight, but this led to other issues. If the kitchen door was
unlocked, the first thief archer that runs out from the upstairs meeting
headed west instead of east. That’s because his primary goal was to fetch the
two undercover thieves in the west guard post, and through the kitchen was
the easiest route. If it remained locked, he headed east like the other five
thieves, which was highly desirable. So I left the kitchen door locked and
dealt with the abnormal guard patrols. Again, it shouldn’t count as a bust of
ghost rule #5. It wasn’t intentional, plus it didn’t benefit my cause. In
fact, I’d say it made it harder. The
“two on the inside” in the guard post also had purses. The woman’s along the
south wall was easy enough to obtain, but the man’s purse was worse. I found
I had to rush in and wait in the northwest corner until he settled from an
assumed alert. It took about 30 seconds before I could safely grab it (right
image below). Nice to get the count for that one.
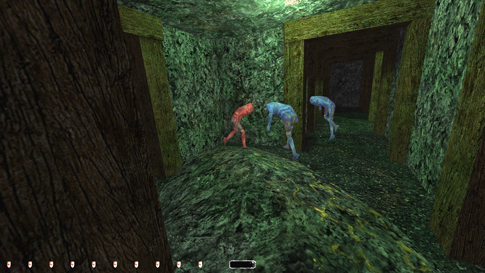
Then
came the fight. Since I wanted to get all 7 pickpocket counts from the
plotting thieves, I had to find somewhere close, yet dark and grab them as
they emerged from their meeting room. Once they got involved in the fighting,
there was no chance. By that time, they were too spread out. At first, I
thought I’d have to douse the torch on the east walkway and grab it all from
atop the stairs. This worked, but most of the time the thieves alerted to the
torch being out, which made them stop on a dime for about 5 seconds, plus I
wanted to avoid that consumable if at all possible. I finally found the
southeast corner at the bottom of the stairs to be dark enough. It wasn’t a
perfect shadow, but crouched I could grab all the pockets without leaning and
without being detected (left image below). The thief swordsman did give an
alert as he was heading down the stairs, but I think it was from spotting the
archer through the guard post window. I know it wasn’t a Supreme bust because
he gave the same alert if I was hiding underneath the stairs, completely out
of sight. From
here, I had a plan. Three of the thieves headed directly for the east guard
post, fighting the three bluecoats there. If they won (which they usually
did), sometimes they ended up searching around the room before settling to a
standstill. Other times, they would run down the hall towards the town
entrance. The latter was the preferred scenario, as that’s where the other
thieves most probably were fighting other guards. The more people by the
entrance also meant a higher chance of the shop door opening and the two
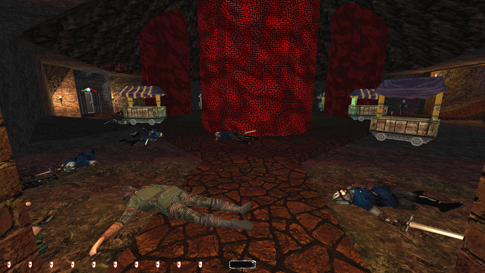
shopkeepers getting caught in the crossfire. After a few tries, that’s
exactly what happened (right image below)!
The
more thieves left standing at this point, the better. Now some of the guards
from outside were most probably in hunt mode. With some luck, I could monitor
the situation from inside the bar and watch as the thieves headed out the
main entrance (left image below). Luckily, thieves are more adept fighters
than bluecoats, so even though they had the rogues outnumbered, the odds were
even. I replayed this scenario 5-6 times until the perfect outcome occurred.
Only one thief remained, the male swordsman from the west guard post. He
eventually headed back to his station, completely out of sight. In addition,
one of the swordsmen by the western sloped entrance from the starting cave
survived; everyone else was down and out (right image below). Even the guards
by the entrance to the ancient miner’s residence had fallen. This was a
better result than I ever could have hoped for, so I continued on my merry way.
Grabbed
everything from the shop and from the bar area. All the items I couldn’t take
without getting detected before. A readable from the shop safe told about
hidden gems on one of the outside carts. The only way to get them was to
smash the crates with the sword or with a fire arrow. This is considered
property damage and disallowed for both Ghost and Supreme. In total, 800
worth of loot. That was a high amount of loot to skip this early. Luckily, I
knew the loot requirement was less than 50% of the total available in the
mission. There was also a hidden weapon’s cache in a locked room to the east.
A boarded up back exit was also found here. It led to the sewers, and
furthermore to an underground entrance to the hammerite
and guard headquarters. This was a much more desirable way in than the front
door. Dodging the guard inside the main entrance was possible, but not
without a “semi-bust”. However, breaking boards is property damage, and in
violation of ghost rule #6. After a bit of fiddling though, I found you can
quite predictably squeeze between the boards on the left side. With a
half-crouch, lean forward and jump, along with a few mouse-wiggles, before
too long I fell into the water on the other side (left image below). I
repeated this move effortlessly a good 5-6 times.
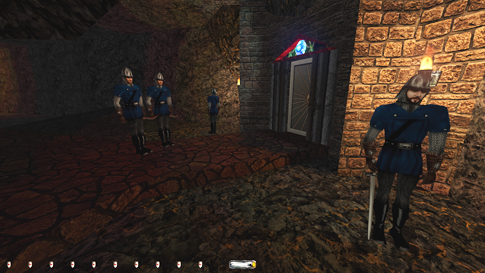
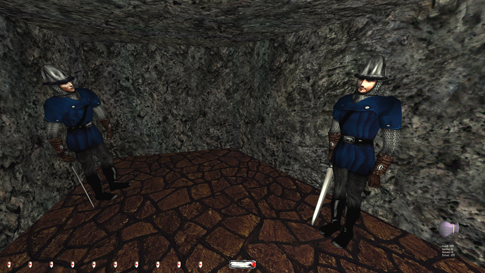
Hammerite &
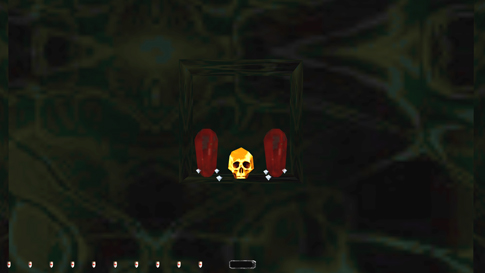
Guard HQ The
biggest issue in this place was getting the Gem of Oldorf.
As an objective, there was no way around obtaining it, but doing so required
dealing damage, and lots of it. 3-4 flash bombs were my best bet. However, I
had read on the forums long ago that somebody had once found the gem on the
floor ready to be picked up after the fight with the hammerites.
This gave me hope. After a few tries I discovered its weakness. Apparently,
the priests’ flying hammers deal damage similar to flash bombs. 5-6 shots and
it fell. The vault where the gem was kept opened when I read the scroll in
the southeast bedroom upstairs. Luckily, two of the swordsmen from downstairs
were triggered to come up and fetch the priests and the hammerite
guards. Their bedroom doors were usually already open, but if not, the guards
made sure. The gem’s shots were loud, more than enough to lure everyone
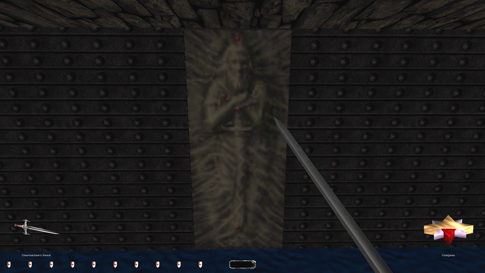
downstairs. One of the priests was unfortunately stuck in his bed (right
image above), but strangely enough I was still able to sneak in undetected to
get the loot. I was afraid I’d have to shut off the lights. The hammer mace
guard in the northwest bedroom was stuck in a similar way, but he more easily
freed up on his own. It was also in my best interest for the swordsman by the
front door to die. That way I could avoid the Supreme bust when leaving, as
I’d have to turn off the lights if he lived. His state was difficult to
monitor though, as I couldn’t go down to check until the gem had been slain.
I stole the upstairs loot while the hammerites were
away. Then I watched part of the fight from the staircase (left image below).
The gem and the priest duked it out all right. When low on health (or so I
assume), the gem fled into the bedroom, where it was downed by a final shot
(right image below). The hammerites took the
situation surprisingly well and returned to their bedrooms within a matter of
seconds. I hid in the kitchen and waited. To my joy, the front door guard was
nowhere to be seen.
Only
two patrolling swordsmen remained, which meant the rest of this floor was lootable without too much trouble. They were extremely
jumpy, however; running upstairs to alert the hammerites
when reminded of their lifeless workmates. This was most problematic in the
chapel, where there were 4 pieces of loot, tiled floor and no real shade.
Plus, the guards loved spending time in the long hallway due south. They were
so edgy that the smallest glimpse of me at great distances either made them
come chasing or running upstairs to get their friends. Either way I was
caught. There were two spots in either back corner where I could monitor them
from complete darkness (left image below). I could rush out to pick the locks
on the chests to get the loot there. I thought I was safe behind the wooden
fences, but the guards apparently could see through those. The
big blue gem attached to the outside of the pulpit was a light source that
disappeared when taken. Those are not allowed to be removed for Supreme, so
that mode had to skip it. The same applied to the gem above the headquarters
main entrance. Furthermore, the 10 diamonds in the caves below the chapel
were impossible to reach for any ghost mode (right image below). You have to
use two fire arrows on the sun symbols above the chapel’s hanging ceiling
first. That makes enough noise to alert anybody in the vicinity, fire elementals
as well as swordsmen. There are four elementals guarding the diamonds, and
two more that spawn if you take the pile of 40 fire arrows. The elementals
were already on high alert, I assume from the gem fight earlier. Another
grand worth of loot skipped. 1,800 so far for regular ghost.
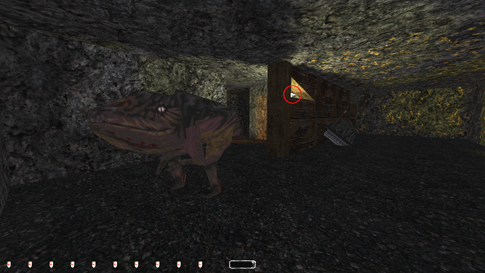
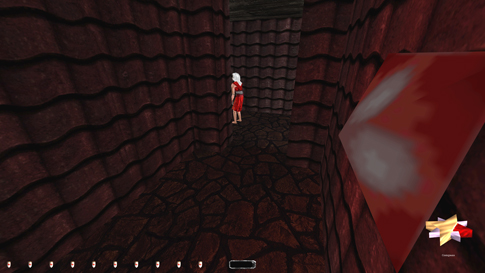
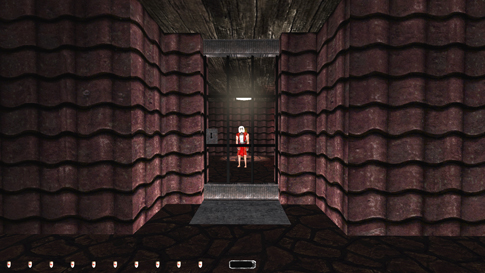
Into the Mines In
the ancient miner’s residence came my first inevitable Supreme bust. A bugbeast lady (the ‘woman’ sent by Bantar
mentioned in one of the readables) stationed in one
of the eastern rooms gave a first alert when crossing the way. There was no
way to avoid her gaze. If sneaking along the western wall (left image below),
she didn’t actually give the alert, but she did a high-pitched remark as I
left her view, indicating a settling remark. I did it several times and she
always gave the same verbal cue, so it most certainly was a bust. Next
I was forced into the tombs by the shadow burricks.
They guarded the entrance to the upper mines, but there was no way to fool
them. They reacted to everything except for perfect shadows. They did have a
30-degree or so blind spot directly behind them. Luckily they preferred darkness,
and two of them did a scripted run and ate two mushrooms before stationing
themselves in the first sloped cave. Unfortunately there was one more lit
fungus in a crack in the wooden wall outside the tomb entrance. It was enough
to prevent travel further north than shown in the capture below. I could
sneak past the first critter ever so slowly, only spawning a first alert.
Quite frankly, I was surprised I made it that far. If I had an invisibility
potion, I reckoned I could make it up the cave system unscathed. I’d probably
need to use some moss arrows too. I kept that idea in the back of my mind for
now.
Garrett
gave some comments as I headed into the lower catacombs. The entrance gate
was pickable, but also responded to the barracks
key. Strange. This meant I’d either have to leave it unlocked or not return
the key for Supreme, either of which was a bust. I locked it and kept the
key, it felt more Supreme-like. If I had decided not to lock it, I would’ve
had to leave the key behind before coming down here at all, since returning
it would’ve spawned another two first alerts from the bugbeast
lady in the ancient miner’s residence. Next
I found the embalming chambers. The northern one had three sleeping hammer
zombies (left image below). I could enter without any alerts, but it required
staying elevated, using at least two rope arrows. Sleeping zombies trigger
only to proximity at the floor level. As long as you stay above them, they
remain silent. However, this method was inconsistent at best, and the zombies
all woke when I passed an invisible border close to the middle of the room
anyway. There was a purse on the floor close to one of the zombies. It was
the only thing of interest in there, except for a scroll and the exit at the
opposite end of the room. If wanting to obtain that purse, it seemed like
waking the zombies (which only counts as first alerts by the way) was
inevitable. I decided to leave this room untouched and instead approach from
the east later. The south chamber was harmless, but contained some goodies.
Catacombs of the Ancient Ones The
tomb of the commoners had nothing to pick up. White ghouls occasionally
ventured into this area. The merchants sections had three rooms in the
northwest. The two northernmost ones had hidden mines that had to be disarmed
before entering. It doesn’t count as picking locks, I realized. The last one
was protected by four spiders patrolling in a room below. I had to sneak by a
few bright portions before reaching the tomb. The mine protecting it was
invisible, but I could still disarm it once I knew where it was (right image
above). It’s supposed to become visible using the Gem of Oldorf,
but that didn’t work for me. NewDark, maybe? Lots
of loot in there. My
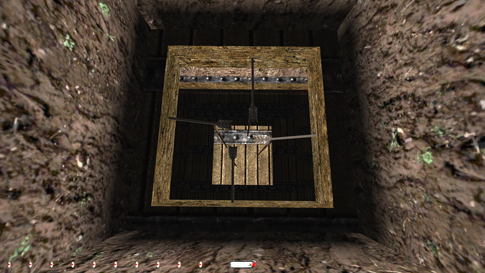
goal was to reach the north embalming chamber, so I passed the Halls of
Sorrow into the Well of Lost Souls. To get the whistling stone, I must admit
I used a walkthrough the first time playing it years ago. That is disallowed
for Ghost, so to be fair I should report it as a bust. I remember pulling my
hair out trying to figure out what to do at the well. The problem was the
whistling stone is a mandatory objective, and there was no hint anywhere in
the mission on where it can be
found or how to obtain it. If this
section on the map had been called the Whistling Well, or something of that
nature, then maybe, but it is outright cruel to practically require the
player to get hints in order to find it. In the end, I assumed the well was
just a challenging way to obtain all the potions and vials at the bottom,
eight in total. They could all be retrieved without the use of a breath
potion and without taking damage. I needed two dives to do it. Regardless, I
had to drop the nearby rubble piece into the middle of the well (left image
below), and wait for it to land on the pressure plate in order to spawn the
red, merry gem.
Back
to the embalming chamber. From this (the east) side, I could sneak by the first
hammer zombie. The readable gave very useful hints on how to access a tomb
called Viper VI. More on that later. Experimenting for a bit with the
zombies, I found there was a certain radius around the purse where all
zombies growled simultaneously, then if Garrett was still positioned within
that radius after a few seconds, they stood up, facing the player. If Garrett
was visible, they’d come chasing; if not, they would reposition themselves to
the previous angle, except they’d remain on their feet. This type of behavior
is normal for sleeping zombies going to an awaken state. The problem is, once
woken up, they alert to visible and audible cues just like a normal
stationary guard. However, if I simply rushed out from between the caskets on
the north wall, grabbed the purse and headed back as quickly as possible,
none of the zombies got up (right image above). They still grumbled,
indicating a first alert and of course a Supreme bust, but I was totally ok
with that. Another room passed. The
next challenge was the second time I needed walkthrough assistance when I
played 3-4 years back. Due to the aforementioned embalming chamber readable,
I should perhaps have tried a bit harder. I think I was somewhat frustrated
at the mission’s difficulty level. Resorting to hints seems more justified
then, I suppose. No excuse though, as I personally do whatever I can to
figure puzzles out on my own. I’m talking about how to access the crypts in
Hall of Lost Heroes South. Each crypt had a lever that opened another crypt,
six in total. Except the only way to open the door to the Viper VI crypt was
to flip the switch in the generator room in the northwest of the Merchants
section. Once you do, you have about 25 seconds to run through the crypt door
and pull the lever that keeps the door open. The author’s intention was to
use the speed potion in the starting inventory. Problem is, if you at any
point use it for some other purpose, there are no other speed potions to be
found anywhere in the mission.
Fortunately, you can make the run without the potion, but there’s no more
than a few extra seconds to spare. If you miss your chance, there is no
second attempt possible, as the generator causes an overload that blows two
of the red crystals. The real problem was the crystal bursting outside the
entrance to the south halls, since it was right in the path of all the
wandering ghouls (left image below). They all alerted without fail, hunting
for my presence with their distinct reptilian sounding hisses. That was a
serious Ghost bust and not acceptable. Instead I tried to enter the crypt by
other means.
The
readable had mentioned using an explosive charge, so I knew that was
possible. With a fire arrow shot and avoiding the blast, I got the door open
without taking damage (right image above). However, the ghouls back in the
outside halls still alerted. It was quite the distance, but they still heard
it. Upon a reload I went back to the entrance to the south halls and listened
for their patrols. Soon after, they faded. Back to make the shot again and
ran over to hear for alerted ghouls. Nothing. At least that avoided a hunt
mode bust, which I see as one of the worst types in the entire rule set.
Opening the gate by use of explosives is strictly speaking still a bust due
to property damage. Some would probably react to my use of the words
“strictly speaking”. After all, it’s not any different than bashing in a
locked door with a sword…or is it? Rule #6 states: “No property damage is
allowed. No banners cut, no doors bashed in, no things burnt or destroyed,
and no broken glass.” Cutting a banner, breaking glass, destroying a crate,
those are all irreversible, clearly visible and destructive acts that leave
evident signs of forceful behavior. When a regular door is bashed in with a
bomb or a sword, the locking mechanism opens, as if using a key, indicating a
broken lock. That implies damage to the property item, hence the rule. Here,
nothing was broken. The gate simply opened, whereupon it could be reclosed
with the inside lever, returning it to its previous state. In fact, if doing
so, I could now go back and use the generator to open the gate normally. If
the gate had become frobbable and able to be opened
at will, I could see the argument that the magical seal that kept it closed
had been destroyed. But that wasn’t the case. There was no way to tell I had
used the explosive charge to begin with. If so desired, I could even use a
second explosive charge to open the gate again. I imagine you could do this
as many times as you had charges available. To me, that made this situation
distinctly different than the ones rule #6 was targeting. Although I can see
the argument to count this as a bust, it was “only” property damage (viewed
by me as perhaps the rule that least violates the spirit of the regular Ghost
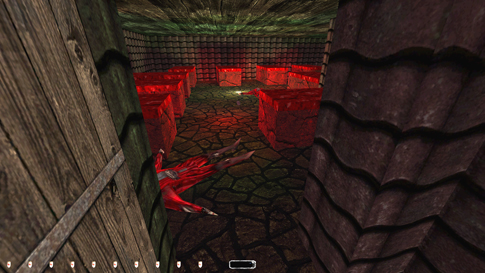
rules), and it was a doubtful one at that. In fact, I vote a no bust here. Tank of the Deep Ones I
opened all the crypts in this section, but didn’t touch the loot. I knew of
the spawning enemies and wanted to deal with them later. The crypt of Questorus revealed the entrance to the flooded part of
the tombs. There was a map of this entire area in a side tunnel, but it was
guarded by another shadow burrick and impossible to
take without getting seen. Only an invisibility potion would work, and I
wasn’t about to waste it. The upcoming section wasn’t difficult to navigate
anyways. A secret entrance took me to on overgrown basement. Quite a bit of
loot but no enemies, so nothing to report. The
top floor was patrolled by craymen and some
fast-moving, chatty zombies. I ascended to the top of the aquarium first.
Circumnavigated the tank along the eastern wall and flipped a switch that
turned on some of the lights. This is ok for Supreme; only the removal of light sources (except for
those you turn on yourself) is disallowed for that mode. Along with the
lights, a manhole cover also opened in the northwest corner of the tank (left
image below). It held a red gem. I had a very hard time finding any
predictable pattern when it came to the tank’s piranhas. They exploded and
killed me on impact, alerting the patrolling crayman
in the process. They moved a lot faster than any of the other fish, but
weren’t confined to any set areas. They didn’t follow me, but occasionally
were drawn to my general location, only to relocate soon after. Upon further
investigation, I realized they always started swimming faster the instant I
entered the pool. This was a clear enough indication of a second level alert,
and I thus ended up skipping the pool (and the gem) completely. On my way
back down through a nearby chute, I found more hidden loot in a wall
depression (right image below).
The
button puzzle to find Bantar’s hideout was very
cool, although I needed help to progress when I played the mission first time
around. This was the third and last situation where I needed help from a
walkthrough. The first button had to be pushed by climbing the wall by the
only stationary zombie (left image below). He was very jumpy when dropping back
to the east side. I managed to fool him with no alerts if inching slow
enough. For the next three buttons I used the Gem of Oldorf.
However, the latter of those three alerted the aforementioned zombie when the
gem landed. I could use a moss arrow to soften the landing, but I wanted to
avoid the Supreme bust here. Instead, I found I could drop a potion straight
down, then without moving, look straight up and throw the gem. If done
perfectly, it would land directly on the potion, then bounce a few feet away
(right image below), but without making too much noise. I did this
successfully on the first try, without as much as a first alert.
Used
a water arrow to click the fifth button, which accessed Bantar’s
lair. I was pulled up further by some kind of vacuum. Protecting the cave
entrance were two monkeymen and the tricksterling. The latter was down a side cave to the
left, while the two primates partly blocked my path. I didn’t find a way to
sneak by them using conventional means, so I had to resort to nudging. That’s
considered an engine exploitation and only allowed for regular Ghost as a
last resort, which this was a case of. I could nudge either monkey, although
I chose the one to the right (left image below). Another Supreme bust. The
innermost cave held two thieves (a female arbalist and a swordsman), Bantar on an elevated plateau, plus a will-o’-the-wisp
floating in the distance. The wisp would prove to be the biggest issue. Two
torches and a small bonfire kept the cave illuminated. The margrothian pillars also lit the cave some. Once I
entered the cave, the thieves and Bantar started
conversing. Upon concluding, they all got hostile, where Bantar
downed both thieves with one shot each. If I was in view once this happened,
he turned to me and kept attacking. “Eyeball!” If dousing the eastern torch
during their conversation, I could sneak along the right wall and hide in the
northeast corner until their fight was done. Bantar
would keep searching for a bit, before settling by his throne. Dousing any
light before the conversation
triggered a second level alert from the woman. I could now swim through the
tunnels and approach Bantar’s lab from the back. It
could be done without a breath potion, but there was only a fraction of a
second to spare. It also had to be done without touching the crystalline
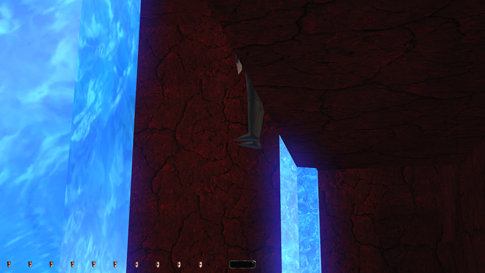
walls of the tunnels. Tough, but repeatable. Mantling out of the pool without
getting hurt was also a bit tricky. Bantar
was hyper sensitive at this point. Leaning around the corner behind his back
triggered instant alarm mode. If anything was to be done, it would necessitate
the use of an invisibility potion. But even with that, he heard me approach. Using a moss arrow
on the ground behind the throne fixed that problem. One overhead swing killed
him, permitted by the explicit directions in the objective. However, his gasp
alerted the wisp, a ghost bust of the worst kind. It was very tough to detect
the wisp’s alert levels, but it clearly changed its patrol path, indicating
hunt mode. Furthermore, getting the loot and the readable in the back cave
was nearly impossible at this point. The readable was necessary to change two
of the mandatory objectives. So I tried experimenting with different weapons;
holy water, flash bombs, etc. All yielded the same result, an alerted wisp.
Alas, the issue wasn’t the choice of weapon, but simply the fact that Bantar was dying, an inevitable consequence of dealing
lethal damage.
My
only chance to get out of this without a bust was by having someone else kill
Bantar. But could that be done? I decided to replay
the Bantar-thieves fight a few times, just to
observe. Perhaps the archer could get enough shots in to kill him? I
eventually spotted something that would be crucial. Every so often, the
archer’s shot would repel Bantar’s eyeball (right
image above). It would go off, but without dealing damage. It occurred merely
by coincidence, if the arrow happened to meet the eye’s trajectory. It meant
she would get a couple more shots in before dying. What if I could quicksave each time she got a deflection in, then reload
until another one followed? Cheesy, but it might be the only way to get this
done. Well, it worked, sort of... It took about 15-20 minutes before Bantar died. On average, one in every 8-10 shots got
repelled. Immediately following a deflection, she got anywhere from 1-5 shots
in before getting hit again. When he finally fell, he landed with the front
half of his body suspended outside the upper ledge. The wisp got alerted of
course, but this was no longer a bust, as I didn’t cause it. It started
shooting, which attracted the monkeymen in the
outer cave. They killed the thieves, returned to their spots and everything
seemed fine. Well, when emerging after diving through the flooded tunnels, I
realized the next problem. Every time the wisp floated out towards the
throne, it saw Bantar’s body and started searching.
Since it would see his body every 30 seconds or so, it never really lowered
its alert state. This was bad news, as it was difficult for me to go for the
items in the back cave, let alone be able to leave without making sure I
didn’t get spotted. Unfortunately, the whole scenario needed a redo. Something
I had noticed during Bantar’s battle was that he
had slid a significant distance forward during the shootout. So much that I
could see the tips of his shoes from my hiding spot below. On replaying the
fight, I noticed it was his shooting motion that pushed him forward. This
time I wanted to make sure he got as many shots in (and deflected) as
possible before keeling over. Between each block, the archer would get at
least one shot in before Bantar’s next blast. If I
reloaded until it only took two arrows until the next blocked shot, Bantar might slide so far forward he would fall off the
edge (left image below). That is exactly what happened! It took longer,
probably 20-30 minutes in total, but after about 11 blocked shots, Bantar dropped into the water below. Occasionally, he’d
even fall into the crystal cave. This required a reload, as there was no way
he’d die down there. He was immune to drowning, it seemed. Once firmly in the
water though, the swordsman ran down and went for the kill. It didn’t take
more than one or two swings before Bantar was down
and out. The swordsman returned to his previous spot soon after. Then, like
before, the wisp would start shooting and attract the monkeymen.
This time, the swordsman downed one before falling. Next, the tricksterling showed up and killed both the second monkeyman and the archer (right image below). Killing the
monkeyman was an accident, but could easily happen
due to its blow dart gun’s enormous blast radius. This was the absolute best
conceivable outcome. Every enemy bar the wisp was gone, and the tricksterling shortly returned to its hidey hole.
Eventually, the wisp would settle, playing its normal, calm tune. This time I
could easily get the drill bit and the maps from the back cave without
risking any alerts. I left the top cave by sneaking out and jumping onto the
plateau with the thieves.
In
order to safely return from Bantar’s lair, I had to
use two slow-fall potions when dropping through the chute. One soon after
letting go of the rope, then another just before landing. Following the rule
set, falling damage is only allowed as a last resort and is “frowned upon”.
Using potions is likewise not ideal, plus it brands the run as a “chemical
success”. Since potion use isn’t listed just as a last resort, I figured it
was better than taking the damage. Dwarf-Monkey-Haunts Had
to use another water arrow to close the lair entrance and reopen the way out
to the Tank of the Deep Ones. Returned to the Hall of Lost Heroes to tackle
the crypts there. Getting all the loot in this area was a big challenge, so I
braced myself for some creative gameplay. The halls were laid out in two
sections, north and south. Each part had six crypts, twelve in total. Each
crypt held a golden skull, while three crypts in the south had some more loot
as well. Only the skulls were interesting for this report. When taking a
skull, an enemy would spawn in a specific location somewhere else in the
halls. The enemies had a dwarfed stature, with the sounds of a haunt, yet
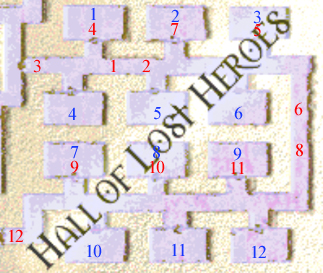
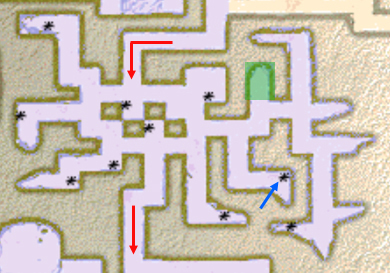
moved like monkeymen. The map below illustrates the
crypts in blue, as well as the spot where the dwarves for each crypt would
spawn. For example, when taking the skull in crypt 10 (blue), a dwarf would
spawn in the location marked with a red 10. This happened to be in crypt 8,
just northeast of crypt 10. All the dwarves were stationary and spawned
facing south. They were very jumpy just after spawning, almost as if they
appeared in an already alerted state. After 30 seconds or so, they were much
easier to work with, although they never gave any audible cues to indicate
this. Even still, a certain radius to their front or side would automatically
alert them, even if I was dark. If yellow or red, they could even spot you
directly behind. They had no first or second alerts, but instead jumped
straight to third level or alarm mode. This way, at least busts were easily
detectable. My goal was to get all twelve skulls without any Ghost busts. No
easy task, nuff said. The
layout almost felt like a puzzle. As if the author had carefully placed each
dwarf to make it difficult, yet possible. I seriously doubt YcatX designed the mission with ghosters
in mind, but one could always imagine. The biggest problem I noticed when
returning from the Bantar kill. Crypt 9 (Viper VI)
had closed on its own, without me being able to take the skull within. After
some testing, I gathered as long as the switch in the generator room that
operates the Viper VI gate hadn’t been triggered, upon each reload the game
checked if the gate was open. If it was, it closed immediately. The only
thing that stopped it from closing was Garrett being in the way. Nothing else
would impede it. The only way to get it back open was to use the lever inside
the crypt itself or to use another explosive charge. Using another charge was
out of the question, and the only way to use the lever was to reload to a
save when Garrett was already located inside the crypt. Ultimately, this
meant two things. First, I would have to reload and deal with the crypts before heading towards Bantar’s. Second, robbing crypt 9 would have to be my top
priority. All the other crypts would need to wait. And therein lay the rub. You’d
think it shouldn’t be that hard, perhaps. After blowing open crypt 9, I could
just take the skull then, right? Well, it wasn’t that easy. Try to follow.
Skull 9 spawned a dwarf in crypt 7, so I’d have to take skull 7 first. Taking
skull 7 spawned a dwarf in crypt 2, so now that would need to be robbed prior
to both 7 and 9. See the problem? But that wasn’t all. Crypt 2 spawned a
dwarf in the hallway just outside, in plain view of the entrance to crypt 5,
so now that also had to be emptied. Crypt 5 spawned a dwarf in crypt 3, which
then became the priority. Luckily, it stopped there, as the skull in crypt 3
triggered a dwarf in the far western end of the northern hallway. You can see
it in the top right in the image above. I had to start in crypt 3 then, if I
was to have any chance. Of course, since the crypt 9 gate closed upon every
reload, I had to do as much as possible without needing to reload, or go back
to crypt 9 and make every save in there. Safe to say, I was mentally
exhausted even before starting. I have laid out my escapades below: ·
Took skull 3;
returned to crypt 9 to save ·
Snuck into
crypt 5 and took the skull there ·
Crept back to
the hallway and into crypt 2 to take the next skull ·
Waited for the
outside dwarf to settle, then rushed out and hid behind its back (difficult
move, since it had to be done in one swoop) ·
Nudged the
abovementioned dwarf into the doorway of crypt 5 (right image above) ·
Snuck east and
rushed past the view of the dwarf now present in crypt 3 (another very
difficult move) ·
Finally back to
crypt 9 to save again ·
Took the loot
in crypt 7 ·
Lastly, I could
get the crypt 9 skull and not worry about the gate closing any longer Three
skulls in the northern halls were left. Since I now could safely save and
reload, there was a greater margin for error. Got the crypt 6 skull without
issues, though this spawned another dwarf in the north-south going hall in
the far east. This meant I couldn’t use that path to get back south, so I’d
have to leave out the west exit. That doorway was guarded by the dwarf
spawned from crypt 3, however. To deal with this issue, I had to nudge it out
the doorway and partly into the lit halls with the patrolling ghouls (left
image below). Getting in behind it to start the nudge was tough, as the red
gem on the wall was partly in the way. Before leaving I took the last two skulls
in this area. The crypt 1 skull spawned a dwarf just outside. I believe this
to be the same dwarf as the one I nudged earlier when taking the crypt 2
skull. At least that dwarf had now disappeared and seemingly got relocated. I
used a similar method to before; rushed in behind it and pushed it back into
the doorway of crypt 5. Then I took the crypt 4 skull. This spawned a dwarf
in crypt 1, but that wasn’t a problem because I could leave out the western
exit. I had to time the pulsating lights, but no big deal.
At
this point, I returned to the south halls and redid the whole tank area,
including Bantar’s lair. I managed to avoid using
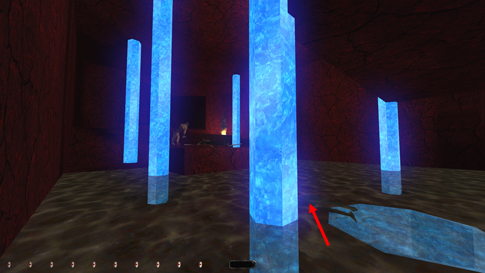
any slow-fall potions this time. Before entering the lair, I placed four rope
arrows into the wooden frame at the bottom of the chute (right image above).
With a bit of luck, when coming back down, I would catch hold of one of them
and not take damage. Excellent! The
four remaining skulls in the south part of the halls were a breeze compared
to the previous. I cleaned crypts 12, 11, 8 and 10, in that order. Pulled the
levers to close as many of the crypts as I could. Had to leave crypts 8 and
10 open. The only real challenge was passing the view of the dwarf in crypt 7
(left image below). Like before, I had to rush from shadow to shadow. I
started on the north side of the hallway, close to the east corner of the
gate. From there I made a near running leap, except I went from a crouching
position to standing, then quickly back to crouching again. The clue was to
only spend a fraction of a second upright with a yellow light gem. The
dwarf’s reaction was slightly delayed, which allowed a brief window of
opportunity to get by unseen. It was enough to create a repeatable and fairly
predictable method. The last dwarf by the western exit required a similar
method, though a lot easier. I rushed in behind him from the narrow doorway.
Then timed the lights as I left this area towards the north. Eleven dwarves
were left standing around the Halls of Lost Heroes, completely oblivious to
all their loot gone missing.
The
stairs up by the Halls of Sorrow was the intended way towards the exit.
However, it was guarded by two air elementals; impossible to pass by orthodox
means. They were set to ultra-sensitive, which means detection at anything
but perfect shadows. I could get as far as the corner before the bottom of
the stairs (right image above). I recognized the elementals from the air
mages in Thief Gold. The slightest flicker, and it would come flying. A first
alert was detectable as a minor change in its sound. It went from a regular
windy howl to a slightly more angry gust. Hunt mode was a change of direction
and a slow float. Third alert was a swift hover with intent. Up the stairs
was a larger room with an encircling icy staircase; very difficult to
navigate. The second elemental was hiding behind a large pile of dirt. I
could get all the way past both elementals with no less than two invisibility
potions and one speed potion. Got a first alert from both of them also. I
used an invisio and a speed potion to get in behind
the pillar after the first bend in the icy stairs. This gave me hardcover.
The second elixir of concealment got me the rest of the way. Unfortunately,
this was too costly to accept. I expected I could do a lot better heading a
different route. Fiends & Burricks Instead
I went back to the shadow burricks in the lower
mines, right before the tomb entrance. With an invisibility potion, I was
able to get past them. I needed a moss arrow too, plus all three burricks gave a first alert as I passed. I shot the moss
arrow just below the middle portion of the slope. Then I snuck over to the
east wall as far as possible and readied my potion. From the time I drank it
I had 10 seconds to get to safety. I instantly started half-a-second
crouch-run taps. This got me to right underneath the wooden frame, from where
I could leap onto the moss and run in behind the second burrick.
As the potion wore off, the two closest gave first alerts, but that was ok.
Next, I crept up the slope to the left of the third burrick
without further alerts (left image below). They both settled as I rounded the
next corner. Since potions are “frowned upon” in the ghost rules, being able
to remove two of them using this method was well worth it. To
get into the upper mines, I had to blow away some of the rubble blocking the
collapsed path using a fire arrow. I didn’t count this as property damage.
Nobody owns the rocks, do they? Since the rules (along with the ‘interpretation
of the rules’ section) only mention man-made items like crates, doors,
banners etc. but never reference natural objects, boulders should be fine. I
could mantle over the boarded up doorway, otherwise breaking the planks
would’ve been a bust. I could get past with only one blast if I shot from
atop the fallen beam outside. Neither the burricks
behind me nor the fiends up ahead heard the commotion.
Two
red, headless fiends patrolled the next section. They sounded like a mix
between burricks and spider bots, but moved like treebeasts. I needed the rope arrows from the hidden
toolbox to traverse the crystal lake. Six ropes were required to pass this
area. I found a neat method where I could leap from one rope to the next
while retrieving the arrow I was jumping from (right image above). That way I
didn’t leave any ropes behind, and avoided the Supreme busts. Taking them in
the first place was necessary, so no bust there. Cool area of the map this,
if not my favorite. I
absolutely loved the atmosphere in the shadow burrick
caves. The feeling of desolation was gripping. The caves weren’t that hard
though, as long as I stayed crouched. It seemed the author had placed the burricks so that their line of sight got blocked if I
stayed at the lowest point in each of the adjacent caves. I could get all the
nuggets this way, even the ones by the burricks’
feet. The most difficult one was in the far southwest (left image below). If
I moved a hair too fast or stood up, I got caught. There was another exit
from these caves, towards the south, but it wasn’t practical for ghosting. I
returned north and moved on to the fiend caves.
Take
a look at the map above for details. There were 5 red fiends and 3 blue ones.
I think the blue ones had more hit points. One broadhead
would kill an unalerted red fiend, while I needed a
few more arrows to down their blue buddies. Irrelevant for my run, but
interesting nonetheless. If you want to kill them, flash bombs are the best.
My biggest problem was the noisy gravel, plus a few lit up segments. All the
fiends seemed to patrol down every shaft, bar the one marked in green. This
was the safest spot in the mines, if I could get there. I arrived from the
north, while my exit awaited to the south (red arrows). 10 grey nuggets were
scattered throughout the system, most of them at the end of side shafts. The
six westernmost ones were fairly easy. Plenty of shade and the fiends didn’t
seem to venture into this area too often, at least not for me. The four to
the east were much, much worse. The central hallways going west-east were
very bright, and most of the fiends used them frequently. I found a few
near-black spots safe from most alerts. However, if a fiend patrolled right into
me, they usually gave a growl indicating a first alert. One area against the
east side of the middle pillars was probably the best one. It was central and
I could monitor most of the key hallways from here. Getting
to the nugget marked with a blue arrow was hard, and it was a pure nightmare
getting back. The entire shaft heading north was bright enough to get caught
if someone passed, plus the halls beyond were unpredictable and out of view.
I had to guess their locations by listening for footsteps and growling. If a
fiend started coming down towards the end of this shaft before I got out, I
had to shoot a rope arrow into the wall and hide in the upper corner to avoid
an alert (left image below). It was only first alert comment, but I was
adamant to keeping this portion Supreme clean. I escaped undetected, but only
with patience and some luck.
One
area where the fiends tended to get stuck ended up making this whole area
easier. They always got crammed into a corner by a pile of dirt in the north
(right image above). They would free up on a reload, but sometimes 5-6 of
them would be roaming around there. Not sure if other players have had the
same thing happen. At any rate, it certainly made my escape less troublesome.
On
my way through the crumpled mines ahead I was forced to trigger a rolling
boulder trap. It activated when crossing an invisible tripwire on a steep
downslope. Nothing to be done, but another Supreme bust. Tricks Although
a couple of arguable situations lay behind me, in my opinion, I still had the
Ghost mode intact. Alas, the inevitable bust came next. The entrance to
Tricks necessitated breaking the glassed barrier (left image below). It was a
clear example of property damage, explicitly stated in the rules. I had known
since the first time I played the mission that this probably would seal the
deal. That made it easier to handle, but nevertheless frustrating. Honestly,
I don’t understand the reasoning behind forcing the player to break a window
here. A monkeyman patrolled the inside, but his
route was long and easily outwaited. Although the mission had failed the
Ghost, I at least wanted to complete the map with no second level alerts. Another
piece of loot had to be skipped in the first section to the east. A tomb was
sealed by two locked doors, only accessible by sword bashing (right image
below). One of the doors was permanently left open, while the other one
opened and became frobbable. It could be closed
again, but the lock was clearly broken. Both were cases of property damage,
and the torc worth 350 gold was thus avoided. An
easy skip.
The
only tough area remaining was the temple, or at least that’s what I called
it. It was a circular room with a three-pillared division in the middle. The
northern end held an elevated, pulsating holy water font; in the south was
the exit to a lower garden, defended by a lone, stationary monkeyman. Patrolling around the central pillars were an apebeast and two will-o’-the-wisps. The ape could patrol
both directions and turn around at set points. One of the wisps had a
clockwise route around the pillars, at eye level or so. The other wisp I
couldn’t figure out. I seemed completely random in its movements. It never
left the temple, but other than that it floated all over the place, even
vertically. Above the garden entrance were two raised plateaus that
eventually accessed two chests with loot in a couple of side tunnels. The intended
way to reach them was to shoot the mana seed from the adjacent tomb with a
holy water vial, and then climb the spouting tree. Problem was this alerted
everybody and usually ended up killing the monkeyman.
The seed getting hit let out what seemed like a fireball, which made too much
noise. If I was to get the loot up above worth 600, I’d have to figure out
something else. Unfortunately, there were no spots to attach ropes. Also,
whatever I did I had to be extremely careful around the monkeyman.
While the wisps were around, the slightest speed enhancement set them off. I
was safe right at the edge by the garden drop-off, or directly on the south
side of the large, central pillar. The wisps illuminated a certain radius
around them, but they didn’t get close enough to either of those spots. How
about a stack? I had picked up plenty of handy items for that exact purpose.
First I tried a stack behind the monkeyman. I
needed to get far enough out from the ledge to clear the ceiling frame, then
build it from there. However, the wisp lit me up when passing and there was
no way to make the entire stack in the time it took for the wisp to patrol
one loop. Not even close. Then I thought perhaps I could get on top of the
thin walls between the blue pillars. From there I could leap to the plateaus,
maybe? I decided to go for this. Making the stack here was no problem. I used
12 potions, 5 vials and 1 fruit. I imagine you could get away with a few less
items also. Mantling the ledge was also easy, but the top was metal and the
mantling noise alerted the wisp. It also saw me up here when rounding the
middle pillar, so I had to make the jump across the gap before it arrived.
This just couldn’t be done without a moss arrow, so the gems would have to be
skipped for Supreme. When I come to think of it, you can’t stack items on a
patrol route for that mode either, and the ape and the wisp did patrol quite
close. The moss arrow had to be shot from atop the stack, but I had to make
the arrow strike the ledge on the way down, after reaching the top of its
trajectory. This was a tough shot to make. I ended up removing 2 items from
the stack before getting it, otherwise even the slightest of pullbacks made
the arrow hit the ceiling. I could tell it had landed on the top ledge when I
saw moss clumps carpet the floor on the south side. Now I could mantle up
fine, with no noise whatsoever. As the wisp rounded the corner to the west, I
had to mantle and do an angled running jump from the ledge to the outcropping
(left image below). I imagine this jump to be impossible in OldDark, but that was none of my concern. I got the hang
of it after not too long. Getting both pieces of loot from up here took a lot
of sneaking and patience. If I was in view of the wisp, I stood still until
it left my view. That was the safest bet. I had to use rope arrows to cross
the dips in either side chamber. Luckily, I could attach the ropes from up
here and not from the ground below, which I’m sure was the intended approach.
I had to use the ledge along the south wall to get to the western side (right
image below).
To
get back, I leapt and mantled onto the eastern ledge above the stack. I then
dropped back onto the items from above. If fortunate, I’d slide off quietly
and land on the small red ledge by the floor. If I had to do this whole setup
again, I’d probably make the stack a bit farther away from the wall. If you
make it too close, it’s almost impossible to land firmly on top coming from
above. Another
problem arose when leaving the temple. The other non-patrolling wisp had
seemingly gotten stuck on the north side between the two westernmost pillars.
As soon as I rounded the corner it saw me, no matter how I approached. First
I thought I’d have to use another invisio potion,
but decided to replay and try again. I found that each time it gets stuck in
a random location. I think it was trying to reach an area beyond the pillars,
but couldn’t find a logical way around. I played it over until it got stuck
in the niche to the right of the holy water font (left image below). I could
now sneak out along the base of the font’s pedestal unseen, but even then it
was difficult. I managed to avoid needing to use an extra potion at least,
which I’m happy about.
To
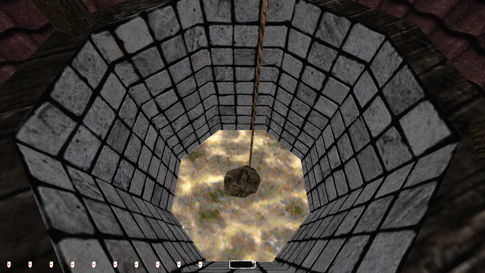
exit the mission I had to use and leave behind three rope arrows. There is no
way to retrieve them and still end the map, so these were more Supreme busts.
This remains one of the most astonishing achievements in the creative history
of Thief fan missions. Despite not yet having played the other three missions
in this campaign, I can honestly say Mines of Margroth
already has become one of my favorite maps of all time. And given the amount
of years I’ve been playing this game, that’s impressive. Statistics: Time: 3:59:36 Loot: 10412 out of 12862 (Supreme: 9312) Pickpockets: 24 out of 24 Secrets: None Locks Picked: 12 Damage Dealt: 0 Damage Taken: 0 Bodies Discovered by Enemies: 10 Consumables: 1 explosive charge, 2 fire arrows, 3
water arrows, 2 moss arrows, 1 invisibility potion, 3 rope arrows (left
behind) Ghost: Failed (but only one bust, in my opinion) Perfect Thief: Failed Supreme Thief: Failed Perfect Supreme Thief: Failed Notes: -
Skipped 4 diamonds worth 800 on one of the mining carts
in the starting cave system. Property damage isn’t allowed for any mode. -
Skipped 10 diamonds worth 1,000 in the fire elemental
cave below the hammerite chapel. Opening the panel
to access the cave requires the use of two fire arrows. Impossible to do
without severe alerts. -
Skipped the blue gems in the chapel pulpit and outside
the hammerite headquarters main entrance for
Supreme. They are considered lights sources, and cannot be removed for that mode.
Worth 100 total. -
Got a first alert from the bugbeast
lady in the ancient miner’s residence. Our first Supreme bust. -
Couldn’t return they barracks key after locking the
entrance gate to the catacombs. It’s either this or never bringing the key,
leaving the gate unlocked. Either way it’s a Supreme bust. -
Skipped a purse (100) in the north embalming chamber
for Supreme. Taking it necessitated at least one first alert from each of the
sleeping hammer zombies. -
Used an
explosive charge and a fire arrow to open the gate to the Viper VI crypt in
the Hall of Lost Heroes South. A debatable Ghost bust of rule #6. I vote no,
as there was neither visible damage nor lasting effect. -
Skipped a red
gem worth 300 in the big fish tank for all modes. I wasn’t sure about the
piranhas’ alert levels, but it seemed like they detected me as I entered the
pool, so I played it safe. -
Nudged one of
the monkeymen outside Bantar’s
lair forward in order to pass safely. A Supreme bust. -
Used a water
arrow to douse a torch in Bantar’s lair. Another
Supreme bust. -
Used the
save-and-reload technique to lure Bantar over the
edge so he’d get killed by the thieves. Arguably an engine exploit and thus a
Supreme bust. -
Had to skip 3 golden
skulls (300) in the Hall of Lost Heroes for Supreme. Taking them required
nudging enemies out of the way in order to escape. -
Had to leave
two gates open in Halls of Lost Heroes South. Supreme busts. -
Took three
first alerts, used a moss arrow and an invisibility potion to pass the burricks in the lower mines. Supreme busts. Potions are
allowed for regular Ghost, but “frowned upon”. -
Triggered a
rolling boulder just before reaching the Tricks area. Supreme doesn’t allow
the activation of traps, so another bust. -
Broke the
window to access the Tricks section. This ended up being the mission’s only
Ghost bust, due to property damage. -
Skipped a torc worth 350 gold in the Tricks section for all modes.
Getting it necessitated bashing in two doors, with visible damage to the
locks. -
Skipped two
purple gemstones (600) in the Tricks section for Supreme. Reaching them
required a big stack very close to patrol routes, plus the use of a moss
arrow on a ledge above. -
Had to leave
behind 3 rope arrows in order to reach the mirror room and finish the
mission. Supreme busts. -
Used a
walkthrough to find the whistling stone, enter the Viper VI crypt and find Bantar’s lair the first time I played this mission
several years ago. Since I used that information to complete this ghost run,
I’ll report it as a Ghost busts. -
The bodies
discovered were from the multiple scripted fights in the miner’s town, the hammerite headquarters and in Bantar’s
lair; none attributed to me. |
|
|