|
OMINOUS BEQUEST GOLD This is perhaps my
favorite single-mission FM release ever. I had played through the “regular”
edition back in ’03, but never attempted Supreme Ghost. Well, the new and
updated version was just the excuse I needed. Unfortunately, I knew the mission
wasn’t ghostable in any mode because of two unavoidable scenarios (which I
will mention later), but I still wanted to try and Supreme the rest. The
reason I Ghost isn’t exclusively to be successful, but to have fun
attempting. I have mentioned most of the hard loot, with some explanatory
screenshots. For an entire list of pickups, see the link to the left above. The art collector
Grimworth had sent me on a quest to retrieve the lost will of Lord
Farrington, and the items it mentioned; as well as information on a possible
mages order below his manor. My blackjack was lost so I needed to find a
replacement, plus 5,000 gold worth of loot. My night started on the south
side of the front doors. Into the Lion’s
Den I entered the manor
through the coal chute. There was an alternate way in on the west side, but
the gazebo strikers saw me climbing the vine. The guard by the chute gave a
comment as I turned on the sprinklers, but I assume this to be a triggered
script. He never paired it with a settling comment either, so I am quite sure
I was clear. Immediately grabbed the
cold storage key from underneath the kitchen dumbwaiter. Wanted to finish the
basement entirely before moving upstairs. Noticed early how guards were set
up perfectly for Ghosting. Tough enough to challenge any player, but at just
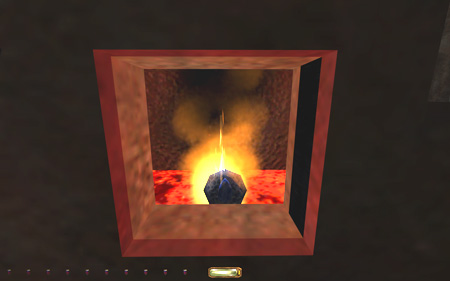
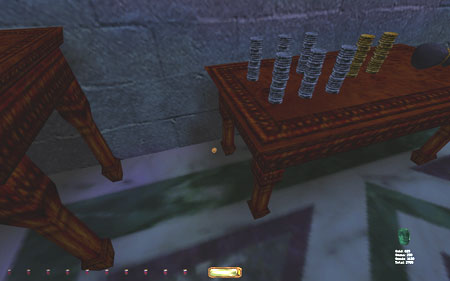
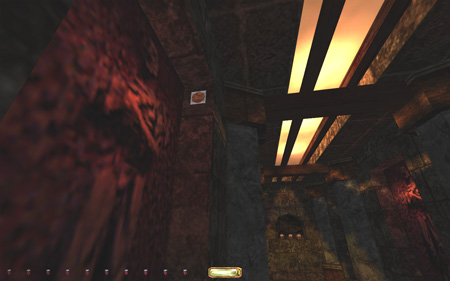
the right level not to be daunting. Melted the lump of ice in the furnace
instead of using a fire arrow (left image above). It made a lot of noise but
didn’t seem to alert anyone. Found a hidden pair of lucky coins in the armory
(right image above). Brought a rope arrow along for the ride; knew I would
need one later. Went up through the
kitchen again, returning the cold storage key and lowering the elevator. Got
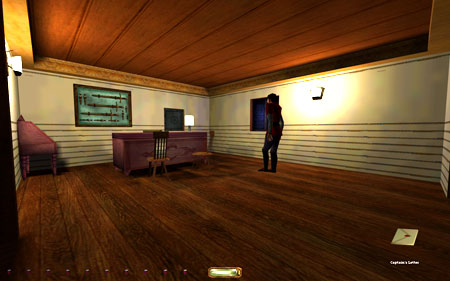
the skillet and the loot from in here as well. Used the secret passage in the
hallway to enter the captain’s office. He had a patrol back and forth from
his desk to the bedroom, stopping at either end for a few seconds. I had to
wait in the bedroom corner and rush out to steal the contents of his safe as
he had his stop. Needed to do it in three runs to get everything and lock up
the safe afterwards. The contents were hard to get without accidentally
closing the safe. Waited in the office corner when he returned each time
(left image below). Dropped the key on the bedroom floor before leaving.
Found a tiny ring on a skeleton going back through the crawlspace dungeon
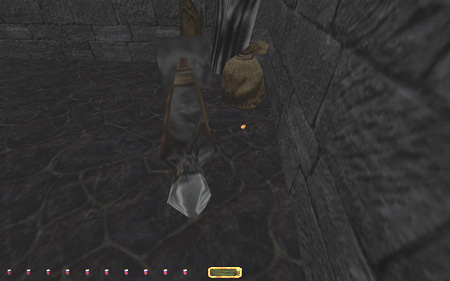
(right image below). Left the captain’s letter
in Benny’s locker to check off my new objective. Found a couple of coins
among his donuts. A few of the donuts fell out also, so I put them back
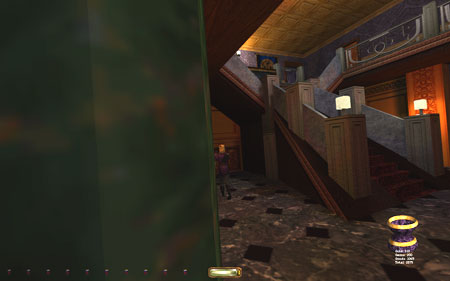
before leaving. Making Choices The centre courtyard on
the first floor was a key spot for Ghosters. On a balcony above, a stationary
swordsman had his nightshift, preventing all travel in the north-south
direction. This only caused a problem as far as the vital greenhouse sponge
was concerned. It meant I had to get it coming from either of the southern
doors, the southwestern being the easiest. It was possible to crouch across
the south wall in the courtyard unseen, but this was very difficult dodging
both the archer and the roaming servant. I actually preferred traversing the
main foyer to the south. An alternate path would be to enter the greenhouse
from the outside using the house key, but as a Supreme perfectionist I try to
avoid picking up what I don’t need, and I felt I could leave the house key
alone and still finish the mission happy. I needed to loot the rest of the
foyer anyway. I utilized the two pillars
in each display wing for cover as the patrolling archer passed (right image
above). As I crossed the ground by the front doors I noticed all footsteps
from upstairs were gone. All the patrollers had long routes down the long
narrow hallways, so these quiet moments occurred from time to time. I seized
the moment and quickly stole all the loot from the railings. Even had time to
grab the gems below the foyer floor panel; the switch was fortunately
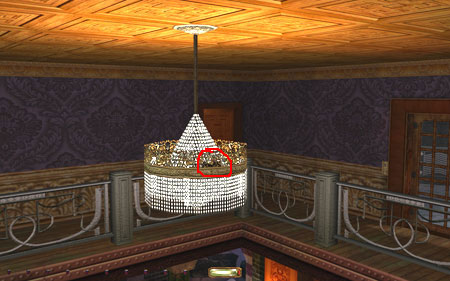
frobbable through the Farrington banner. Crossing the foyer again after
grabbing the sponge was a harder, since I this time was moving against the
archer’s flow of traffic. When I also realized I had forgotten about the
nifty purse in the chandelier (right image above), I decided to head upstairs
and continue from there. Again most patrollers were away so I could steal the
purse using a rope arrow and seek cover in the southeast dining hall. The remainder of this
floor was standard Ghosting procedure; basically moving from room to room
dodging the hallway patrollers. I eavesdropped on all doors not to spawn
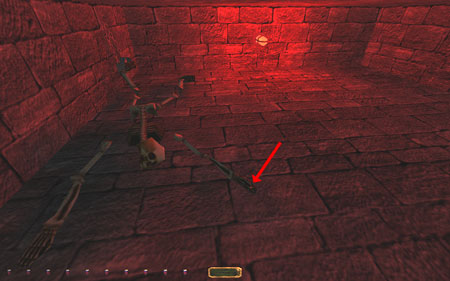
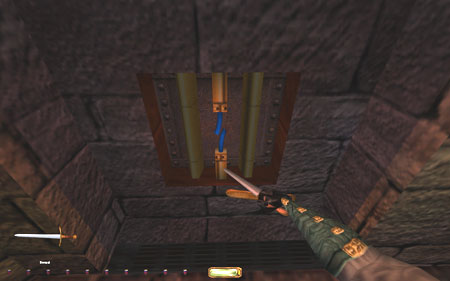
first alert comments. The first major bust came from cutting the electrical
forcefield wire in the northwest tower (left image below). There was no way
to circumvent it, and property damage is strictly forbidden in all modes of
Ghost. It allowed me to take the Horn of Dloren, which was a main objective.
Some players have argued this bust to be waived due to the instructions in
the objective. As an answer to that I simply refer to the official Ghost
rules: “It is not acceptable [...] to
incur a ghost bust that the player thinks is "necessary" to meet
another objective. For example, it is not allowed to KO an AI or slash a
banner simply because they stand in the way of meeting another objective, such
as stealing something.” When intended by the author and part of the
mission’s storyline, a bust is easier to accept; that was the case here.
There was no way to turn the forcefield back on afterwards. Had to skip some
loot in the southernmost guest room for Supreme. The chanting hammer alerted
on both opening the door and when spotting his prized hammer was missing. The
guest room next door had two more pieces of loot, including a tiny ring I
almost overlooked (right image below). The stationary swordsman
on the inner balcony seen from downstairs couldn’t be reached in normal
fashion. His door was locked and unpickable. I could lure him out by shutting
off the lights in the main office, but that was against Supreme rules. I had
something else in mind for later however, so I shoved it to the back of my
mind and continued with the rest. To finish upstairs I
needed the attic pole from the vault. Needed to use a water arrow and a fire
arrow to open the secret entrance; neither of these is mentioned in the
Supreme rules (except when dousing torches), so no bust. Got the default
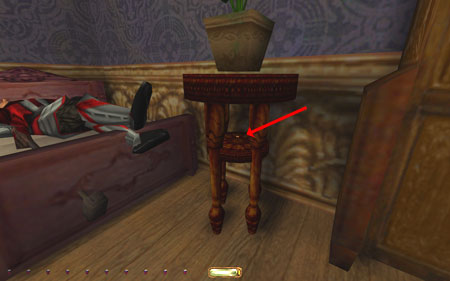
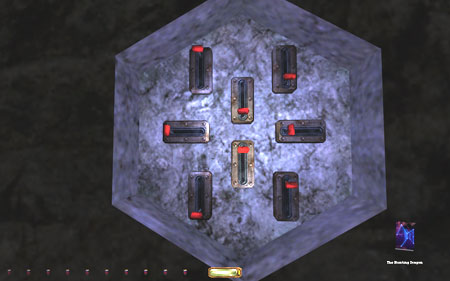
combination from the vault manual in the library. Cleaned out the valuables,
not forgetting the lucky coins by the table (left image below). The switches
in the next room followed the description on the Hunting Dragon (right image
below). Had to take the ancient tome to reach the loot behind the concrete
wall; it wasn’t replaceable. (As it would turn out later, the tome was a huge
part of the story) As mentioned, the crooked pole here was needed to access
the attic. Locked up all the doors as they were, except for the hatch to the
vertical passage, which wasn’t closeable. On my way to the second
floor I brought the single water arrow from the burrick stables; I knew I
would need one later in the mission. I don’t like cluttering the inventory
with unnecessary weaponry for Supreme, so I wanted to avoid getting
multiples. Also found a pair of lucky coins under the northwest spiral
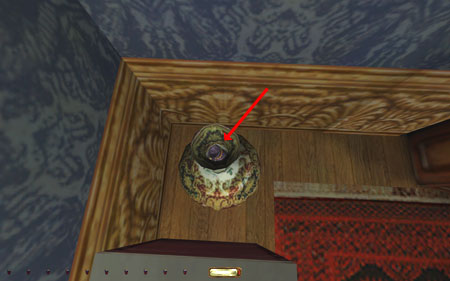
staircase (left image below). Back on the second floor I found a hidden purse
in Farrington’s bedroom. It was tucked away in the mouth of a giant vase
(right image below). Cleaned the rest of these rooms easily. When entering Found a quiet moment and
entered the attic in the main foyer. There was a hidden diamond in a tiny
niche just below the rafter above the entrance hatch. The guards below didn’t
alert to the hatch staying open, but they could partly see me even though it
was closed. Got the key for the attic windows and traveled to the opposite
attic crawlspace. This area was impossible to reach from downstairs, due to a
large shelving unit blocking the hatch. In here I found the last gemstone
Bloodtear. Up on the roof I suddenly
heard the patrolling guards inside comment on something. Rushing down to
check, it appeared one of the guards had accidentally opened the small closet
to the northeast rounding the hallway corner. I bet two of them met in the
hallway, pushing one too close to the door and it automatically opened. Every
guard from then on commented, thinking something was up. This was way out of
my control as I had never even touched that door; naturally it was no bust. With the roof being done I
now pointed my eyes to the inner balcony, located between two metal fences.
The goblet and the golden plate on the table below looked tempting. I could
drop onto either fence from the tiled roof without making noise. I could
furthermore drop down on either side of the guard undetected and without
losing health. Unfortunately, the guard was positioned too close to the wall
so I couldn’t pass his back without accidentally nudging him forward, which
isn’t allowed in Supreme and only as a last resort in plain Ghost. I tried
dropping to the courtyard from the east side after having taken the loot, but
he commented every time. If I could have leaned in and grabbed everything
from the west side, then I could have left through the door, returned to the
roof, and drop the key quietly onto the apple from above, but alas, only the
plate and the apple were reachable. Without the key I was screwed from that
side. And from the other side I couldn’t leave without a comment, so I ended
up outright skipping it for Supreme. For plain Ghost I lured him out by
switching off the light in Farrington’s office; he gave a comment but that
was allowed for normal Ghost. Remembered to drop the windows key back onto
the attic footlocker also. Into the Depths The main manor was done,
so I moved on to the chapel below. Snuck counterclockwise along the metal to
reach the door that led upstairs. Fetched the crypt key from Rieleg’s
chamber. Had to go across his bed and flip the hammer from behind his back.
Couldn’t pass him on the floor without nudging, so I dropped from the bed on
his left. He didn’t notice the sounds from the secret door. Went down the
stairs and slowly crept around the hall to the double doors. Didn’t return
the key right away, as I knew there would be a better opportunity for that
later. The three hammers by the
altar all turned quite frequently, but eventually they would have their backs
to me and I could leave safely. The crypts provided a sudden change in pace;
few AIs, but numerous puzzles and traps. I really loved this variety, which
also gave a break from tough Ghosting. The only things to watch out for were
traps and closing up all passages and hatches (where possible). Nothing to
report until I returned after having switched on the holy water to the chapel
fonts. Couldn’t reach the western font without getting spotted, so I circled
the chapel to the opposite side. I hid behind the northeastern pillar and
observed the two closest sentries. Took my chance and frobbed the font when
no-one was looking, then swiftly snuck into the nearby barracks. The holy
water arrow only lasted 30 seconds and I needed to drench the sponge within
that time. The hammers heard the splash anywhere in the chapel, but the
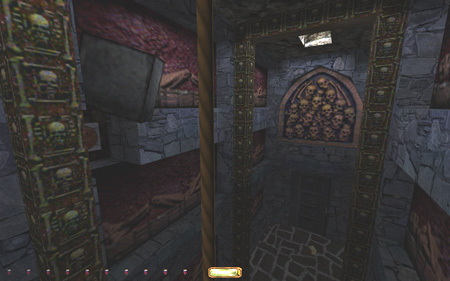
bedroom was safe. Made my way down to the crypt again afterwards. The hallway leading to the
family tomb held a secret treasure cache. The button was in the top corner of
a nearby relief (left image above). One of the skulls in the background also
held a tiny gem. Brother Sorven’s note gave
me hints to the whereabouts of another secret. A loose brick on the wall in
the upstairs hall (right image above) revealed a button that lowered one of
the coffins encircling the central tower. It eventually led me to the Tomb of
the Nameless Riddler. I won’t give away spoilers on how to solve its puzzle,
but it involved dousing a torch, which isn’t allowed for Supreme. Thus the
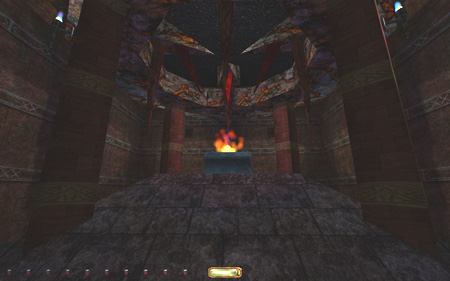
935 loot was skipped for that mode. This cave system also took me to Xedormicost,
the famous artifact sword mentioned in one of the manor’s readables (left
image below). That book also mentioned it could be released using holy water,
which is what I brought the sponge for. After grabbing the sword, a spirit
appeared and started circling the elevated center. It always appeared on the
west side and patrolled clockwise around the room. It was no hassle to avoid. Back in the crypts I tried replacing the
loose brick, but only managed to partly (right image above). Supreme rules
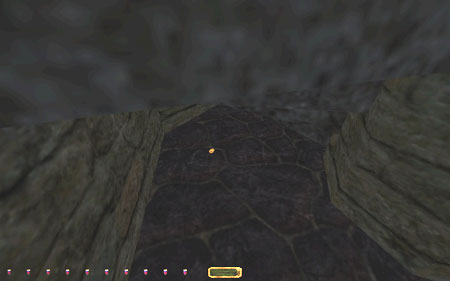
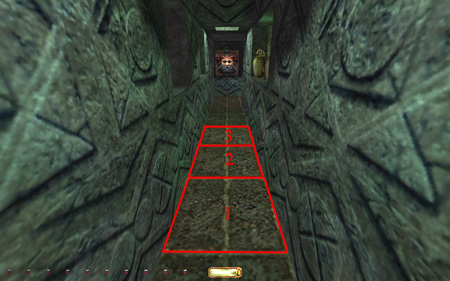
say to put them back in the nearest logical spot, so I figured I was ok. Further down I found the
trapped hallway leading to the talisman, my as of then final objective. The
right image above shows the various tiles and how they triggered. Tile 1
sprung a boulder trap in the ceiling. The rock landed on tile 2 springing a
spitfire trap behind me. The third sprung another spitfire to the front.
There was no way to avoid springing all of these; the gap was too far of a
leap. After all, I needed this and another boulder to open the gate beyond
the turn. Sorven’s body was also needed as a sacrifice to open the talisman
chamber, but his body turned haunt when I stole the artifact. He wasn’t that
big of a deal to dodge, with plenty of shade around the room. I left through
the secret passageway in the bedroom. After picking up the loot down there
though, I returned to the talisman chamber and snuck out behind the haunt’s
back. Being as Supreme as possible, I wanted to lower the gate and put the rubble
pieces back to their original positions. This finished all my
objectives, so I went for the sewer exit, on the way switching the chapel
pipe back to normal water. Endgame Unfortunately, Robert
Farrington’s burrick trap required the use of the horn, alerting all the
critters to hunt mode. Although bittersweet, I did it without them ever
seeing me. I can understand people claiming the wire-cut in the manor
shouldn’t be a bust, but this situation settles any dispute. ‘Ominous
Bequest’ is unghostable and that’s it. His letter was actually droppable, so
I put it back before blowing the horn. Passing the crayman caves
was easy enough, with the exception of the final worship chamber. The two
dancing craymen were in a trance far beyond this world, but the sentry was on
alert. I snuck around him to the left, but alas he gave a chirp as I opened
the floor panel. The tomb of Armion Drake had a little
puzzle element to it, but nothing incomprehensible. Made sure to frob back
the three skulls after having opened the inner chamber. The panel and rope in
the final resting place couldn’t be closed up or pulled back in, so I left
them like that. Finally, there was a skull-trap in the next narrow
passageway. I think it must have had a proximity trigger, as I couldn’t notice
any floor depressions. The last task was to kill
Kadar, by cutting the Book of Souls in half using Xedormicost. I emerged via
the burrick stables of the manor and had to make my way back down to the
chapel. I returned the (holy) sponge to the greenhouse first. Kadar was using
Elizabeth Farrington’s body for some bizarre ritual, in the true spirit of
occultism, no pun intended. I snuck upstairs and ascended the ceiling rafters
on the south side. It took a few tries reaching the rope without alerting the
spirit below, but in the end I got to the book unseen. Kadar didn’t look too
good, before plummeting to the chapel floor lifeless. I returned the crypt key, put Statistics: Time: 3:11:25 Loot: 8000 out of 8000
(Supreme: 6865) Pickpockets: 2 out of 7 Secrets: 8 out of 8 Locks Picked: 15 Damage Dealt: 0 Damage
Taken: 0 Bodies Discovered by
Enemies: 1 Consumables: 3 Water
Arrows (vault entrance, sponge & riddler’s tomb) & 2 Fire Arrow
(vault entrance & riddler’s romb) Ghost: Failed! Perfect Thief: Failed! Supreme Thief: Failed! Perfect Supreme Thief:
Failed! Notes: -
Had to cut the wire to the
electrical forcefield in order to obtain the Horn of Dloren. The property
damage is considered a bust. Although the horn is an objective, cutting the
wires is not. -
Had to skip a hammer worth 100
gold in the second floor guest room for Supreme. The stationary hammer
alerted to opening the door (and to taking the loot). -
Had to skip another 100 loot on
the inner balcony for Supreme. The door was locked from the inside, and
dropping to the courtyard coming from the roof spawned a comment. -
Skipped 935 loot in the Nameless
Riddler’s tomb for Supreme. Dousing the torch to get through the puzzle
wasn’t allowed for that mode. -
More Supreme busts were necessary
to reach the Talisman of Life. Two boulder traps and one spitfire trap were
triggered on the way. Inevitable, I’m afraid. -
Escaping Robert Farrington’s
burrick pit required blowing the Horn of Dloren. This alerted all burricks to
second level hunt mode. Without a doubt a Ghost bust. -
The stationary crayman in the
worship chamber alerted to me opening the escape hatch. Supreme bust. -
Leaving Armion Drake’s tomb
triggered a skull-trap. Another inevitable Supreme bust. -
The body discovered could
possibly be from cutting the Book of Souls and killing Kadar. He might have
spotted one of the dead haunts before dying himself. |