|
ENDLESS RAIN Probably
a top 10 mission of all time for me; definitely the best of the year so far.
That statement should say a lot given the quality of missions released in the
last half a decade. Funny thing is, it’s not customized textures or fancy
scripts that make this one so good, it’s simply solid gameplay. Be prepared
for the thieves’ highway on steroids. Took a long time for me to find all the
loot, but that was only a good thing. My first mission by Skacky, but it
won’t be the last. I
chose to Ghost this mission with the newest HD texture packs, despite
Skacky’s recommendations for the vanilla experience. My blackjack run was
without any texture updates, so I had gotten that satisfaction already.
Mostly I think the texture updates make missions look grittier, which is half
of the Thief experience. Especially the new Necro Age mod is high on my list of
favorites. I’ll tell you what though, this mission looks stunning regardless. My
main goal was to find and steal an opal from Lord Monsegur, the new warden.
In addition, I was to locate some information about his friends and foes.
First though, I’d have to find some rope arrows. Due to rushed circumstances,
I hadn’t brought any. 2,500 loot and a pagan relic of some sort were also on
my list of to-dos. Lastly, I was to pick up a ruby from the late Lord Felton.
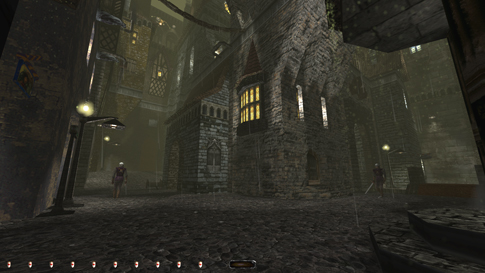
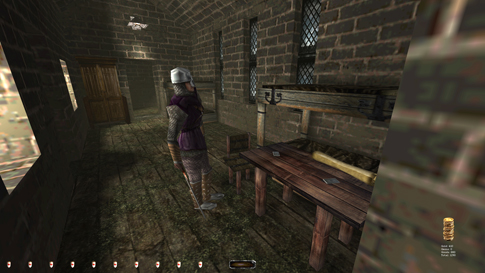
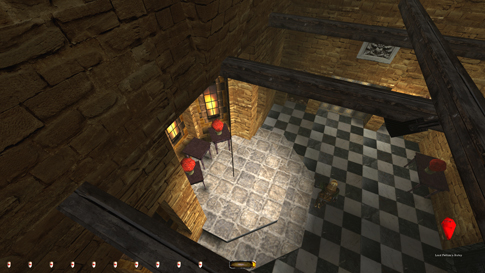
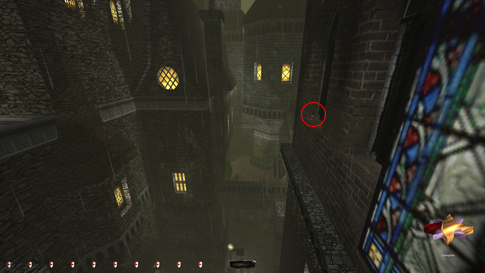
Sounded like enough trouble for one night; time to get started. The
initial streets had a few patrollers and a couple of stationary guards, but
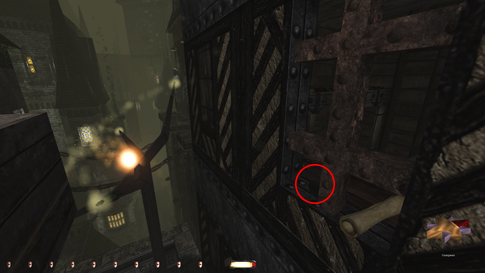
nothing a waiting attitude wouldn’t solve (left image below). I sucked up the
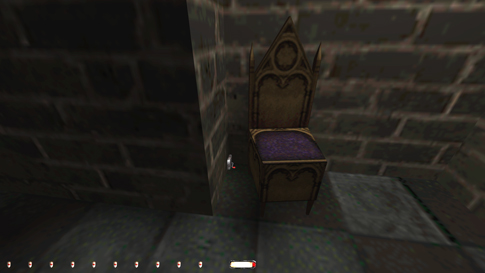
atmosphere and started looting. Went for some rope arrows at the weaponsmith’s
first. Found the entrance to the keeper’s compound in a corner behind a chair
(right image below). A clever goblet lay under the lift in the elevator
shaft. Seen that trick before, although it’s been a while now. Seems like
authors have forgotten it. I read the letters down there but reloaded, as I
knew this objective wouldn’t be possible for Supreme. It involved the
triggering of traps, not allowed for that mode. Unless I missed a trick that
is. Anyone? Took the loot down there and left.
A Thief’s Highway At
this point I had a decision to make. My goal when ghosting is always to reduce the number of locks picked that
cannot be relocked. To me that goes along with the spirit of the Supreme
rules, leaving as few things unchanged as possible. The objectives and loot
takes priority of course, but this is a mission where plenty of picked locks
can be avoided. Given the plurality of access points to the various
buildings, I wanted to move around the map in such a way as to minimize locks
picked. No rule mentions picked locks except to say that they don’t count as
busts.
So
I started by climbing the east wall in the starting plaza. The wooden
framework made it possible. If placed correctly, a single rope was enough to
ascend. I had to watch all the patrollers, as well as guards up on the roofs
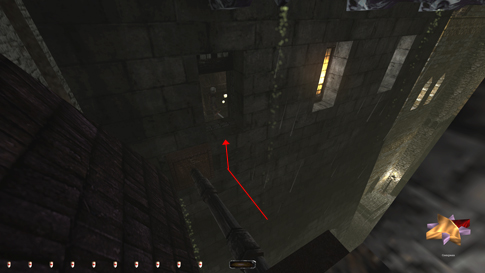
once climbing. Especially the archer to the west was dangerous. Blocked sound
propagation made it extra difficult. The statue had a dark spot by the inner
wall (left image above). I could even retrieve my rope from here. Cleaned the
manor to the south first, accessible through two wooden shutters and a trip
through a vent (right image above and left image below).
Cleared
the technician’s room to the east, grabbing the coin stacks by the coil.
Didn’t want to go further east due to a locked door. As mentioned, I want to
avoid picking them if possible. Crossed west to Fielding manor instead (right
image above). Moved along the ledges westward unbothered. Found a few more
coin stacks and a purse in a tucked-away windowsill south of the market (left
image below). It could only be reached via a balcony at the top of a climbable
gutter.
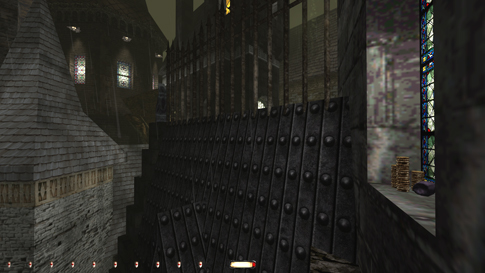
Had
a bit of trouble entering the power station through the window. The metal
pipe was impossible to land on without wreaking havoc, so I jumped across and
made a mantle directly into the window instead (right image above). Difficult
but repeatable. Found some hidden coins on the metal beam in there as well.
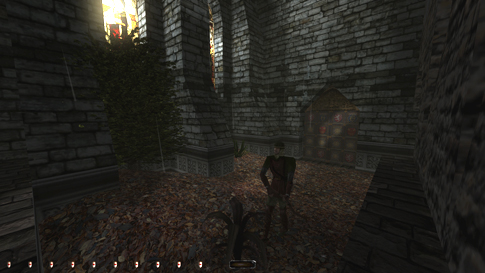
Scooted down to the basement and grabbed the nugget, dodging the mission’s
only zombie. Didn’t exit into the sewers though, again due to the door having
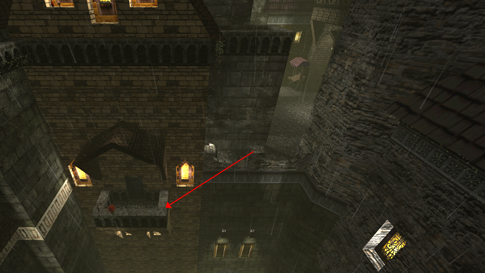
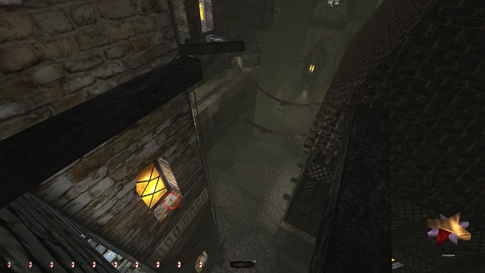
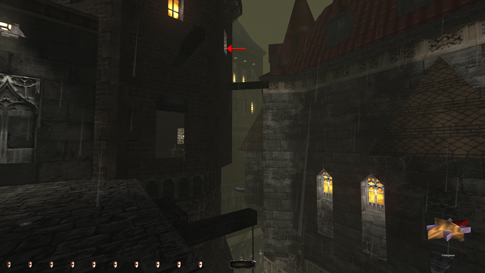
to be picked. Dropped
to the streets back at the market. There was a hard-to-reach balcony with
loot north of the clocktower that took some time to figure out (left image
below). A lone guard did an occasional pivot out there. Found it easiest to
jump from the second fence post; any closer had me mantle the roof instead.
Needed to enter and find shade quickly, or else the guard appeared again. I headed
inside, scooted left and hid behind the nearest pillar. Two vases in there,
then back out again. I thought about dropping to the canal, but instead
managed to mantle back to street level. This was more difficult than getting
down, but with the right angle and velocity I got it.
Ascended
to the rooftops again back on Usher Street. Headed northeast this time,
passing through Cribs’ gallery. Lady Valerius’ letter was a nice touch.
Moving east, the guard quarters above the canal was difficult; especially the
coin stacks on the patio table. Had to monitor both guards from the ladder,
the stationary archer was visible from there (right image above). He had
three facing angles: west, south and east. His pivots were frequent, even
swinging north if turning from west to east. The patroller had a stop in the
bedroom, but he still viewed the balcony through the open windows. The best
scenario was when the archer faced east, as I could descend the stairs and
approach the table crouching along the wall unnoticed. Then he had to shift
position before the swordsman came outside for me to reach safety. The table
or even the ledge on the east wall were good options (left image below).
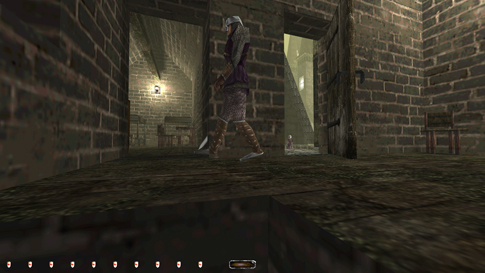
Returned in the same manner. Downstairs
was another bedroom with a single patroller. Not as tricky as up above, but I
still had to follow him to either end and duck into the shadows (right image
below). The door in the basement was pickable and the ladder above the
frobbable grate in the staircase wasn’t reachable from below. My only option
if wanting to avoid the lockpick was to return upstairs and leave through the
window. Took the plunge into the canal from here.
There And Back Again Nothing
to report from the sewers. Every area had a maximum of one patroller, with
plenty of shade or hardcover. No noisy flooring either. A breeze. I
soon realized the keeper grotto couldn’t be entered at all for Supreme. In
order to access the passage below the sewer control room, one needs to use
holy water on the statue. “Ye who seek
entry must cleanse my heart first.” Well, as per Supreme rule #5 no
potions are allowed at all for that mode, and holy water vials are considered
potions. That meant 260 loot skipped for that mode. As mentioned earlier,
taking The Seven Forbidden Doctrines triggers several spitfire traps, another
bust for Supreme. However, that was only a hidden objective; skipping loot
prevents Perfect Supreme Ghost and always leaves a bigger scar. And
just for the record: Lolth’s lair looks awesome in high definition! Can you
find the bodies?
Back
in the streets I climbed one of the wooden rafters east on Wailing Way.
Headed north to Castle Termay and followed a patrolling archer along the
balcony. Found a spot on the railing where I was safe once he came back (left
image below). Two coin stacks in a dark windowsill across the alley, and a
goblet in another sill at the east end of Grime Street (right image below).
The coins were easy to reach, but the chain was noisy and my light gem shone
red. Once I managed to get onto the chain silently and even mantle into the
windowsill itself, things got easier. That way I could time the street
patrollers and the top archer and plan my return more carefully. Had
to make a couple of careful rope hops to make it to the diamond cutter’s. I
was visible to the street guards on a few occasions as well, plus the rafters
weren’t always that easy to mantle. The aforementioned goblet was only
reachable from a rope. Only needed one arrow and retrieved it once I entered
the window. Found a semi-hidden diamond on top of the cabinet, although it
was hinted to in the readable.
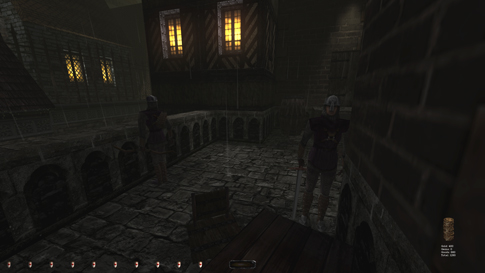
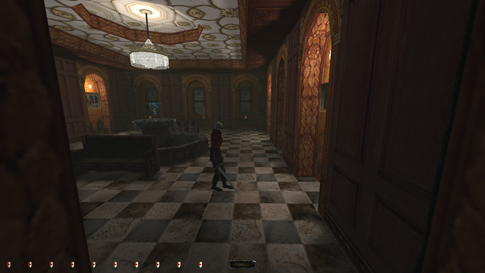
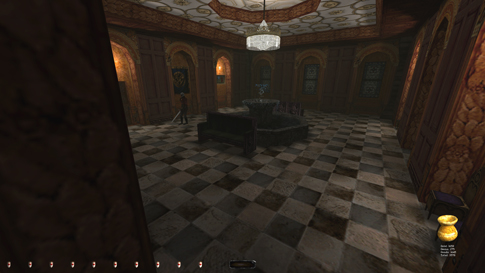
Monsegur’s & Beyond Entered
Monsegur’s through the ballroom window. All tile and one swordsman (left
image below). No shade except for a few spots in the corners. Intimidating to
say the least. For now, I only needed to reach the door on the north wall. As
soon as the guard turned west, I dropped and closed the window. Tapped
creep-crouch-run until he swung south, then switched to cc-strafe for a few
seconds, then back to run. Reached the door without comments this way. I knew
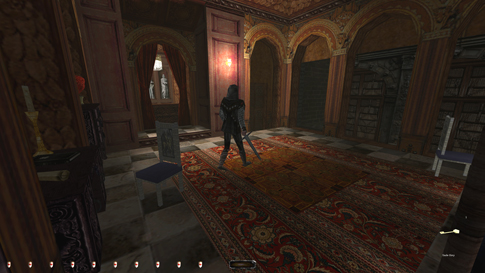
I’d have to come back here later. I’d deal with the loot then. The
rest of this floor was heavily patrolled, but still not that difficult. I had
to be patient in certain areas, but every room had shadows, scattered carpets
and brief periods with no guards. That was all I needed. Found Monsegur’s
ring on the library couch. A hidden lever among the plants opened a ceiling
panel and a back entry to the lord’s bedroom chamber. This room also seemed
daunting at first, but Monsegur’s predictable patrols and some degree of
shade (especially in the southwest corner, right image below) made it doable.
Dropped his safe key anywhere on the carpet after taking the gemstone.
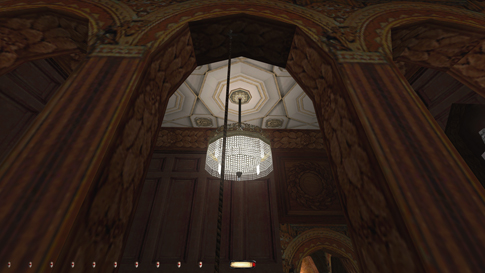
The
hardest piece of loot so far was the diamond in the hall chandelier. I
assumed I could reach it from Monsegur’s balcony railing, but nooooo.
Realized I needed to take it from the walkway outside the bedroom door. But
that was easier said than done. First you had Monsegur himself scouting from
the balcony. Second, there was the archer patrolling the staircase with a
stop staring straight at the chandelier. Then you had the swordsman passing
through the downstairs foyer; the least of my worries really. I found it was
reachable from the black metal railing. Problem was, mantling it made me land
on the outer edge, nearly falling off. In order to lean in for the grab, I
had to scoot back a tad to get proper footing. This made a clunk that busted
even regular Ghost every time. I had to reconsider my method. A rope arrow
was the solution (left image below). If I climbed a rope, I could lower
myself on top of the railing, grab the rope and softly land without noise.
The rope had to be attached far enough to the south so I could climb it, but
close enough to the railing so I could swing around without dropping off when
I retrieved the arrow. Provided Monsegur wasn’t stationed on the balcony, I
could take the diamond and lurk back inside the fence. However, this wasn’t
all. Heading back to the bedroom, two problems arose: 1) Monsegur was in
plain view when I opened the door, and 2) the archer was headed back up the
stairs. The only place with shade was the doorway itself, so I reloaded.
Figured I’d have to wait a few cycles to see if their patrol times shifted,
and they did. After about 3 cycles there was an opening where Monsegur wasn’t
at his balcony when I grabbed the diamond and where he was at the west end of
the bedroom when I opened the door. All that for 100 loot.
Back
in the ballroom were Monsegur’s last three pieces of loot. Since the guard
circled the room counterclockwise, I had to follow suit. All four corners had
shadows enough to evade his looks once he passed. The most difficult one to
find was in the southwest nook (right image above). I had to bury myself in
the sill there. The longest stretch came along the southern wall. I utilized
the guard’s back being turned to move a little faster. Found my way to the
window at last. Burrows, Usher & Felton Backtracked
to Wailing Way and crossed the street to Burrows Estate. Used the wooden
rafters amply. Found some more “hidden” coin stacks in a windowsill in the
north tower (left image below). Accessed the main estate on the south side of
the building. No problems cleaning house. Passed through Usher Palace on the
way south. A bit troublesome getting the vases in there, but either end of
the hallway had spots of shade. Exited through the living room window and
mantled up the plateau on the east. Found a cleverly hidden purse and a
scroll in a boarded up window at the north end (right image below). Gotta
love being a thief!
Making
my way eastward to Felton Manor proved somewhat difficult (left image below).
Dodging the swordsman and the archer on the roofs was easy enough, as I could
hear their comments. Both of them patrolled far enough to evade their gazes.
The hammer in the streets was worse, as I couldn’t detect whether he saw me.
“If a tree falls in the woods and nobody is there to hear it…” right? I
deemed it ok, as there was no way of knowing. If you oppose, let me know. No
problems in the manor except the top floor and the ruby itself. An
ingeniously designed room with a single patroller, many lights and tiled
floor. The ruby itself was on a table on the far wall from the entrance. The
alternate entrance through the ventilation system proved the correct
approach. The rafters weren’t in perfect shade, but flickered, plus the beams
served as hardcover. My only chance was to use a rope arrow and
descend-ascend when the guard walked south (right image below). The rope had
to be very close to the northern
wall, that way I didn’t have to leave the rope to reach the ruby. I still had
to lean forward when at the bottom of the rope to make the ruby highlight,
but it was enough to grab it and rush up again. There wasn’t much in it, but
definitely repeatable. Nice to keep Supreme from busting here.
Headed
back to Usher Palace and dropped to the garden in the far southeast. Found a
couple more pieces of loot in another windowsill on my way there (image
below). Robbed the butcher’s after picking the door. Heard a thief’s presence
nearby while in there. Sounded like the thief from the hideout in the sewers.
Figured maybe there was a secret back entrance to the place. Looked around
for a hidden switch, but to no avail. Ended the mission by heading out the
gate to the west. Closed it on my way out. What a fantastic mission!
Statistics: Time: 2:23:50 Loot: 4500 out of 4500 (Supreme: 4240) Pickpockets: 4 out of 5 Locks Picked: 3 Damage Dealt: 0 Damage Taken: 0 Consumables: 1 Holy Water Vial & 1 Water Arrow
to enter keeper grotto (Supreme: None) Ghost: Success! Perfect Thief: Success! Supreme Thief: Success! Perfect Supreme Thief: Failed! Notes: -
Had to skip the keeper grotto and 260 loot for Supreme.
Using a holy water potion goes against the rules. -
Skipped triggering the keeper objective for Supreme.
Taking the book triggers traps and is not allowed. Skipping the objective
circumvents the issue. |
|
|