|
Death’s Cold Embrace - Act 2, Scene 3:
Waking the Dead This is a very strong and immensely enjoyable
mission. A beautiful cathedral compound with spellbinding atmosphere and a
thrilling plot twist. The audio-visual experience is top shelf. Not too
difficult before the surprise meet, when things get a lot more challenging.
This one can be perfect supremed, but the last
third is quite unpredictable and I imagine could break the ghost for some.
Having plenty of hardsaves is crucial at that
point. Lots of hidden loot as well. It’s been a long time since my count was
that low after the first playthrough. This campaign
is now sailing up as one of the all-time best. And there’s still more to come! So,
we were finally getting serious. We had to break into St. Aldan’s cathedral
and dig up Julia’s body. We had to find a shovel first, plus 2,500 worth of
loot. Lastly, we needed to leave through the front gates, something which
wouldn’t end up being as straight forward as it sounded. Due
to my foreknowledge of the turn regarding Edwin, I wanted to make sure I got
all the loot I could before exhuming Julia. Once the undead would spawn, although
they would disappear once I replaced Edwin’s body in the grave, at that point
any surviving hammerite would be on high alert,
potentially blocking progress through certain areas. Then, even regular
ghosting would be far too unpredictable to leave anything to chance. The
graveyard would therefore be the last place I’d visit. I was carrying 3 rope
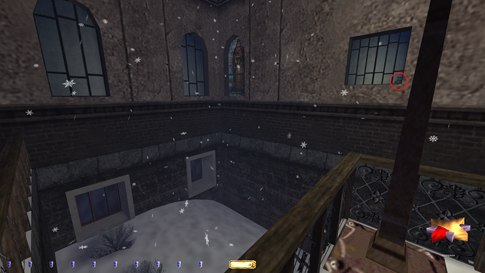
arrows, so no need to look for those. St. Aldan’s Cathedral A
purse lay on a windowsill in the opening courtyard (left image below). Easy
to miss that one. The door up here was locked and unpickable.
The basement acolyte could see me through the purple windows, so I waited for
him to walk away before entering. Other than his little dance, there was
nothing to report from this floor. There was a locked gate further east, but
it didn’t protect any loot. Arriving
on the ground floor, there was only one patrolling hammerite
in the northwest. I cleaned this section easy enough. Found one of the gems
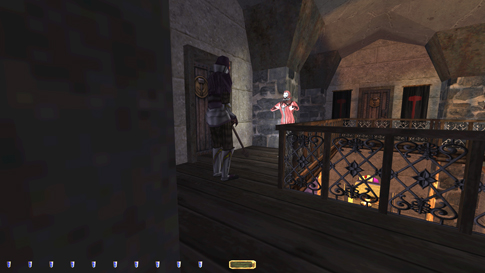
mentioned in the readable atop a beam further south. Next, I went upstairs
and cleaned Thaddeus’ floor. Again only one patroller and he was easy to
dodge. A nicely placed nugget lay by the foot of a statue beyond the walkway
railing (right image below).
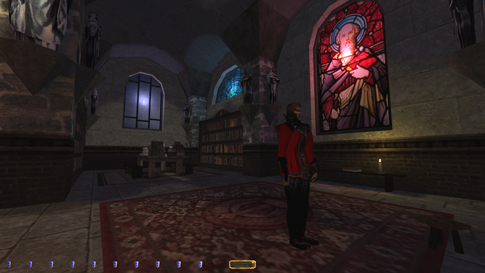
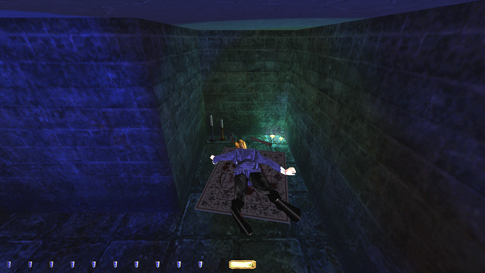
Back
downstairs I moved on to the library. Both the visuals and ambiance were
breathtaking (left image below). Found another gem on a ledge here; that made
2 out of 3. A couple of patrollers in here, but there were plenty of shadows
to help me out. Reached the loot goal as I took a candlestick in one of the
study halls to the north. Cleaned the “unreachable” balcony and the larger
study hall nearby also with ease. The entire compound was so far requiring
nothing but standard sneaking. Passed
through the inner courtyard and approached the main chapel from the west.
Found a very cleverly hidden tiara embedded in a mosaic window near here.
Don’t think I’ve seen that before. I expected the chapel to be more
difficult. There was only one patroller solely confined to the chapel, with
one more passing through, and an archer occasionally stationed on the upper
balconies. I think more of the torches should’ve been lit on expert, plus an
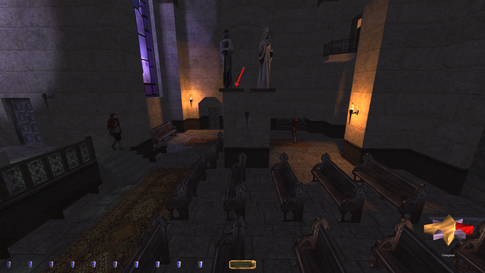
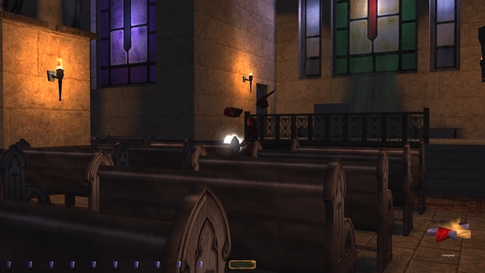
extra pivoting hammerite by the pulpit. Generally,
none of the loot items were even remotely challenging to steal. Found the
third and last gem by one of the statues here as well (right image below),
plus heaps of scattered coins and left behind loot items between the pews. The
graveyard had lots of loot, some of which was well-hidden. Three patrolling hammerites with fairly long routes. I could dig up Julia
in peace, but that seemed to have disturbed it. First time around I thought I
had released the undead then and there, but realized they were just audio cues
playing on repeat. Nothing had changed around the compound just yet.
The Dead Awaken Once
trying to escape with Julia, things got real. First I met Julia’s brother
Edwin, or his ghost, who told me in order to lay the spirits to rest, I
needed to put his body into Julia’s grave and cover it back up. Then his
farewell note needed to be put on Thaddeus’ desk. Plenty of haunts, zombies
and apparitions had spawned around the compound. Ensuing fights were
widespread and highly unpredictable. My
first task was to enter the main chapel unseen. The westernmost access forced
me through a bright room with a single haunt. He had just downed an acolyte
and was in seemingly constant hunt mode. I quickly scrapped that idea. The
main entrance actually seemed the better option. I could rush through the
double doors and observe the fights unbothered. It was very easy to detect
any alerts, as the enemies were all either involved in fights or in hunt
mode. If they saw me, they would come chasing. The chapel had a hammer haunt,
an undead priest and a zombie. Currently, there was a lone guard fighting
them. Replaying the scenario a couple of times, I realized the priest’s blows
could accidentally kill the zombie. This happened on more than one occasion.
Testing this further, one time the guard downed the priest and the haunt
quickly, and ended up fighting the zombie heads up. This was too good to pass
up, so I saved and replayed until the zombie also got killed (left image
below). At this time, another hammerite came in
through a door to the south and they both ended up searching around. Like I
suggested earlier, more of the torches were now lit, making traversing
anywhere near the alter impossible. With their backs turned, I instead made a
run for the door to the west. The big pillar in the middle provided valuable
hard cover. Safely out the exit from here. Phew!
It
seemed like undead spawned by Garrett’s proximity. As I neared the library
from the west, I heard commotion going on a few rooms away. This lured a
hammer haunt towards the south and I got time to scoot upstairs towards
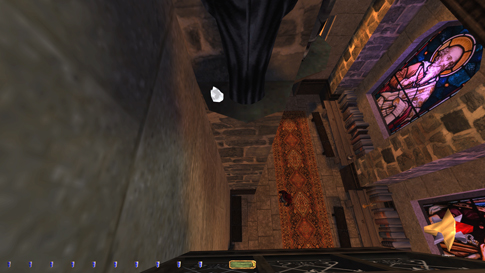
Thaddeus’. Here came another big problem. Eavesdropping on Thaddeus’ door, I
could hear the hammerite from earlier searching
around, probably alerted by the noises downstairs. Then as I passed the
threshold of the doorway, he started fighting an apparition. It was almost
like there was an invisible tripwire that spawned the apparition, as I could
stand listening for the guard, then the instant I stepped into the room the
shooting would commence. I could partly observe the fight from the doorway
(right image above). The hammerite normally won, as
his blows were a lot faster. Plus, the apparition did a slow animation once
hit, exposing it to subsequent hits from the guard. No matter who won though,
the prevailing enemy would always end up searching right by the door to
Thaddeus’ office, leaving me no opportunity to get to the adjacent library. I
saved once the apparition won the fight, but in retrospect this is not a
smart thing, as it lights up a small radius around its body and catches you
the instant is comes close. The office itself was also super bright, and
although there was a switch, turning off the lights is not allowed for
Supreme. I actually ended up heading back downstairs and rope arrowed up the
railing on the east side. Most of the enemies in the downstairs library had
died anyway. There was a single haunt to dodge, but he wandered quite a long
distance. In the meantime, the apparition from upstairs must have somehow
fumbled over the railing, as it was suddenly nowhere to be seen. Since it
doesn’t leave a corpse, it must have gotten killed. At this point, I took
whatever I could get. Found Edwin in the hidden passageway (left image below).
Brought his note to the office and lugged him along towards the grave.
Originally
I wanted to cross through the inner courtyard, since I thought it to be
empty, but since last time I was there a hammerite
must have spawned and killed a zombie. At least there he was stationed in the
snow, with body parts strewn all around. So instead I had to pass through the
library, again dodging the haunt there. The large study hall further east had
a single female zombie roving about, but she was quite easy to sneak by. The
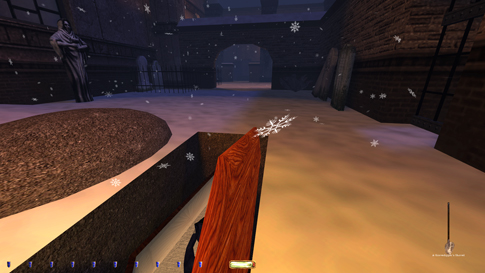
last issue was placing Edwin’s body and covering the casket. The problem was the
haunts and zombie in the courtyard to the east. Passing the gate was very
bright, due to the nearby torch and candles by the gravestone. Remember,
Supreme disallows putting those out. However, it was just a matter of
patience, waiting for all of them to be away from the gate or having their
backs turned. Once past the gate, I could do my deeds from southeast of the
casket. I was out of view of the adjacent courtyard and could reach the dirt
with my shovel (right image above). To
get back to Julia’s body, the main problem was the chapel. Since the hammerites had won the fights in that area, most of them
were still alive. I actually had to circumvent the compound and approach from
the west. However, upon entry, the guards quickly settled and went back to their
former patrol routes. A few acolytes had spawned it seemed, and they just
remained standing when settled. Luckily, they were either facing east or too
far away to be an issue. From here, the route out was easy and I could finish
the mission with Supreme intact. Statistics: Time: 1:08:16 Loot: 5155 out of 5155 Pickpockets: 4 out of 5 Secrets: 7 out of 7 Locks Picked: 0 Damage Dealt: 0 Damage Taken: 0 Bodies Discovered by Enemies: 3 Consumables: None Ghost: Success! Perfect Thief: Success! Supreme Thief: Success! Perfect Supreme Thief: Success! Notes: -
The bodies
discovered are from the hammerite guards fighting
the undead. It has nothing to do with me, so no bust. |
|
|