|
Death’s Cold Embrace - Act 2, Scene 1:
Seeking Counsel With Shadows A
pretty good romp this, although not as exciting as the first two. It’s the
third time we visit the same cityscape, although most of the locations used
in this mission are new. The hammerite chapel is an especially atmospheric
place. The map has a lot of guards, but Supreme is still fairly easy to
accomplish, bar the skipped loot that is. The story now shifts from family
feud to loss and despair, albeit with a sense of distant hope, or perhaps
desperation. It will be interesting to see where this ends up, regardless. My
initial tasks were short and sweet. Sneak into Fairbanks’ manor undetected
and meet the Sir in the library. Further direction would be given then, I
assumed. It all seemed highly secretive, as I couldn’t even be spotted by the
manor guards. Fairbanks There
were two ways into Fairbanks’ residence; both involved using the basement
dumbwaiter. The obvious way was to use the replacement button from the shed
outside the electric station to lower the lift. The other approach involved
applying an arrow to the second floor lift button through the window from the
lookout on Maple Road. Problem was, the lookout had two stationed guards,
both of which alerted to me opening the balcony door. The replacement button
method it was. To reach the basement without an alert, I had to sneak super
slowly over the ledge leading to the steep stairs. The male guard on the
balcony was peeking over the parapet and would catch me at the slightest
speed enhancement. At the top of the lift I had to listen for Fairbanks’
guards through the shutters. The instant I opened them, the light turned on
and I was a sitting duck. The Supreme rules do allow turning on lights, just not switching off ones
that Garrett hasn’t caused. I
needed to pilfer the library key from the upstairs guard in order to meet Fairbanks.
He revealed his rather ludicrous intentions of bringing Julia back to life,
and gave me instructions to find information on an applicable ritual. I ended
up leaving down the lift again afterwards, mainly to trigger the manor
guards’ disappearance. I could have left through the front door, but not
without taking the key off the other guard’s belt, and I don’t like picking
pockets unnecessarily. When ascending the lift once again, an extra manor key
spawned back in the library. I also found a hidden purse on the rafter in
here (left image below). Moreover, I had to skip three lit candlesticks in
the manor for Supreme, for a combined value of 150 gold. Snuffing the flames
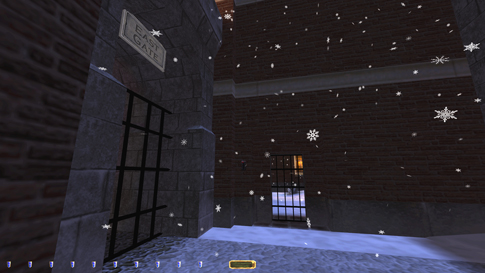
before taking the loot is not allowed for that mode. I wanted to leave through
the main entrance due to the difficult area by the lamppost across from the
basement access. The aforementioned balcony sentry made that spot very tough,
not to mention the 5-10 patrollers that all ventured through here (right
image below).
Hammerite Chapel Although
there were a lot of patrollers in the streets, most of them had long routes.
One wandering hammer even carried an electric light. The south side of the
high priest’s residence was tricky. Had to pick a difficult lock on the
chapel door to get inside. I realized later that the lantern guard entered
the chapel for a brief period during his patrol route, so I technically didn’t
have to pick the lock on the front door. However, I could relock it using the
chapel key later, so no big deal. The
ground floor was heavily guarded, but plenty of shade and long patrol paths
lessened the difficulty. Overall, the entire compound had very few stationary
guards; those are normally the trickiest ones. The hidden loot on top of the
hammer statue was the most difficult item to get in the chapel itself. An
archer was stationed at the base of it for the longest time, before finally
wandering off (left image below). A rope arrow was needed, but I had to place
it so that when I retrieved it, I would drop onto the silent edge of the
closest pew. Once I figured out the method, it wasn’t a big deal.
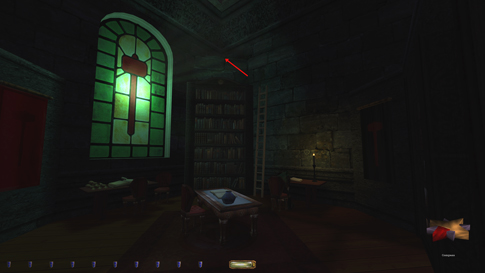
The
upstairs library was gorgeous. Found the Book of Shadows atop one of the
bookcases there (right image above). This was the ritual I need and checked
off that objective. The room was divided into six study halls, four of which
contained objects of interest. All patrollers could see through the
bookcases, which was a bit misleading. One bookshelf in the west had loot on
top of it, but I couldn’t climb the ladder due to a nearby acolyte staring
straight at it. Instead I had to mantle the dividing walls and leap across to
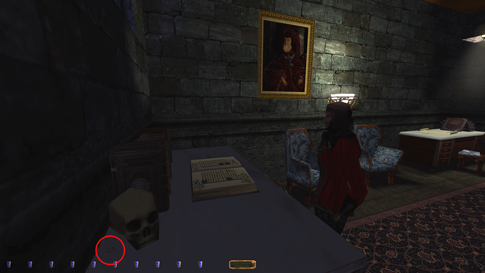
get it. Two
of the hammer priest bedroom’s on this floor had more lit candlesticks
needing to be skipped for Supreme. The bedroom with the wandering priest also
had a very well-hidden ring behind a skull along the wall (left image below).
This was one of the last pieces of loot I found when playing the mission the
first time around. This bedroom’s door doesn’t need to be picked to gain
entry. The priest regularly takes a trip into the library, at which point I
could block the door and avoid the lockpick. Cleaned the dining hall and
kitchen on my way back down. I remember one of the servants being stuck on
top of the kitchen counter once, making it impossible to descend into the
basement alert-free. They were both roaming free this time around.
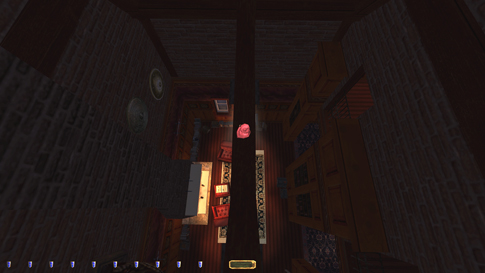
Found
a secret pleasure retreat in the basement barracks. The switch was small and
well-hidden in the corner of the rafter (right image above). Took a while
before I found it, even though I always check sleeping quarters well for
secrets. From the basement I could also reach the chapel’s back entrance.
This took me to Greenwood Apartments by the East Gate (left image below).
There was no loot in the apartments, only two readables and one secret. From
what I could assess, you can’t get past the sentry in the alley without at
least a first alert, so if you want all the secrets for Supreme, you have to
approach the apartments from the chapel’s rear. I
went back through the chapel and left through the main entrance. Counted
myself lucky not to run into any street patrollers. Remembered to lock-block
the door and drop back the chapel key before leaving.
Thaddeus & General Looting Back
at Fairbanks I received further instructions to go see High Priest Thaddeus.
He gave me his key even. I could now safely leave both the library and the
manor key behind for Supreme. If I for some reason needed to return, I could
always use the less desirable dumbwaiter. At Thaddeus’ I got a letter to give
to Robert Highwater, some information on the needed keystones, and his rosary
beads. Then I was free to end the mission at any time by the East Gate. I
still had some places left to loot, however. The inn was a troublesome spot
for Supreme, as it already had been in missions 1 and 3. Entering by way of
the second floor window triggered a trap left by another thief, Jill Black. I
found no way to circumvent it besides heading up the stairs from the ground
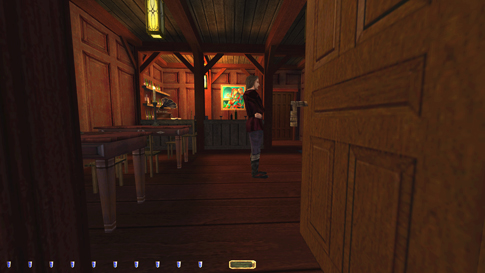
floor. Then the window was open and she had left. Problem was, entering via
the front door spawned a comment from the innkeeper. He had two facing angles
in the middle of the restaurant, north and east. If facing east, he gave a
first alert the instant I opened the door. If facing north (right image
above), he gave no remark, but still gave a settling remark about 2 minutes
later. Of course, this still indicated he was alerted and busted Supreme. I’m
not sure why he didn’t alert as normal in this position, but it was the only
way to enter for plain Ghost. Alas, all the 415 loot at the inn had to be
skipped for Supreme. That brought the total amount skipped to 665.
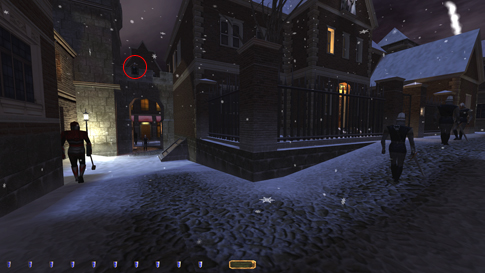
The
only other area remaining was beyond North Gate. Only a few establishments
existed here. There were a few patrollers, but they all ventured to the
southern part of town also. I was pretty much free to loot as I pleased.
There was a semi-hidden purse on a windowsill above the northernmost alley,
just east of the mechanist facility (left image above). The warehouse in the
northwest wasn’t hard to loot, but an odd situation occurred if blackjacking
the patrolling guard upstairs. Afterwards, heading for the cubicle triggered
the appearance of another guard out the northwestern door. I tried gunning
for the door to rush in behind him as he appeared, but I could tell it wasn’t
a real room. Seemed only like a black wall behind it; disappointing. I
couldn’t have gotten there for Ghost regardless. I also found the corpse in
the freezer talked about in the diary (right image above). I assumed both the
freezer, the mechanist research center and the paper store would be
accessible in later missions. Statistics: Time: 2:04:18 Loot: 4127 out of 4127 (Supreme: 3462) Pickpockets: 4 out of 4 Secrets: 4 out of 4 Locks Picked: 8 Damage Dealt: 0 Damage Taken: 0 Consumables: None Ghost: Success! Perfect Thief: Success! Supreme Thief: Success! Perfect Supreme Thief: Failed! Notes: -
Skipped 3 lit candlesticks worth 50 each in Fairbanks’
manor for Supreme. You cannot remove light sources for that mode. -
Skipped 2 more such candlesticks in the upstairs priest
bedrooms in the hammerite chapel for Supreme, for the same reason as above. -
Had to skip the entire inn for Supreme. The owner gives
a first alert when opening the front door. All the valuables in there
amounted to 415 worth of loot. |
|
|