|
THE CHALICE OF SOULS - Mission 1: With the Snow As Sole Witness The
first mission released for the Summer 2015 FM Challenge contest. And when I
heard it was a sequel (albeit a loose one) to the classic Endless Rain, there
was no turning back. It was a two-mission pack at that, where FireMage and Squadafroin join skacky as coauthors. The first mission, ‘With the Snow As
Sole Witness’, takes place in a strange, but mesmerizingly wintered city
called Fidgewick’s Hollow, and the tunnels below. I
knew Ghosting this would be fun, but difficult. The latter only fueled my
motivation. My
main goal was to find the brothel called The Dark Hollow. Along the way I had
to pick up 2,500 in loot, a precious stone from the diamond dealer, and a
magical cup from Messer Yharnam. As always, I hoped
for a successful Supreme run. If unsuccessful, I’d still limit busts to an
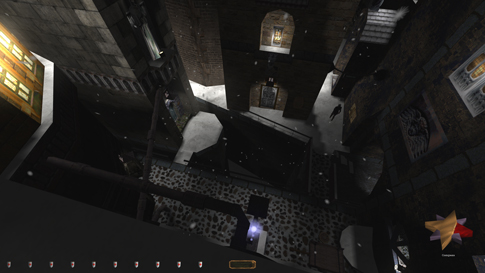
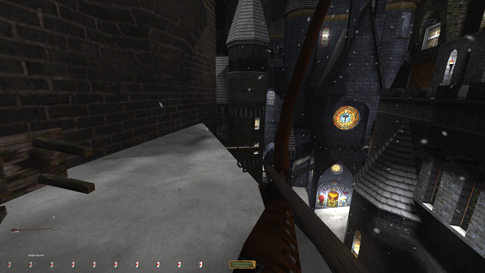
absolute minimum. Time to get started. PART 1 Balancing Acts The
winter atmosphere struck me immediately. I could tell this was gonna be good. Climbed the first set of pipes I could
find. It led me to Theedsblot’s balcony in the
southeast (left image below). I love the fact that quite a few recent missions
make effective use of NewDark’s mantle mechanics.
It leads to more vertical missions, which this one was certain proof of.
Theedsblot
manor gave me no trouble. The Sir himself was the only patroller, alternating
between the two floors. Snagged his key to enter the bedroom, and flipped two
hidden switches to open the safe (right image above). It gave me the required
tunnels key, which I knew would have to be returned later. I relocked the
bedroom door and left the key on the carpet for Supreme on my way out. Found
a well-hidden coin stack on a windowsill just south of Theedsblot’s
(left image below). This roof was a dead end, however, so I started to
circumvent the city counterclockwise, along the northeastern rim heading
west.
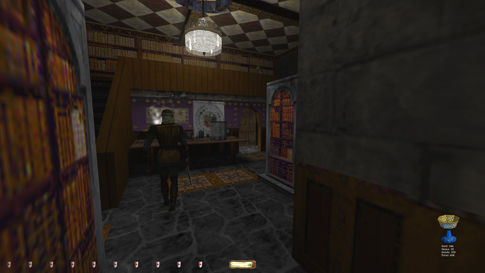
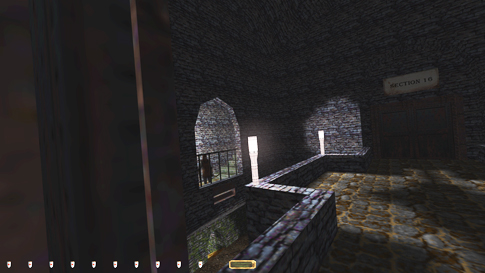
Had
to cross the streets below at Goldenbaum Castle.
Entered the uppermost window into an empty storage area (right image above).
The gallery here had a mesmerizingly eerie feel to it. The lack of explanation
to go along with the paintings also added to the horror. Sometimes less is
more, I guess. The door at the end of the gallery was locked, but pickable. I don’t like picking locks if I don’t have to,
so I wanted to find a different way down to the lower floors. There was
another open window below the one I entered earlier. I could rope arrow down
to it, but not without leaving the arrow behind. Instead I dropped onto the
window itself and entered the floor that way (left image below). A tough move,
but repeatable. It circumvented picking the aforementioned lock.
The
main floor held a few intricate rooms protecting an inner vault with a
valuable stone. It involved picking a few locks and disabling two security
systems (right image above). The latter is not allowed for Supreme due to
rule #8, so I skipped the item worth 75 for that mode. The rule is a little
vague in specifying what constitutes a “security system”, but I imagine the
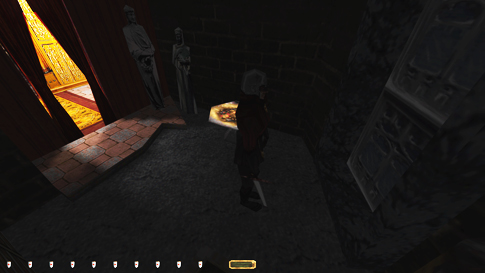
aforementioned mechanisms apply. Entered
Pr. Walstrand’s Grandhouse
through an open window. Why are so many windows left open on a cold winter
night? One of the trickiest places in the mission coming up. I had to enter
Messer Yharnam’s inner study by dodging a
patrolling guard and a roaming female servant (left image below). One of the
main objectives was in there. Evading the patrollers wasn’t that bad, but
picking the lock on the study door without triggering a first alert was. The
woman alternated between an upper walkway and the laboratory below. She even
entered the small hallway going straight past the door in question. I also
couldn’t avoid the swordsman’s gaze while picking the lock, plus they both
came close enough to hear the lockpicks and give a
comment. The best idea was to wait until their patrols synchronized enough to
give a longer window of opportunity. Still, the servant gave comments even
when stationed on the walkway above. This proved to be one of those
situations where if you play regular Ghost, you can get through in 2 minutes;
playing Supreme, well, let’s just say it’s a tad more difficult. I got there
in the end and could check off my first objective when stealing the magical
cup. Going back out was a breeze in comparison, as I didn’t have to pick the
lock this time.
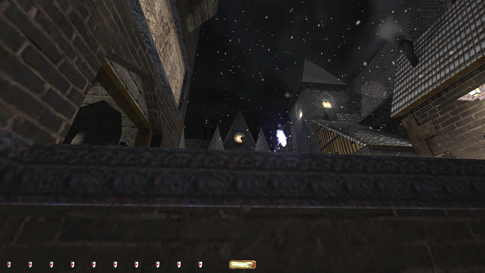
Made
my way south along the city’s western wall. Passed through what I believe to
be the Grinning Boar, an inn of some sort, without any problems. Made a
difficult jump from the inn’s attic to a patrolled walkway above the canal
(right image above). There were plenty of guards in the streets below also,
and their potential alerts were tough to notice. A split in my path forced me
to reenter Goldenbaum Castle. Descended a rope
arrow from a conveniently placed beam on the south side (left image below).
Tough to get inside without alerting a guard there also, plus you had at
least one patrolling hammer across the canal to the southeast who
occasionally commented. Hid on a box to the left immediately upon entry
(right image below). This floor was somewhat tricky, due to tiled floors and
little shade. Left through a ceiling panel and looted an empty attic space
across a pair of pipes. Returned to the aforementioned canal overpass
afterwards.
Two
buildings with loot in the far southwest. Both were easy to loot. One had a
single patroller, while the other had a pickable balcony
door, but no enemies inside. Nothing to report except smooth sailing. The
last place to visit up here was the hammer priest’s tower in the southeast. I
could maneuver along the ledges in this area, but not without monitoring the
patrolling archer from before. I imagine he could give first alerts from
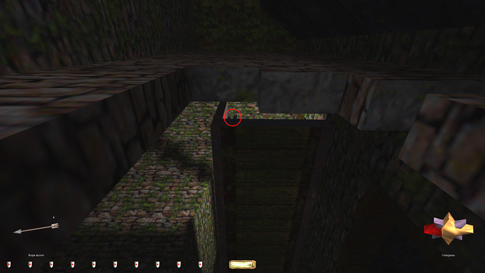
quite a distance. There was a ruthlessly difficult piece of loot in a
windowsill just outside the tower (left image below). I remember missing that
one first time through this mission. I ended up placing a rope arrow from
above, leaning out from the icy ledge. I had to place it so I could reach the
loot from the rope, without bumping into the outcropping statue. However, I
could only reach the rope from the tower window.
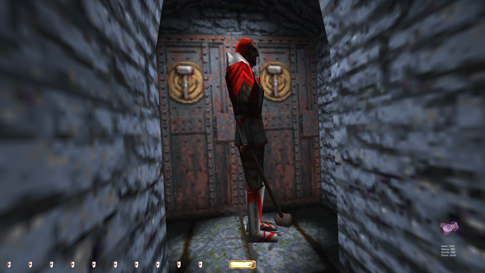
The
tower itself had a wandering hammer priest, with a rather obnoxious head
piece (right image above). A funny book in the bedroom too. Some loot,
including some hidden wine on the rafters. Found a hidden attic space, but no
loot in there, only an arrow. Left the tower and descended to the streets by
use of some pipes and a slanting roof. Had to dodge another patrolling hammer
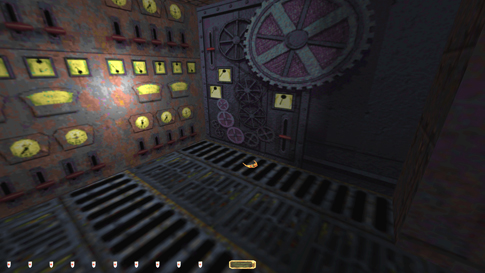
in the snow down there. Middle Ground Next
I hit the old clockworks manufactory. A single roamer on the lower floors. A
tough-to-find necklace in one of the control rooms (left image below).
Although it was just lying there, I had a tough time spotting it. There was a
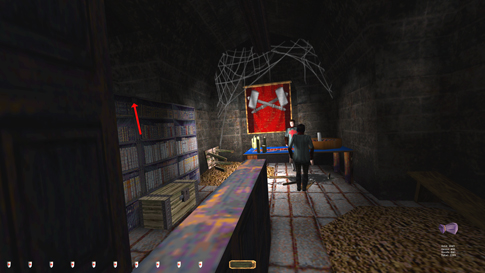
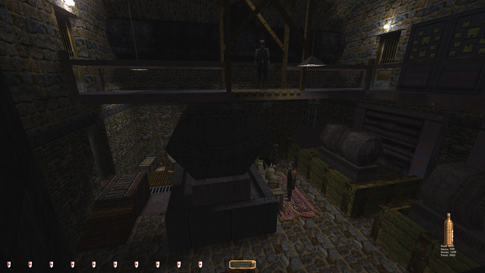
gas arrow on the metal beams above this room also. On the top floor there
were a few gamblers and more loot (right image below). A pulsating light made
me able to get the purse from the footlocker quite easily. There was a hidden
area behind one of the bookshelves too. Had to mantle up when the light was
off to avoid detection. The top of the shelving units were permanently dark;
that helped a lot. Got the method down pretty quickly and could leave without
any comments from the two. Supreme still intact. Nice!
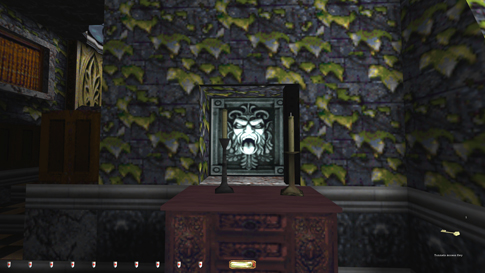
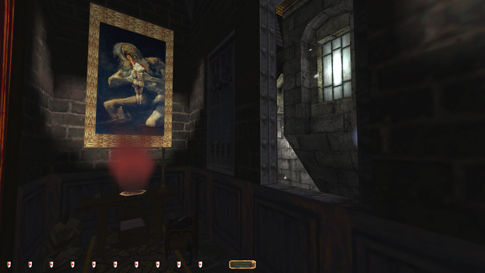
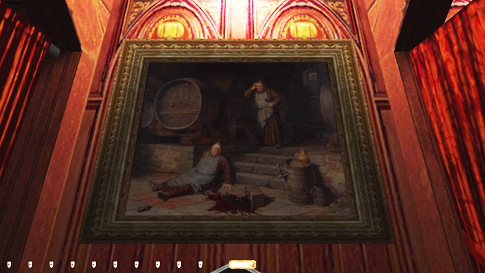
Passed
through the southeastern part of the cardinal’s townhouse, picking up some
more loot along the way. Used a rope arrow to enter a gallery with a single
coin further east. Some nice new artwork from the mission designers here.
(Look to the screen capture below for my favorite piece). This area was a
dead end, however, so I made my way down to the streets instead. Had to use a
few sills and pipes to lighten the drops, plus time a walking hammerite below. One more hammerite
was stationed outside the chapel south of here. He had a purse that proved
more difficult to obtain that I expected. Remember, I play Supreme Ghost,
which requires the elimination of all first alerts in order to be successful.
He had to face south for me to accomplish this, as seen in the picture below.
Then you had the aforesaid patroller who provided me with little time to work
with. I basically had to reload until he turned south within the first 10
seconds.
Slick Street Swipin’ There
were a total of six patrollers and a few stationary guards on the street
level. Luckily, the city provided enough shade to move around quite freely. I
looted the apothecary and the dungeons below next. No enemies except for the
trap in the tomb (left image below). It was easily avoided once I knew how.
Just loved the sounds and the atmosphere down there. It gave me chills
without anything even happening. Just how it should be.
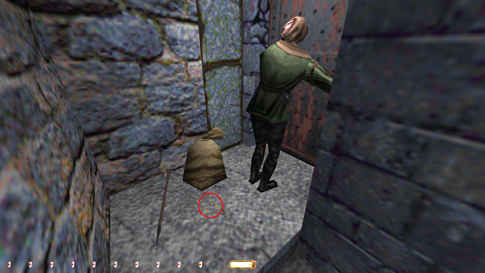
Back
up in the streets I dodged a few guards and made my way northeast. A purse on
a patrolling guard and some coins behind a lockpicker
(right image above) were all of interest. Don’t think I’ve ever seen head
turning quite like that lol. Great little scenario that. Moved west and
dropped into the canal. Difficult to do without taking damage, but I managed
to half-mantle up the wooden walkway on the opposite side. Followed the canal
to the northeast and readied myself to leave the city. PART 2 Into the Depths The
junction station gave access to the tunnels using, well, the tunnels access key.
This had to be returned for Supreme. I did that after lock-blocking the
tunnels door, knowing there was no need to return to the city later.
Remember, relocking all doors while also returning all items is required for
the Supreme Ghost mode. Lock-blocking is sometimes the only way to accomplish
this, thus the reasons for my aforementioned actions. This is not considered an engine exploit, and
therefore does not break rule #11. The
underground tunnels provided a very different atmosphere than the city streets.
So much so that it almost looked like a different mission, and perhaps it
should have been. Regardless, finding my way around this maze-like compound
was the first challenge. I somewhat remembered the layout from my first playthrough, although planning my route for a Ghost run
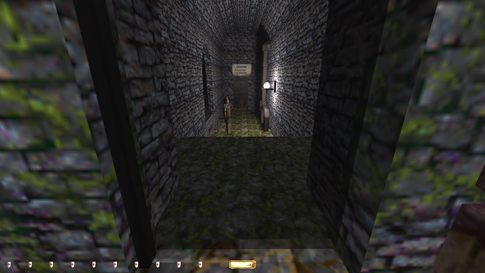
is a vastly different animal. I took a left after the power station (dodging
a few guards along the way) and opened the first door to the sewers. A
pivoting archer overlooked the main bridge ahead. I could monitor his positioning
from a shadow behind the left door frame (left image below).
Mantling
into the window on the right I could circumnavigate the bridge room and
approach the archer from the south (right image above). This was a tricky
hallway as he had to stay facing west long enough for me to sneak down the
steps and into the shadows past him and to the right. He turned quite
frequently and more often than not pivoted towards the stairs. It took 10-15
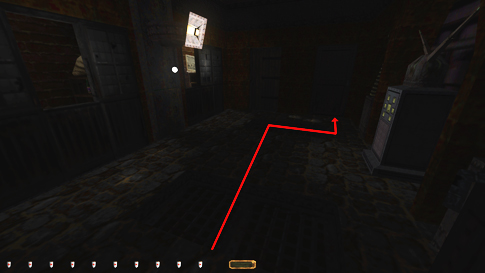
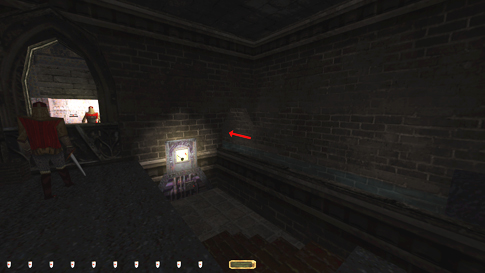
tries or so before I could reach safety undetected. The
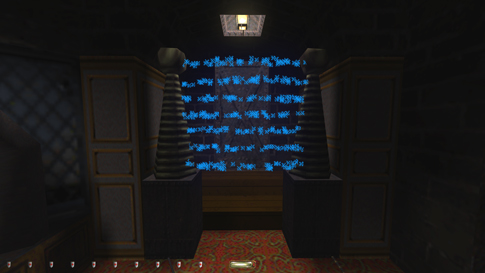
next rooms were even rougher. First there was a guarded control room of some
sort. One camera and two stationary guards (an archer and a swordsman)
watched the middle of the room. There was a floodlight, but it wasn’t strong
enough to illuminate a path down the middle and in the back corner (left
image below). Beyond the next door, however, it was very bright. Enough for
one of the guards from before to give a comment the instant I passed the
doorway. I was out of his view not more than a foot inside the next room
though, and this gave me an idea. The less amount of time you spend in an
enemy’s field of view, the lower the chance of detection. Reduce the time
visible to but a fraction of a second, and you can even avoid first alerts.
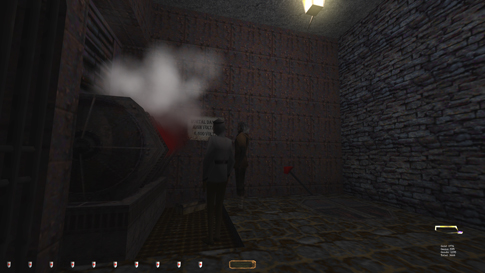
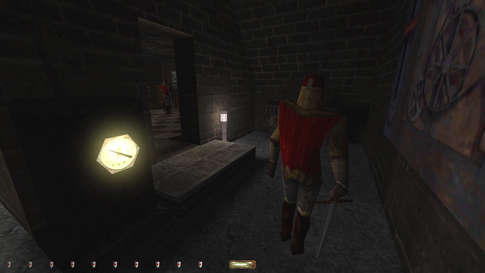
Scuttling in, hugging the open door, I managed to avoid the comment. A
similar approach had to be taken with the people in the following room (right
image below). The partially blocked entrance to the tombs was in the
southeast corner . Two workers were facing a bloody generator; one slightly
more with his back turned than the other. The guy in brown commented when I
tried to round the corner of the room. It almost seemed as if the author had
done this on purpose, as it was literally a matter of inches. Again, I could
rush into the room and come to an immediate halt and prevent the alert.
However, this was more difficult than with the previous guard. Probably not
more than a 10% success rate.
The
tombs were easy enough. The shadow monsters could be evaded by heading up the
stairs before they entered the room. Coming back to the generator room
yielded the same problem as before. Again I avoided any and all alerts by
rushing past the doorway corner. Nice to get all the loot here without any
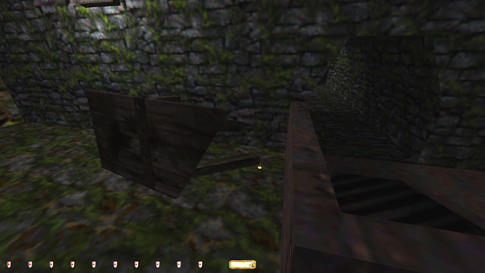
Supreme busts. I left through the sewer hatch in here. Stole a tiny coin in
one of the drainage rooms next (left image below). I remember this was the last
piece of loot I found during my first playthrough.
From here I climbed some ladders in a drainage room and emerged through a
back door to the engine area.
Downwinders Dodged
a few guards on my way to the thieves’ hideout, but nothing worth reporting.
Found two coin stacks on a walkway with a stationary thief (right image
above). The easiest way to get them was by use of a rope arrow from below.
Previously I had climbed the back of the walkway from a furnace room, but
this usually alerted the guard. Next I entered the thieves’ main hideout. It
was a large machine room with no less than three stationary rogues (left
image below). One of them was on an upper walkway, pivoting quite frequently.
I needed to reach two pickable chests in the back
corner for some more loot. The best way was to mantle and cross the large
metal structure on the left. It was noisy, but traversing slowly kept me
silent. Getting back up was the more difficult move. Using the chair and
slightly strafe-running got me up there unnoticed. I expected to get a first
alert when leaving through the door on the north wall, but nobody said a
peep.
Found
a dead guard with a key in some sort of interrogation room not long after
this. His key unlocked a door at the end of this section that took me closer
to the brothel and the end of the mission. Problem was, you needed to pass a
room with two guards and a flooded sewer to proceed (right image above).
Getting into the water always alerted at least one of the guards. It was only
a comment, so plain Ghost was in the clear. But for Supreme, I needed to
figure something else out. I knew there was a back door to the brothel area,
but it required some backtracking. I didn’t know whether that area was
Supreme ghostable, but I’d give it a try. Also, I
don’t like picking unnecessary locks, and this would prevent me from having
to open the door to the interrogation room with the dead guard. So I reloaded
and never even entered that area.
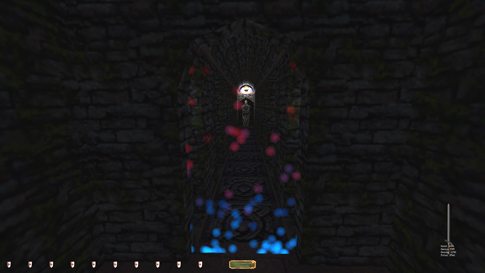
The
last piece of loot was hidden in the so-called “hallucinations” room. Its
“mysterious” key was found on a metal walkway just past the thief machinery
room (left image above). I was able to unlock the door without alerts from
the nearby worker. He commented occasionally, but not always. I couldn’t find
a consistent pattern though. Anyways, taking the golden skull in the inner
chamber triggered a fire trap. This is against Supreme rules and prevented me
from taking the loot for that mode. Also, the noise from the fireballs
alerted three miniature keeper apparitions to hunt mode. I’m not sure whether
this would count as a Ghost bust or not, as they didn’t attack me or detect
me before taking the loot. They did, however, alert normally to the use of a
regular fire arrow. I simply treated them as blind enemies and skipped the
loot for plain Ghost as well. Too bad, as this meant Perfect Thief busted on
the final piece of loot. I guess you could argue these creatures merely to be
Garrett’s visions and therefore shouldn’t count. I think that would be
stretching the Ghost rules a bit too far. Headed
back to the upper levels to approach the brothel from behind. The door by the
main bridge had disappeared since last time. This meant I couldn’t close it.
Annoying, but obviously not a bust. Overheard the conversation between the
guards in the barracks and snuck through the bedroom (right image above).
Caught the two readables in here as well before
finishing the mission Supreme clean. Nice one! Statistics: Time: 2:51:29 Loot: 3900 out of 4000 (Supreme: 3825) Pickpockets: 3 out of 3 Locks Picked: 14 Damage Dealt: 0 Damage Taken: 0 Consumables: None Ghost: Success! Perfect Thief: Failed! Supreme Ghost: Success! Perfect Supreme Ghost:
Failed! Notes: -
Skipped the valuable stone (75) in the vault at Goldenbaum Castle for Supreme. Disabling the security
system to enter the vault isn’t allowed. -
Skipped the golden skull (100) in the hallucinations
room in the sewers. Taking the skull triggers a trap, which isn’t allowed for
Supreme, and the trap’s noise alerts the three mini-apparitions to hunt mode,
forcing a Ghost bust. -
Couldn’t close the bridge gate when returning the final
time. It had disappeared due to a glitch, so no bust. |
|
|