|
CALENDRA’S CISTERN One of the best missions ever made for Thief 1.
It’s a follow-up to ‘Autumn In Lampfire Hills’, Purah’s first creation in the Calendra
universe. I was never able to successfully ghost it back in the day, but NewDark and the release of the HD texture mod were jut
the excuses I needed to reattempt. A timeless classic that looks stunning,
some 13 years on. I was meeting an old acquaintance,
Mercedes, in the wine cellar of the Weeping Angel tavern by midnight. She
sent me a letter regarding an ancient relic that sounded interesting. A
secondary objective was to steal a rare vase from the art collector Lord Alharzad. I also needed to deposit Ragnor,
captain of the city watch, inside Alharzad’s
mansion. The mandatory loot requirement was 2,000 gold. I could feel this
night would get busy, so I got to it. Started with 3 ropes and 1
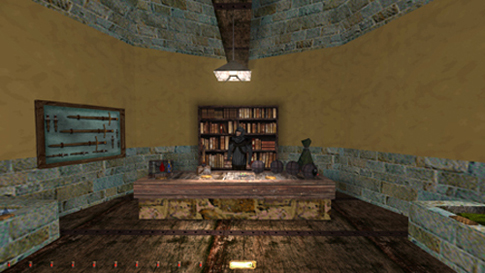
water arrow. There was no normal purchase screen. Instead I could buy
necessary equipment at Farkus’ Outfitters (left
image below). A credit of 500 was given upon entry. He even had an
invisibility potion! It was too expensive as of now, but I could return at
any point during the night and purchase more. Only gold though, no goods or
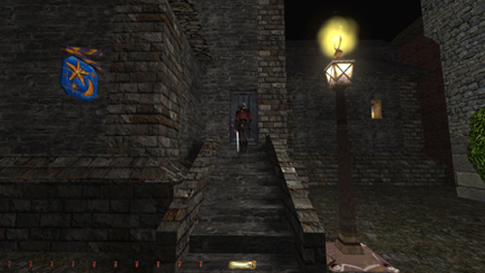
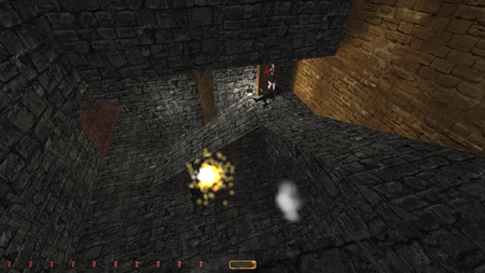
gems were accepted. The clerk, Dibbler, didn’t alert to my presence. In the past I always
looted Alharzad first, but NewDark
presented me with a conundrum. The outside guard gave settling remarks
without first alerting (right image below), a consistent problem with the
Thief 2 engine. This is not a bust towards the Supreme rules, but still
something I try to avoid. I therefore planned to bring Ragnor
in through the back later. I’d just loot the place then.
An old beggar to the east
didn’t alert besides his scripted monologue. The map said Lord Wimple’s had been
hit twice in the last six months. The only way to enter his place was to
break the window, which made him faint. I tried getting through by keyholing and using a rope arrow, but to no avail. I
didn’t find signs of a backdoor or a secret entrance either, and climbing the
roof didn’t lead me anywhere. It was only a stack of gold coins, so no major
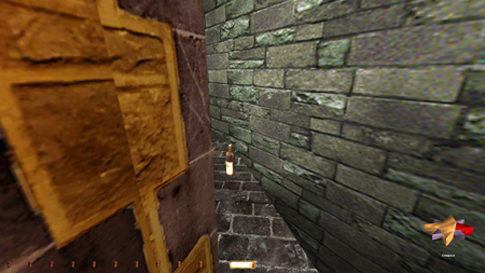
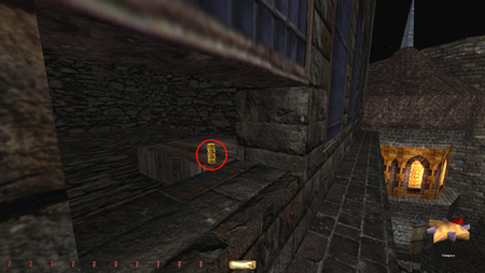
deal. Still, Perfect Thief got an early exit. Found a well-hidden bottle
on a tower ledge in northwest River District (left image below). Another
bottle sat on a windowsill just east of this (right image below).
The gate by Lord Wimple’s
could only be opened from the south. This meant I had to pass through the
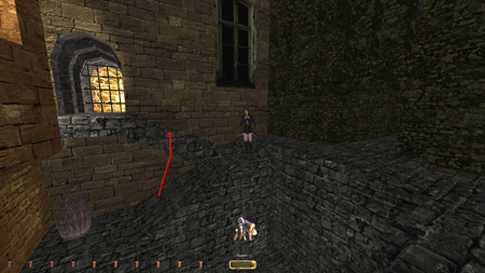
chapel south of the River District. Picking the door on the River District
side alerted the guard (left image below). His comment was clear if
eavesdropped at the door. To avoid the bust to Supreme, I looked to the
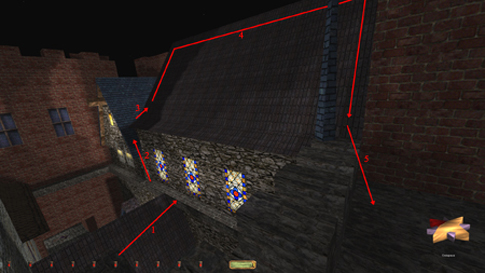
southeastern roofs (right image below). I tried climbing the south wall
directly, with a rope arrow into the eave underside of the southeast corner,
but the swordsman spotted any mantle or leap. For the record, he faced north,
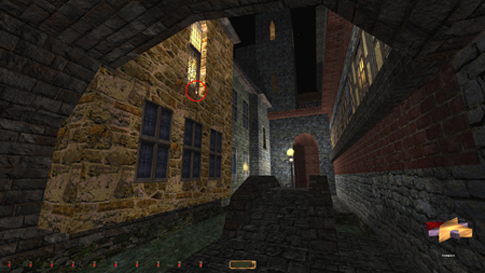
east and south randomly. So I followed the path in the screen capture
instead. Needed a rope arrow to reach the roof with the hidden gas arrow (2).
There was a stretch of shadow along the top rim of the eastern roof (4). I
slowly traversed it, clasping the map’s border. For some reason, the
swordsman was oblivious to most outside sounds, despite the open window.
Finally, I could squeeze between the spire and the brick wall (5).
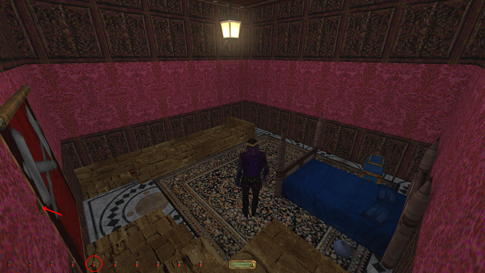
The Weeping Angel Took the tavern key from
Bartholomew’s flat, but didn’t pick the lock on any of the doors there. I like
to keep picked locks to a minimum, especially if they can’t be relocked. Met
Mercedes in the cellar without further trouble. Skipped the bottle above the
party area for now (left image below). Moving the barrel seemed unnecessary,
considering I would probably be able to access that piece of loot from below
later. A little rope gymnastics was necessary to pick the chest on the ledge
above the party entrance also, but nothing too difficult.
The party itself was pure
terror. I couldn’t move west further than to sign the guest book. In order to
have any chance on Supreme, I would have to assemble Adrius’
body and let him kill most/all of the guests. I wasn’t sure how that would
affect the objective of keeping Lady Calendra alive
until having gotten the shrine key, because I absolutely could not obtain
that or the cylix before letting Adrius do his
deed. If he killed her or Ragnor and it counted
against any of my objectives, I was screwed. Nevertheless, it was a chance I
had to take. I knew the killings were definitely not a bust on my part, in
reference to Supreme rule #12. Adrius is set loose
as a direct consequence of completing an objective. Nobody alerts to Garrett
and no damage shows up in the stats. The entire tavern, with the exception of
a goblet worth 15 in the northeast, could be plain Ghosted without Adrius’ help. If you feel using Adrius
is too “messy”, go ahead and skip it. For Supreme however, I really didn’t
have a choice. Many of the guests stopped
randomly and engaged in dull one-liners with fellow customers. Some of them
reminded me of alerts, but they were easily distinguishable. One of the guests
(Lord Whitman) even started whacking his sword in the middle of
conversations, to imitate the hammers. Once he hit one of the cathedral
benches and alerted everyone, even himself! I guess times like that remind
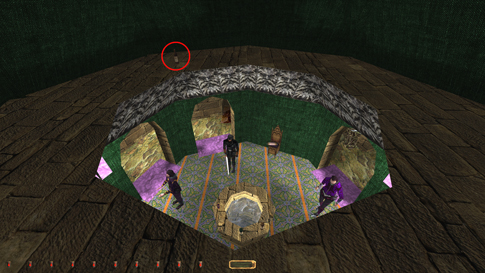
you Thief is still only a game. Two of the patrollers rang a bell to enter
the portcullis in the northeast. I followed them in and hid in the shadows to
the left (right image above). A swordsman here controlled the lever. He
occasionally went to inspect the area by the gate, and I used that to slip
through the door in the northwest corner. The stationary swordsman in this
next great hall covered the grounds well, so I had to rope up the rafters in
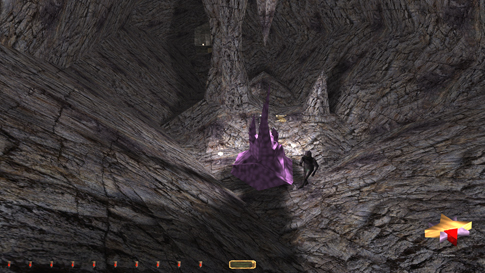
the southeast. Figured it would be most natural to fetch the summoner’s stone right away. I think the one spider
outside the observatory gate is supposed to patrol alongside the other. Its
legs were moving, but the body remained locked in place. If it saw me and
gave up, it started to patrol. It could be a Dromed
issue. I entered using the intended route, mantling the metallic structures
and headed through the tunnel (left image below). Picking the observatory
chest unfortunately prompted a first alert from said spider. It was
inevitable, but probably wouldn’t have happened had its patrol route been
fully functional.
I exited through the
cathedral attic and overheard Lady Calendra and the
Dillon’s conversation from the stairs. Could easily pilfer her key. I reached
the cathedral ground floor through the basement factory. Adrius’
head never gave a howl like it used to in OldDark.
This would’ve alerted Ragnor and the hammer couple
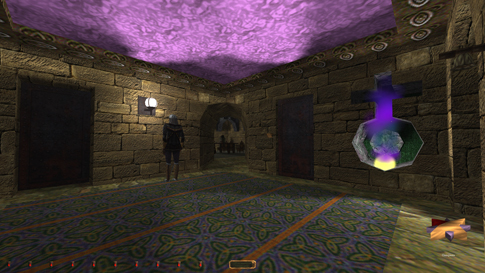
upstairs to hunt mode. In the past I had to open the chest as the hatch was
shutting (see right image above). The screen capture was taken as the hatch
was on its way down, at the last moment where the chest still lit up. Timing
it correctly, I managed to prevent the scream from travelling anywhere. It
also helped to drop the head immediately. I double-checked conditions by instantly
roping up the second floor benches; both hammers remained still. As the
situation prevented itself, none of this fiddling around was needed. I took
the head and moved on. Only two places in the
mission I could get dried frog: Farkus’ shop or Calendra’s basement. The latter was not an option for
Supreme, so it had to be the shop. This meant 125 less gold. Supreme rule #5
prohibits purchases from the loadout screen only,
so I argued this deal to be ok. Besides, the incentive for the rule is so not
to risk getting seen. Well, Farkus knows me, he
even left a note! So I headed back to get the dried frog and Adrius’ body parts. The most hidden one lay among some
rubble in the far northeast. Found another piece of loot on my way back. A
stack of coins inside a semi-shut window just north of the beggar (left image
below). Time to let loose the
ghost of Adrius. One of his parts (I think the arm)
made more sound and alerted the spiders. Had to muffle it with the head to
avoid problems. Oh and now both spiders was stationed outside the gates in
the same spot, legs moving yet frozen. Definitely an engine bug. The haunt
ended up killing everyone except Ragnor, one of the
Whitman brothers, Lady Calendra and the swordsman
down the sewage tunnel. Perfect! The remaining pieces of loot were now easy
to grab. Had to use a crate from the attic to get the bottle on the ledge
above the well. As mentioned before, I wanted to avoid moving the barrel in
the wine cellar. A simple jump and I could grab it from below. Returned the
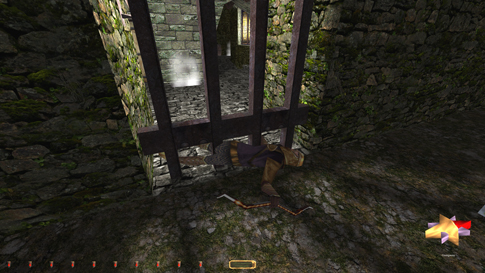
crate immediately. Blackjacked Ragnor and deposited
him by the cemetery gate (right image below). That way he’d be accessible
from the streets later.
Creedleton Way I knew about the infamous
frog screwing up Ghost runs in the past. There were two ways to Calendra’s mission, but the flooded pipe room was a
one-way ticket, which forces you past the frog in the room with the glowing
mushrooms...or does it? I wasn’t so sure from the start to be honest. The
chute into the water was metal yes, but the area beneath and the ledge on top
were both dirt, hence rope attachable. The first rope would have to be shot
from the top (the reason for planning ahead). I inched out as far as humanly
possible, leaned out, turned, and flung an arrow into the grassy edge. The
rope fell into the dirt below, but I had hope of reaching it from underneath
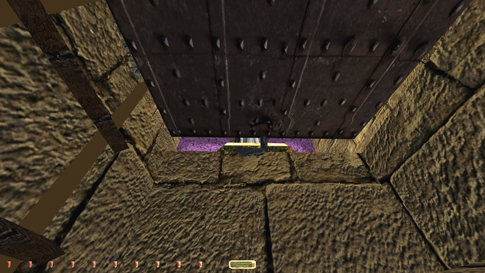
with another arrow down there. It could be shot from the small pipe you jump
onto from the ladder. Both ropes were easily ascended like this (left image
below), so I could safely head for Calendra’s.
Not much to report from
her house. Two ways in, either could be used without busting any mode. The
patrolling guard sounded the alarm if I left the bedroom door open. He didn’t
notice any of the loot gone though. Could safely grab an artifact worth 10
gold in the underground tomb. Taking anything else set off a jumping skull.
If taking a third piece, the torch went out and a zombie spawned in search
mode. I figured the skull as a trap, so I guess the tall vase worth 100
should be taken for normal Ghost. Supreme prohibits traps altogether, so I
skipped all but the single artifact for that mode. Circumstances like these
are open for interpretation, so whether you take more loot or not I guess is
up to you. Met with Mercedes a second time (right image above) and headed
back for the shrine.
Brimstone and Calendra’s fight attracted the haunt’s attention. He
ended up fighting the zombie in a never-ending battle. They eventually made
their way up the ramp to the party area (left image above). That’s when I
made a run for it, locking the shrine door behind me. The boulder-trap in the
catacombs ended up being a second Supreme bust. Managed to leap past it going
down, but after grabbing the cylix I couldn’t make it back up without
springing it. Somewhat anticlimactic after all the work preventing busts so
far. Had to accept it and move on. The cylix was easy to steal once I
realized how. Move around the cave clockwise and use the shade in the north
corner for recognizance (right image above). The beast didn’t notice a thing.
Returned the shrine key to Calendra’s afterwards.
Found another tiny ring in a floor crack in the tomb area beneath her house
(left image below). It was so small I had a hard time spotting it even when I
knew where it was.
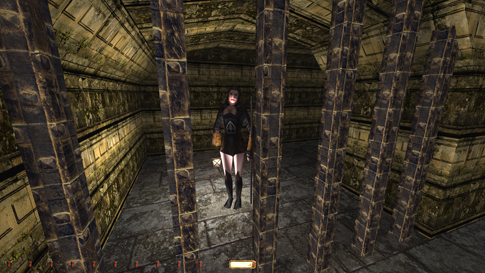
Mercedes’ The gate to Feegrim’s Court was now open, so I met with Mercedes
there and followed her. The old witch’s house nearby had a piece of loot in
it. Unfortunately, the frog outside heard the lockpicks,
so I skipped it for Supreme. Picked up Ragnor on my
way to Highwatch Gate. I wanted to loot the
collector’s before triggering the end fight, so I dropped into the alley and
mantled up the stairs in the northeast (right image above). This prevented
Mercedes from starting her patrol down the ramp. Alharzad’s
back door was pickable. The collector himself was
stationed in his bedroom upstairs; one false move and he would hear. Took my
time and stole the loot. Found a key in a tiny alcove behind a banner
upstairs (left image below), which opened both the chest in the corner and
the chest behind the secret panel downstairs. Supreme rule #7 refers to the
replacing of items to the “nearest logical place”. I figured that to be on
the stairs below the banner. Dropping it there alerted Alharzad,
so I skipped that 112 loot for Supreme. For Ghost I fell onto the bed edge
without alerts. From here I could reach the chest. The safe upstairs was
hard. The lock reset after a limited number of attempts, and each time the
combination changed. The five lights in the middle signified right or wrong
digits. Mine was 1-3-4-5-5, and that only required three changes from the
initial numbers. I reset the numbers afterwards.
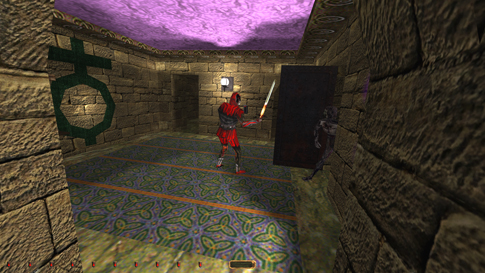
The final challenge was
the ambush by Tommyrot and Wormwood. There was no specific objective
directing to hurt or kill them. The only argument imaginable is the objective
that says “keep Marcedes alive and well”, but this
is far too vague to justify knockouts and/or damage. I always assumed this
meant a bust even to regular Ghost, but I wanted to try something else this
time. Occasionally, Mercedes would kill Tommyrot on the ramp, only to get
killed by the arrows of Wormwood not long after. Wormwood’s advantage was
shade and speed of attack. However, once in a while Mercedes would back up to
the top of the ramp before killing Tommyrot, therefore luring Wormwood into
the light. She would normally be so low on health at this point that it
didn’t take more than a few arrows to down her. I replayed the scenario
enough times to learn that if she was pushed all the way into the corner, she
would fire her shots despite getting hit by arrows. Also, the farther back
she was standing, the more visible Wormwood would have to be in order to have
a clear line of shot. Eventually I realized it wasn’t farfetched for her to
survive without my interference. After about 10-12 minutes of trial and
error, she finally managed to get two shots on both thieves (right image
above). Ghost success!! Statistics: Time: 2:17:05 Loot: 4602 out of 4897 (Supreme: 4340) Pickpockets: 7 out of 9 Locks Picked: 6 Damage Dealt: 1 Damage Taken: 0 Knock Outs: 1 Bodies Discovered by Enemies: 3 Consumables: 1 Dried Frog (Adrius) Ghost: Success! Perfect Thief: Failed! Supreme Thief: Failed! Perfect Supreme Thief: Failed! Notes: -
Couldn’t enter Lord Wimple’s to steal his gold. Breaking
the window is the only way in. 25 gold skipped. -
The spider outside the observatory gate first alerted
when picking the lock on the chest to the Summoner’s
Stone. Supreme bust. -
Had to buy dried frog worth 125g from Farkus’
Outfitters in order to complete the Adrius-objective.
Supreme rule #5 only prohibits purchases at the loadout
screen, not from in-game shops. This can be avoided for plain Ghost, instead
getting the dried frog from Calendra’s basement.
That method was not applied here though (since Perfect Thief was already
busted). -
Had to skip all but one piece of loot in Calendra’s basement for Supreme. Anything more sets off
the jumping skull. Taking a third piece spawns an alerted zombie. For normal
Ghost the vase worth 100 was also taken. -
Couldn’t avoid setting off the boulder trap in the shrine
catacombs. This is against Supreme rules and busts that mode. -
Alerted the frog outside the old witch’s house when
picking the door. Skipped the jar worth 50 in there for Supreme. -
Skipped the loot from the two locked chests at Alharzad’s for Supreme. Dropping the key back alerts him. -
The last 25 loot is confirmed unobtainable, hence the
final amount has been reduced. -
The 3 bodies discovered are from the fights between Adrius’ haunt and the party guests. Not a bust. |